SparkFun u-blox GNSS Arduino Library - v3
 |
 |
 |
 |
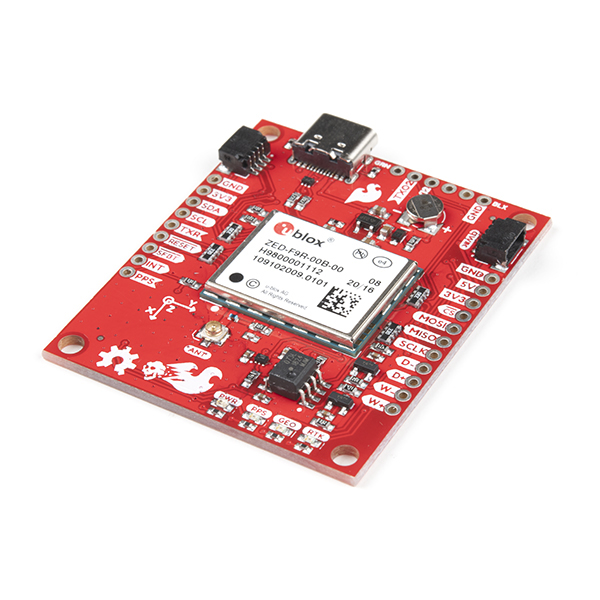 |
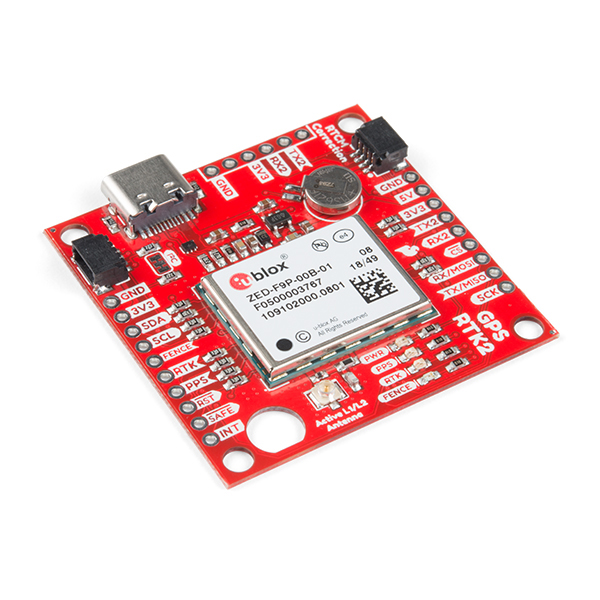
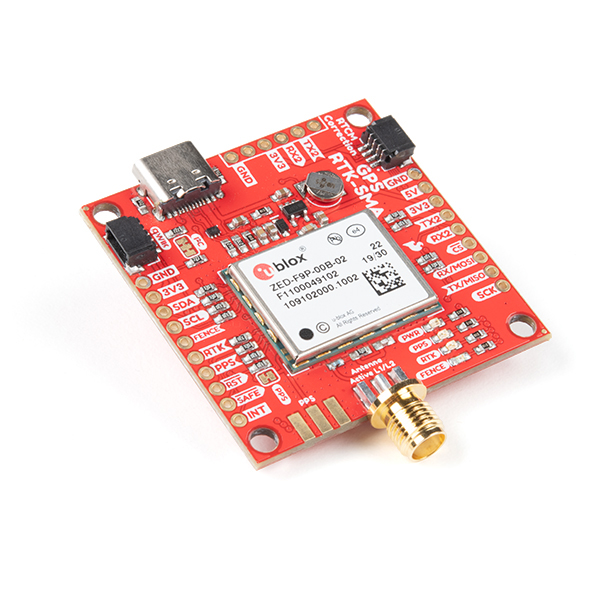
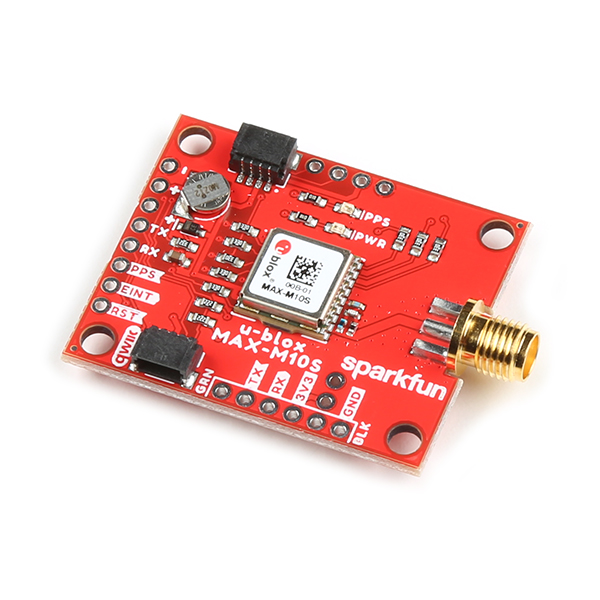
| SparkFun GPS-RTK2 - ZED-F9P (GPS-15136) | SparkFun GPS-RTK-SMA - ZED-F9P (GPS-16481) | SparkFun MAX-M10S Breakout (GPS-18037) | SparkFun ZED-F9K Breakout (GPS-18719) | SparkFun ZED-F9R Breakout (GPS-16344) |
u-blox makes some incredible GNSS receivers covering everything from low-cost, highly configurable modules such as the MAX-M10S all the way up to the surveyor grade ZED-F9P with precision of the diameter of a dime. This library supports configuration and control of u-blox devices over I2C (called DDC by u-blox), Serial and SPI. This version uses the u-blox Configuration Interface to: detect the module; configure message intervals; set the base location; etc.. We wrote it for the most recent u-blox modules which no longer support messages like UBX-CFG-PRT or UBX-CFG-MSG.
If you are using an older module, like the M8, you will need to use version 2 of this library.
This library can be installed via the Arduino Library manager. Search for SparkFun u-blox GNSS v3.
v3 vs. v2
This library is the new and improved version of the very popular SparkFun u-blox GNSS Arduino Library. v3 contains some big changes and improvements:
- Module detection and configuration is done exclusively using the u-blox Configuration Interface (UBX-CFG-VALSET and UBX-CFG-VALGET)
- The library no longer uses UBX-CFG-PRT to detect the module and configure the port settings
- UBX-CFG-MSG is no longer used to configure message intervals
- This allows the library to work with the latest module firmware where those messages have now been deleted
- SPI support has been enhanced:
pushRawDatais fully supported on SPI - in addition to I2C and Serial (UART)pushAssistNowDatais also fully supported on SPI
- The hardware interface has been abstracted:
- All hardware communication is performed through
class GNSSDeviceBus - This makes it much easier to re-use this library on other hardware platforms. Only
sfe_bus.handsfe_bus.cppneed to be updated
- All hardware communication is performed through
- Template methods simplify multiple-VALGET and multiple-VALSET configuration
Migrating to v3
Migrating to v3 is easy. There are two small changes all users will need to make:
- The name of the library header file has changed:
- Change:
#include <SparkFun_u-blox_GNSS_Arduino_Library.h> - to:
#include <SparkFun_u-blox_GNSS_v3.h>
- Change:
- The library now uses three separate hardware classes:
SFE_UBLOX_GNSS,SFE_UBLOX_GNSS_SERIALandSFE_UBLOX_GNSS_SPISFE_UBLOX_GNSSprovides support for I2C (Qwiic / Wire) onlySFE_UBLOX_GNSS_SERIALprovides support for Serial (UART) onlySFE_UBLOX_GNSS_SPIprovides support for SPI only- If you are using Serial or SPI, you will need to change your code to:
SFE_UBLOX_GNSS_SERIAL myGNSS;orSFE_UBLOX_GNSS_SPI myGNSS;
v3 is mostly backward-compatible with v2, but there have been some important changes. If in doubt, please look at the updated examples. They have all been updated and tested with v3.
VAL_LAYER
Because all module configuration is performed using the Configuration Interface, you will find that the VAL_LAYER has been added as
a parameter in many methods. The set methods default to using VAL_LAYER_RAM_BBR - i.e. the configuration will be changed and stored in both
RAM and Battery-Backed RAM but not flash. Options are: VAL_LAYER_RAM, VAL_LAYER_BBR, VAL_LAYER_FLASH (if your module has flash memory attached),
VAL_LAYER_RAM_BBR and VAL_LAYER_ALL (all three).
Please check your code. If you are using maxWait, you will need to specify the LAYER too. E.g.:
- v2:
  bool setAutoPVT(bool enabled, bool implicitUpdate, uint16_t maxWait = defaultMaxWait);
  bool setAutoPVTrate(uint8_t rate, bool implicitUpdate = true, uint16_t maxWait = defaultMaxWait);
  bool setAutoPVTcallback(void (*callbackPointer)(UBX_NAV_PVT_data_t), uint16_t maxWait = defaultMaxWait);

  bool setSurveyMode(uint8_t mode, uint16_t observationTime, float requiredAccuracy, uint16_t maxWait = defaultMaxWait);
bool addGeofence(int32_t latitude, int32_t longitude, uint32_t radius, byte confidence = 0, byte pinPolarity = 0, byte pin = 0, uint16_t maxWait = defaultMaxWait);- v3
  bool setAutoPVT(bool enabled, bool implicitUpdate, uint8_t layer = VAL_LAYER_RAM_BBR, uint16_t maxWait = kUBLOXGNSSDefaultMaxWait);
  bool setAutoPVTrate(uint8_t rate, bool implicitUpdate = true, uint8_t layer = VAL_LAYER_RAM_BBR, uint16_t maxWait = kUBLOXGNSSDefaultMaxWait);
  bool setAutoPVTcallbackPtr(void (*callbackPointerPtr)(UBX_NAV_PVT_data_t *), uint8_t layer = VAL_LAYER_RAM_BBR, uint16_t maxWait = kUBLOXGNSSDefaultMaxWait);

  bool setSurveyMode(uint8_t mode, uint16_t observationTime, float requiredAccuracy, uint8_t layer = VAL_LAYER_RAM_BBR, uint16_t maxWait = kUBLOXGNSSDefaultMaxWait);
  bool addGeofence(int32_t latitude, int32_t longitude, uint32_t radius, uint8_t confidence = 0, bool pinPolarity = 0, uint8_t pin = 0, uint8_t layer = VAL_LAYER_RAM_BBR, uint16_t maxWait = kUBLOXGNSSDefaultMaxWait);
Likewise, when reading (getting) the configuration, you can specify VAL_LAYER_RAM or VAL_LAYER_DEFAULT. The methods default to VAL_LAYER_RAM.
(VAL_LAYER_BBR and VAL_LAYER_FLASH are also supported - but earlier ZED-F9P's NACK'd reading those layers.)
VALSET and VALGET
v3 provides a new way of reading (getting) values from the Configuration Interface: newCfgValget, addCfgValget and sendCfgValget.
Please see the VALSET and VALGET examples for more details.
setPortOutput, setPortInput and getPortSettings have been deleted.
To get (read) the port configuration, please use getVal with keys like UBLOX_CFG_I2CINPROT_UBX and UBLOX_CFG_UART1OUTPROT_NMEA.
To configure the ports, please use the methods:
  bool setI2COutput(uint8_t comSettings, uint8_t layer = VAL_LAYER_RAM_BBR, uint16_t maxWait = kUBLOXGNSSDefaultMaxWait);
  bool setUART1Output(uint8_t comSettings, uint8_t layer = VAL_LAYER_RAM_BBR, uint16_t maxWait = kUBLOXGNSSDefaultMaxWait);
  bool setUART2Output(uint8_t comSettings, uint8_t layer = VAL_LAYER_RAM_BBR, uint16_t maxWait = kUBLOXGNSSDefaultMaxWait);
  bool setUSBOutput(uint8_t comSettings, uint8_t layer = VAL_LAYER_RAM_BBR, uint16_t maxWait = kUBLOXGNSSDefaultMaxWait);
  bool setSPIOutput(uint8_t comSettings, uint8_t layer = VAL_LAYER_RAM_BBR, uint16_t maxWait = kUBLOXGNSSDefaultMaxWait);

  bool setI2CInput(uint8_t comSettings, uint8_t layer = VAL_LAYER_RAM_BBR, uint16_t maxWait = kUBLOXGNSSDefaultMaxWait);
  bool setUART1Input(uint8_t comSettings, uint8_t layer = VAL_LAYER_RAM_BBR, uint16_t maxWait = kUBLOXGNSSDefaultMaxWait);
  bool setUART2Input(uint8_t comSettings, uint8_t layer = VAL_LAYER_RAM_BBR, uint16_t maxWait = kUBLOXGNSSDefaultMaxWait);
  bool setUSBInput(uint8_t comSettings, uint8_t layer = VAL_LAYER_RAM_BBR, uint16_t maxWait = kUBLOXGNSSDefaultMaxWait);
  bool setSPIInput(uint8_t comSettings, uint8_t layer = VAL_LAYER_RAM_BBR, uint16_t maxWait = kUBLOXGNSSDefaultMaxWait);
Template VALSET and VALGET
Please also note that as of Jan 10th 2023 the u-blox Config Keys defined in u-blox_config_keys.h now have their size encoded into them. We OR extra data into the unused bits in each key to define the size. This allows set and get template methods to cope with the different sizes. E.g.:
// CFG-ANA: AssistNow Autonomous and Offline configuration
//-=-=-=-=-=-=-=-=-=-=-=-=-=-=-=-=-=-=-=-=-=-=-=-=-=-=-=-=-=-=-=-=-=-=-=-=-=-=-=-=-=-=-=-=-=-=-=-=-=-=-=-=-=-=-=-
const uint32_t UBLOX_CFG_ANA_USE_ANA = UBX_CFG_L | 0x10230001;    // Use AssistNow Autonomous
const uint32_t UBLOX_CFG_ANA_ORBMAXERR = UBX_CFG_U2 | 0x30230002; // Maximum acceptable (modeled) orbit error in m. Range is from 5 to 1000.
UBX_CFG_L is a logical boolean single bit, stored as 8-bit U1 (uint8_t). UBX_CFG_U2 is 2-byte (16-bit) unsigned (uint16_t). Etc..
If you are using the keys in your own code, you can restore the original key value by ANDing with the inverse of UBX_CFG_SIZE_MASK :
key &= ~UBX_CFG_SIZE_MASK; // Mask off the size identifer bitsThe get and set template methods are based on an idea by Michael Ammann. Thank you @mazgch
Multiple-VALGET
Start by creating a custom ubxPacket :
  const uint16_t maxPayloadSize = 100; // Make this large enough to hold all keys and values
  uint8_t customPayload[maxPayloadSize]; // This array holds the payload data bytes
  ubxPacket customCfg = {0, 0, 0, 0, 0, customPayload, 0, 0, SFE_UBLOX_PACKET_VALIDITY_NOT_DEFINED, SFE_UBLOX_PACKET_VALIDITY_NOT_DEFINED}; // Create and initialise the custom packet
  myGNSS.newCfgValget(&customCfg, maxPayloadSize, VAL_LAYER_RAM); // Create a new VALGET construct inside the custom packet
Add the Keys you want to get using addCfgValget :
  myGNSS.addCfgValget(&customCfg, UBLOX_CFG_I2C_ADDRESS); // Get the I2C address (see u-blox_config_keys.h for details)
  myGNSS.addCfgValget(&customCfg, UBLOX_CFG_I2COUTPROT_NMEA); // Get the flag indicating is NMEA should be output on I2C
  myGNSS.addCfgValget(&customCfg, UBLOX_CFG_UART1_BAUDRATE); // Get the UART1 baud rate
Perform the VALGET by calling sendCfgValget(&customCfg);. The method returns true if the VALGET was successful.
Extract the Key Values using the template method extractConfigValueByKey.
Note: you do still need to know the data type to extract the data correctly.
Consult the u-blox Interface Description or u-blox_config_keys.h to see the data type (size) for each Key ID.
| Size | Type |
|---|---|
| L | bool |
| U1/E1/X1 | uint8_t |
| I1 | int8_t |
| U2/E2/X2 | uint16_t |
| I2 | int16_t |
| U4/E4/X4 | uint32_t |
| I4 | int32_t |
| U8/X8 | uint64_t |
| I8 | int64_t |
| R4 | float (32-bit) |
| R8 | double (64-bit) |
Pass a pointer to, or the address of, your variable plus its size (in bytes) to extractConfigValueByKey to extract the value.
The method returns true if the extraction was successful.
  uint32_t baud; // U4
  myGNSS.extractConfigValueByKey(&customCfg, UBLOX_CFG_UART1_BAUDRATE, &baud, sizeof(baud)); // Get the baud rate - using the key and the address of and sizeof baud
Please see VALGET_and_VALSET/Example6 for more details.
Multiple-VALSET
In v2 of the library, you had to specify the key value size when calling addCfgValset. v3 uses a template method to deduce the size automatically
using the size encoded into the key itself.
Start by creating a new VALSET:
myGNSS.newCfgValset(VAL_LAYER_RAM); // Create a new VALSET construct (internally in packetCfg)Add each key and value that you wish to set. The type / size is deduced automatically if required. The method returns true if the add is successful.
  myGNSS.addCfgValset(UBLOX_CFG_UART1_BAUDRATE, 38400); // U4 - deduced automatically
  myGNSS.addCfgValset(UBLOX_CFG_TP_DUTY_LOCK_TP1, 50.0); // R8 - deduced automatically
  uint32_t freq = 1000; // U4
  myGNSS.addCfgValset(UBLOX_CFG_TP_FREQ_LOCK_TP1, freq);
Finally, send the VALSET by calling sendCfgValset();. The method returns true if the VALSET was successful.
Please see VALGET_and_VALSET/Example6 for more details.
If you are setting many configuration items, such that the number of keys and values could overflow packetCfg, you can use the
method autoSendCfgValsetAtSpaceRemaining to send a VALSET automatically when packetCfg is almost full. E.g.:
myGNSS.autoSendCfgValsetAtSpaceRemaining(16); // Trigger an auto-send when packetCfg has less than 16 bytes are remainingPlease see VALGET_and_VALSET/Example4 for more details.
Compatibility
v3 of the library provides support for generation F9 and M10 u-blox GNSS modules.
For most generation 8 modules, please use version 2 of this library.
For generation 6 and 7, please see this example (depricated).
Contributing
If you would like to contribute to this library: please do, we truly appreciate it, but please follow these guidelines. Thanks!
Repository Contents
- /examples - Example sketches for the library (.ino). Run these from the Arduino IDE.
- /src - Source files for the library (.cpp, .h).
- keywords.txt - Keywords from this library that will be highlighted in the Arduino IDE.
- library.properties - General library properties for the Arduino package manager.
- CONTRIBUTING.md - Guidelines on how to contribute to this library.
- /Utils - contains a Python utility which can check the contents of UBX log files.
Documentation
- Installing an Arduino Library Guide - Basic information on how to install an Arduino library.
Products That Use This Library
- GPS-15136 - SparkFun GPS-RTK2 Board - ZED-F9P (Qwiic)
- GPS-16481 - SparkFun GPS-RTK-SMA Breakout - ZED-F9P (Qwiic)
- GPS-16344 - SparkFun GPS-RTK Dead Reckoning Breakout - ZED-F9R (Qwiic)
- GPS-18037 - SparkFun GNSS Receiver Breakout - MAX-M10S (Qwiic)
- GPS-18719 - SparkFun GNSS-RTK Dead Reckoning Breakout - ZED-F9K (Qwiic)
- GPS-18774 - SparkFun GNSS Timing Breakout - ZED-F9T (Qwiic)
- GPS-19663 - SparkFun MicroMod GNSS Function Board - ZED-F9P
- GPS-17722 - SparkFun MicroMod GNSS Carrier Board (ZED-F9P)
License Information
This library is open source!
Please see LICENSE.md for full details.
- Your friends at SparkFun.