 FaZeF1
commented
2 years ago
FaZeF1
commented
2 years ago Lab: Working with git in the Theia lab environment
Estimated time: 20 minutes
Objectives
After completing this lab you will be able to:
- Open a terminal on Theia
- Clone a GitHub repo
- Explore the cloned repo
- Open and make changes to a file in the editor
- Add a new file to the repo
- Check the changes you have made
- Mark the changes for commit
- Commit the changes
- Push the code to GitHub
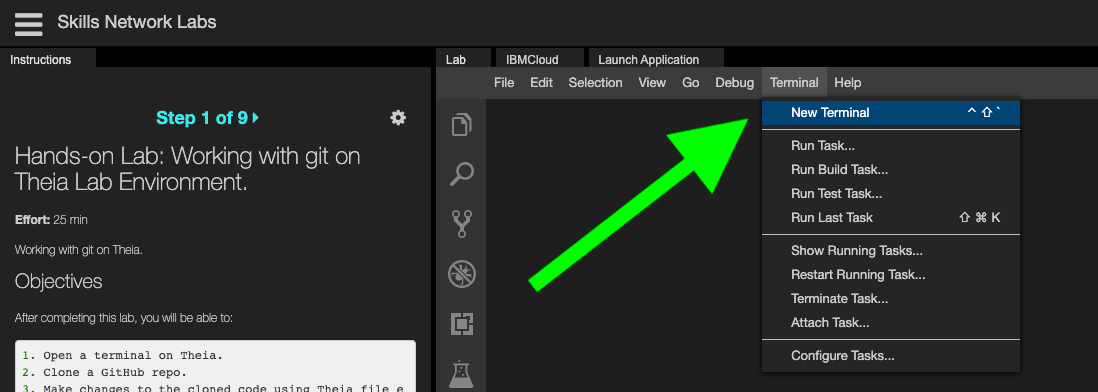
1. Open a terminal on Theia
To open a terminal in the Theia lab environment, click Terminal > New Terminal as shown in the following image:
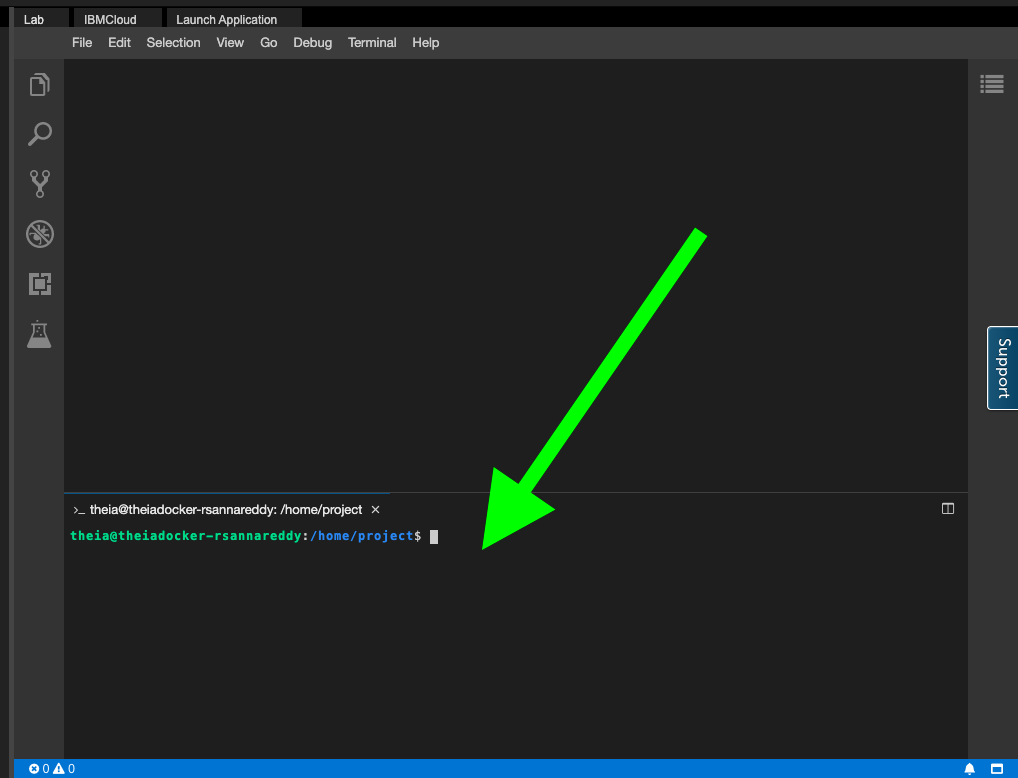
You will see a new terminal window open at the bottom of the screen:
2. Clone a GitHub repo
To clone a GitHub repo to your local directory and then open it in the Theia environment, complete the following steps:
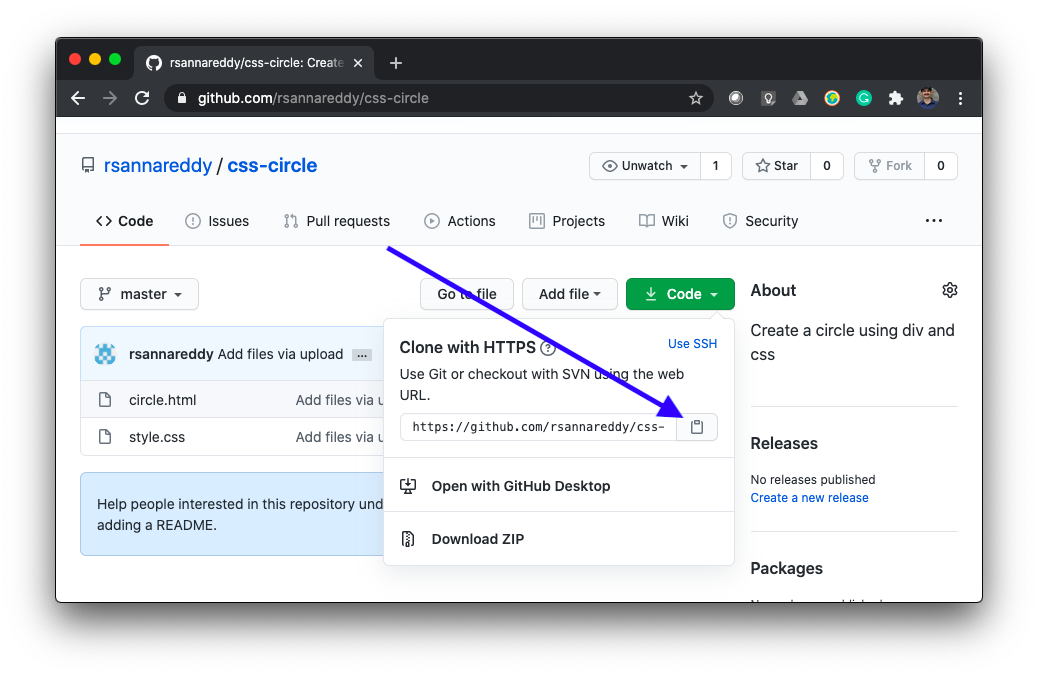
-
On the GitHub repo web page, copy the HTTPS link of the repo you wish to clone. You will need this link in a subsequent step.
-
To clone the repo on to the Theia lab environment, run the following command in the terminal:
git clone [HTTPS link]The repo on GitHub will be copied into a local directory.
The following image shows the
git clonecommand and resulting actions:
3. Explore the cloned repo
To become familiar with the cloned repo, complete the following steps:
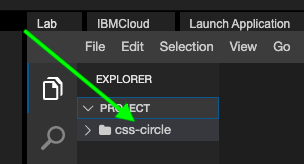
-
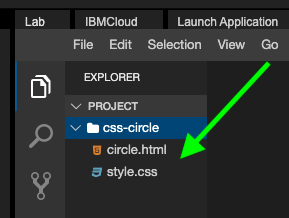
Click on the Explorer icon as shown in the following image:

-
Click on Project. The name of the repo that you cloned is displayed.
-
Click the repo name. The names of the repo's included files are displayed.
4. Make changes to a file
To update a file in your repo, complete the following steps:
-
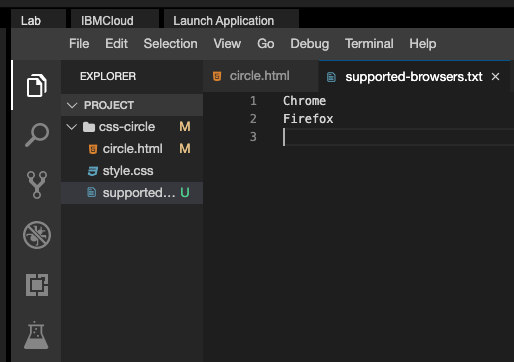
Click on the file you want to edit. The file opens in the editor as shown in the following image:
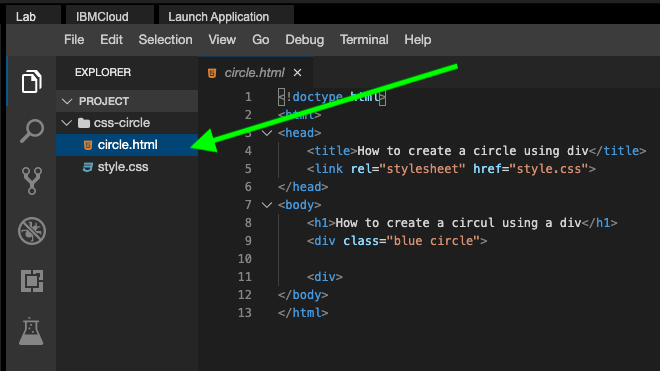
Note that in the image, there is a misspelled word in line 8.
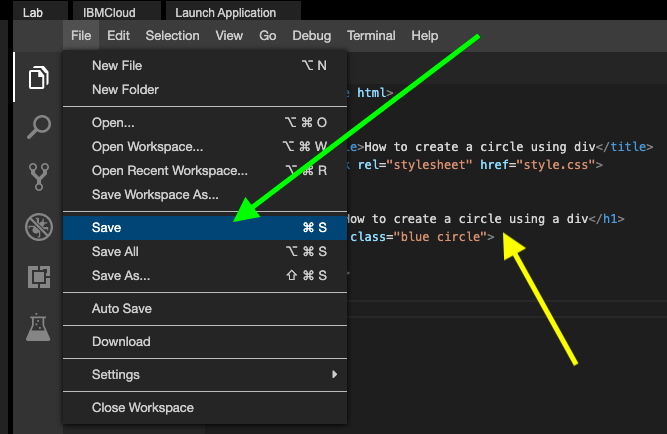
-
To update the file, make the revision in the editor and then click File > Save.
5. Add a new file to the repo
There are currently two files in the project:
circle.htmlstyle.css
You will now add another file called supported-browsers.txt. This new file contains the web browser names that support the code in circle.html.
-
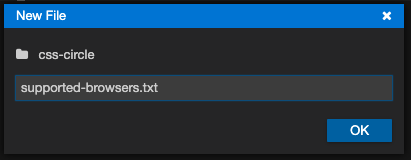
Open a new file by clicking File > New File. A New File window opens.
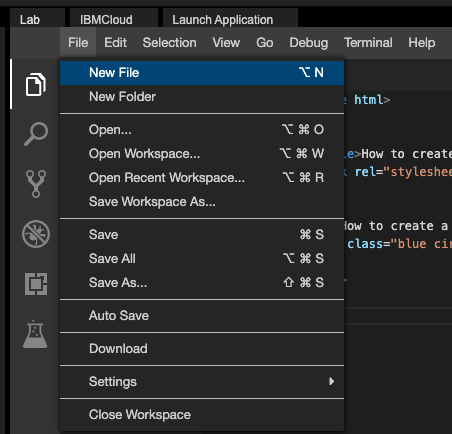
-
Enter the name of the file you wish to create.
-
In the editor, enter the following text in the new file:
-
Click File > Save to save your new file.
6. Review changes to the repo
To review the changes that have been made to the repo, run the following commands in the terminal:
   cd [your repo name]
   git status
The git status command will display all the changes you have made to this point, similar to the following image:
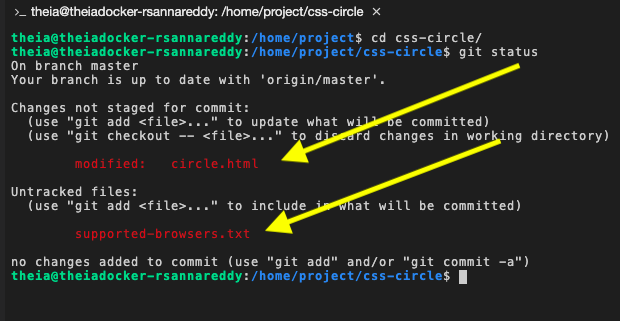
Changes to circle.file are noted and supported-browsers.txt is listed as an untracked file.
7. Mark the changes for commit
You now need to commit the changes you've made. Before you can do that, you need to add the new and revised files to the commit:
- Run the following commands to add the files to git tracking:
   git add [name of revised file]

   git add [name of new file]
-
After adding the files, run
git statusagain. You will see output similar to that in the following image: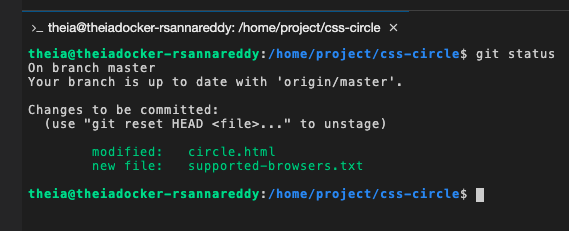
8. Commit the changes
Because this is first time you're using git on Theia, you need to set your display name and email so you can commit the changes:
- Run the following commands, sustituting your email and display name:
git config --global user.email your_email@email.com

git config --global user.name "FirstName LastName"
You are now able to commit the changes you've made using git.
-
Run the following command to commit the changes. You will pass a commit message using the
-moption.git commit -m 'changes made from theia lab environment'
Task 9 - Generate Personal Access Token
- Verify your email address if it hasn’t been verified on Github.
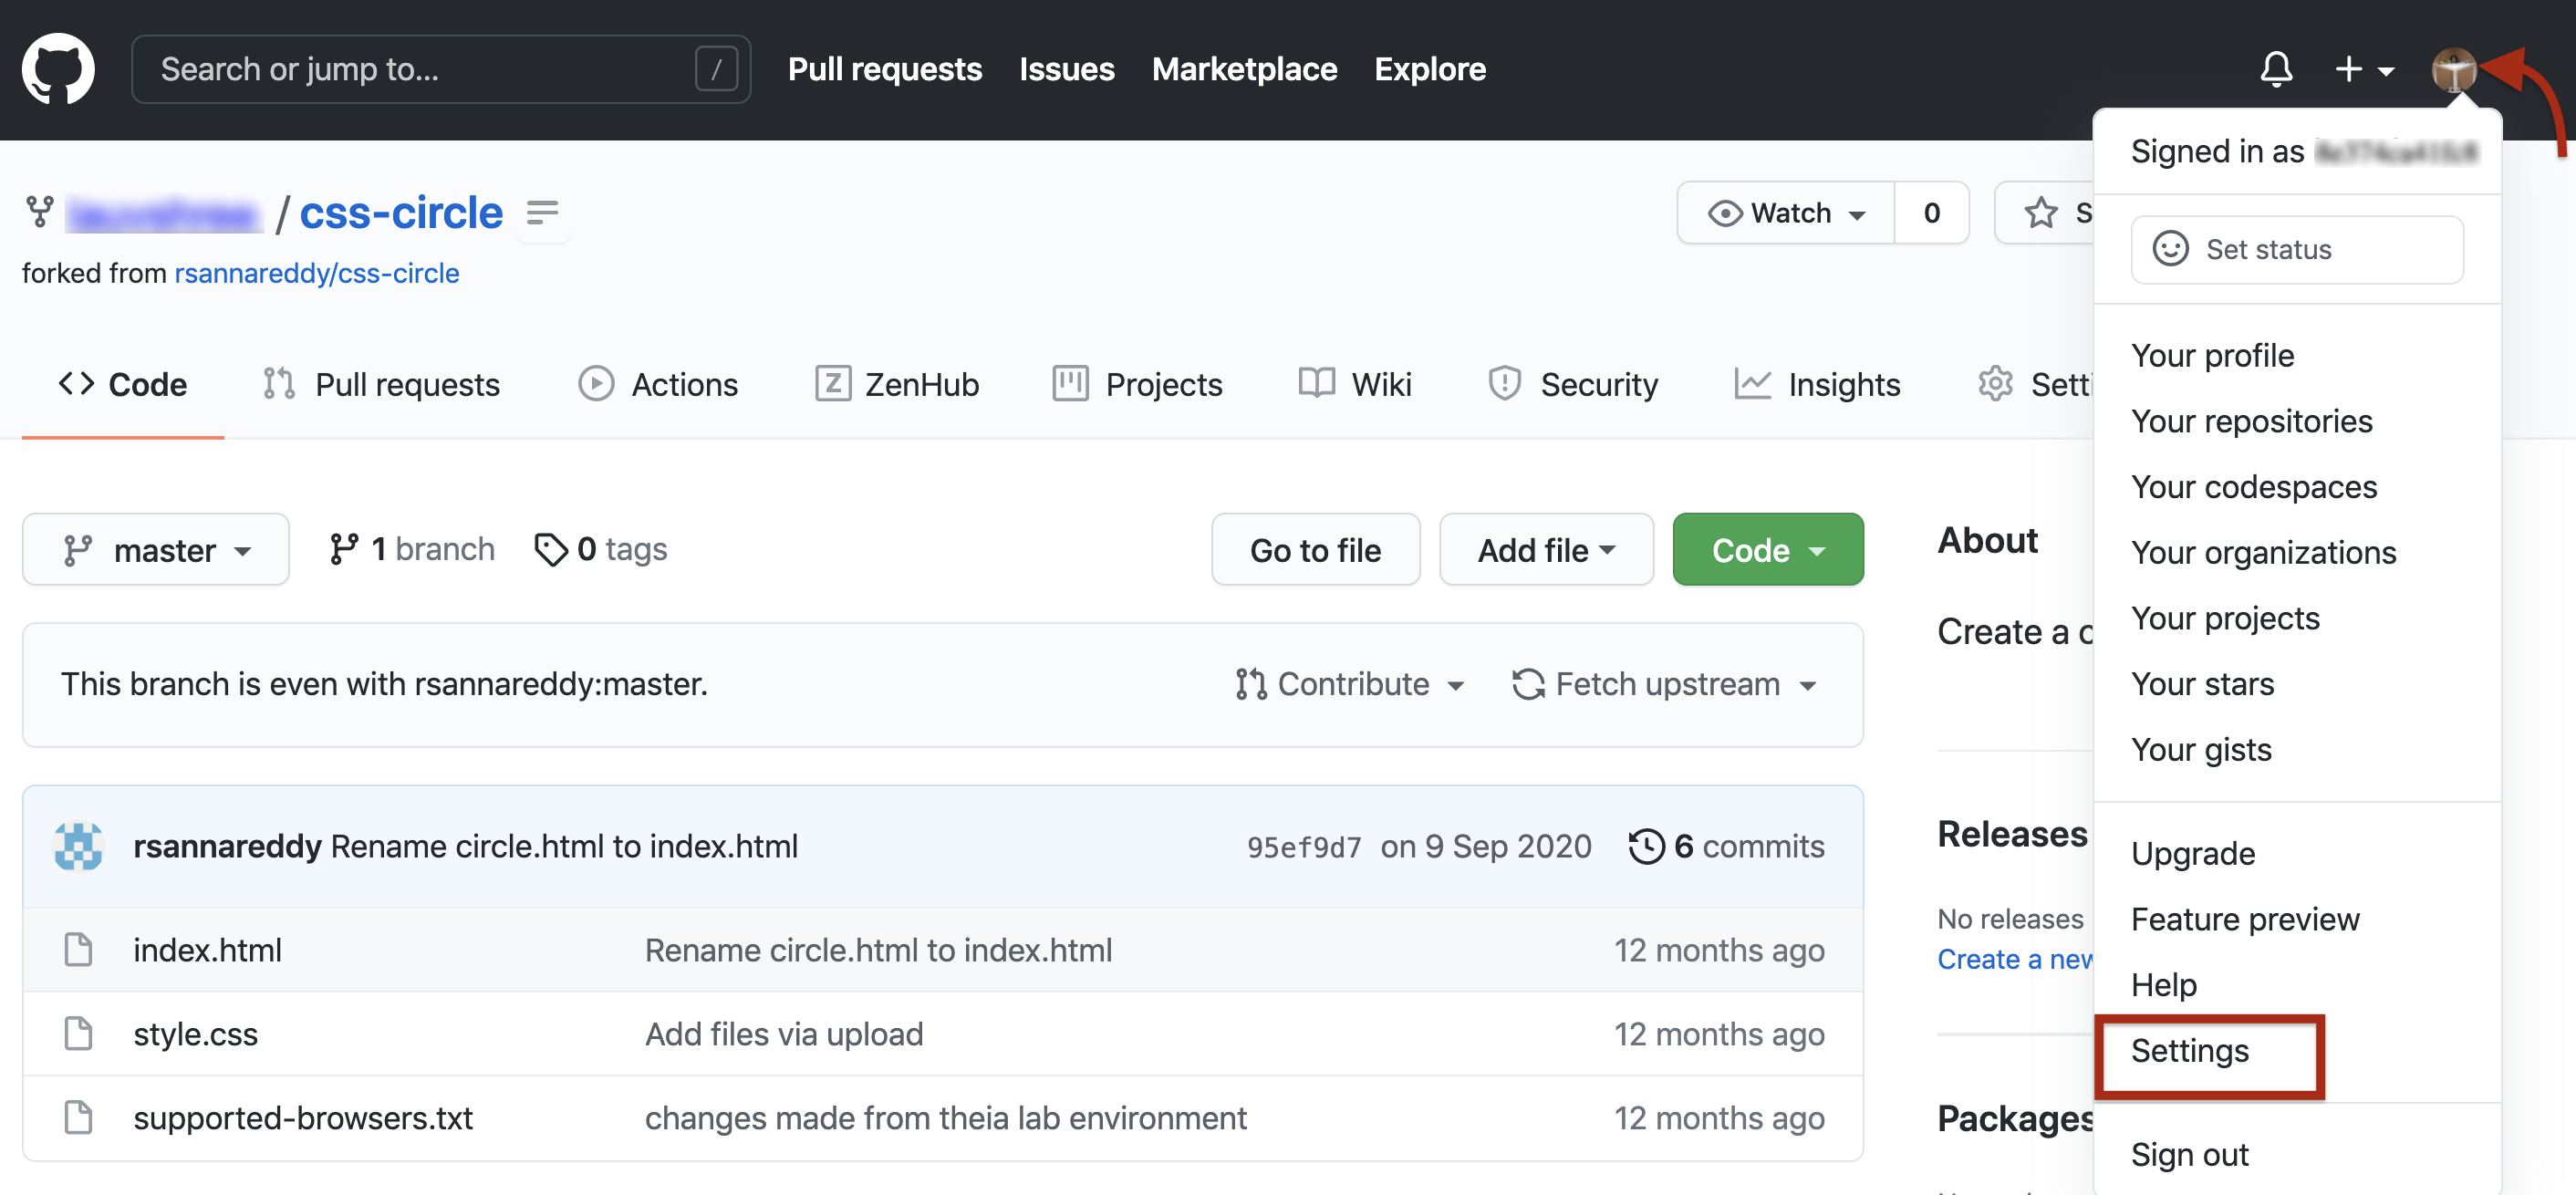
- In the upper-right corner of any page, click your profile photo, then click Settings.
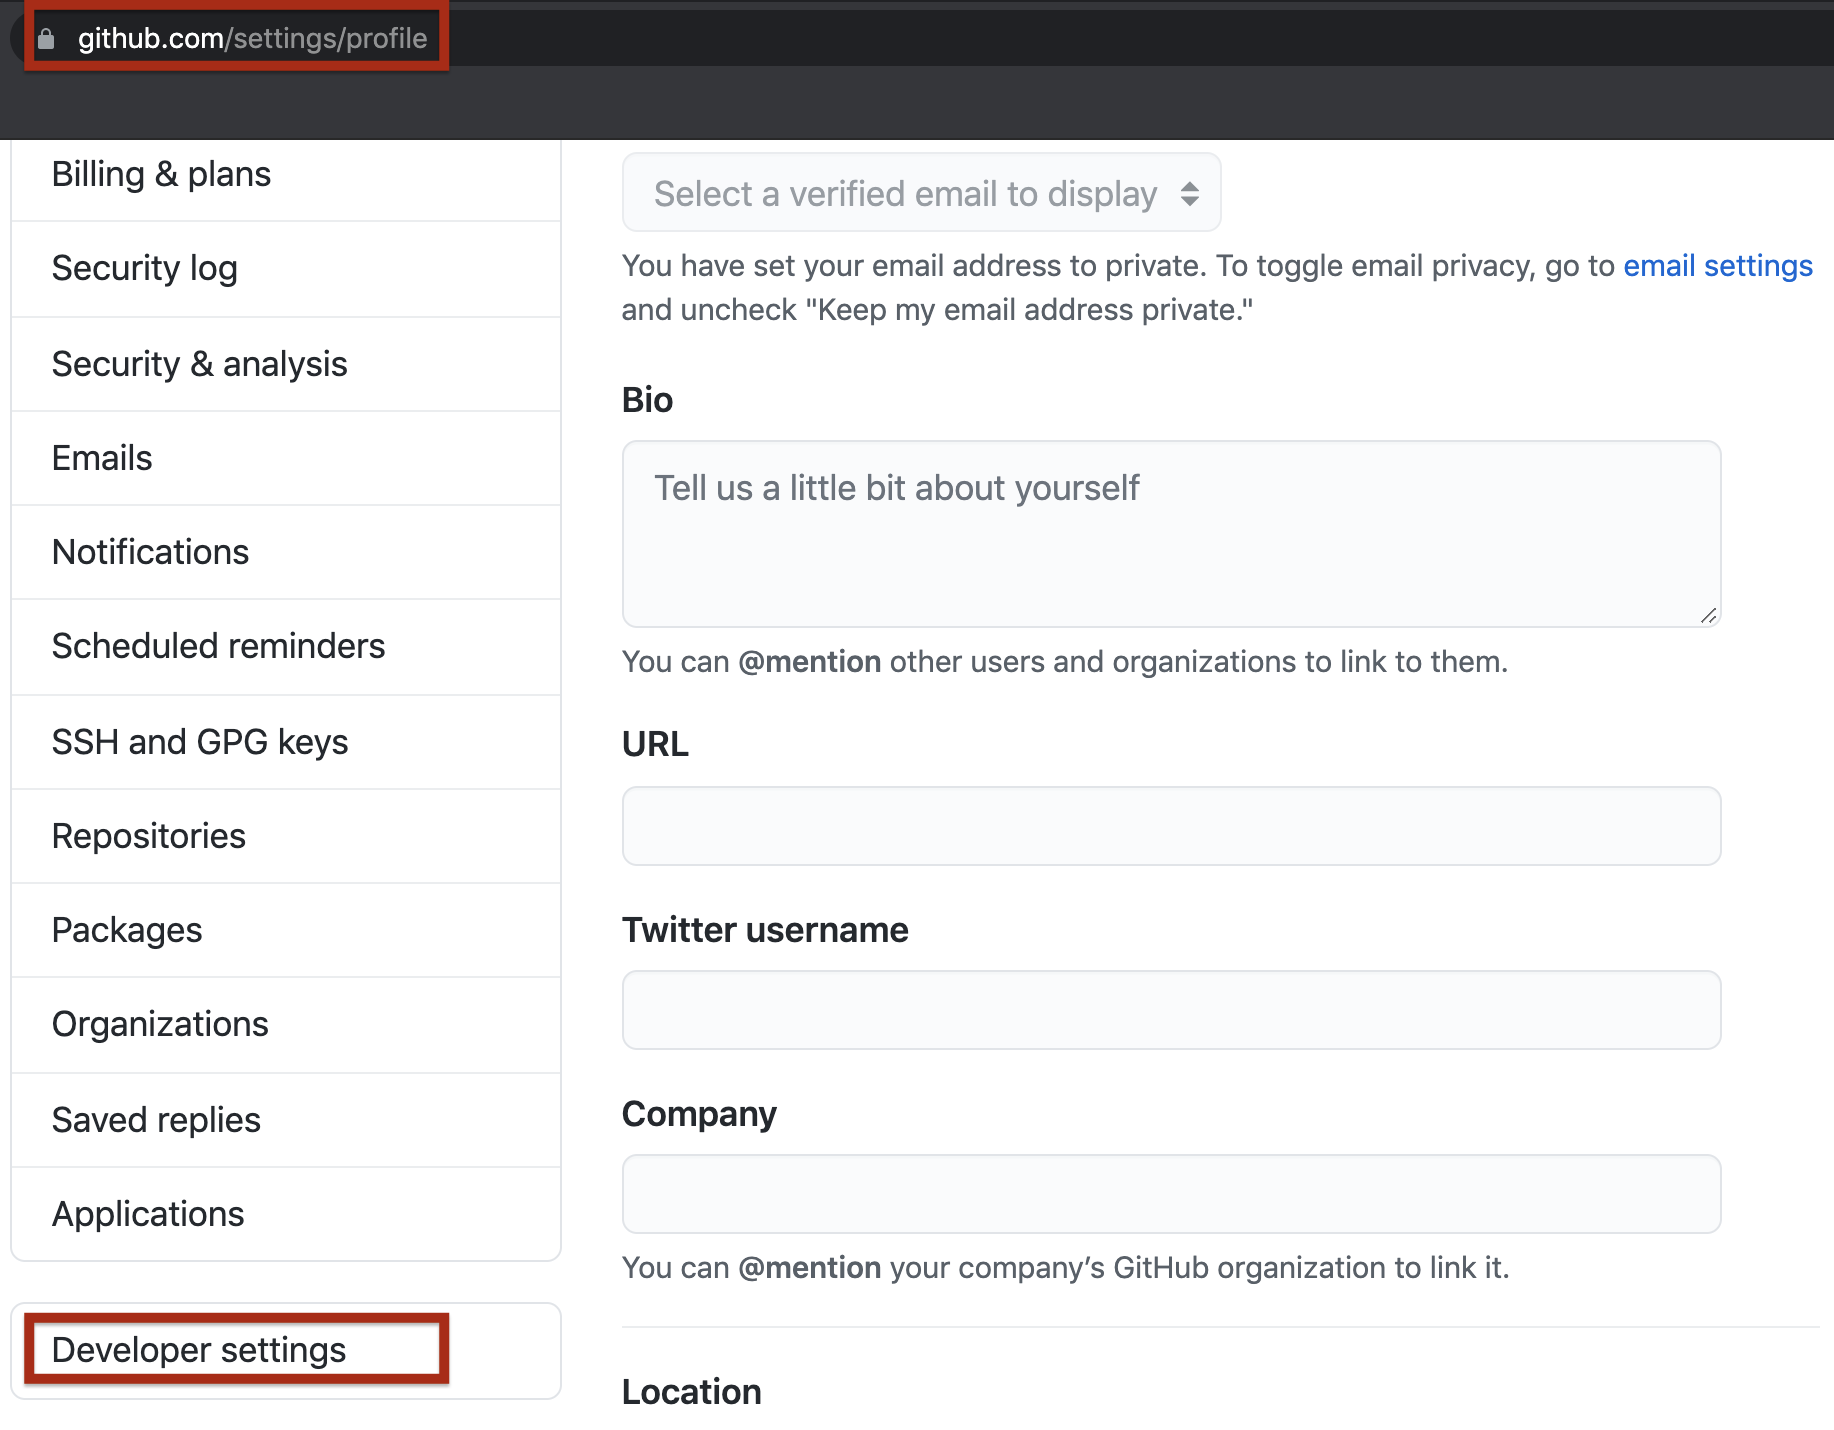
- In the left sidebar, click Developer settings.
- In the left sidebar, click Personal access tokens and click on
Generate Tokens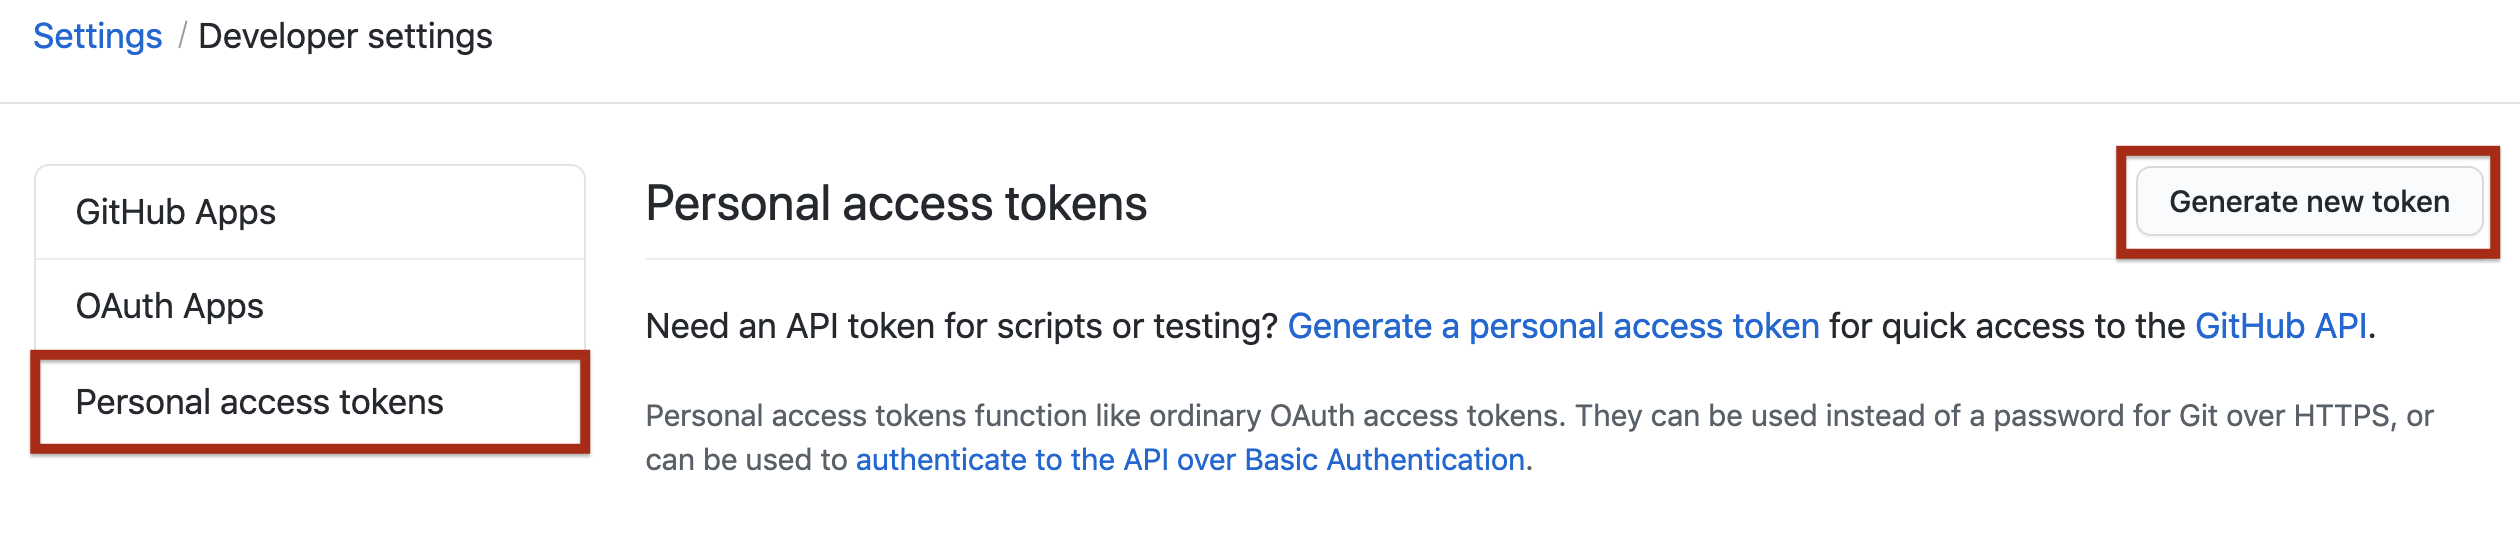
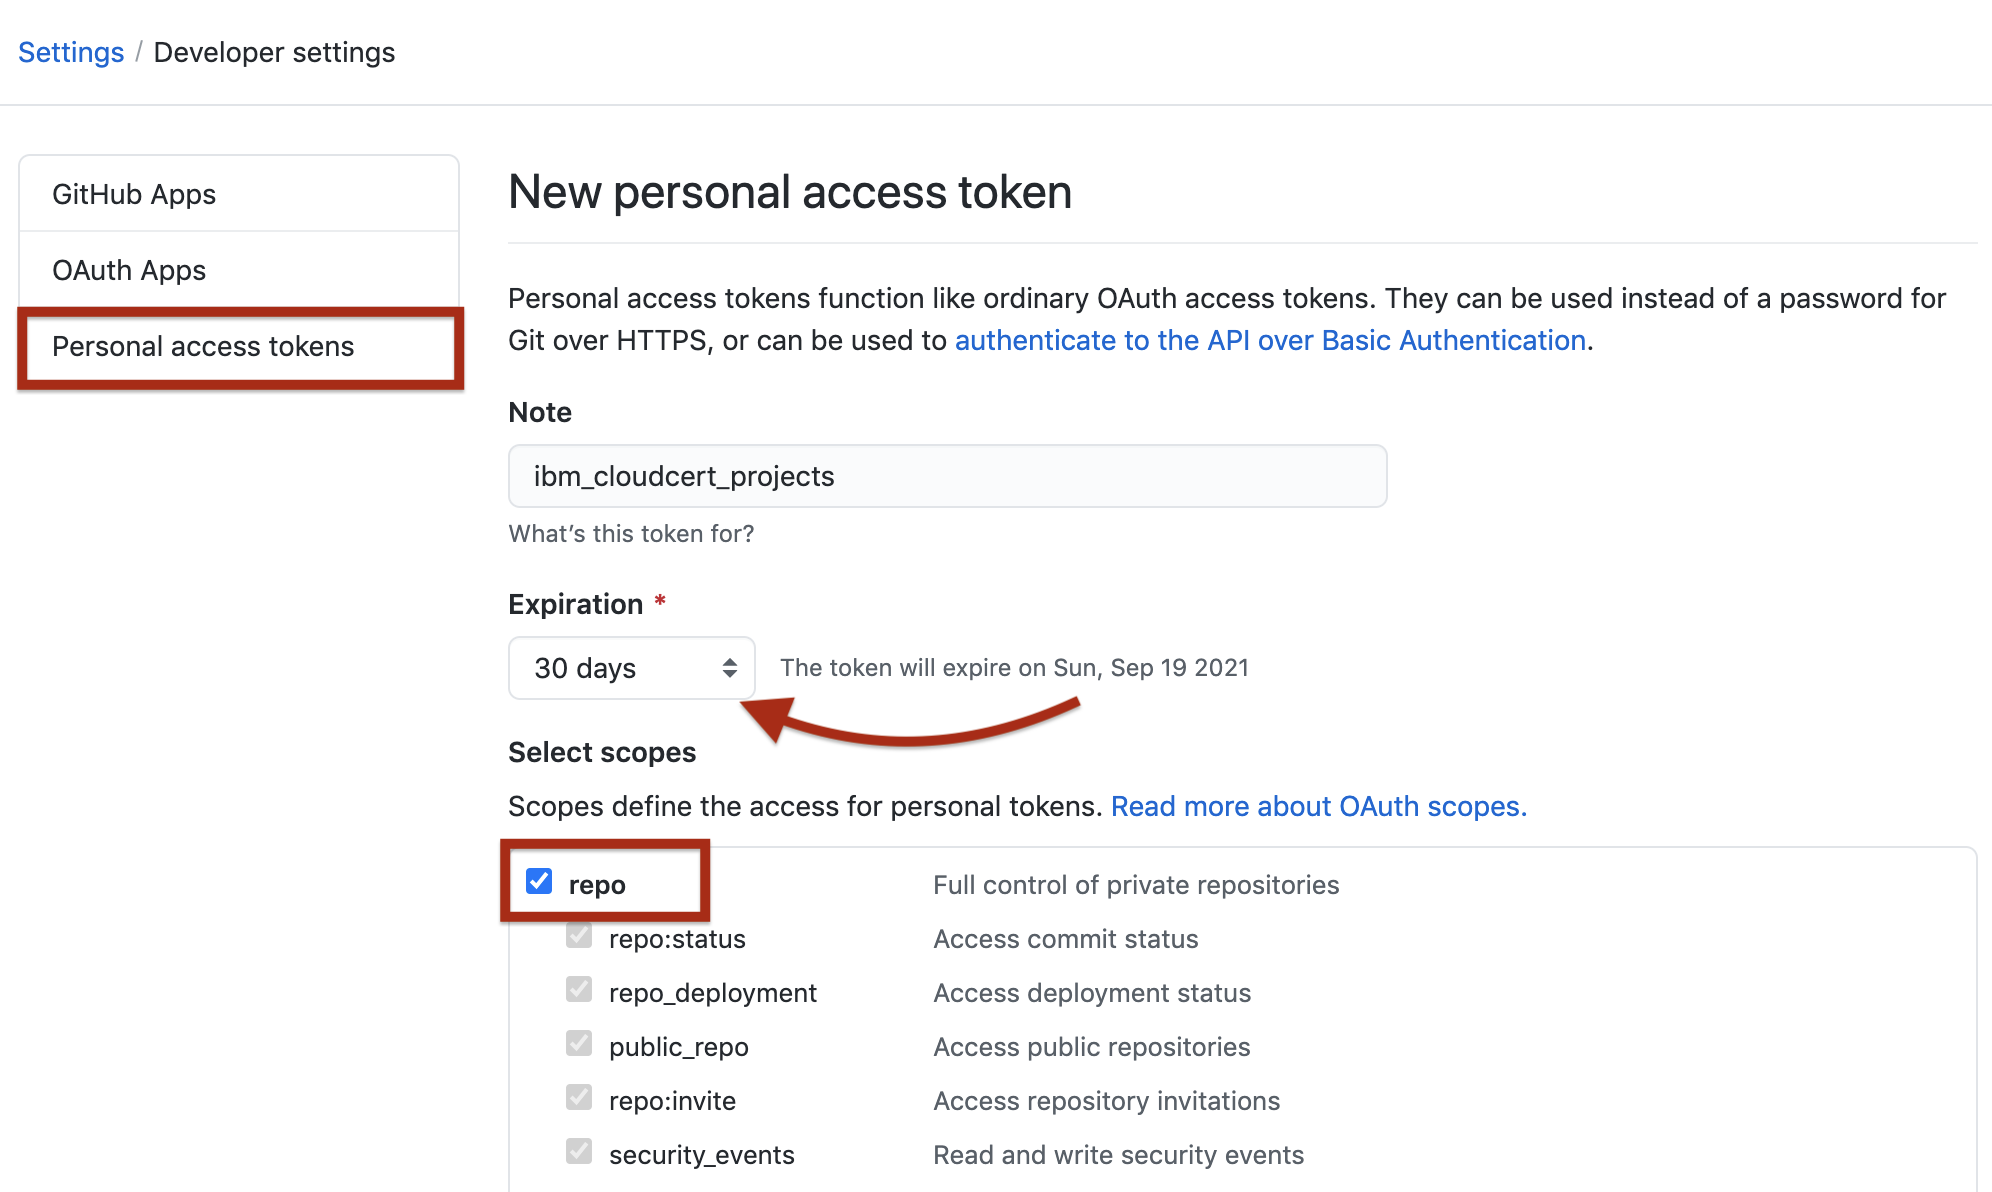
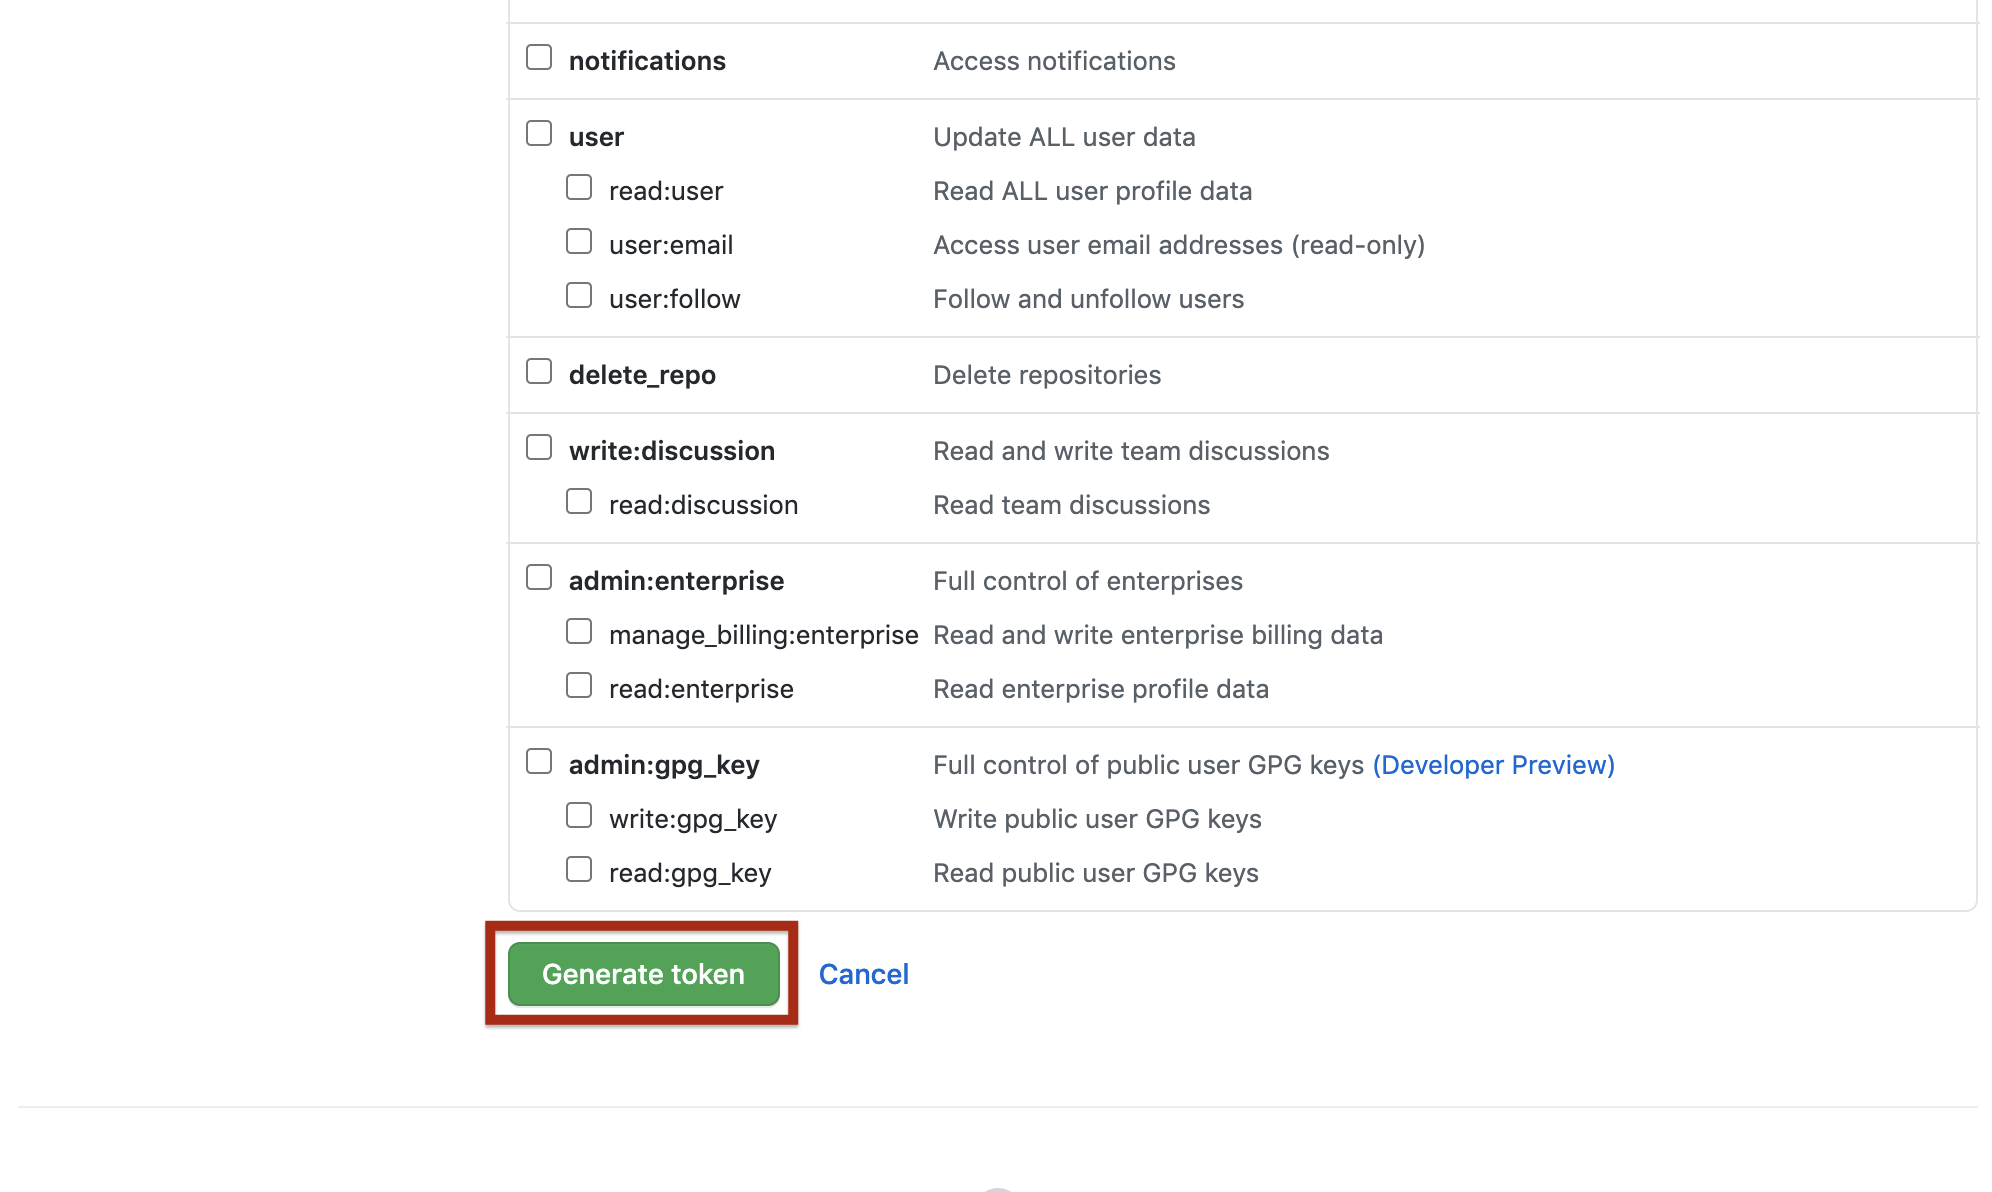
- Give your token a descriptive name. To give your token an expiration, select the Expiration drop-down menu, then click a default or use the calendar picker. Select the scopes, or permissions, you'd like to grant this token. To use your token to access repositories from the command line, select repo.
- Click Generate token and make a note of it.
- Make sure you copy the token and keep it safe. It is not visible to you again.
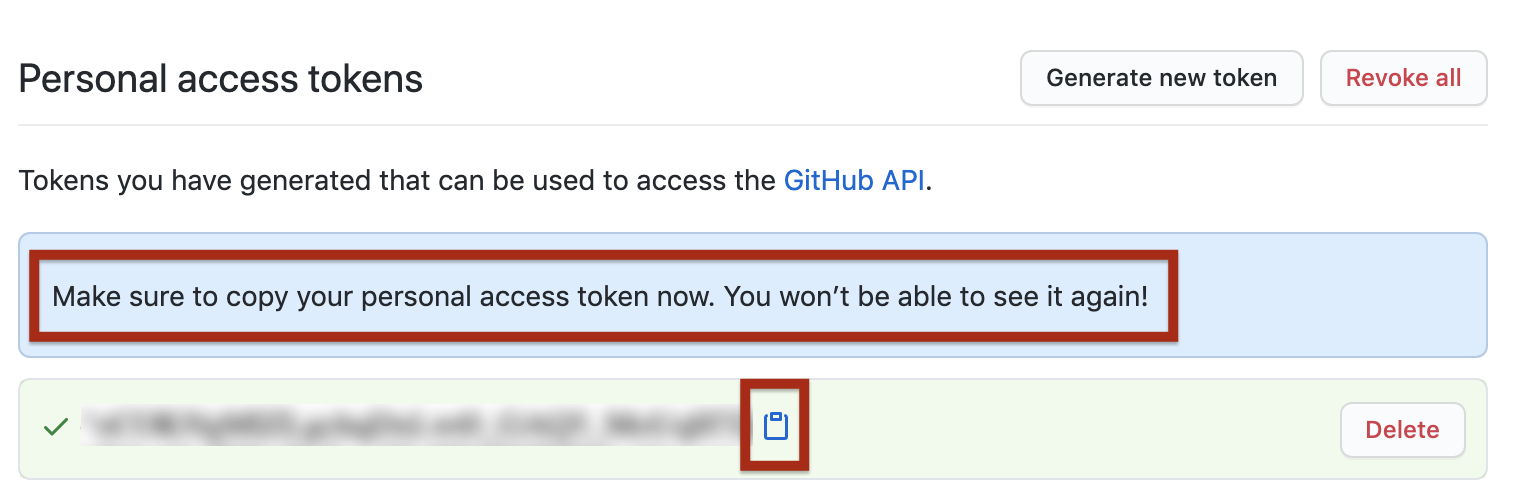
Treat your tokens like passwords and keep them a secret.
Once you have a token, you can enter the Personal Access Token as password when performing Git operations.
10. Push the code to GitHub
The git push command will enable you to sync all the changes made locally to the GitHub web repository.
-
Run the following command with your actual HTTPS link:
git push [HTTPS link]You will be prompted by git for your username and password.
-
Type your GitHub username and password. When you are authenticated, all committed changes are synced with your GitHub repository.
You can now visit the GitHub repository page and check to ensure that the revised and newly added files are in place.
Summary
Congratulations! You should now know how to access git and run commands from the command line using the Theia lab environment.
In this lab, you have learned how to:
- Clone your GitHub repo locally
- Make changes to a file
- Add new files
- Commit the changes
- Push the updated files to GitHub
We encourage you to make more changes to your files using the Theia environment to become familiar with git, GitHub, and running commands from command line.
Tutorial details
Author:
Ramesh Sannareddy
** Other Contributor(s) ** Richard Ye
Changelog:
| Date | Version | Changed by | Change Description |
|---|---|---|---|
| 2020-08-28 | 1.0 | Ramesh Sannareddy | Initial version created |
| 2020-08-31 | 1.0 | Nayef Abou Tayoun | Reviewed |
| 2022-01-27 | 1.1 | Richard Ye | Removed personal information |
https://cf-courses-data.s3.us.cloud-object-storage.appdomain.cloud/IBMDeveloperSkillsNetwork-CD0101EN-SkillsNetwork/labs/Theia%20Labs/04%20-%20GitHub/Lab%20Using%20git%20on%20Theia/images/open-terminal.png