Closed TheMaskedMan00 closed 2 years ago
It would be a neat idea to automatically get the color values from koikatsu, but the game applies a saturation filter (called Amplify Color) to everything on screen. Directly reading the raw values into blender will give you duller, lighter versions of each color because they aren't going through this saturation process. In order for this to work, each color would need to be converted.
There are tools like https://github.com/ManlyMarco/KK_BetterColorPicker and https://koikoi.happy.nu/texture_color_adjuster/ that use the rgb values and a lookup texture to UNsaturate a color with code showing step by step how it's done, but I have no idea how the actual lookup process works, so I don't know if this process can used in reverse to generate the saturated version of the color.
Amplify Color is now a free asset on the unity store, but I don't know if the code or process for the package is even available to view so it can be recreated in blender. The LUTs that the game uses are at least available in the BetterColorPicker repository above, so it's really just the process that needs to be figured out.
So without Amplify Color's code, and without a similar saturation process, there'd be no point in trying to do this. The next best thing is the current process, where you manually click on a screenshot that already has the saturation filter applied.
Here's a script that converts KK RGB values to its saturated values.
The way it works is it uses a LUT taken from KK and saturates the colors.
colorToSample
to the RGB values you want to convert.To use the script in Blender you will need to install the dependencies to blender's python installation. If so, make sure to run python as admin so that the packages will be installed the blender's install folder.
The image on the right is the corrected color.
Here is the .cube LUT KKV2.zip
Dependencies: https://colour.readthedocs.io/en/develop/index.html#installation https://pillow.readthedocs.io/en/stable/installation.html numpy
from colour import read_LUT
from PIL import Image
import numpy as np
############################################# CONFIG
colorToSample = (255,255,255)
samplerSize = 16
#############################################
# Get KK.cube LUT
lut3d = read_LUT("W:/KK/KKV2.cube")
# Create an image sample and scale it
imgSampler = np.array(Image.new('RGB', (samplerSize, samplerSize), color=colorToSample))/255
# Apply KK lut3d to the sampler
imgSampler = lut3d.apply(imgSampler)
# Scale the converted sampler
imgSampler = np.uint8(imgSampler*255)
# Store the converted RGB values
convertedRGB = imgSampler[0][0]
print(convertedRGB)
# For debug
#PIL_image = Image.fromarray(imgSampler)
#PIL_image.show()
New LUT It seems to be slightly more accurate.
This took over 60 hours to R&D...
Call 1800-555 and double your offer, buy one get one free!!! Just kidding.
But yes, this is the ultimate script. Just set the color in the Config section and get the corrected value out. It's all contained in a function that you can copy and paste.
colorToUse
and make sure lutName
is correctimport bpy
import bgl
import gpu
import numpy as np
from gpu_extras.batch import batch_for_shader
# Please below to change the settings
########## FUNCTIONS ##########
def colorToKK(color, lutName):
width = 1
height = 1
# Some Sauce
vertex_default = '''
in vec2 a_position;
void main() {
gl_Position = vec4(a_position, 0.0, 1.0);
}
'''
# The Secret Sauce
current_code = '''
uniform vec3 inputColor;
uniform sampler2D lut;
vec3 to_srgb(vec3 c){
c.rgb = max( 1.055 * pow( c.rgb, vec3(0.416666667,0.416666667,0.416666667) ) - 0.055, 0 );
return c;
}
void main() {
vec3 color = inputColor / 255;
const vec3 coord_scale = vec3(0.0302734375, 0.96875, 31.0);
const vec3 coord_offset = vec3( 0.5/1024, 0.5/32, 0.0);
const vec2 texel_height_X0 = vec2( 0.03125, 0.0 );
vec3 coord = color * coord_scale + coord_offset;
vec3 coord_frac = fract( coord );
vec3 coord_floor = coord - coord_frac;
vec2 coord_bot = coord.xy + coord_floor.zz * texel_height_X0;
vec2 coord_top = coord_bot + texel_height_X0;
vec3 lutcol_bot = texture( lut, coord_bot ).rgb;
vec3 lutcol_top = texture( lut, coord_top ).rgb;
vec3 lutColor = mix(lutcol_bot, lutcol_top, coord_frac.z);
lutColor = to_srgb(lutColor);
vec3 shaderColor = lutColor;
gl_FragColor = vec4(shaderColor.rgb, 1);
}
'''
# This object gives access to off screen buffers.
offscreen = gpu.types.GPUOffScreen(width, height)
# Context manager to ensure balanced bind calls, even in the case of an error.
# Only run if valid
with offscreen.bind():
# Clear buffers to preset values
bgl.glClear(bgl.GL_COLOR_BUFFER_BIT)
# Initialize the shader
# GPUShader combines multiple GLSL shaders into a program used for drawing.
# It must contain a vertex and fragment shaders, with an optional geometry shader.
shader = gpu.types.GPUShader(vertex_default, current_code)
# Initialize the shader batch
# It makes sure that all the vertex attributes necessary for a specific shader are provided.
batch = batch_for_shader(
shader,
'TRI_FAN', {
'a_position': ((-1, -1), (1, -1), (1, 1), (-1, 1))
},
)
# Bind the shader object. Required to be able to change uniforms of this shader.
shader.bind()
try:
# Specify the value of a uniform variable for the current program object.
# In this case, a color tuple.
shader.uniform_float('inputColor', colorToUse)
except ValueError:
pass
try:
lutImage = bpy.data.images[lutName]
# https://docs.blender.org/api/current/bgl.html
bgl.glBindTexture(bgl.GL_TEXTURE_2D, lutImage.bindcode)
bgl.glTexParameteri(bgl.GL_TEXTURE_2D, bgl.GL_TEXTURE_WRAP_S, bgl.GL_CLAMP_TO_EDGE)
bgl.glTexParameteri(bgl.GL_TEXTURE_2D, bgl.GL_TEXTURE_WRAP_T, bgl.GL_CLAMP_TO_EDGE)
bgl.glTexParameterf(bgl.GL_TEXTURE_2D, bgl.GL_TEXTURE_MIN_FILTER, bgl.GL_LINEAR)
bgl.glTexParameterf(bgl.GL_TEXTURE_2D, bgl.GL_TEXTURE_MAG_FILTER, bgl.GL_LINEAR)
# Specify the value of a uniform variable for the current program object.
# In this case, an image.
shader.uniform_int("lut", 0)
except ValueError:
pass
# Run the drawing program with the parameters assigned to the batch.
batch.draw(shader)
# The Buffer object is simply a block of memory that is delineated and initialized by the user.
buffer = bgl.Buffer(bgl.GL_BYTE, width * height * 3)
# Select a color buffer source for pixels.
bgl.glReadBuffer(bgl.GL_BACK)
# Read a block of pixels from the frame buffer.
bgl.glReadPixels(0, 0, width, height, bgl.GL_RGB, bgl.GL_UNSIGNED_BYTE, buffer)
# Free the offscreen object. The framebuffer, texture and render objects will no longer be accessible.
offscreen.free()
# Get and return the pixels from the final buffer
finalColor = [v for v in buffer]
finalColor = np.array(finalColor).reshape(width, height, -1)
return finalColor[0][0]
########## CONFIG ##########
# Set the RGB values from KK here.
colorToUse = (127, 127, 127)
# Make sure to import the LUT into blender first, then set it's name here.
lutName = "KK LUT V4.png"
convertedColor = colorToKK(colorToUse, lutName)
# For Debugging
print(convertedColor)
Here's a crude snippet to set a RGB node's color:
convertedColor = colorToKK(colorToUse, lutName)
floatColor = convertedColor / 255
mat = bpy.data.materials['Material']
mat.use_nodes = True
nodes = mat.node_tree.nodes
colorNode = nodes['RGB']
colorNode.outputs[0].default_value = (floatColor[0], floatColor[1], floatColor[2], 1)
See how the retuned RGB needs to be divided by 255 for it to be compatible with Blender's RGB system.
To see the correct colors in the viewport, make sure View Transform is set to Raw
(I may be wrong here, but that's what worked for me.):
@FlailingFog I strongly suggest using this script instead of the older version for V5/V6 If you do use it, please credit me.
@MediaMoots
I-I kneel...
I just got to trying your first script last night, and already thought it did a really good job. This second one looks like literal black magic though... How the hell did you do this? It looks like you're running C code inside of a python script...
Still, this is cool stuff, thank you for doing this! It opens up possibilities for (un)converting main textures for accessories, clothing, and studio items too. Since your new script is using the actual KK LUT, can you use the night time LUT to give you the dark (shadow) version of each color as well?
The final piece of this puzzle would be to automate the color value collection itself inside of koikatsu. Luckily the code for this is already written, because the KK Material Editor plugin accesses these values. If that code could be repurposed to save each material's color value to a csv or something, the csv could be read into blender, run through your conversion code and applied to all of the material templates automatically. Any main textures could also be converted the same way. I'll definitely be looking into making this after I finish some other stuff for V5. Ideally I'd want your code and this color collection thing to appear side by side, so not sure if it will appear in V5 or V6. It depends on how easy repurposing the material editor code turns out to be.
Could you make a PR to the V5 branch with this code and put it in the 'importing' or 'extras' directory? Pretty sure you'll be credited as the creator of the file that way.
(You might also want to share your code on one of the koikatsu discord modding channels; there might be interest in the color conversion process for people making modded items.)
@FlailingFog Haha, thanks.
Since your new script is using the actual KK LUT, can you use the night time LUT to give you the dark (shadow) version of each color as well?
Yes, every LUT KK has can be used. Here's a zip with three of them (Day (Same as the one from above), Sunset, Night) LUTs.zip
The final piece of this puzzle would be to automate the color value collection itself inside of koikatsu.
That's a good idea. Would you like some help to do this?
Could you make a PR to the V5 branch with this code and put it in the 'importing' or 'extras' directory? Pretty sure you'll be credited as the creator of the file that way.
Ok, sounds good.
Luckily the code for this is already written, because the KK Material Editor plugin accesses these values.
So, I did a bit of research and found that the Material Editor can't get the color values for many items, such as the skin and clothes.
I think I got it, the idea is to parse and get the color data from character cards.
If you like, I can work on that and update you if there's progress.
So, I did a bit of research and found that the Material Editor can't get the color values for many items, such as the skin and clothes.
Shoot you're right, it only seems to give color values for accessories. I could have sworn it gave more than that... There goes that plan I guess.
I think I got it, the idea is to parse and get the color data from character cards.
If you like, I can work on that and update you if there's progress.
Neat, I didn't know you could do that. If you're willing to do it, then please do!
Y'know, after digging s'more, maybe generating a csv/json template for ppl to fill in manually might be better, haha What do you think?
So, I made a script that generates a CSV template that matches the color boxes available (Except some paint colors) in KK
This is the result: ColorTemplate.csv
Do you think that with this new color workflow, the shaders might need to be rewritten? Such as how it handles skin color, clothes top/bot, and more?
I don't know... If the color values can't be compiled automatically then I still feel like clicking on a screenshot would be faster than finding, recording and retyping each RGB value in. Is there like a function you can use in koikatsu that just lists them out on one page for easy recording?
I looked into https://bitbucket.org/Joan6694/hsplugins/src/master/RendererEditor/ but like material editor, it doesn't seem to give every color value.
I tried this and it looks like it gives skin/hair/etc color values in the dump, but there doesn't seem to be much text associated with the accessory colors, so I don't know how those colors could be correlated with the correct materials: https://koikoi.happy.nu/json_dump/
Might be kind of janky, but maybe this dumper could be used for the values material editor can't get, and the material editor code snippets could be used to get the rest? The json dumper has good labels for everything, so it should be easy to know what goes where, and material editor should know the name of the accessory it's getting color values for, so it could be matched up with the material name shown in blender.
Do you think that with this new color workflow, the shaders might need to be rewritten?
I don't think anything in the blend file would have to be changed, the code reading these values just has to load the colors into the correct spots.
Hi @FlailingFog
I think I have a completely different and easy (for the user) solution.
But first, what do you imagine the workflow to be like?
Import mesh -> Cleanup -> Import Shaders / Materials -> Correct colors -> etc... Like that?
Quick question, why do the Nipples need 4 color values?
Thanks.
That's how it is now, but the workflow can change if it makes it easier.
Some nipple textures are black and white but others have RGB components, so that's where the first three come from. I remember getting better results with an additional fourth color though, so I swapped to that. Nipple 1 and Nipple 2 (combined) can be treated as the red component of the nipple texture, while 3 and 4 represent the green and blue components.
Ok cool, thanks for the explanation.
This (Nipple colors) will be an issue though, since KK only needs one color, so I'm not sure how to translate that over to blender.
Also, I may be wrong but the eyeline shader appears to be incorrect.
See how in KK the eyeline is a gradient (from black to color), as opposed to a solid color in blender.
Texture:
Ok cool, thanks for the explanation.
This (Nipple colors) will be an issue though, since KK only needs one color, so I'm not sure how to translate that over to blender.
nvm, i got this one
PR #31
This looks awesome! Really smart idea grabbing colors from the pmx images. I'll check this out and also fix the eyeline shader. I know I had the second color at one point, so I wonder what happened to it...
Found a weird quirk in KK The eyebrows have some kind of saturation going on
See how the colors are completely different shades? Actually, they are set to the same color.
Weird stuff.
@FlailingFog The new eyeline system still has an issue. The fade is also off. In KK In KKBP:
Same color.
Example with both colors (KK and KKBP) set to white KK KKBP
I got the fade to be slightly more accurate (the fade should now shrink away from the edges like it does in the game), but I don't know what's going on with the colors. I'm also having a hard time removing that outline on the eyeline because the eyeline texture's alpha and the color don't completely match up, and leveling it doesn't seem to help.
I'm also having a hard time removing that outline on the eyeline because the eyeline texture's alpha and the color don't completely match up, and leveling it doesn't seem to help.
https://blender.stackexchange.com/questions/34626/white-edge-around-objects-with-alpha Does this help?
but I don't know what's going on with the colors.
Looking a bit at the shader code, it seems that a there's a color ramp (or light color), (line 76) but I'm not sure that it's affecting its color that much.
https://github.com/JIexan/Koikatu-shaders-source/blob/master/toon_eyew_lod0.shader
Edit: I can't test now, but the light color is looking a bit sus (maybe the light color of the game is affecting the eyeline)
_LightColor0
Figured it out (Invert and Color Burn) KKBP KK
@MediaMoots Thanks again for improving the project tenfold!
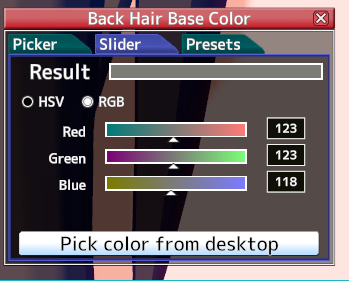
in game you can use material inspector to view all values for colors and stuff, so can you make it when you import your textures a gui will pop up asking you for numbers/colors for each material, which correspond the the material inspector. so you just enter them and press ok and it will automatically fix all the colors for you