Kay607 / obsidian-canvasblocks

MIT License
11 stars 0 forks source link

How to select the code node? #1

Open JuuHuu opened 1 month ago

JuuHuu commented 1 month ago

I have create the canvasblocks folder, and put some .md code file under it. How to select and add code node in canvas?

Kay607 commented 1 month ago

You can create a .md file in your vault with the script text and add it to the canvas by dragging the file in or pressing this button image If you choose to add the files into your vault they can be anywhere and are not limited to the plugin's data folder (default Assets/CanvasBlocks)

You can also create a text node directly in the canvas and copy the script into it rather than having a seperate file. You can create a text node by double clicking in the canvas or clicking on this button image

The Assets/CanvasBlocks folder is used by some of the scripts as a location to output files to. This location can be changed in the settings
JuuHuu commented 1 month ago

Thank you, I have add the code block in canvas, and run the execute command. However, a message shows: " an error has occurred while running this script. Check the console for more detail". How to check the error information? My configuration is shown below:

  1. the plugin configuration image
  2. the path image
  3. the script file image
  4. the canvas file image

After I post the question, I tired to remove the whole obsidian vault to a new path that does not contain any Chinese character, but the problem still exists.

Kay607 commented 1 month ago

You can open the console with Ctrl+shift+i

JuuHuu commented 1 month ago

Thank you for the answer. I find that its because i have multiply python version. A 3.10 version's path was added to "path" in system variable, and there also two variables in system variables called: "PYTHONPATH" and "PYTHONHOME"(python 2.7), which is different from "path". I changed all python related variables in system to point to python 3.10. However after the setting, nothing appears after i execute the command. No errors nor results.

Kay607 commented 1 month ago

I have found 2 issues with the plugin and fixed them in the latest release, though I'm not sure if it is the same issue that you've had. If it still doesn't work I have more information which might help:

I'm running Windows 10 which i've fully tested all of the example scripts on and have several python installs and haven't had any issues. If you're on a different OS I may need to update the plugin, though other Windows versions should be fine

It might be useful to try some of the other scripts from examples or some test scripts to see what is functioning

Print test

print("Test") # This should output to the console

Error test

raise Exception("Test")  # This should raise an error which will be shown in the console

If you add either of these to a node you can just run the command without a parameter node to be touching it

If you encounter any errors while running them please send the error message from the console and which script you ran which caused it

JuuHuu commented 1 month ago

Good news and thank you so much! I finally correctly run the script and generate the desired results.

Here are some tips that may useful for other users:

  1. Code files and code nodes: The code file is an .md file that contains code. And the code MUST put in the code block, which have following format: image Adding these .md files into canvas, then these .md files become code nodes.
  2. Path and version problem:
    • My computer (win 10) has been installed multiply python version, from python 2.7 to python 3.12, and these cause huge problem. In general, make sure the system variables (e.g. PYTHONHOME, PYTHONPATH, path), user variables(e.g. path) in Windows and "python path" setting in the plugin are the same.
    • I also find that the python version may required to be python 3 and below python 3.10. Because the generated python file has some comments to imply that. image
  3. Running problem You MUST select the code nodes before running the command, and when running a code nodes that have inputs, do not select the parameters node (this caused my previous problem: nothing happened after typing the command):
    • If running a code node that does not contain any input parameters nor input files (like a print test code). Just select the code node and run it.
    • If running a code node that contain input files and parameters (like a image rotation code). Select either code nodes or input file nodes but not parameter nodes, which means you can select either 1) the code nodes, or 2) the input file node, or 3) both the code and input file nodes. All above three situation will run the script correctly. However, once you select the parameters block ( like rotation degree), either alone or together with other nodes, the script will not run.
  4. Multiply parameters when input multiply parameters, just use one text nodes and write all parameters separate with "," like this: image

Here are some questions and advices for the developer:

  1. I believe this plugin will be very useful, so thanks the developer and please keep update it!
  2. I have been always finding some apps that can manage the code snips and also have automation function. but none of them works well. I believe this plugin may satisfied the requirements. Here are some questions and desired function:
    • what's the difference between pycanvasblock and ordinary python? It seems that you add some libs in canvasblocks-python-lib.py, beside, its the same with python, can the plugin use other python lib like numpy? If it is, it's fantastic!
    • If a code block has multiply input files, like merge multiply images into a new one, how to arrange the image file and code block.
    • Why do you use "overlap" to implement input file? is there any possible to use arrows to present it? If it is , then the plugin could be used to build an work flow like many node based editing software or automation app, e.g. automate function in alfred in MacOS, or node tools in blender. The expected workflow is like this: image
Kay607 commented 1 month ago

I'm glad that your problem is solved and thank you for the feedback, it has been very useful for finding some issues that weren't obvious during my testing

To answer your questions:

I also find that the python version may required to be python 3 and below python 3.10. Because the generated python file has some comments to imply that.

The import in the screenshot is to allow type annotation to work in versions below 3.10 since the library uses union types such as str|None which were not supported below 3.10. The plugin should work on any version >= 3.5 but i have only tested on 3.9 and above

You MUST select the code nodes before running the command, and when running a code nodes that have inputs, do not select the parameters node

Needing to select the node before running the command is intended behaviour as this allows you to choose which script to run to prevent any for being accidentally executed. Parameter nodes should also be able to be selected and still run the script, this may be a bug. However, if a parameter node is selected it will look for the closest node which is overlapping. If this is not a script, nothing will happen which may be the cause of your issue

However, once you select the parameters block ( like rotation degree), either alone or together with other nodes, the script will not run

This is intended behaviour but I may add this later as it could be a useful addition

when input multiply parameters, just use one text nodes and write all parameters separate with "," like this

The method of inputting multiple settings parameters such as width and height is decided by the script. In the examples I have tried to use commas to separate them, however this can be changed in the script and is not dictated by the plugin

what's the difference between pycanvasblock and ordinary python

When code is put in a pycanvasblock code block, the plugin hides it. This is so that it is only displayed when editing it so that you can put other text in the node such as a title and only have that appear. If you edit the value of pythonCodeBlockLanguageName in the plugin and build it, it can use py as the language type

It seems that you add some libs in canvasblocks-python-lib.py, beside, its the same with python, can the plugin use other python lib like numpy

canvasblocks-python-lib.py allows the script to communicate with the plugin. It implements several helper functions for getting the parameter file, but it's primary purpose is to allow you to use certain Obsidian Canvas features such as creating and modifying nodes. You can import any library such as numpy. The function in the library install_dependency may be useful. This causes the module to be downloaded with pip if it isn't already installed which makes it easy to share scripts since they will automatically download any libraries required

If a code block has multiply input files, like merge multiply images into a new one, how to arrange the image file and code block.

You can use the arrow parameters variable in python to get all nodes which are connected by arrows. In the examples I used this for settings such as width and height or angle but it can accept any node type, including images to merge

Why do you use "overlap" to implement input file? is there any possible to use arrows to present it?

The purpose of the overlapping is to allow you to quickly run a script with the input by just dropping it on top and running the command. You can also use the arrows to input files, though the examples that I have written only do this to add additional data rather than the main file that the script handles

the plugin could be used to build an work flow

I am planning to implement this in the future but chose to make what is the current version of the project as this is less complex to create and easier to use. I'm trying to decide how the scripts should be stored and if I will need to make modifications to the rendering of nodes such as adding points where the arrows snap to.

In your example, the resize would be unambiguous as it is easy to tell which of the nodes connecting to the resize script are data and which are settings (by detecting the type of node, file/text). However, in the merge script, it isn't clear what the order of the images should be. If the script merges vertically, it isn't clear which of the input images should be on top

Making a work flow where there are multiple steps to processing before the final output isn't too difficult, but making it function with the limitations of JSON Canvas does make it more complex. It is possible to use the colours of the arrows to differentiate between inputs, though this is likely too confusing and makes it slower to make connections

When I do add this functionality, I will likely keep the current method of creating scripts using pycanvasblock as this will be faster to use and simpler to set up


If you have any suggestions on this, feel free to continue here or create a new issue. Also if you have any scripts which may be useful to others, you can create a pull request to add them to the repository in the examples folder

Kay607 commented 1 month ago

image

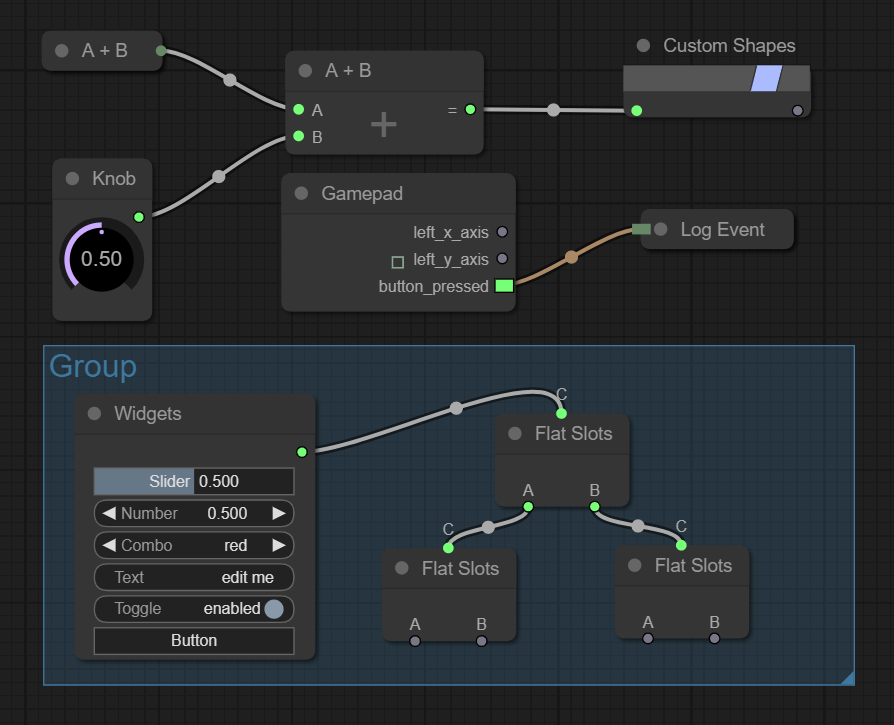
Here's a proof of concept for how this could work. The arrows would likely be coloured according to the data type as well as the dots being coloured. I haven't got a working prototype but this could be implemented relatively easily, hopefully in the next week. The design is open to change but I would prefer it to use nodes and edges from Canvas rather than a custom system

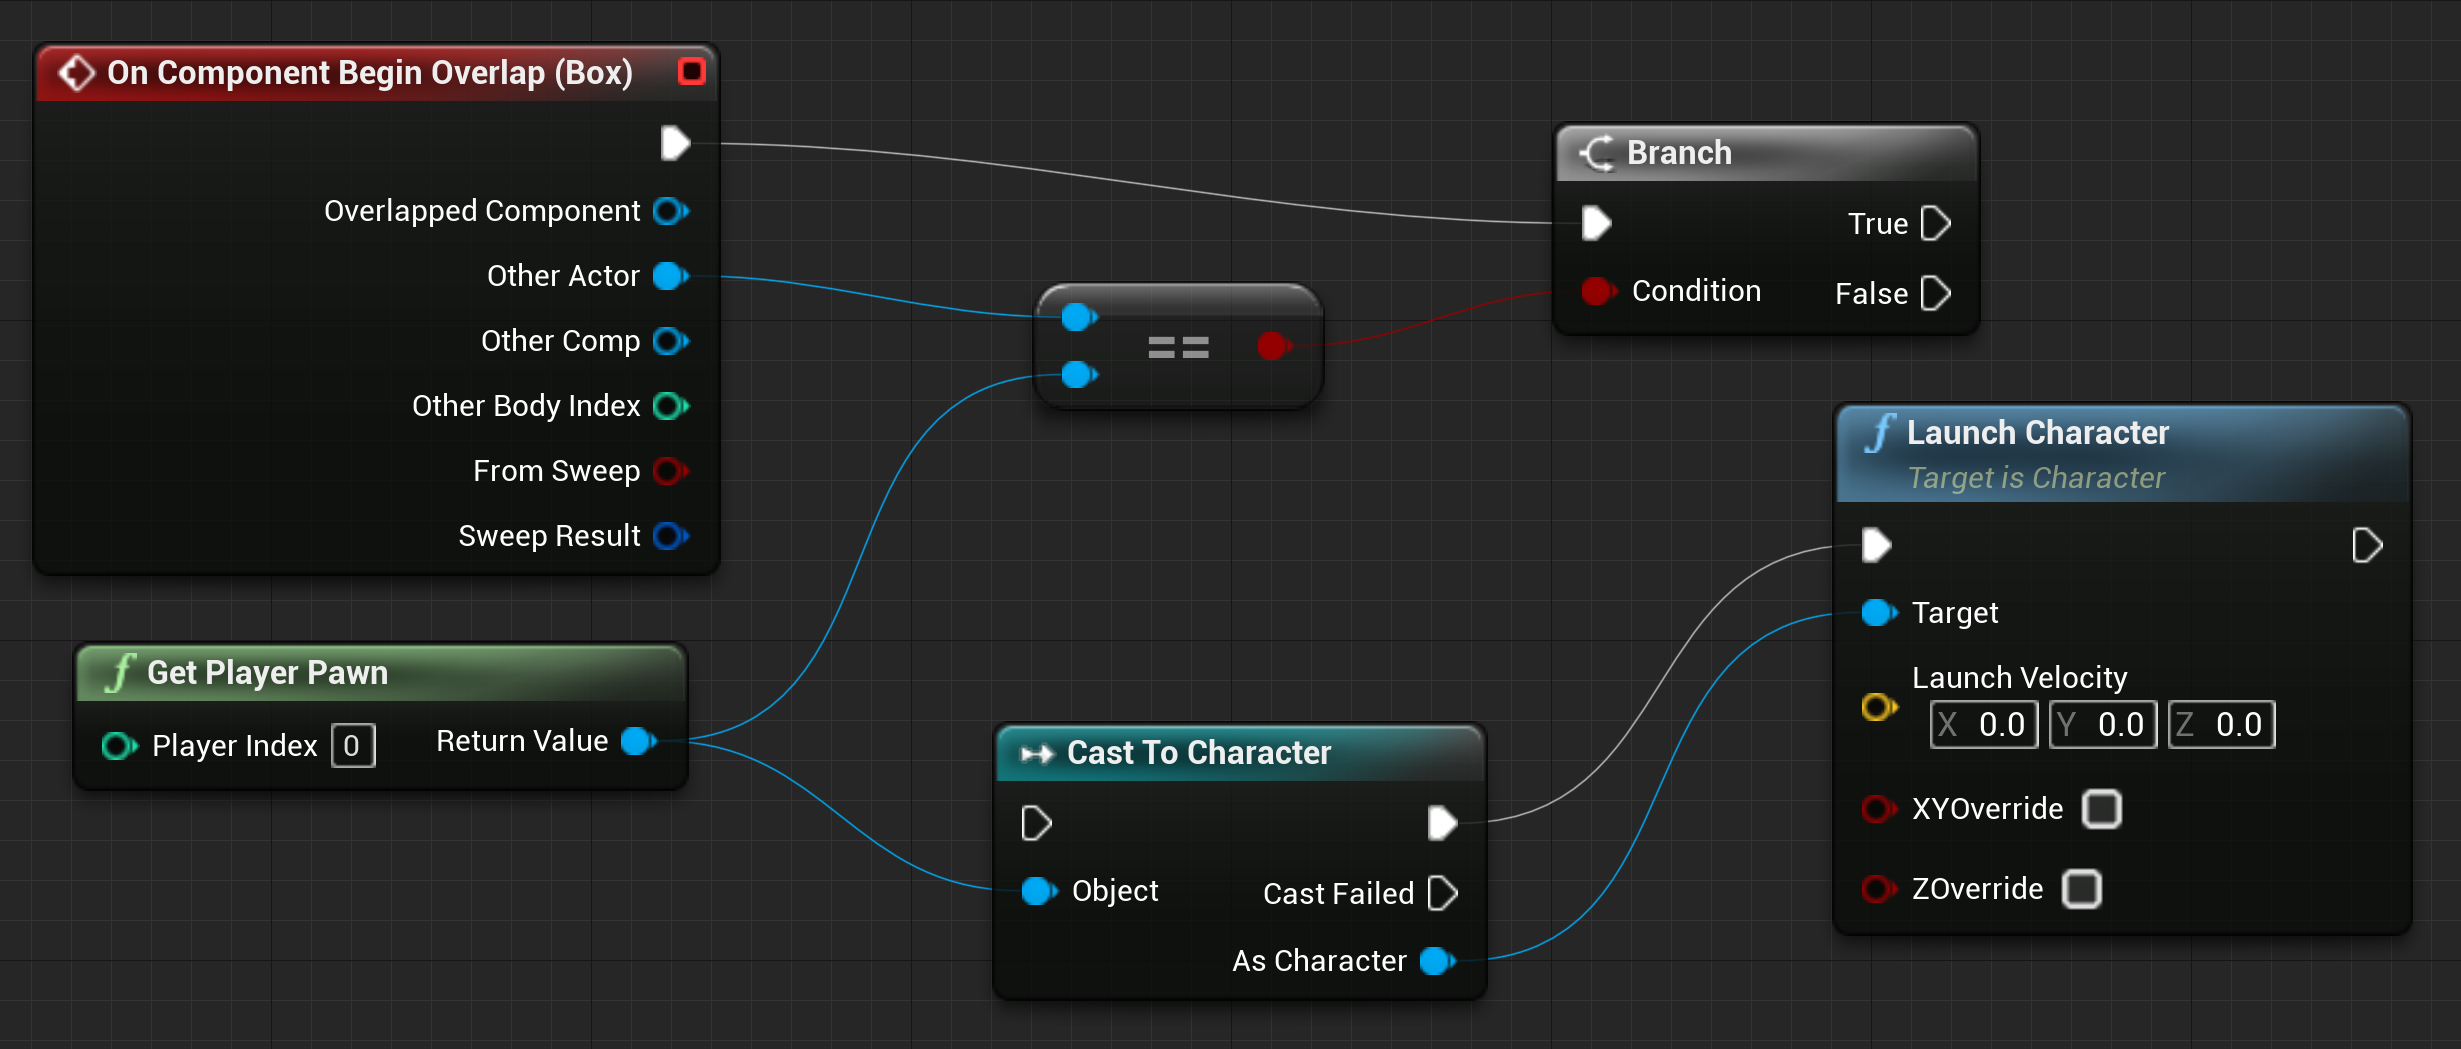
The alternative to this would be something like litegraph, but this would be much harder to implement as the Obsidian Canvas API is very limited and merging a complex system such as litegraph would be difficult (likely requiring most of it to be rewritten as as far as I know, it is rendered using a canvas rather than the DOM like Obsidian does) and would also not integrate well with the rest of Canvas litegraph example

JuuHuu commented 1 month ago
  1. for the first replay According to your first replay, I just realized that the plugin are so flexible! All inputs and parameters are processed in the scripts, and user can freely process they input data! I also find that some useful hints are added into the script! It's useful for a new user like me.

  2. for the last replay Your concept about how workflow is implement is what I am expected. I also believe that using the nodes and edges provided by Obsidian would be better. According to your description, I believe the difficult to implement the "work flow" lays on how to correctly pass the parameter, both order and type. a) If you just want to implement it on .md file layer, it may not difficult, You only need to ask the user to put their date in desired order, and provide some function to get input parameters order according to their position. PixPin_2024-05-23_16-19-23 This kind of implement is easily, you do not even need a preview node. But it will not easy for users to use more complicated script.

b) Or you can implement it on your plugin layer, modify the plugin so that it provides some date I/O, the developer just need to define these I\O in their script, and these IO also shows in Canvas just like your proof of concept , so that the user can connect their data correctly.

Since, I am not familiar with Obsidian Canvas development, I may need sometime to figure out the limitation of Obsidian Canvas API. When I have new progress and more practical code suggestions, I will post them here again.

Kay607 commented 1 month ago

If you want to have a script like what is in the screenshot, that is already possible as the plugin provides a list of nodes connected by arrows to the script. This node data contains the text/file of the node as well as the x and y coordinates and the width and height. You could compare the x coordinates of 2 nodes to find which should go on the left and right.

I can make an example of this later.

If you want to chain these nodes together though, you'll need to use the workflow system which I will work on soon.

JuuHuu commented 1 month ago

I can make an example of this later.

Great,! Image fusion is actually a problem I often encounter when writing papers. If there is such a script, it will greatly simplify my workflow.

you'll need to use the workflow system which I will work on soon

Really looking forward to your updated workflow system.


If there is anything I can help with, please feel free to leave a message here.

Kay607 commented 1 month ago

Here's a script I just wrote for this, it should be easy to expand to work with more than 2 images at once if needed. I made 2 versions, the first one scales the image with the lower height so that there is no blank space on the merged image like in the example you gave. The second just puts the 2 images together so may have blank space. I've only briefly tested it so there may be some issue but it seems to work well. I hope this helps

Whichever image node is on the left will be on the left in the output image

install_dependency("pillow", "PIL")
from PIL import Image
import os

if len(arrow_parameters) != 2:
    raise Exception("Must have exactly 2 image parameters")

for arrow_parameter in arrow_parameters:
    if arrow_parameter["type"] != "file":
        raise Exception("All parameters must be images")

node_centre_x_coordinate = [arrow_parameter["x"]+int(arrow_parameter["width"]/2) for arrow_parameter in arrow_parameters]
if node_centre_x_coordinate[0] > node_centre_x_coordinate[1]:
    arrow_parameters = [arrow_parameters[1], arrow_parameters[0]]

image_paths = [os.path.join(vault_path, arrow_parameter["file"]) for arrow_parameter in arrow_parameters]
images = [Image.open(image_path) for image_path in image_paths]

names = [os.path.basename(os.path.splitext(parameter_data["file"])[0]) for parameter_data in arrow_parameters]
merged_name = f"Merge_{'_'.join(names)}.png"

img1 = images[0]
img2 = images[1]

width1, height1 = img1.size
width2, height2 = img2.size

# Get the aspect ratios of the original images
aspect_ratio1 = img1.width / img1.height
aspect_ratio2 = img2.width / img2.height

# Scale the image with the larger aspect ratio to fit the dimension of the other image while maintaining aspect ratio
if aspect_ratio1 < aspect_ratio2:
    # Scale img1 to fit img2's height
    new_width = int(height2 * aspect_ratio1)
    img1 = img1.resize((new_width, height2), Image.Resampling.LANCZOS)
else:
    # Scale img2 to fit img1's height
    new_width = int(height1 * aspect_ratio2)
    img2 = img2.resize((new_width, height1), Image.Resampling.LANCZOS)

# Correct the dimensions to the scaled ones
width1, height1 = img1.size
width2, height2 = img2.size

# Find the greatest height of the 2 images
max_height = max(height1, height2)

# Create an empty image with the combined width and the maximum height
merged_image = Image.new('RGB', (width1 + width2, max_height))

# Add the 2 images to the correct locations
merged_image.paste(img1, (0, 0))
merged_image.paste(img2, (width1, 0))

merged_file_path = os.path.join(plugin_folder, merged_name)

merged_absolute_path = os.path.join(vault_path, merged_file_path)
merged_image.save(merged_absolute_path)

create_file_node(merged_file_path, script_data["x"], script_data["y"]+script_data["height"]+20)
install_dependency("pillow", "PIL")
from PIL import Image
import os

if len(arrow_parameters) != 2:
    raise Exception("Must have exactly 2 image parameters")

for arrow_parameter in arrow_parameters:
    if arrow_parameter["type"] != "file":
        raise Exception("All parameters must be images")

node_centre_x_coordinate = [arrow_parameter["x"]+int(arrow_parameter["width"]/2) for arrow_parameter in arrow_parameters]
if node_centre_x_coordinate[0] > node_centre_x_coordinate[1]:
    arrow_parameters = [arrow_parameters[1], arrow_parameters[0]]

image_paths = [os.path.join(vault_path, arrow_parameter["file"]) for arrow_parameter in arrow_parameters]
images = [Image.open(image_path) for image_path in image_paths]

names = [os.path.basename(os.path.splitext(parameter_data["file"])[0]) for parameter_data in arrow_parameters]
merged_name = f"Merge_{'_'.join(names)}.png"

img1 = images[0]
img2 = images[1]

width1, height1 = img1.size
width2, height2 = img2.size

# Find the greatest height of the 2 images
max_height = max(height1, height2)

# Create an empty image with the combined width and the maximum height
merged_image = Image.new('RGB', (width1 + width2, max_height))

# Add the 2 images to the correct locations
merged_image.paste(img1, (0, 0))
merged_image.paste(img2, (width1, 0))

merged_file_path = os.path.join(plugin_folder, merged_name)

merged_absolute_path = os.path.join(vault_path, merged_file_path)
merged_image.save(merged_absolute_path)

create_file_node(merged_file_path, script_data["x"], script_data["y"]+script_data["height"]+20)
Kay607 commented 1 month ago

I just finished the workflow system. I've converted a few of the example scripts to work with this new system so if you want to use it rather than the old one you'll have to replace the scripts. I haven't done all of them yet so if there is anything you need converted you can ask. You can still use the old overlapping system but the scripts aren't exactly compatible due to how they handle inputs and outputs

I've added the merge script to the repository in Merge.md and i'll probably add the other implementation soon, but I have provided it in my last comment if you want that version

I'd recommend reading the README.md as there have been a lot of changes. The scripts are slightly difficult to deal with as they're made of multiple canvas elements but if you drag the group by the small box it shouldn't be too bad

image

I hope this helps. If you have any questions you can ask here

JuuHuu commented 1 month ago

Absolutely amazing!!! I'm incredibly impressed by how quickly you created the workflow and how high the level of completion is. As soon as I saw your update, I immediately tested all the scripts and wrote this reply right after. I think everything is fantastic!

  1. I tested multiple QR Code nodes and Merge nodes in series and parallel, and the plugin executed the code nodes in the correct order.
  2. I tested the image download function from the web and connected it with other image processing code nodes, all of which produced the correct results!
  3. I tested all the other scripts, and there were no issues.
  4. Text ioconnection: This is an area I think needs improvement. I'm not sure if it's an operational issue on my part or if the plugin is designed this way, but when the output data is text, it can only be displayed by connecting to a print code node. This isn't ideal for presenting results since ordinary users typically don't use Obsidian with the console open. It would be better if the text content could be directly generated in the connected card. Additionally, another drawback is that I can't drag and drop code files, nor can I copy existing code nodes in the canvas. These are the only two areas I think need improvement, though they are clearly stated in the README. All other features are perfect! The next step is to hope that more people will develop useful scripts for this plugin. I believe this plugin will be incredibly useful!

I can't wait to start developing scripts using your plugin!

Kay607 commented 1 month ago

Thanks for the feedback! The Print script was mostly for me to test during development and I never made an actual one so I just added it Preview Text

I also added another version for images: Preview Image. This creates a text node and puts the image inside of it as a html tag. This means that the image doesn't get saved as a file

image image

This might be useful to prevent lots of images getting saved in your vault, you can just delete the node to get rid of the image rather than having to delete the image

I will work on the dragging and dropping script files as well as copy and pasting them soon. In your testing you may have found that only scripts required by the script you're running will get activated and not any that branch from it, I will probably be working on this soon too.

In this example only the selected Preview Text node will run image

I'd like to write some scripts that might be useful and add them to the repository so if you have any ideas you can send them and I'll try to do it

JuuHuu commented 1 month ago

I have test the text and image preview node, All works well! I believe there are few ways that the plugin can involve.

  1. Providing flow control node, like: If-else , for, while... nodes, So that building complex workflow become possible. (If all these flow control things could only be done inside the code script, the simple and intuitive feature of the workflow would not exist)
  2. Providing more IO with other standardized interface , like networking APIs , So that the plugin can using other platform's services.
  3. Providing packing and unpacking function. Which means after building a workflow with several code node, the user can easily pack the whole canvas and share it to others.
  4. Providing subsystem function. Some workflow based on other workflow, at current state, when i finished a workflow called A with many code nodes, and i want to use it in other workflow called B, I have to copy the whole A and expand it at B, then building new function in B, even just adding few nodes in B, the B would become very bulky. If you can provide subsystem function, similar to the current work flow nodes: Grouping the canvas of A with some interface and insert the group into B, then the plugin would become more powerful. Canvas can be inserted into another Canvas, and interface of Canvas can be assigned by io flag node. workflow A: image workflow B: image

All of these suggestions are based on issues I encountered while using this plug-in, as well as features I found useful when using other node editing software. I hope these suggestions can give you a reference and make the plug-in more powerful.

AmalLuke commented 2 weeks ago

Absolutely Amazing, This Just opened up massive amounts of potential use cases. Is this a possible, option that could be implemented in the future. Snice we use mouse to make connections, button could be useful l think, one that can add workflow elements, one to execute the code. Screenshot_20240628_092726_Obsidian

Kay607 commented 1 week ago

@AmalLuke I just added the button. It is displayed on all nodes currently but this may be changed later so that it detects if the node is a script/parameter to a script. This works exactly as if you used the command Canvas Blocks: Execute canvas script image


@JuuHuu Sorry for the late reply. I haven't started working on the features you recommended yet as it will require a major rewrite of the code, and since the Obsidian Canvas API is very limited, this is quite complex.

I've been working on usability to make it easier to deal with the workflow scripts. You can now delete any of the nodes and group that make up a workflow script and the entire script will be removed from the canvas (the script file won't be affected). You can also drag any of the nodes to move the entire workflow script as the small box is hard to select. I intend to allow scripts to be copied and pasted or for the script files to be dragged into the canvas to add it. I would recommend only dragging a single script at once rather than selecting several as this feature isn't currently well optimised and can be very slow

I will implement packing soon as this is the easiest. I will probably use base64 so that the entire canvas will be converted to a single string with the option to save to a file. This will probably be in release version 1.8.0 along with pasting scripts and dragging files

I would like to implement your suggestions and have some ideas for it but would like any recommendations. To allow flow control it would likely need to use edges for directing flow. This would also probably be required for a subsystem and would also allow for more complex behaviour. I may need to add a start and end function node for the subsystem to properly pass parameters. This could effectively create a script by joining multiple other scripts as a single function. I would still recommend rewriting functions in python as it will be much faster in cases such as looping

This is what it would look like

For the networking APIs, this can be done quite easily using a python library but if you can anything you would like added I will try to write an implementation. I'd also like to have a token/password system in the plugin's settings so that API tokens can be put there rather than writing them in the scripts where it could be accidentally shared. I will add a setting in the script to give it access to individual keys for security to prevent scripts having access to every key