batocera-linux / batocera.linux

batocera.linux
https://batocera.org
Other
2.01k stars 515 forks source link

[all versions] PiStation LCD support ? #5368

Closed soaresden closed 2 years ago

soaresden commented 2 years ago

Hi Team !

I just got the new LCD Pistation LCD to cover pi4 image
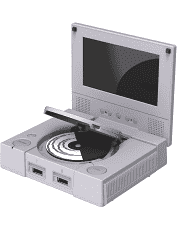
It seems that this screen is 720p and it deliver to the screen via his HDMI port 720p as well. The problem is that I was used to force hdmi group and resolution to force it to 1080p

Even if I force i mode 85 (720p), the screen isn't recognized Also, I can't make it work without blinking and stuff.

I'm available from some tests

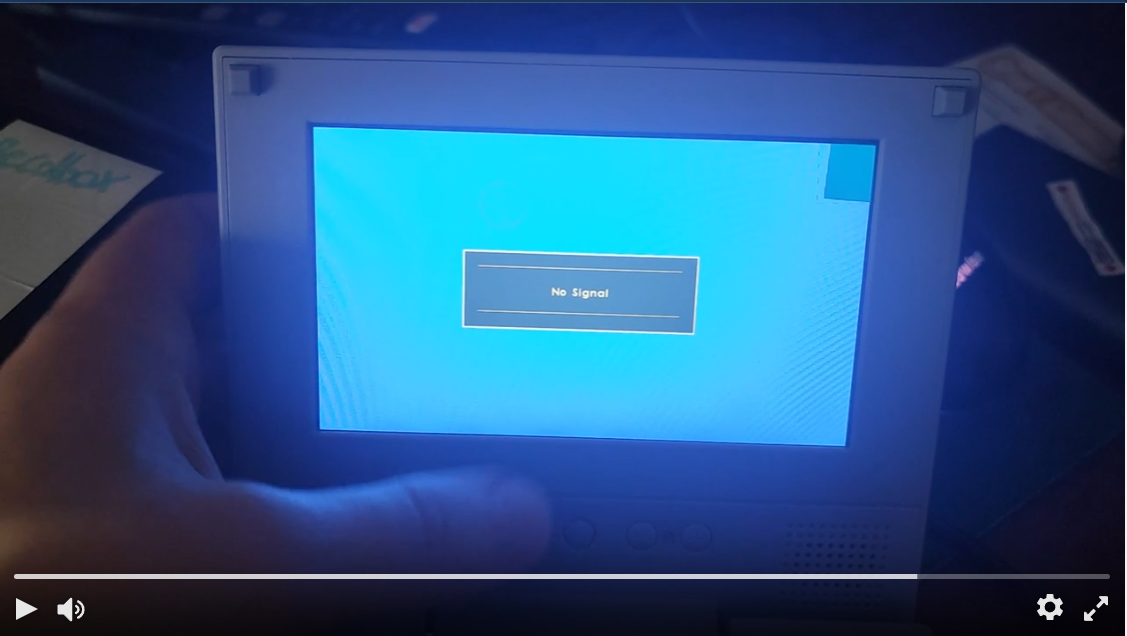
https://streamable.com/qvv6ks image
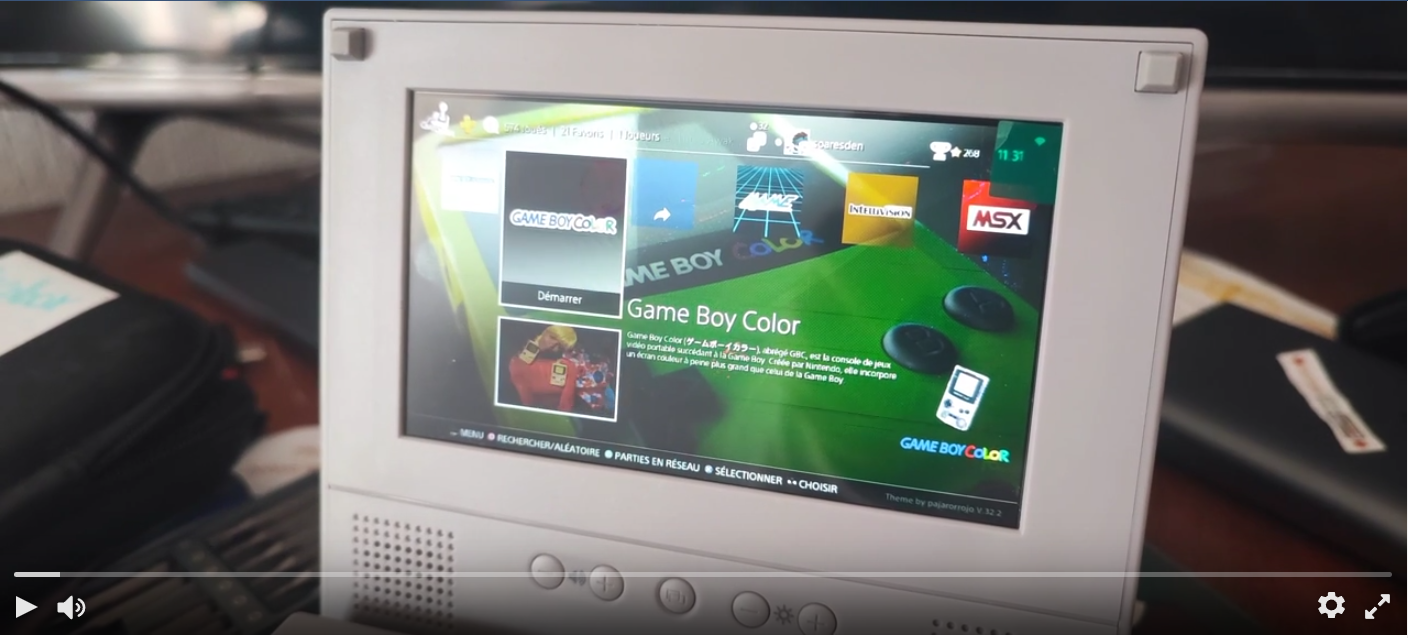
https://streamable.com/mxqahw image

I also try to edit this via GBATEMP forum : https://gbatemp.net/threads/popping-sound-from-pistation-lcd-screen-forced-resolution.604487/#post-9707802

It's the beginning of a solution I guess ? (for ENID and start at some point)

dmanlfc commented 2 years ago

this is the exact lines you put at the end of your config.txt file?

# This sets 1080p as the default hdmi_drive=2 hdmi_group=1 hdmi_mode=16

# This sets 720p for PiStation LCD only [EDID=YDK-YD2680] hdmi_drive=2 hdmi_group=2 hdmi_mode=85

dmanlfc commented 2 years ago

To get the edid type

edid-decode -s /sys/devices/platform/gpu/drm/card1/card1-HDMI-A-1/edid

Look for Manufacturer & Model

Manufacturer: SNY
Model: 33792

i.e. mine is SNY-33792

soaresden commented 2 years ago

hi @dmanlfc , exactly

Here joined some of my files : ` config.txt :

# For more options and information see
# http://rpf.io/configtxt
# Some settings may impact device functionality. See link above for details

# 64-bit mode
arm_64bit=1

# sets the initial CEC name of the device
cec_osd_name=batocera

# uncomment will lead to "safe mode" settings being used to try to boot with maximum HDMI compatibility.
#hdmi_safe=1

# uncomment this if your display has a black border of unused pixels visible
# and your display can output without overscan
# at 0, it causes flickering on hdmi output
disable_overscan=1

# uncomment the following to adjust overscan. Use positive numbers if console
# goes off screen, and negative if there is too much border
#overscan_left=16
#overscan_right=16
#overscan_top=16
#overscan_bottom=16

# uncomment to force a console size. By default it will be display's size minus
# overscan.
#framebuffer_width=1280
#framebuffer_height=720

# uncomment if hdmi display is not detected and composite is being output
#hdmi_force_hotplug=1

# uncomment the hdmi_group command which defines the HDMI output group to be either...
# 1 use CEA (Consumer Electronics Association, the standard typically used by TVs) or
# 2 use DMT (Display Monitor Timings, the standard typically used by monitors).
# This setting should be used in conjunction with hdmi_mode.

#HDMI1080p
#hdmi_group=1
#720p LCD
#hdmi_group=2

# uncomment to apply an appropriate CEA or DMT mode for your display
# see the web site below for valid options depending on the hdmi_group setting
# https://www.raspberrypi.org/documentation/configuration/config-txt/video.md

#HDMI1080p
#hdmi_mode=16
#720p LCD
#hdmi_mode=85

# uncomment to force a HDMI mode rather than DVI. This can make audio work in
# DMT (computer monitor) modes
#hdmi_drive=2

# uncomment will remove all other modes except the ones specified by hdmi_mode and hdmi_group from the internal list
# meaning they will not appear in any enumerated lists of modes.
# this option may help if a display seems to be ignoring the hdmi_mode and hdmi_group settings.
#hdmi_force_mode=1

# use this option to allow selection of 4k 60Hz refresh rates.
# note, this will increase power consumption and increase the temperature of the Raspberry Pi.
# it is not possible to output 4Kp60 on both micro HDMI ports simultaneously.
#hdmi_enable_4kp60=1

# forces the EDID content type to a specific value.
# the options are:
# 0 = EDID_ContentType_NODATA, content type none.
# 1 = EDID_ContentType_Graphics, content type graphics, ITC must be set to 1
# 2 = EDID_ContentType_Photo, content type photo
# 3 = EDID_ContentType_Cinema, content type cinema
# 4 = EDID_ContentType_Game, content type game
#edid_content_type=4

# if you plug your tv at the same time as your rpi and that the rpi switches from the hdmi or give a low resolution because tv had no enough time to initialize it
boot_delay=3

# uncomment to enable composite output via 4 pole TRRS ("headphone") socket.
# note: slightly slows down the entire system on Pi 4 models.
#enable_tvout=1

# uncomment for composite mode.
# 0 Normal NTSC (defult)
# 1 Japanese version of NTSC – no pedestal
# 2 Normal PAL
# 3 Brazilian version of PAL – 525/60 rather than 625/50, different subcarrier
# 16 Progressive scan NTSC
# 18 Progressive scan PAL
#sdtv_mode=2

# uncomment to define the wide aspect ratio for composite video output above.
# 1 4:3 (default)
# 2 14:9
# 3 16:9
#sdtv_aspect=3

# uncomment if you have slow sound issues on composite output
#audio_pwm_mode=0

# uncomment to pretend that all audio formats are supported by the display
# allowing passthrough of DTS/AC3 even when this is not reported as supported.
#hdmi_force_edid_audio=1

# uncomment to pretend that all audio formats are unsupported by the display.
# this means ALSA will default to the analogue audio (headphone) jack.
# hdmi_ignore_edid_audio=1

# uncomment to avoid the firmware parsing the EDID of any HDMI attached display
# that way the Linux video mode system (KMS) will then parse the EDID itself and pick an appropriate mode.
#disable_fw_kms_setup=1

# uncomment for lirc-rpi
#dtoverlay=lirc-rpi

# uncomment if you don't want the rainbow at startup
disable_splash=1

kernel=boot/linux
initramfs boot/initrd.gz

# enable UART (required for for retroflag)
# affect rpi performances
# enable_uart=1

# Uncomment some or all of these to enable the optional hardware interfaces
#dtparam=i2c_arm=on
#dtparam=i2s=on
#dtparam=spi=on

# Uncomment this to enable infrared communication.
#dtoverlay=gpio-ir,gpio_pin=17
#dtoverlay=gpio-ir-tx,gpio_pin=18

# Additional overlays and parameters are documented /boot/overlays/README

# Configure GPU memory based on SDRAM size
# https://www.raspberrypi.org/documentation/configuration/config-txt/memory.md
# Default GPU memory split - at least 288M is needed for some 4k HEVC files
#gpu_mem=256

# Enable audio (loads snd_bcm2835)
dtparam=audio=on

[rpi4]
# Enable DRM VC4 V3D driver on top of the dispmanx display stack
# Preferred 'Full' Kernel Mode Setting (KMS)
dtoverlay=vc4-kms-v3d-pi4

# Optional 'Fake' KMS for displays that won't work with 'Full' KMS
#dtoverlay=vc4-fkms-v3d

# Ensure only one display output can be used on the Pi4 with batocera
max_framebuffers=1

[DPI]
# Put any DPI required display code here
# i.e. Official 7" DSI Raspberry Pi Touch Display for 'Full' KMS
#ignore_lcd=1
#dtoverlay=vc4-kms-dsi-7inch

[Overclock]
over_voltage=5
arm_freq=1950
gpu_freq=700
# Overlay setup for proper powercut, needed for Retroflag cases
dtoverlay=gpio-poweroff,gpiopin=4,active_low=1,input=1

[EDID=XXX-10321]
hdmi_drive=1
hdmi_group=1
hdmi_mode=16

[EDID=YDK-YD2680]
hdmi_drive=2
hdmi_group=2
hdmi_mode=85

If I turn on my pi4 without lcd screen, only with microhdmi cable it boots ok at 1080p and both Lan/Wlan ssh are ok

As soon as I boot with the lcd, I got the splash screen of batocera and then "No Signal" and it won't continue to boot. No network so I'm stuck !

Here my enid with my 4K TV, I just can't boot with LCD attached.

Block 0, Base EDID:
  EDID Structure Version & Revision: 1.3
  Vendor & Product Identification:
    Manufacturer: XXX
    Model: 10321
    Serial Number: 65536
    Made in: week 20 of 2019
  Basic Display Parameters & Features:
    Digital display
    Maximum image size: 121 cm x 68 cm
    Gamma: 2.20
    RGB color display
    First detailed timing is preferred timing
  Color Characteristics:
    Red  : 0.6250, 0.3398
    Green: 0.2802, 0.5947
    Blue : 0.1552, 0.0703
    White: 0.2832, 0.2978
  Established Timings I & II:
    DMT 0x04:   640x480    59.940 Hz   4:3    31.469 kHz  25.175 MHz
    DMT 0x09:   800x600    60.317 Hz   4:3    37.879 kHz  40.000 MHz
    DMT 0x10:  1024x768    60.004 Hz   4:3    48.363 kHz  65.000 MHz
  Standard Timings:
    DMT 0x20:  1280x960    60.000 Hz   4:3    60.000 kHz 108.000 MHz
    DMT 0x33:  1600x1200   60.000 Hz   4:3    75.000 kHz 162.000 MHz
    DMT 0x23:  1280x1024   60.020 Hz   5:4    63.981 kHz 108.000 MHz
    DMT 0x55:  1280x720    60.000 Hz  16:9    45.000 kHz  74.250 MHz
    DMT 0x53:  1600x900    60.000 Hz  16:9    60.000 kHz 108.000 MHz (RB)
  Detailed Timing Descriptors:
    DTD 1:  3840x2160   60.000 Hz  16:9   135.000 kHz 594.000 MHz (1209 mm x 680 mm)
                 Hfront  176 Hsync  88 Hback 296 Hpol P
                 Vfront    8 Vsync  10 Vback  72 Vpol P
    DTD 2:  1920x1080   60.000 Hz  16:9    67.500 kHz 148.500 MHz (1209 mm x 680 mm)
                 Hfront   88 Hsync  44 Hback 148 Hpol P
                 Vfront    4 Vsync   5 Vback  36 Vpol P
    Display Product Name: 'Beyond TV'
  Display Range Limits:
    Monitor ranges (GTF): 50-75 Hz V, 30-80 kHz H, max dotclock 600 MHz
  Extension blocks: 1
Checksum: 0x7d

----------------

Block 1, CTA-861 Extension Block:
  Revision: 3
  Underscans PC formats by default
  Basic audio support
  Supports YCbCr 4:4:4
  Supports YCbCr 4:2:2
  Native detailed modes: 2
  Video Data Block:
    VIC  95:  3840x2160   30.000 Hz  16:9    67.500 kHz 297.000 MHz
    VIC 107:  3840x2160   60.000 Hz  64:27  135.000 kHz 594.000 MHz
    VIC 106:  3840x2160   50.000 Hz  64:27  112.500 kHz 594.000 MHz
    VIC   5:  1920x1080i  60.000 Hz  16:9    33.750 kHz  74.250 MHz
    VIC  20:  1920x1080i  50.000 Hz  16:9    28.125 kHz  74.250 MHz
    VIC  32:  1920x1080   24.000 Hz  16:9    27.000 kHz  74.250 MHz
    VIC   4:  1280x720    60.000 Hz  16:9    45.000 kHz  74.250 MHz
    VIC  19:  1280x720    50.000 Hz  16:9    37.500 kHz  74.250 MHz
    VIC  18:   720x576    50.000 Hz  16:9    31.250 kHz  27.000 MHz
    VIC  17:   720x576    50.000 Hz   4:3    31.250 kHz  27.000 MHz
    VIC   3:   720x480    59.940 Hz  16:9    31.469 kHz  27.000 MHz
    VIC   2:   720x480    59.940 Hz   4:3    31.469 kHz  27.000 MHz
    VIC  22:  1440x576i   50.000 Hz  16:9    15.625 kHz  27.000 MHz
    VIC  21:  1440x576i   50.000 Hz   4:3    15.625 kHz  27.000 MHz
    VIC   7:  1440x480i   59.940 Hz  16:9    15.734 kHz  27.000 MHz
    VIC   6:  1440x480i   59.940 Hz   4:3    15.734 kHz  27.000 MHz
    VIC   1:   640x480    59.940 Hz   4:3    31.469 kHz  25.175 MHz
    VIC  33:  1920x1080   25.000 Hz  16:9    28.125 kHz  74.250 MHz
    VIC  34:  1920x1080   30.000 Hz  16:9    33.750 kHz  74.250 MHz
    VIC  94:  3840x2160   25.000 Hz  16:9    56.250 kHz 297.000 MHz
    VIC  93:  3840x2160   24.000 Hz  16:9    54.000 kHz 297.000 MHz
    VIC  16:  1920x1080   60.000 Hz  16:9    67.500 kHz 148.500 MHz
    VIC  31:  1920x1080   50.000 Hz  16:9    56.250 kHz 148.500 MHz
  Audio Data Block:
    Linear PCM:
      Max channels: 2
      Supported sample rates (kHz): 48 44.1 32
      Supported sample sizes (bits): 24 20 16
    AC-3:
      Max channels: 6
      Supported sample rates (kHz): 96 48 44.1 32
      Maximum bit rate: 640 kb/s
    Dolby Digital+:
      Max channels: 6
      Supported sample rates (kHz): 96 48 44.1 32
  Speaker Allocation Data Block:
    FL/FR - Front Left/Right
  Video Capability Data Block:
    YCbCr quantization: Selectable (via AVI YQ)
    RGB quantization: Selectable (via AVI Q)
    PT scan behavior: No Data
    IT scan behavior: Supports both over- and underscan
    CE scan behavior: Supports both over- and underscan
  Vendor-Specific Data Block (HDMI), OUI 00-0C-03:
    Source physical address: 1.0.0.0
    Supports_AI
    DC_36bit
    DC_30bit
    DC_Y444
    Maximum TMDS clock: 340 MHz
    Supported Content Types:
      Graphics
    Extended HDMI video details:
      HDMI VICs:
        HDMI VIC 1:  3840x2160   30.000 Hz  16:9    67.500 kHz 297.000 MHz
        HDMI VIC 2:  3840x2160   25.000 Hz  16:9    56.250 kHz 297.000 MHz
        HDMI VIC 3:  3840x2160   24.000 Hz  16:9    54.000 kHz 297.000 MHz
        HDMI VIC 4:  4096x2160   24.000 Hz 256:135  54.000 kHz 297.000 MHz
  Colorimetry Data Block:
    xvYCC601
    xvYCC709
  YCbCr 4:2:0 Capability Map Data Block:
    VIC 107:  3840x2160   60.000 Hz  64:27   67.500 kHz 297.000 MHz
    VIC 106:  3840x2160   50.000 Hz  64:27   56.250 kHz 297.000 MHz
  HDR Static Metadata Data Block:
    Electro optical transfer functions:
      Traditional gamma - SDR luminance range
      SMPTE ST2084
      Hybrid Log-Gamma
    Supported static metadata descriptors:
      Static metadata type 1
  YCbCr 4:2:0 Video Data Block:
    VIC  97:  3840x2160   60.000 Hz  16:9    67.500 kHz 297.000 MHz
    VIC  96:  3840x2160   50.000 Hz  16:9    56.250 kHz 297.000 MHz
    VIC 102:  4096x2160   60.000 Hz 256:135  67.500 kHz 297.000 MHz
    VIC 101:  4096x2160   50.000 Hz 256:135  56.250 kHz 297.000 MHz
  Detailed Timing Descriptors:
    DTD 3:  1920x1080   60.000 Hz  16:9    67.500 kHz 148.500 MHz (1209 mm x 680 mm)
                 Hfront   88 Hsync  44 Hback 148 Hpol P
                 Vfront    4 Vsync   5 Vback  36 Vpol P
    DTD 4:  1280x720    60.000 Hz  16:9    45.000 kHz  74.250 MHz (1209 mm x 680 mm)
                 Hfront  110 Hsync  40 Hback 220 Hpol P
                 Vfront    5 Vsync   5 Vback  20 Vpol P
Checksum: 0x5e
mannyp26 commented 2 years ago

Hello,

I have a Pi4 4gb in a pistation with LCD running on Batocera v33 beta. I stumbled across this after having spent days trying to solve this issue I have with my own pistation lcd. I found my EDID and entered it at the end of the config.txt file. The screen came on and I got excited thinking I could finally use this thing. Unfortunately it started flashing after about 20 seconds of slender. As time went on it flashed more often. I thought, Its progress but not the complete answer. Then I tried again and the same thing happened but while it flashed on I decided to try to start a game. To my suprise it has stayed on. Now if I don't enter any inputs it flashes again. I still don't have any audio so I'll figure that out next.

soaresden commented 2 years ago

Indeed you achieve going to menu and launch a game then ? Reading you, it seems it's an ES issue then.

Can you confirm the Enid of your Pistation Screen [EDID=YDK-YD2680] ?

So there is definitely an issue with this screen in Batocera's side

dmanlfc commented 2 years ago

Remove the all previous EDID info & hdmi lines & try to just use without an external screen attached using these lines:

hdmi_group=2 hdmi_mode=1 hdmi_mode=87 hdmi_cvt=800 480 60 6 0 0 0

dmanlfc commented 2 years ago

I need the EDID info without a tv screen attached - so just the lcd panel. You will need to ssh into your Raspberry Pi after setting up the network. Give it a minute after you see the splash screen. From a terminal on a pc use ssh root@<your ip address> the default password is linux Once done then run the edid command & pipe it to a file

i.e. edid-decode -s /sys/devices/platform/gpu/drm/card1/card1-HDMI-A-1/edid > /userdata/system/logs/lcd-edid.txt

also the out of listModes would be good. i.e. batocera-resolution listModes > /userdata/system/logs/lcd-listModes.txt

soaresden commented 2 years ago

Ok I'm trying right now ! But as I told above, I can't boot with screen attached. It simply run in nothing (no ftp, no network, no rj45, nothing at all)

I'm trying with a new fresh SD and keep my HDD and other SD to not be affected by these tests. Like that, it may be possible the config file will be ok with

EDIT : Okay so it boot but the screen goes down after ES load (nice new triforce vid from 2022-01-06 version !) Was able to connect on SSH via RJ45.

here the two files asked :

Block 0, Base EDID:
  EDID Structure Version & Revision: 1.3
  Vendor & Product Identification:
    Manufacturer: YDK
    Model: 4230
    Serial Number: 16843009
    Made in: week 34 of 2020
  Basic Display Parameters & Features:
    Digital display
    Maximum image size: 10 cm x 16 cm
    Gamma: 2.20
    DPMS levels: Standby Suspend Off
    RGB color display
    Default (sRGB) color space is primary color space
    First detailed timing is preferred timing
    Supports GTF timings within operating range
  Color Characteristics:
    Red  : 0.6396, 0.3476
    Green: 0.2929, 0.5849
    Blue : 0.1425, 0.0751
    White: 0.3134, 0.3291
  Established Timings I & II: none
  Standard Timings: none
  Detailed Timing Descriptors:
    DTD 1:  1280x720    60.000 Hz  16:9    45.000 kHz  74.250 MHz
                 Hfront  110 Hsync  40 Hback 220 Hpol P
                 Vfront    5 Vsync   5 Vback  20 Vpol P
    Display Product Name: 'YD2680'
  Display Range Limits:
    Monitor ranges (GTF): 50-76 Hz V, 30-81 kHz H, max dotclock 140 MHz
    DTD 2:   800x480    60.096 Hz   5:3    31.250 kHz  30.000 MHz (analog composite, sync-on-green)
                 Hfront   20 Hsync  10 Hback 130 Hpol N
                 Vfront   10 Vsync   6 Vback  24 Vpol N
  Extension blocks: 1
Checksum: 0x9c

----------------

Block 1, CTA-861 Extension Block:
  Revision: 3
  Basic audio support
  Supports YCbCr 4:4:4
  Supports YCbCr 4:2:2
  Native detailed modes: 1
  Video Data Block:
  Audio Data Block:
    Linear PCM:
      Max channels: 2
      Supported sample rates (kHz): 48 44.1 32
      Supported sample sizes (bits): 24 20 16
  Speaker Allocation Data Block:
  Vendor-Specific Data Block (HDMI), OUI 00-0C-03:
    Source physical address: 1.0.0.0
  Detailed Timing Descriptors:
    Dummy Descriptor:
    Dummy Descriptor:
    Dummy Descriptor:
    Dummy Descriptor:
    Dummy Descriptor:
Checksum: 0x60
max-1920x1080:maximum 1920x1080
max-640x480:maximum 640x480
0.1280x720.60:1280x720 60Hz (1280x720)
1.1280x720.60:1280x720 60Hz (1280x720)
2.1024x576.60:1024x576 60Hz (1024x576)
3.800x600.75:800x600 75Hz (800x600)
4.800x600.72:800x600 72Hz (800x600)
5.800x600.60:800x600 60Hz (800x600)
6.800x600.56:800x600 56Hz (800x600)
7.848x480.60:848x480 60Hz (848x480)
8.800x480.60:800x480 60Hz (800x480)
9.640x480.75:640x480 75Hz (640x480)
10.640x480.73:640x480 73Hz (640x480)
11.640x480.60:640x480 60Hz (640x480)

also my boot config and batocera conf for information : boot.txt

# For more options and information see
# http://rpf.io/configtxt
# Some settings may impact device functionality. See link above for details

# sets the initial CEC name of the device
cec_osd_name=batocera

# uncomment will lead to "safe mode" settings being used to try to boot with maximum HDMI compatibility.
#hdmi_safe=1

# uncomment this if your display has a black border of unused pixels visible
# and your display can output without overscan
# at 0, it causes flickering on hdmi output
disable_overscan=1

# uncomment the following to adjust overscan. Use positive numbers if console
# goes off screen, and negative if there is too much border
#overscan_left=16
#overscan_right=16
#overscan_top=16
#overscan_bottom=16

# uncomment to force a console size. By default it will be display's size minus
# overscan.
#framebuffer_width=1280
#framebuffer_height=720

# uncomment if hdmi display is not detected and composite is being output
#hdmi_force_hotplug=1

# uncomment the hdmi_group command which defines the HDMI output group to be either...
# 1 use CEA (Consumer Electronics Association, the standard typically used by TVs) or
# 2 use DMT (Display Monitor Timings, the standard typically used by monitors).
# This setting should be used in conjunction with hdmi_mode.
#hdmi_group=2

# uncomment to apply an appropriate CEA or DMT mode for your display
# see the web site below for valid options depending on the hdmi_group setting
# https://www.raspberrypi.org/documentation/configuration/config-txt/video.md
#hdmi_mode=4

# uncomment to force a HDMI mode rather than DVI. This can make audio work in
# DMT (computer monitor) modes
#hdmi_drive=2

# uncomment will remove all other modes except the ones specified by hdmi_mode and hdmi_group from the internal list
# meaning they will not appear in any enumerated lists of modes.
# this option may help if a display seems to be ignoring the hdmi_mode and hdmi_group settings.
#hdmi_force_mode=1

# use this option to allow selection of 4k 60Hz refresh rates.
# note, this will increase power consumption and increase the temperature of the Raspberry Pi.
# it is not possible to output 4Kp60 on both micro HDMI ports simultaneously.
#hdmi_enable_4kp60=1

# forces the EDID content type to a specific value.
# the options are:
# 0 = EDID_ContentType_NODATA, content type none.
# 1 = EDID_ContentType_Graphics, content type graphics, ITC must be set to 1
# 2 = EDID_ContentType_Photo, content type photo
# 3 = EDID_ContentType_Cinema, content type cinema
# 4 = EDID_ContentType_Game, content type game
#edid_content_type=4

# if you plug your tv at the same time as your rpi and that the rpi switches from the hdmi or give a low resolution because tv had no enough time to initialize it
boot_delay=3

# uncomment to enable composite output via 4 pole TRRS ("headphone") socket.
# note: slightly slows down the entire system on Pi 4 models.
#enable_tvout=1

# uncomment for composite mode.
# 0 Normal NTSC (defult)
# 1 Japanese version of NTSC – no pedestal
# 2 Normal PAL
# 3 Brazilian version of PAL – 525/60 rather than 625/50, different subcarrier
# 16 Progressive scan NTSC
# 18 Progressive scan PAL
#sdtv_mode=2

# uncomment to define the wide aspect ratio for composite video output above.
# 1 4:3 (default)
# 2 14:9
# 3 16:9
#sdtv_aspect=3

# uncomment if you have slow sound issues on composite output
#audio_pwm_mode=0

# uncomment to pretend that all audio formats are supported by the display
# allowing passthrough of DTS/AC3 even when this is not reported as supported.
#hdmi_force_edid_audio=1

# uncomment to pretend that all audio formats are unsupported by the display.
# this means ALSA will default to the analogue audio (headphone) jack.
# hdmi_ignore_edid_audio=1

# uncomment to avoid the firmware parsing the EDID of any HDMI attached display
# that way the Linux video mode system (KMS) will then parse the EDID itself and pick an appropriate mode.
#disable_fw_kms_setup=1

# uncomment for lirc-rpi
#dtoverlay=lirc-rpi

# uncomment if you don't want the rainbow at startup
disable_splash=1

kernel=boot/linux
initramfs boot/initrd.gz

# enable UART (required for for retroflag)
# affect rpi performances
# enable_uart=1

# Uncomment some or all of these to enable the optional hardware interfaces
#dtparam=i2c_arm=on
#dtparam=i2s=on
#dtparam=spi=on

# Uncomment this to enable infrared communication.
#dtoverlay=gpio-ir,gpio_pin=17
#dtoverlay=gpio-ir-tx,gpio_pin=18

# Additional overlays and parameters are documented /boot/overlays/README

# Configure GPU memory based on SDRAM size
# https://www.raspberrypi.org/documentation/configuration/config-txt/memory.md
# Default GPU memory split (do not change if you do not know what you are doing)
gpu_mem=128

# Configure GPU memory based on SDRAM size - overrides above setting
gpu_mem_256=112
gpu_mem_512=160
gpu_mem_1024=256

# Enable audio (loads snd_bcm2835)
dtparam=audio=on

# Optional 'Fake' KMS for displays that won't work with 'Full' KMS
#dtoverlay=vc4-fkms-v3d

[DPI]
# Put any DPI required display code here
# i.e. Official 7" DSI Raspberry Pi Touch Display for 'Full' KMS
#ignore_lcd=1
#dtoverlay=vc4-kms-dsi-7inch

[pi02]
# 64-bit mode
arm_64bit=1

start_file=start_x.elf
fixup_file=fixup_x.dat

# Enable DRM VC4 V3D driver on top of the dispmanx display stack
# Preferred 'Full' Kernel Mode Setting (KMS)
dtoverlay=vc4-kms-v3d,cma-128

[pi2]
start_file=start_x.elf
fixup_file=fixup_x.dat

# Enable DRM VC4 V3D driver on top of the dispmanx display stack
# Preferred 'Full' Kernel Mode Setting (KMS)
dtoverlay=vc4-kms-v3d

[pi3]
# 64-bit mode
arm_64bit=1

start_file=start_x.elf
fixup_file=fixup_x.dat

# Enable DRM VC4 V3D driver on top of the dispmanx display stack
# Preferred 'Full' Kernel Mode Setting (KMS)
dtoverlay=vc4-kms-v3d

[pi4]
# 64-bit mode
arm_64bit=1
# Run as fast as firmware / board allows
arm_boost=1

start_file=start4x.elf
fixup_file=fixup4x.dat

# Enable DRM VC4 V3D driver on top of the dispmanx display stack
# Preferred 'Full' Kernel Mode Setting (KMS)
dtoverlay=vc4-kms-v3d-pi4

# Ensure only one display output can be used on the Pi4 with batocera
max_framebuffers=1

# custom config
[all]

batocera conf

# lines prefixed by a # are comments, remove the # to uncomment them

# device to the share data (userdata)
sharedevice=INTERNAL

# resize the internal partition if needed (disabled automatically once done)
#autoresize=true

# enable the nvidia driver (remove the # to enable it)
# nvidia-prime enables the nvidia gpu over the intel gpu in case you've an nvidia hybrid gpu
#nvidia-driver=true
#nvidia-prime=true

# radeon-prime enables the amd-radeon gpu over the intel gpu in case you've an amd-radeon hybrid gpu
#radeon-prime=true

# force i965 driver (to override iris driver for example)
#intel-i965-driver=true

# disable the splash screen
#splash.screen.enabled=0

# maximum resolution (you can get the full list for your tv with batocera-resolution listModes)
# es.resolution=max-1920x1080

### below are copied values from batocera.conf to make them ###
### available in an early boot stage ---- DON'T CHANGE THEM ###

After that, I tried to reboot with your lines :

hdmi_group=2
hdmi_mode=1
hdmi_mode=87
hdmi_cvt=800 480 60 6 0 0 0

It book ok to main menu, but as soon as I choose audio output, the screen shutdown (as if Sound is taking so much resources like @manyp26 said.) I'm removing them to keep it original

dmanlfc commented 2 years ago
[EDID=YDK-YD2680]
hdmi_group=2
hdmi_mode=87
hdmi_drive=2
hdmi_cvt=800 480 60 6 0 0 0

is likely correct - please try if you don't have audio & batocera crashes when choosing that menu option we'll need other info.

soaresden commented 2 years ago

I just tried, and after 1sec of splash video, first second of sound and the screen shows a "No signal" Then the screen shutdown Can't have access this time to networ (like my original SD card) Batocera seems to be in a frozen state

This is so weird !

edit : after & minute or two after the screen shutdown , got access to putty edit 2 : trying again a fresh flash with new 11/01/2022 version ... LCD attached only edit 3 : All went OK directly after flash !

I got the image but still no sound. I tried to change the audio output, and then ... No signal splash again, no image just after. Indeed, it's seems to be related to audio !

dmanlfc commented 2 years ago

run batocera-support via ssh with the lcd screen attached. then reboot & run it again with an external tv (which works). this will generate a two support files in your /userdata/saves folder which you can access over the network. compare the dmesg.txt files & es_log.txt files - see if you see anything unusual. don't paste the files in here. if you want to link the full compressed support files to an external site for us to look at, feel free.

soaresden commented 2 years ago

okay here are my exported files https://mega.nz/folder/EgxERByT#WUcB1zChBtFO_StZ4XEcTA

Comparing it quickly:

See further details in files : Also, the [EDID=YDK-YD2680] seems to have been applied successfully, ES is not in fullscreen. So I changed it to hdmi_cvt=1280 720 60 6 0 0 0 to be full

[    4.140454] bcm2835-isp bcm2835-isp: Device node output[0] registered as /dev/video13
[    4.141784] bcm2835-isp bcm2835-isp: Device node capture[0] registered as /dev/video14
[    4.141996] bcm2835-isp bcm2835-isp: Device node capture[1] registered as /dev/video15
[    4.142366] bcm2835-codec bcm2835-codec: Device registered as /dev/video10
[    4.142394] bcm2835-isp bcm2835-isp: Device node stats[2] registered as /dev/video16
[    4.142399] bcm2835-codec bcm2835-codec: Loaded V4L2 decode
[    4.142405] bcm2835-isp bcm2835-isp: Register output node 0 with media controller
[    4.142415] bcm2835-isp bcm2835-isp: Register capture node 1 with media controller
[    4.142423] bcm2835-isp bcm2835-isp: Register capture node 2 with media controller
[    4.142435] bcm2835-isp bcm2835-isp: Register capture node 3 with media controller

Navigating on menu (without trying to define audio output) works, I can reboot and it saves the config ok. I tried to launch some integrated homebrew and I immediately got a ES return.

Seeing the log, here the error stderr :

/usr/bin/batocera-resolution: ligne 67 : test:  : nombre entier attendu comme expression
2022-01-13 11:26:44,523 ERROR (emulatorlauncher.py:619):<module> configgen exception: 
Traceback (most recent call last):
  File "/usr/lib/python3.9/site-packages/configgen/emulatorlauncher.py", line 617, in <module>
    exitcode = main(args, maxnbplayers)
  File "/usr/lib/python3.9/site-packages/configgen/emulatorlauncher.py", line 204, in main
    return start_rom(args, maxnbplayers, args.rom, args.rom)
  File "/usr/lib/python3.9/site-packages/configgen/emulatorlauncher.py", line 269, in start_rom
    gameResolution = videoMode.getCurrentResolution()
  File "/usr/lib/python3.9/site-packages/configgen/utils/videoMode.py", line 35, in getCurrentResolution
    return { "width": int(vals[0]), "height": int(vals[1]) }
ValueError: invalid literal for int() with base 10: ''

I randomly have the same error when with my tv screen after launching many games after some times. Rebooting batocera on pi4 was a solution.

dmanlfc commented 2 years ago

try this build & do a manual upgrade https://drive.google.com/drive/folders/1xFfYsxRQNUYzKLNjLJzSTeWznbkmANNw?usp=sharing

put the files in you /userdata/system/upgrade folder & from ssh run the manual-upgrade.sh script. make it executable first by chmod + manual-upgrade.sh & then run ./manual-upgrade.sh

soaresden commented 2 years ago

hi!

In your 29/01 build , I'm using single fresh sd card. From now, no HDD. Just like a freesh install to test.

In order :

Normal boot (microhdmi)

All is OK on TV

PIStation LCD boot

splashscreen and then blue no signal screen on lcd waiting 2 minutes and still no network It's a fail I guess

Pistation LCD Boot + HDMI TV used

720p splashscreen OK then no signal on TV waiting and still no network

rebooting in microhdmi

booting OK in 1080p

dmanlfc commented 2 years ago

Remove the config.txt modification & see what happens...

soaresden commented 2 years ago

My config.txt is clean

# For more options and information see
# http://rpf.io/configtxt
# Some settings may impact device functionality. See link above for details

# sets the initial CEC name of the device
cec_osd_name=batocera

# uncomment will lead to "safe mode" settings being used to try to boot with maximum HDMI compatibility.
#hdmi_safe=1

# uncomment this if your display has a black border of unused pixels visible
# and your display can output without overscan
# at 0, it causes flickering on hdmi output
disable_overscan=1

# uncomment the following to adjust overscan. Use positive numbers if console
# goes off screen, and negative if there is too much border
#overscan_left=16
#overscan_right=16
#overscan_top=16
#overscan_bottom=16

# uncomment to force a console size. By default it will be display's size minus
# overscan.
#framebuffer_width=1280
#framebuffer_height=720

# uncomment if hdmi display is not detected and composite is being output
#hdmi_force_hotplug=1

# uncomment the hdmi_group command which defines the HDMI output group to be either...
# 1 use CEA (Consumer Electronics Association, the standard typically used by TVs) or
# 2 use DMT (Display Monitor Timings, the standard typically used by monitors).
# This setting should be used in conjunction with hdmi_mode.
#hdmi_group=2

# uncomment to apply an appropriate CEA or DMT mode for your display
# see the web site below for valid options depending on the hdmi_group setting
# https://www.raspberrypi.org/documentation/configuration/config-txt/video.md
#hdmi_mode=4

# uncomment to force a HDMI mode rather than DVI. This can make audio work in
# DMT (computer monitor) modes
#hdmi_drive=2

# uncomment will remove all other modes except the ones specified by hdmi_mode and hdmi_group from the internal list
# meaning they will not appear in any enumerated lists of modes.
# this option may help if a display seems to be ignoring the hdmi_mode and hdmi_group settings.
#hdmi_force_mode=1

# use this option to allow selection of 4k 60Hz refresh rates.
# note, this will increase power consumption and increase the temperature of the Raspberry Pi.
# it is not possible to output 4Kp60 on both micro HDMI ports simultaneously.
#hdmi_enable_4kp60=1

# forces the EDID content type to a specific value.
# the options are:
# 0 = EDID_ContentType_NODATA, content type none.
# 1 = EDID_ContentType_Graphics, content type graphics, ITC must be set to 1
# 2 = EDID_ContentType_Photo, content type photo
# 3 = EDID_ContentType_Cinema, content type cinema
# 4 = EDID_ContentType_Game, content type game
#edid_content_type=4

# if you plug your tv at the same time as your rpi and that the rpi switches from the hdmi or give a low resolution because tv had no enough time to initialize it
boot_delay=3

# uncomment to enable composite output via 4 pole TRRS ("headphone") socket.
# note: slightly slows down the entire system on Pi 4 models.
#enable_tvout=1

# uncomment for composite mode.
# 0 Normal NTSC (defult)
# 1 Japanese version of NTSC – no pedestal
# 2 Normal PAL
# 3 Brazilian version of PAL – 525/60 rather than 625/50, different subcarrier
# 16 Progressive scan NTSC
# 18 Progressive scan PAL
#sdtv_mode=2

# uncomment to define the wide aspect ratio for composite video output above.
# 1 4:3 (default)
# 2 14:9
# 3 16:9
#sdtv_aspect=3

# uncomment if you have slow sound issues on composite output
#audio_pwm_mode=0

# uncomment to pretend that all audio formats are supported by the display
# allowing passthrough of DTS/AC3 even when this is not reported as supported.
#hdmi_force_edid_audio=1

# uncomment to pretend that all audio formats are unsupported by the display.
# this means ALSA will default to the analogue audio (headphone) jack.
# hdmi_ignore_edid_audio=1

# uncomment to avoid the firmware parsing the EDID of any HDMI attached display
# that way the Linux video mode system (KMS) will then parse the EDID itself and pick an appropriate mode.
#disable_fw_kms_setup=1

# uncomment for lirc-rpi
#dtoverlay=lirc-rpi

# uncomment if you don't want the rainbow at startup
disable_splash=1

kernel=boot/linux
initramfs boot/initrd.gz

# enable UART (required for for retroflag)
# affect rpi performances
# enable_uart=1

# Uncomment some or all of these to enable the optional hardware interfaces
#dtparam=i2c_arm=on
#dtparam=i2s=on
#dtparam=spi=on

# Uncomment this to enable infrared communication.
#dtoverlay=gpio-ir,gpio_pin=17
#dtoverlay=gpio-ir-tx,gpio_pin=18

# Additional overlays and parameters are documented /boot/overlays/README

# Configure GPU memory based on SDRAM size
# https://www.raspberrypi.org/documentation/configuration/config-txt/memory.md
# Default GPU memory split (do not change if you do not know what you are doing)
gpu_mem=128

# Configure GPU memory based on SDRAM size - overrides above setting
gpu_mem_256=112
gpu_mem_512=160
gpu_mem_1024=256

# Enable audio (loads snd_bcm2835)
dtparam=audio=on

# Optional 'Fake' KMS for displays that won't work with 'Full' KMS
#dtoverlay=vc4-fkms-v3d

[DPI]
# Put any DPI required display code here
# i.e. Official 7" DSI Raspberry Pi Touch Display for 'Full' KMS
#ignore_lcd=1
#dtoverlay=vc4-kms-dsi-7inch

[pi02]
# 64-bit mode
arm_64bit=1

start_file=start_x.elf
fixup_file=fixup_x.dat

# Enable DRM VC4 V3D driver on top of the dispmanx display stack
# Preferred 'Full' Kernel Mode Setting (KMS)
dtoverlay=vc4-kms-v3d,cma-128

[pi2]
start_file=start_x.elf
fixup_file=fixup_x.dat

# Enable DRM VC4 V3D driver on top of the dispmanx display stack
# Preferred 'Full' Kernel Mode Setting (KMS)
dtoverlay=vc4-kms-v3d

[pi3]
# 64-bit mode
arm_64bit=1

start_file=start_x.elf
fixup_file=fixup_x.dat

# Enable DRM VC4 V3D driver on top of the dispmanx display stack
# Preferred 'Full' Kernel Mode Setting (KMS)
dtoverlay=vc4-kms-v3d

[pi4]
# 64-bit mode
arm_64bit=1
# Run as fast as firmware / board allows
arm_boost=1

start_file=start4x.elf
fixup_file=fixup4x.dat

# Enable DRM VC4 V3D driver on top of the dispmanx display stack
# Preferred 'Full' Kernel Mode Setting (KMS)
dtoverlay=vc4-kms-v3d-pi4

# Ensure only one display output can be used on the Pi4 with batocera
max_framebuffers=1

# custom config
[all]

[Overclock]
over_voltage=5
arm_freq=1950
gpu_freq=700

Maybe it will be faster to find out by discord, feel free to ping me

mannyp26 commented 2 years ago

I finally got the pistation lcd to work. First I made a copy of the original config.txt file and saved it to my desktop. I deleted the config.txt file in batocera. Then I copied the config64.txt file and saved a new one as config.txt. Then I uncommented framebuffer 1280x720 in both the config.txt and config64.txt files. Also I now boot directly to Kodi as I read somewhere it helps and I did notice that the lcd would work when booted into Kodi but then when I would exit to Batocera the screen would flicker again. And now its working even after I exit to Batocera. I suspect my resolution will remain at 720p when I plug in the HDMI back into the tv. I will have to test that later.

soaresden commented 2 years ago

Hi @mannyp26 ,

I didn't have so much luck on my side...

Will try on the latest dev beta (2022-02-03) and keep this post updated

edit: updated, but still not LCD working. No signal after the batocera splashscreen. As if there is something that happen after showing it ..

could you please show us your config.txt to compare ?Thanks !

soaresden commented 2 years ago

OK messing around with config I found the culprit !

Could you try @mannyp26 to only change the

vc4-kms-v3d-pi4

in [PI4] section

to

vc4-fkms-v3d-pi4

I got a yellow lightning icon, but everything is OK

mannyp26 commented 2 years ago

Yeah let me try some things. I should mention that since I began this endeavor I started out using the newest version of Batocera and then moved to the Beta and then I downloaded a Batocera pre-build running on v29. Knowing that I am a little nervous to try upgrading it. I might use another Mini SD and try it out on that first.

soaresden commented 2 years ago

Why closing ? Its still not fixed IMO. I just took the new config.txt and it still gave the no signal

dmanlfc commented 2 years ago

config.txt is a user editable file. we won't set fake kms by default here.

mannyp26 commented 2 years ago

I think the simplest fix for me worked when I changed the dtoverlay to fkms…I believe that’s what I did but I can’t recall for sure. I messed with a lot of different things but I think ultimately that’s all I had to do. This was almost 2 months ago though

soaresden commented 2 years ago

@mannyp26 yes that's what I wrote !

@dmanlfc , I agree, changing to fkms and kms FIX the issue, but it's not automatic I think that this issue could only be closed

Again, I'm not expert, I'm just bringing suggestion to fix this, as for me, this manual patch can't be accepter as a definitive solution

soaresden commented 2 years ago

Nice :) ! Thanks will try when the next beta above the 27/03 will release