googlecreativelab / anypixel

A web-friendly way for anyone to build unusual displays
Apache License 2.0
6.44k stars 517 forks source link

Suggest hardware steps #1

Closed alexgorbatchev closed 7 years ago

alexgorbatchev commented 8 years ago

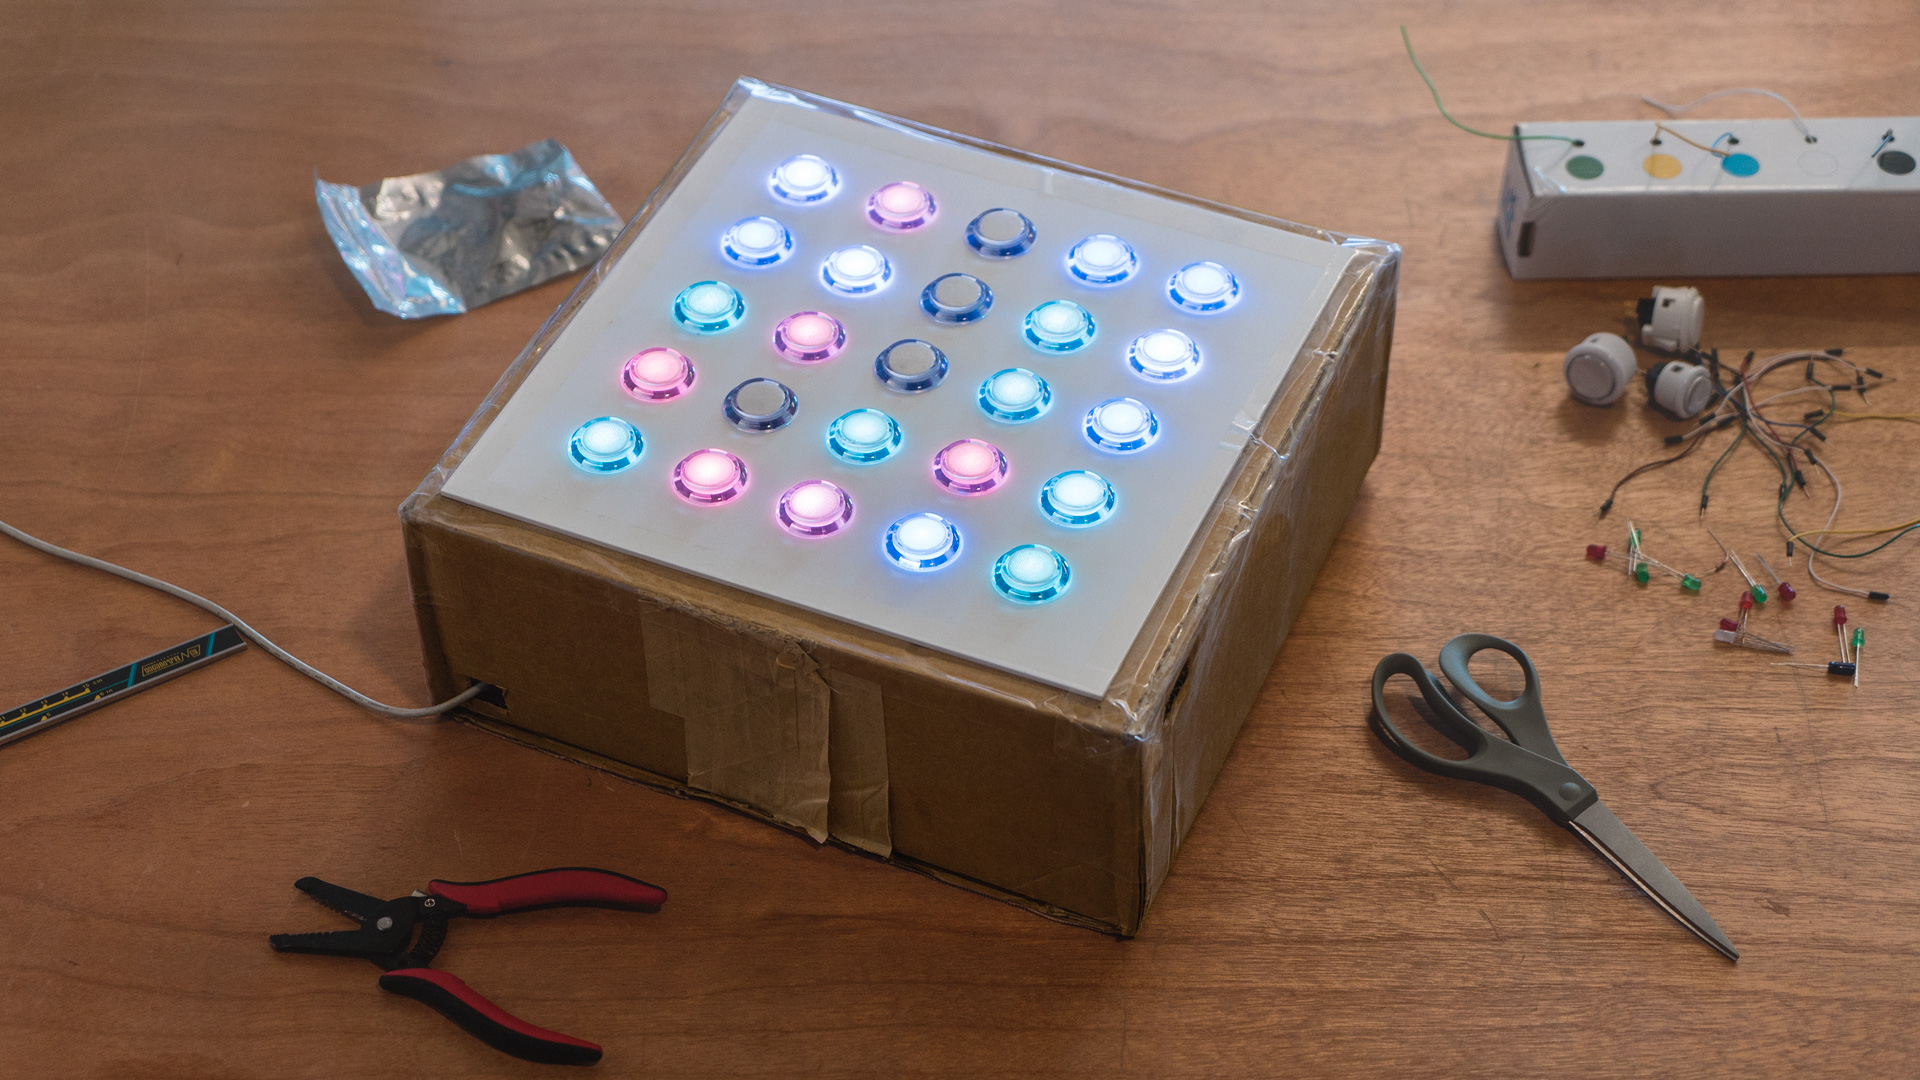
Having amazing specs for hardware, it would be useful to have suggestions about what to do with me for software-only folks like myself. I would like to see:

  1. Possible places, URLs or at least type of places that can manufacture this stuff
  2. Approximate costs (obviously this would be locale specific, but any data is better than no data)
  3. Assembly instructions or at least a video walk through of this wall internals

Thank you so much for your incredible efforts!

cjgammon commented 8 years ago

+1 I would love to do something like this as a project but have no idea where to start with hardware. I'm worried I'd buy the wrong thing or be missing parts I didn't anticipate.

A shopping list of the bare necessities to get this working would be great (like do i need special LED's?). Once I knew I had exactly what I need I feel like I could maybe research the assembly of it. Although having a general step by step build instructions or even as mentioned a video would be phenomenal.

very cool idea.

Bre77 commented 8 years ago

Give it a few weeks and the likes of Adafruit will likely have hardware tutorials and kits up.

ZerofeniX commented 8 years ago

For a short term answer, this stuff is really expensive. They included BOMs (Bill of Materials) for everything from the looks of it. The circuit board component BOMs all have part numbers, vendor part numbers, and they list VID which I'm guessing is short for Vendor ID, the one I looked at has a VID of "DK" which I am fairly certain is digikey. There are other electronics suppliers such as Arrow and Newark. All of these components are relatively cheap but you'd have to solder it all yourself or get someone to assemble the boards for you which is where it gets tricky.

PCBs (printed circuit boards) are expensive and most of the places that do PCBs are all about doing as many as possible. They typically make them in large batches and the surface area of the PCB plays a key roll in the cost. Anecdotally, I had 6 PCBs about the size of a sheet of a paper made and it cost $500, that doesn't include components which you would either have to source to a manufacturer in a package that their machines can use, or solder a few hundred components yourself per board without melting them or destroying your PCB.

Like Bre77 said, your best bet is to hope that one of the hobbyist electronics sites like Adafruit or Sparkfun decide to sell some sort of assembled board or kit.

jarrydfillmore commented 8 years ago

+1. I totally agree!

PatrickFranken commented 8 years ago

This project has already been indexed by AISLER.

https://aisler.net/googlecreativelab/anypixel/display-r2 BOM price is about 219EUR for 439 parts, difficulty level is expert because of some parts which are hard to solder by hand.

Same applies to https://aisler.net/googlecreativelab/anypixel/controller-r3 BOM price is about 87EUR for 154 parts.

Regarding the PCBs, these are quite large and have 4 layers.

Disclaimer: I'm one of the founders of AISLER. PS: We'll provide the detailed description on how to solder it by hand soon.

sahunt commented 8 years ago

+1. Would love to see a list of compatible microcontrollers. Hoping there's a STM32 controller (mentioned in readme) which would work.

awesomephant commented 8 years ago

Correct me if I'm wrong, but the budgets on AISLER seem very far off. The arcade buttons alone are about $1 a piece (according to the website listed in the BOM ), which works out to $5880 - even assuming you can get these cheaper in bulk, you're looking at thousands rather than hundreds of dollars.

PatrickFranken commented 8 years ago

Our budgets only include the electric components (PCB + parts). If you are curious what the costs of the parts are have a look under https://aisler.net/googlecreativelab/anypixel/display-r2/bom and https://aisler.net/googlecreativelab/anypixel/controller-r3/bom Wether you use the arcade buttons or anything else depends on your installation. AISLER delivers the DIY kit, the specific physical installation is up to you.

ryburke commented 8 years ago

Thank you all so much for your interest and excitement for the AnyPixel.js project. You've surfaced some great questions - with varying degrees of difficulty in answering.

Let me just say as a macro level point that we are aware that implementing AnyPixel.js in-full, at-scale is complex and not a day's work. Our hope in sharing every bit and bolt was to inspire and provide a reference from which ideas, parts, etc. could be cherry-picked from. For those who can do, we hope you do do. But at minimum, we hope you get excited about what's possible.

In AnyPixel.js' exploratory phase, we did create a form and interaction prototype (it does not run the software framework) - seen here. In the coming weeks, we will be adding documentation to outline that build process.

We are also looking at possibly developing a lighter version - perhaps a single board. This is time and resource dependent but it's definitely on the table. Even better, someone from this great community could take the reins!

jeremyabel commented 8 years ago

We've been thinking about this a bit, and we have some ideas we'd like to share in an effort to spur some thinking in what might be a good direction.

We're imagining a combination of the control board and the 7x7 grid board. One board with both the control chip, network hardware, and the LED driver chips. But instead of putting the LEDs directly on the board, it would have a large array of output pins so you could plug in / solder up your own LEDs.

Some additional thoughts:

ryburke commented 7 years ago

This morning we released a simple starter example with AnyPixel running on a first gen Raspberry Pi controlling a single neopixel button. Check it out at /rpi-example.