hzeller / rpi-rgb-led-matrix

Controlling up to three chains of 64x64, 32x32, 16x32 or similar RGB LED displays using Raspberry Pi GPIO
GNU General Public License v2.0
3.72k stars 1.18k forks source link

Driving 6x64x64 Matrix's from a single Pi? #989

Closed mikecann closed 4 years ago

mikecann commented 4 years ago

Hi @hzeller,

First thanks for this incredible library mate, you have done an excellent job here. I have already used it to great effect creating an LED matrix toy here: https://mikecann.co.uk/personal/led-matrix-toy/

Now I want to build an LED Matrix cube. So that means driving 6 of the same panels that I have purchased here: https://www.aliexpress.com/item/32650789975.html?spm=a2g0s.9042311.0.0.17ea4c4dE7aC3h

Those are p2.5 indoor smd2121 hub75 64x64 led 1/32 Scan..

So my questions are:

Can I drive all of them together from a single Pi? Can I just daisy chain them together then connect an Adafruit Bonnet to the Pi and expect it to work? Would a Rasperry Pi 4 work or should I go with a 3 or something else?

I appreciate you probably dont want to play technical support to every maker on the planet but ill definately be giving you massive props in my writeup if I can get this thing built and working 😄

hzeller commented 4 years ago

You can drive these with a single Pi but I'd not suggest to use a long chain of six of these panels: that will definitely result in noticeable flicker as the panels are not fast enough to clock with the needed speed.

Use three parallel chains (e.g. using the active adapter, a ard party one or build your own), and then put only two of the 64x64 in each chain. So don't use the Bonnet as it only allows for one chain.

I suggest a newer Pi, so a 3 or 4 are great, Pi zero is probably too slow for this.

mikecann commented 4 years ago

Awesome, thanks for that! I really appreciate you taking the time to give me some advice on this.

I havent ever tried to make PCB before from designs such as you have listed on your active adapter page so to be safe I decided to go with one of the third party ones for now.. fingers crossed it works.

Ill grab a Pi 3 or a 4 too.

Im just trying to calculate how much power the displays will need. The sellers page (https://www.aliexpress.com/snapshot/0.html?orderId=8010499598137002) says that they need a maximum of 1200 W/m2.

For this project I have 6 x 160mm x 160mm = 153600 mm2 = 0.1536 m2 .. x 1200 w/m2 = 184 w

Is my math right there?

So im probably going to need about 200w power supply at 5v thats 40a .. so thats quite a bit bigger than anything I have lieing around here..

I was hoping to power it from battery but im guessing that not possible? But then again for my LED Matrix toy I was able to power one of them from a battery.. Hmm... Maybe I should just have a go and see how many of them I can power with the battery / adafruit powerboost

mikecann commented 4 years ago

@hzeller @raspberry-pi-maker Hey guys. My Pi and panels have arrived and I have been playing with it trying to get it to work and it sort of does... see this video:

https://photos.app.goo.gl/QiAD42SKG2d57Psy5

I havent modified the Electrodragon HAT or the Pi in any way.

I used DietPi Buster Lite as described in this post: https://github.com/hzeller/rpi-rgb-led-matrix/issues/991

Im not sure exactly whats going on.. my current thinking it is something to do with the 1:32 multiplexing and the E-line as mentioned at the end of here: https://github.com/hzeller/rpi-rgb-led-matrix/tree/master/adapter/active-3

My Matrix panels are these here: https://www.aliexpress.com/item/32650789975.html?spm=a2g0s.9042311.0.0.17ea4c4dE7aC3h

Is this something you have seen before? If it is the E-address line that I need to change could you hint as to which ones I should be soldering?

image

raspberry-pi-maker commented 4 years ago

@mikecann I successfully tested 64X64 matrix with Electrodragon HAT. Perhaps you can use it with one of the following pictures. This is the same concept of @hzeller 's explanation.(https://github.com/hzeller/rpi-rgb-led-matrix/tree/master/adapter/active-3)

In my case, the second picture(P8-E, P4-GND) is the successful config.

image image

mikecann commented 4 years ago

@raspberry-pi-maker thats awesome. Ill give it a try, hopefully I dont break anything :)

mikecann commented 4 years ago

@raspberry-pi-maker It worked! Awesome :) Thanks again.. Going to keep this issue open just incase I run into any other issues when trying to get 6 of them running but so far its looking good!

mikecann commented 4 years ago

@raspberry-pi-maker @hzeller okay so after a lot of pain I have the cube built but im running into another issue see this video:

https://photos.app.goo.gl/jZ5scPPoYUvJQRbG8

You can ignore the flickering, only the camera sees that you cant see it with the eye. The problem is the half / half on the side and top panel.

image

This is the command im running:

sudo examples-api-use/demo -D11 --led-rows=64 --led-cols=64 --led-chain=2 --led-parallel=3 --led-slowdown-gpio=2

I was worried that the panels were broken or something but when I changed which port on the HAT I was plugged into I saw it happening with different panels.

So I think the issue is the two panels that are plugged into P3 seem to suffer from half of each panel is missing the blue and maybe green part of the signal..

image

Anyone seen this before? Could it be something to do with me plugging in the wrong e-line?

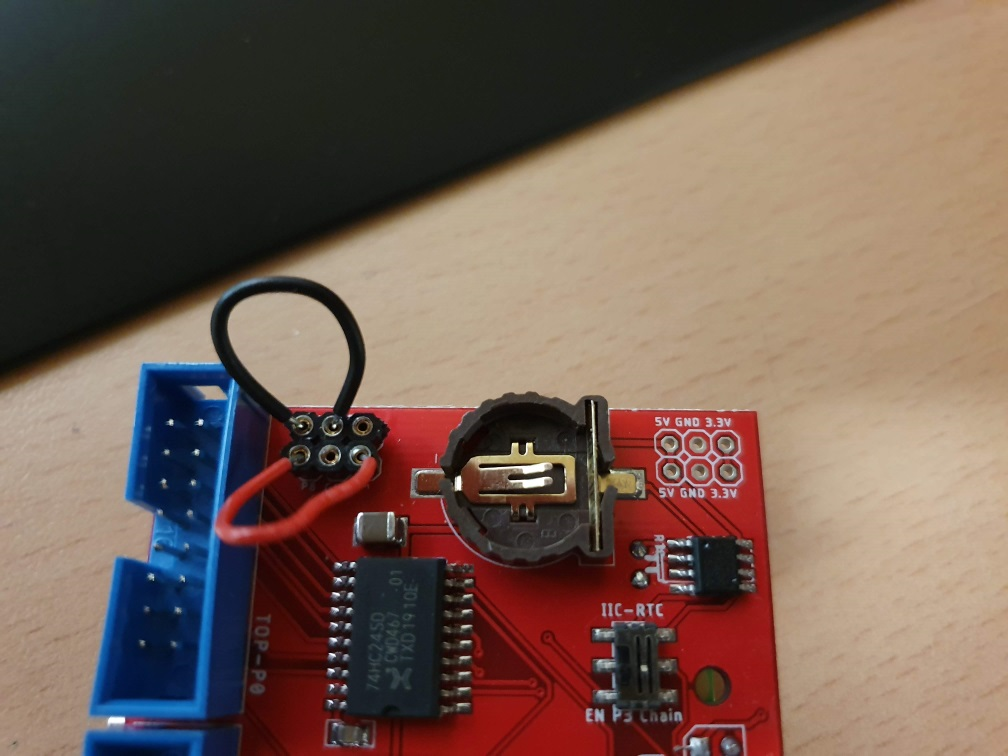
Should I be plugging a coin-cell battery onto the HAT? What is that for exactly?

mikecann commented 4 years ago

Hahaha typical... I found the issue! It was this switch:

image

I flicked it the other way and suddenly everything looks awesome :D

mikecann commented 4 years ago

So finally I have finished this project :) I made a video that went through the whole process here:

https://www.youtube.com/watch?v=l_GSGFhnWwo&feature=youtu.be

Massive thanks to you @hzeller and @raspberry-pi-maker for all your help with this one :)

mikecann commented 4 years ago

@daveythacher hmmm.. In the end im pretty sure I wasnt supplying anything close to this calculated power requirements and it still worked.. see my video on this project where I talk about it here: https://youtu.be/l_GSGFhnWwo?t=243

So shrug I have no idea what is going on

mikecann commented 4 years ago

@daveythacher it definately sounds like you know what you are doing mate, much more than I. I have no idea how I managed to get it to work considering the little I know about this sort of thing. Should I ever attempt something like this again ill be sure to look you up! :)

mikecann commented 4 years ago

@daveythacher thanks for some important tips there mate. I was aware of temperature issues inside the cube, TBH I dont usually run it for long enough for it to become a big problem. If I was at a hack day or running a long demo or something I would have to put some more serious thought into that.

Same goes for the wires. You are right I probably should be concerned about taking them past what they are rated for. Im hoping that the short periods of use negate this somewhat.

Definately good info for anyone that reads this issue in the future tho!