 masc4ii
commented
6 years ago
masc4ii
commented
6 years ago Haha, I wanted to ask this too! ;-) But you like to do that with which parameters? All, or just exposure?
Closed ilia3101 closed 5 years ago
masc4ii
commented
6 years ago Haha, I wanted to ask this too! ;-) But you like to do that with which parameters? All, or just exposure?
 ilia3101
commented
6 years ago
ilia3101
commented
6 years ago Probably a simplified set of parameters, stuff like simplifying the white balance (like lightroom does it think) and probably without the sharpening/chroma blur. Maybe a good time will be after OpenCL is implemented as well cos this is probably slow.
 bouncyball-git
commented
6 years ago
bouncyball-git
commented
6 years ago @ilia3101
I always thought that pure mac devel e.g. cocoa and avfoundation are sucking out all your cool inspiration. You would do so much more in processing otherwise ;)
masc4ii
commented
6 years ago From the GUI side, the starting point is equal to the wbPicker. But the click&drag will be funny to implement. The lines could be drawn using a second semitransparent scene in the QGraphicsView. So the image has not to be redrawn, when the lines are changing (I hope).
masc4ii
commented
6 years ago I tested: adding a QGraphicsItem to the scene works good. It can be selected and dragged automatically, without any latency, yeah (I added just 4 lines of code for a dragable line, with QGraphicsLineItem). Problem: the "Zoom: fit" mode will not work so easy, because this is a manual zoom - so the line is not zoomed in the right way. If "fit" is disabled, no problem.
m_pGradientGraphicsItem = new QGraphicsLineItem( 0, 0, 1856, 1044 );
m_pGradientGraphicsItem->setPen( QPen( Qt::white ) );
m_pGradientGraphicsItem->setFlag( QGraphicsItem::ItemIsMovable, true );
m_pScene->addItem( m_pGradientGraphicsItem );
EDIT: Even better... the DaVinci style:
QPolygon polygon;
polygon << QPoint(0, 0) << QPoint(-10, 10) << QPoint(10, 10) << QPoint(0, 0) << QPoint(0, 100) << QPoint(-10000, 100) << QPoint(10000, 100) << QPoint(0, 100);
m_pGradientGraphicsItem = new QGraphicsPolygonItem( polygon );
m_pGradientGraphicsItem->setPen( QPen( Qt::white ) );
m_pGradientGraphicsItem->setFlag( QGraphicsItem::ItemIsMovable, true );
m_pScene->addItem( m_pGradientGraphicsItem );
bouncyball-git
commented
6 years ago Hmm... cool
ilia3101
commented
6 years ago @bouncyball-git yeah the Mac stuff is really annoying. Sometimes feel like giving up on it, but sometimes it has been useful for me to me to be able to add a button here or there to test new processing stuff, and someone once said they like it :D
Been getting inspiration for new processing ideas from papers. There's a lot of simple stuff that's really cool that i want to add soon.
ilia3101
commented
6 years ago @masc4ii how does it look? I think two dragable points would be enough to control it
masc4ii
commented
6 years ago I can't upload an image... ImgBB does not work :-(
ilia3101
commented
6 years ago I found out you can just drag it on to the comment editor, try it
masc4ii
commented
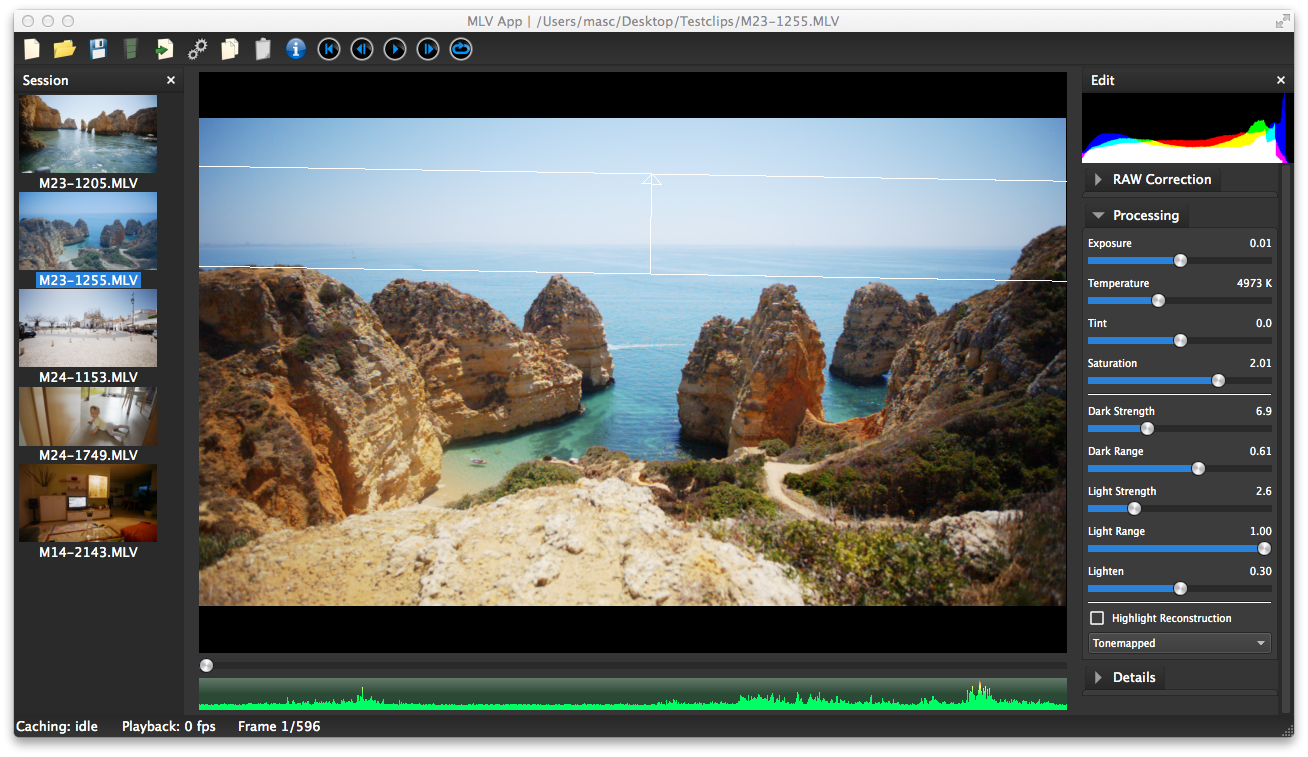
6 years ago 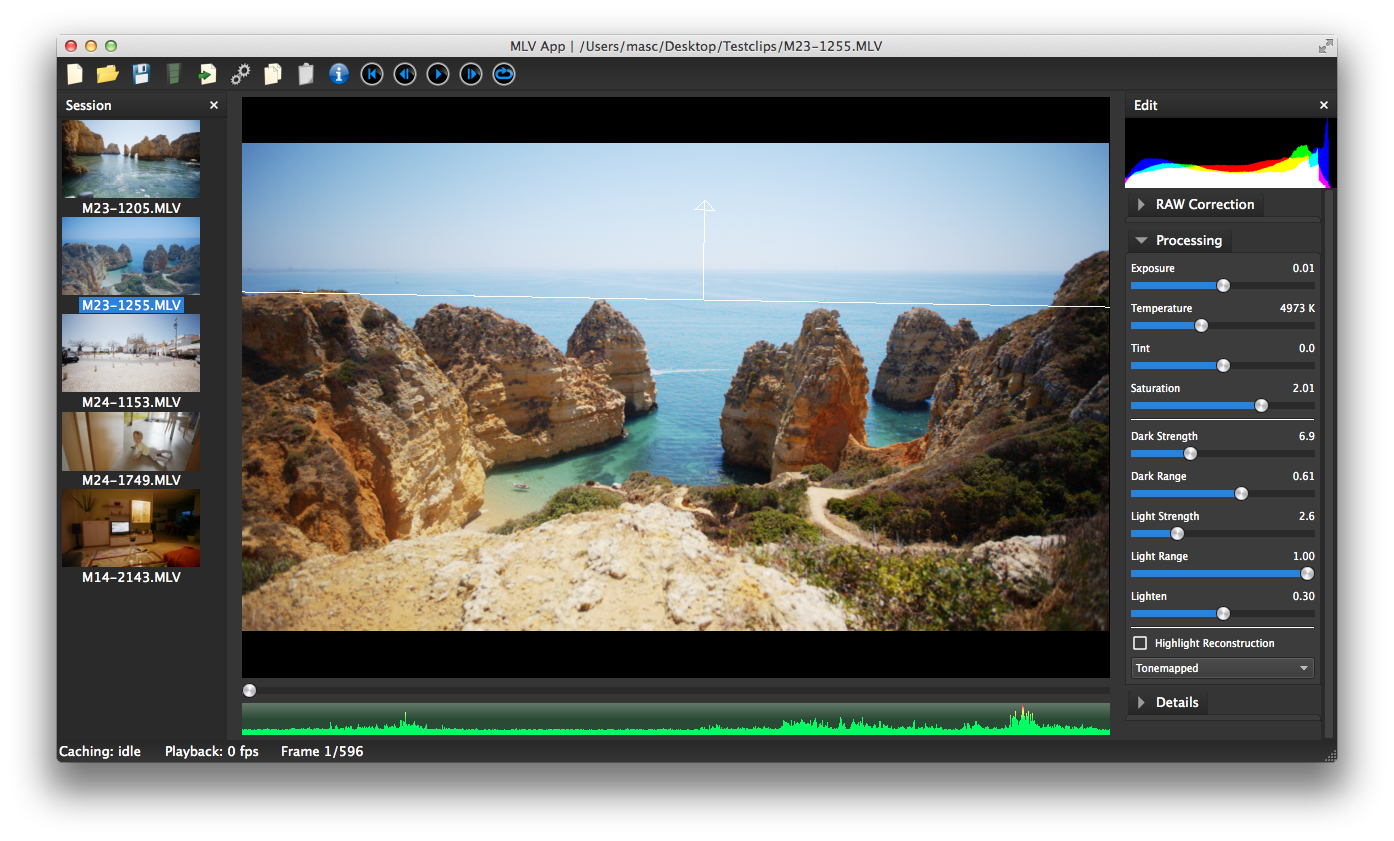 Different hoster now...
I can place it and turn it.
Different hoster now...
I can place it and turn it.
masc4ii
commented
6 years ago So I think... parameters could be: anchorPoint(x,y) angle(alpha) radius(length) This would be the same parameters, for a (how is it called in english?) radial gradient. I only would have to change the graphics element and it would work identical... okay, you don't need the angle then. Or we need the angle, + radiusX and radiusY.
ilia3101
commented
6 years ago Oo nice
I don't know what the best parameter system would be, what do you think of the anchor point, and the other point (anchor point moved by radius at angle), not sure which way would be simpler to do in processing.
Maybe we should also use a floating point, 0 to 1 instead of pixels, as that would be transferable when copying settings between clips of different resolutions and aspect ratios. If we even want to copy this adjustment...
masc4ii
commented
6 years ago Or with two lines: a mixture between Lightroom and DaVinci:
Yes, floating point is also a nice idea. This would also work better with my "self-scaled" "zoom: fit" mode.
 iFloris
commented
6 years ago
iFloris
commented
6 years ago yeah the Mac stuff is really annoying. Sometimes feel like giving up on it, but sometimes it has been useful for me to me to be able to add a button here or there to test new processing stuff, and someone once said they like it :D
@ilia3101 That could be me. I really like the cocoa app. But if it hampers progress to support multiple architectures, perhaps focusing on the most future proof architecture would be better. Regardless, I stand in awe of the progress that you all are making with this app. 👏
ilia3101
commented
6 years ago @iFloris haha 🤣, it was you! (but I like it too). Don't worry, I probably won't give it up, as it is what I use to write the processing/mlv code and test new features, so I kind of need it for testing really quick and easily. It has a little bit of sentimental value as well. And it is good reference for anyone wanting to write a Cocoa app without XCode.
masc4ii
commented
6 years ago I now can draw the lines exactly like in Lightroom. Click, drag, release - it is painted the whole time. @ilia3101 : you have the choice between (I have now both, at least in int x,y, but float should be no problem):
masc4ii
commented
6 years ago This really makes fun to implement!
 Now we can:
Really not easy to do in the Qt jungle... but fuuuuun! :o) There are so many links...
Do you already have an idea, how many gradients we want to support? For now I have just one...
bouncyball-git
commented
6 years ago @masc4ii
Man this gradient section is fantastic! :) Love this and everything you are doing with love and taste :) including metal knobs :P
bouncyball-git
commented
6 years ago However if mlv is not imported the gradient tool behaves very strangely ;) I suggest in this case make "enable" check box grayed out.
masc4ii
commented
6 years ago Thx. Yes... the behaviour is not right yet. That should when no clip is loaded. ;-) Edit: fixed.
ilia3101
commented
6 years ago I was planning just one gradient for simplicity. I think light room also has just one (may be wrong tho). If I'm honest, my way of thinking is simply: If in doubt, imitate how Adobe did it
masc4ii
commented
6 years ago Adobe has as many the user wants (or his PC gets calculated). But I also would say, we implement one for now.
masc4ii
commented
6 years ago Update: I changed a lot here, to not kill all the work with the new aspect ratio stretch function. There are now 2 coordinate systems parallel: one for the frame viewer and one for the line painter. If I would sync both, the lines are very ugly when stretch parameter is not 1.0. So I stretched only the frame and the lines are calculated different. In the end, that works now for the starting point, end point and the arrow between this two points. What is not right yet: the start & end line is still 90° to the arrow - but when beeing stretched, this is nearly never correct (correct only for 0°, 90°, 180° & 270° gradient orientation). This has to be fixed one day...
bouncyball-git
commented
6 years ago Hmm... lot of math because of non standard aspect ratio...
masc4ii
commented
6 years ago Exactly... most of the math I could do in memory to my school time... but with these lines I have a problem now :-D
masc4ii
commented
6 years ago Some progress in this field...
 (test of linear gradient mask by using the red channel)
masc4ii
commented
6 years ago More progress:

bouncyball-git
commented
6 years ago Awesomeness!!! You are the MAN!
bouncyball-git
commented
6 years ago Could you share Mac version for me? I have macbook with me but have no any development environment set up here because of lack of space and the fact that it's 4/5 of the time my daughter's notebook ;) and she will never let me own it full time for devel.
 dannephoto
commented
6 years ago
dannephoto
commented
6 years ago Oh, shit, I gotta test this. Here is a mac version @bouncyball-git . WIll it work on your mac, who knows ;): https://bitbucket.org/Dannephoto/magic-lantern/downloads/MLV%20App.app.zip
masc4ii
commented
6 years ago Sry guys... it is not all commited... there are still some bugs I'll fix this evening (Windows hangs completely as expected, receipt realization is missing, highlight reconstruction does not work and other little "nice" bugs). After that I'll upload a version to play with! 😄
bouncyball-git
commented
6 years ago It really works!!! 🤣
masc4ii
commented
6 years ago https://www.dropbox.com/s/cvk3gyb564xzh79/MLV%20App%20r1610.zip?dl=0 This one should work better.
dannephoto
commented
6 years ago @masc4ii. You are doing so much creative stuff these days. Very impressive. Only tested briefly and works great with exposure slider. Could one wish for white balance slider working for this too? And maybe even ability for multiple gradients?
masc4ii
commented
6 years ago Thanks. Adding WB and contrast could be possible relatively easy... this would mean dublicating even more matrices and functions. Adding multiple gradients would be the death for my concept (if there is any) and also for the CPU... 😄 Atm there are several 65535*uint16_t arrays... all these arrays would be there n times... and have to be calculated. It isn't impossible... but...
masc4ii
commented
6 years ago Added a contrast gradient slider. That was not so difficult... WB should be harder... let's see...
ilia3101
commented
6 years ago wowowowow amazing 😍😍😍
masc4ii
commented
5 years ago With the same processing I am able to realize a vignette filter. The problem is, that I can not add it additionally - it would be linear gradient OR vignette. My processing solution is too limiting.

Or do you have a better idea how solving the processing? Here Exposure is affected and overrides standard picture by using a mask. That's why a third layer can't work.
bouncyball-git
commented
5 years ago You mean there is no chance to repeat the procedure second time in the processing pipeline? after 1st was over? Do second linear gradient or vignette, whatever?
masc4ii
commented
5 years ago Right. That means it is possible, but is absolutely not nice. Last time I doubled code. Now I would have to double it again, so we have 4 times the code (2x2=4).
If someone had a better idea, please let me know.
Inspired by this video: https://vimeo.com/240910267, where I saw some shots where the sky was clearly darkened with a graduated filter.
Opening an issue just to remember.
How it looks in Lightroom:
Would look great in landscapes and stuff.
Of course colour wheels is probably coming before.