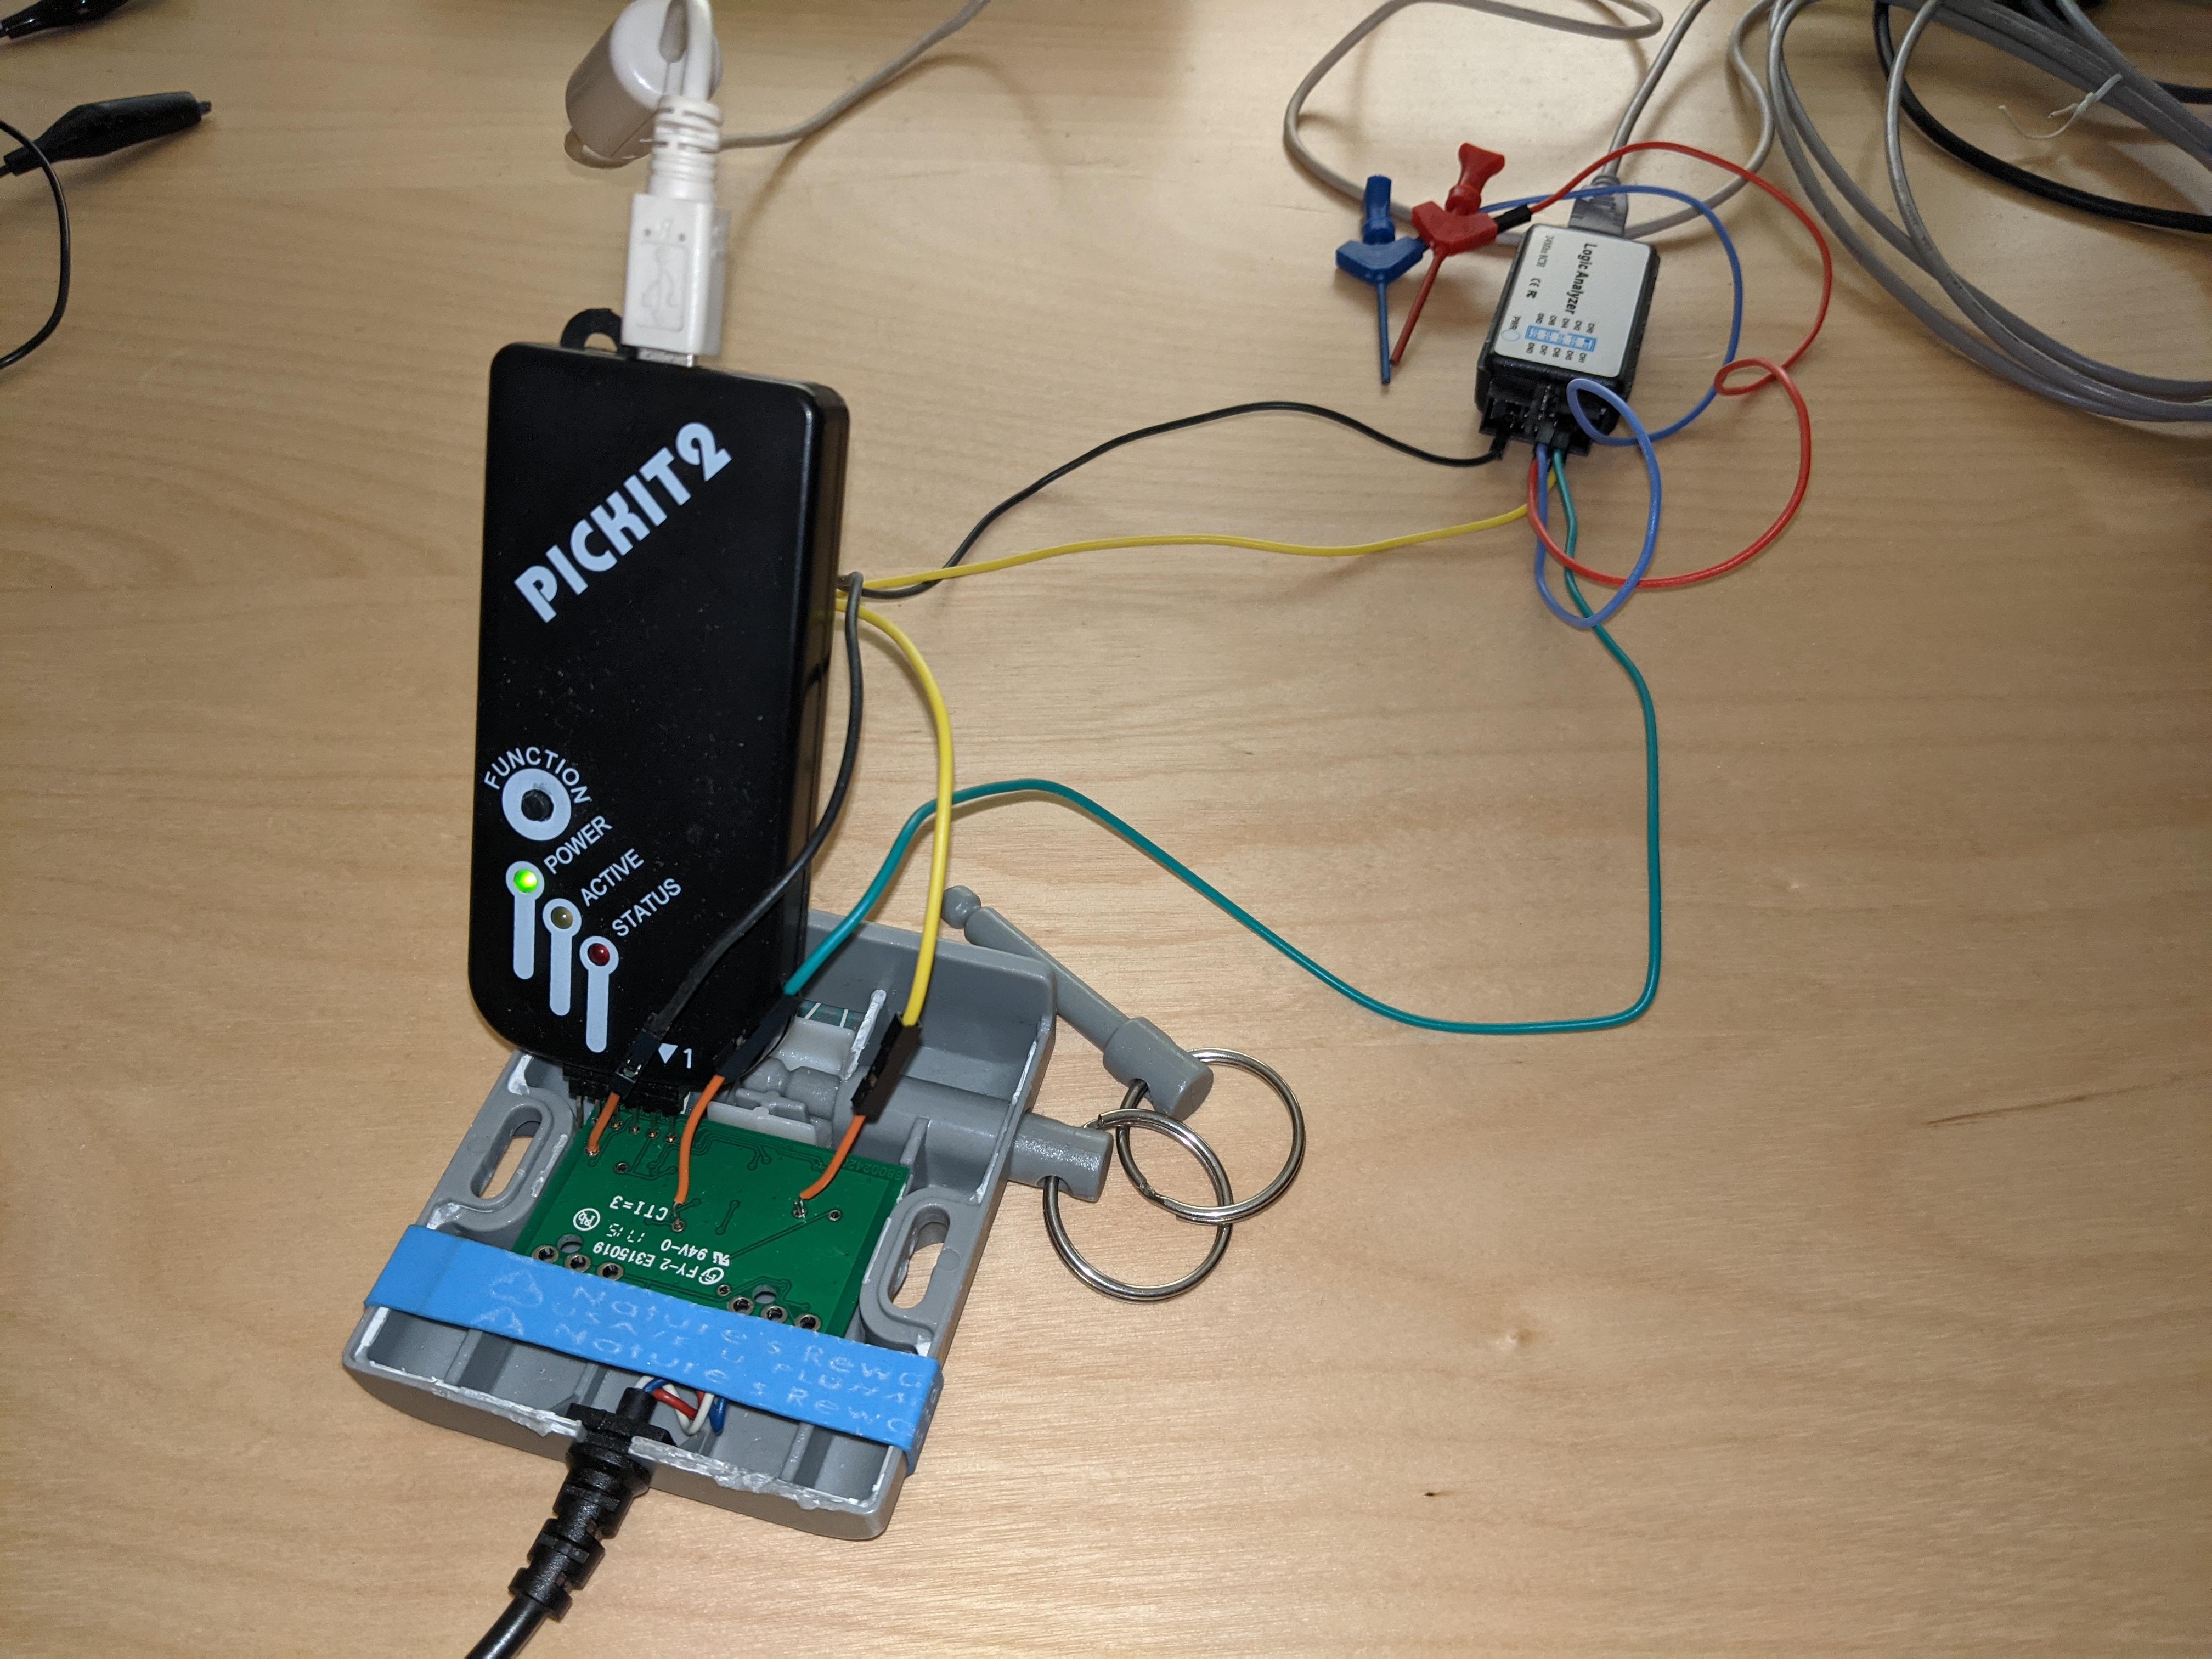
Jep, I would appreciate too. In particular, an image of the proper cabling would be great to reproduce and a remark of how to create a firmware backup first.
Closed zyrorl closed 3 years ago
Jep, I would appreciate too. In particular, an image of the proper cabling would be great to reproduce and a remark of how to create a firmware backup first.
Hi, great to see some interest in using the new firmware.
I agree that some more documentation would be helpful. But before a comprehensive guide is ready, I can offer a few pointers for flashing the firmware.
First, be aware that my BEKANT control box has a date code of "2015/34" so it is several years old by now. I hear there have been new models with hardware changes since then, so your process may vary.
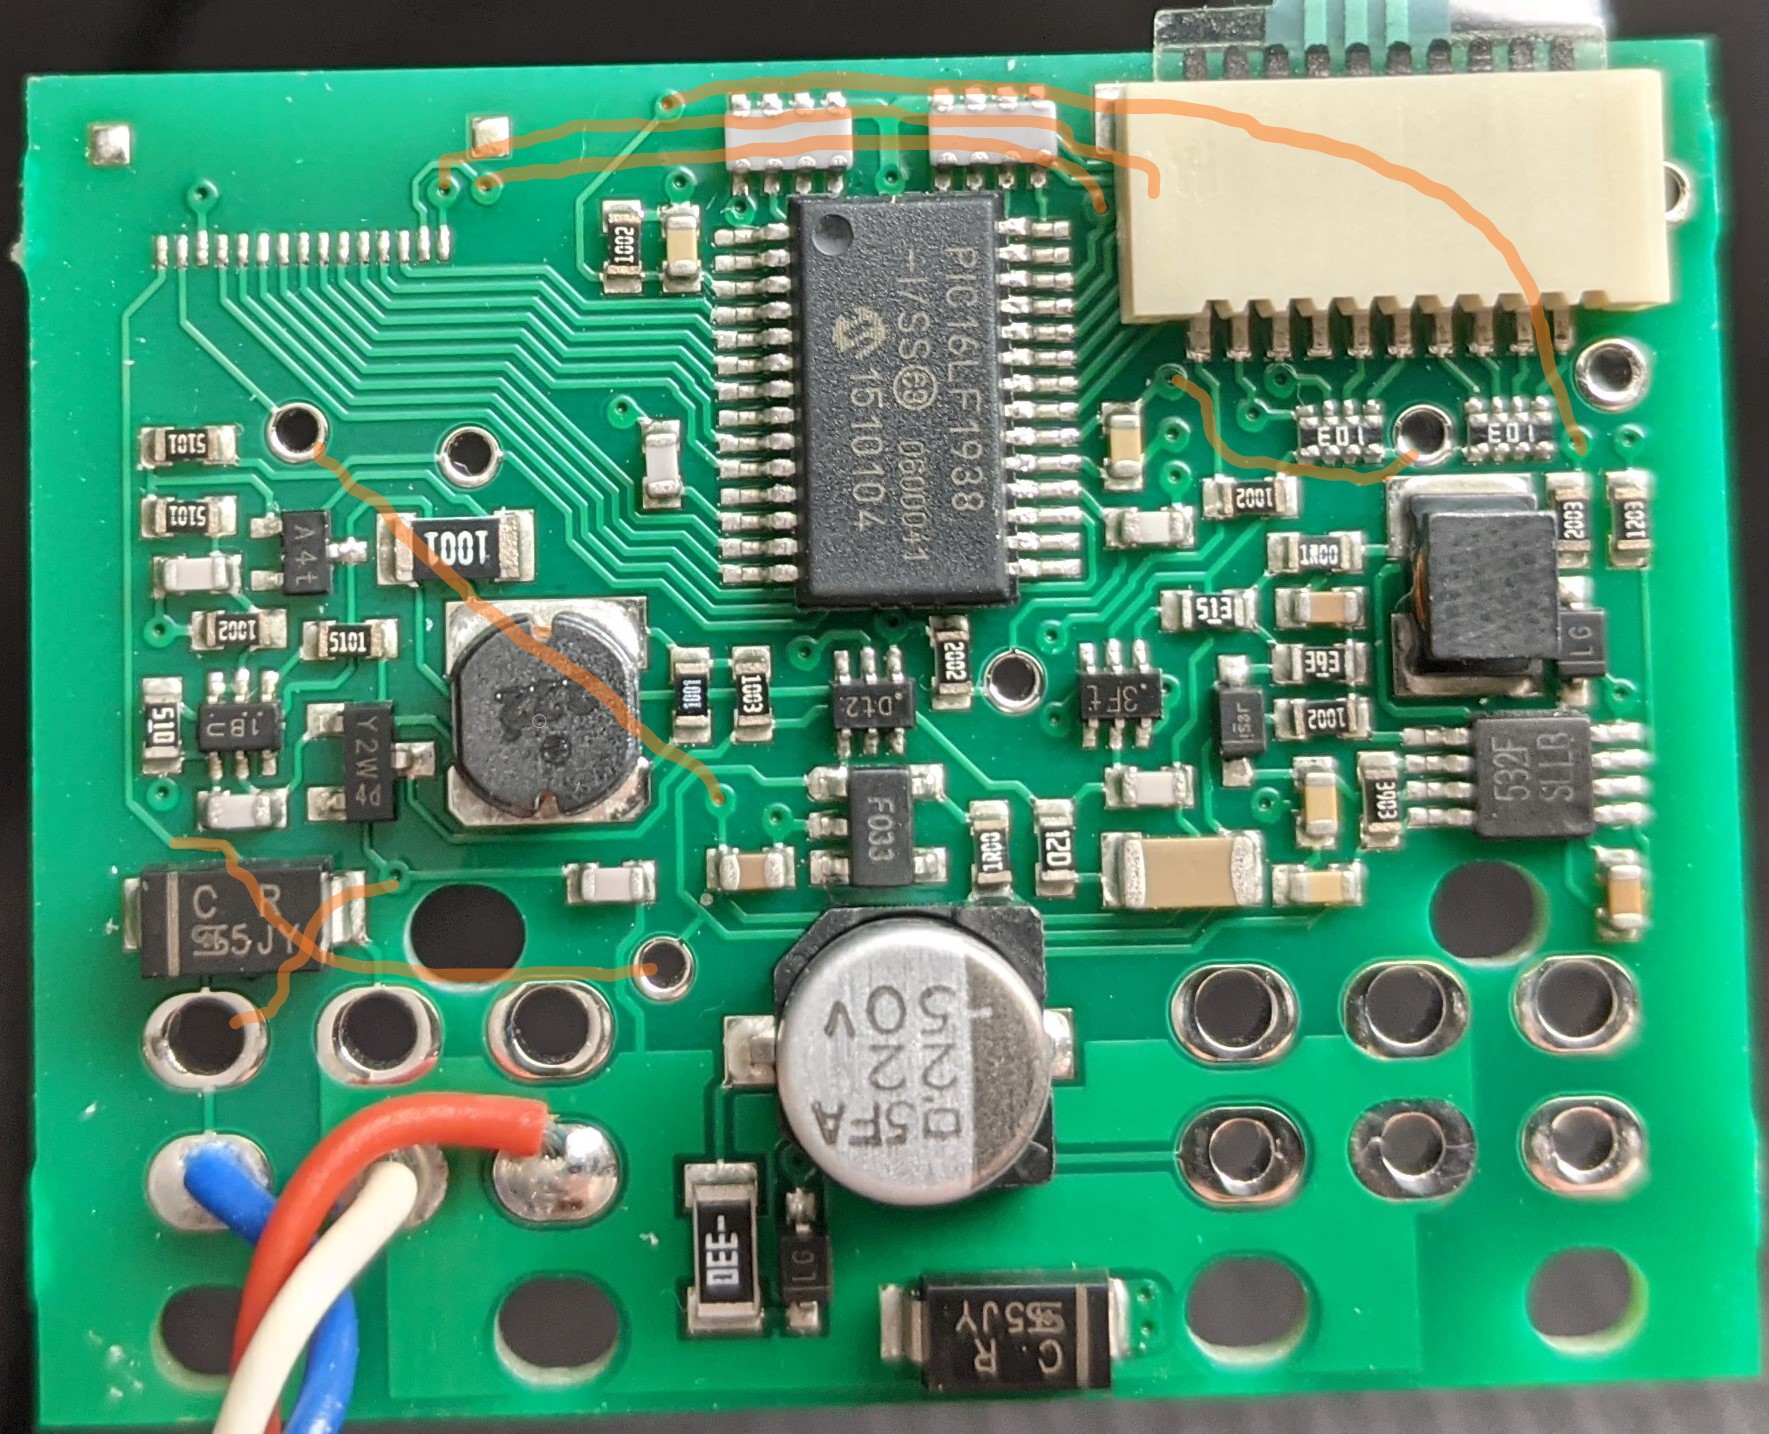
The ICSP pins need to be connected between the chip and the programmer. I used a PICKit2, which has the same pinout as a PICKit3. Pins 1-5 need to connect to the 5 holes on the top-right of the board, assuming the board is oriented like this:

You can only just see the fifth hole on the top-right behind that rectangular flat-flex connector. Flip the board over and they are all exposed on the back side. In fact I was able to connect without soldering anything by simply plugging a long pin header into the programmer and leaning it inside the holes enough to make contact.

Pin 1 connects to the hole closest to the center of the board. Pin 6 does not need to be connected. You could solder pin headers into these holes but that wasn't necessary for me.

Photo from @diodenschein archived at https://web.archive.org/web/20190116092248/http://blog.rnix.de/hacking-ikea-bekant/
With ICSP connected, the programmer software can dump or flash the firmware on the chip. The new firmware contains pre-programmed heights in EEPROM, so EEPROM data should be flashed along with the program code.
The PICKit2 has a GUI for Windows, or PK2CMD command line version which also works on Linux and macOS. The PICKit3 may need to use MPLAB X IPE, but I am not familiar with it.
Other programmer and software combinations should be straightforward. Remember to back up the existing firmware and EEPROM data before overwriting it.
If you try this, please let me know how it works, and what programmer, hardware date code, and model you have.
Much of this comment can be added as documentation.
A Firmware Programming Guide is added to the documentation.
Hey Ivan,
I've found this great project which seems to do exactly what i want to do, program my bekant table.
The main barrier i've found however to doing what i want is a lack of a walkthrough on how to program this thing using the firmware hex file you've provided.
I have got a PICKit3 programming device and i have got the unit taken apart. However as someone who's never touched these specific programming devices it's a bit difficult to figure how exactly to program it.
I have been able to disassemble the device, and pull it apart and I'm ready to program this thing. I have soldering iron, wires etc, all as required, but the instructions on your page don't exactly cover the what do we need to solder where, and how exactly do we load the software onto the device.
Could you please cover these steps for people like me who are trying to get their table to be awesome?:P