 github-learning-lab[bot]
commented
3 years ago
github-learning-lab[bot]
commented
3 years ago Step 4: Create a branch
Let’s complete the first step of the GitHub flow: creating a branch :book:.
Creating a branch
## Creating a branch :tv: [Video: Branches](https://www.youtube.com/watch?v=xgQmu81G1yY) You just learned how to create a branch—the first step in the GitHub flow. Branches are an important part of the GitHub flow because they allow us to separate our work from the `main` branch. In other words, everyone's work is safe while you contribute. ### Tips for using branches A single project can have hundreds of branches, each suggesting a new change to the `main` branch. The best way to keep branches organized with a team is to keep them concise and short-lived. In other words, a single branch should represent a single new feature or bug fix. This reduces confusion among contributors when branches are only active for a few days before they’re merged [:book:](https://help.github.com/articles/github-glossary/#merge) into the `main` branch.:keyboard: Activity: Your first branch
- Download and open Visual Studio Code (referred to as VS Code) if you don't already have it.
- In VS Code, open the Command Palette using Ctrl+Shift+P on Windows, or Command ⌘+Shift+P on macOS. You can also follow VS Code's official documentation on cloning.
- Type:
git cloneand press Enter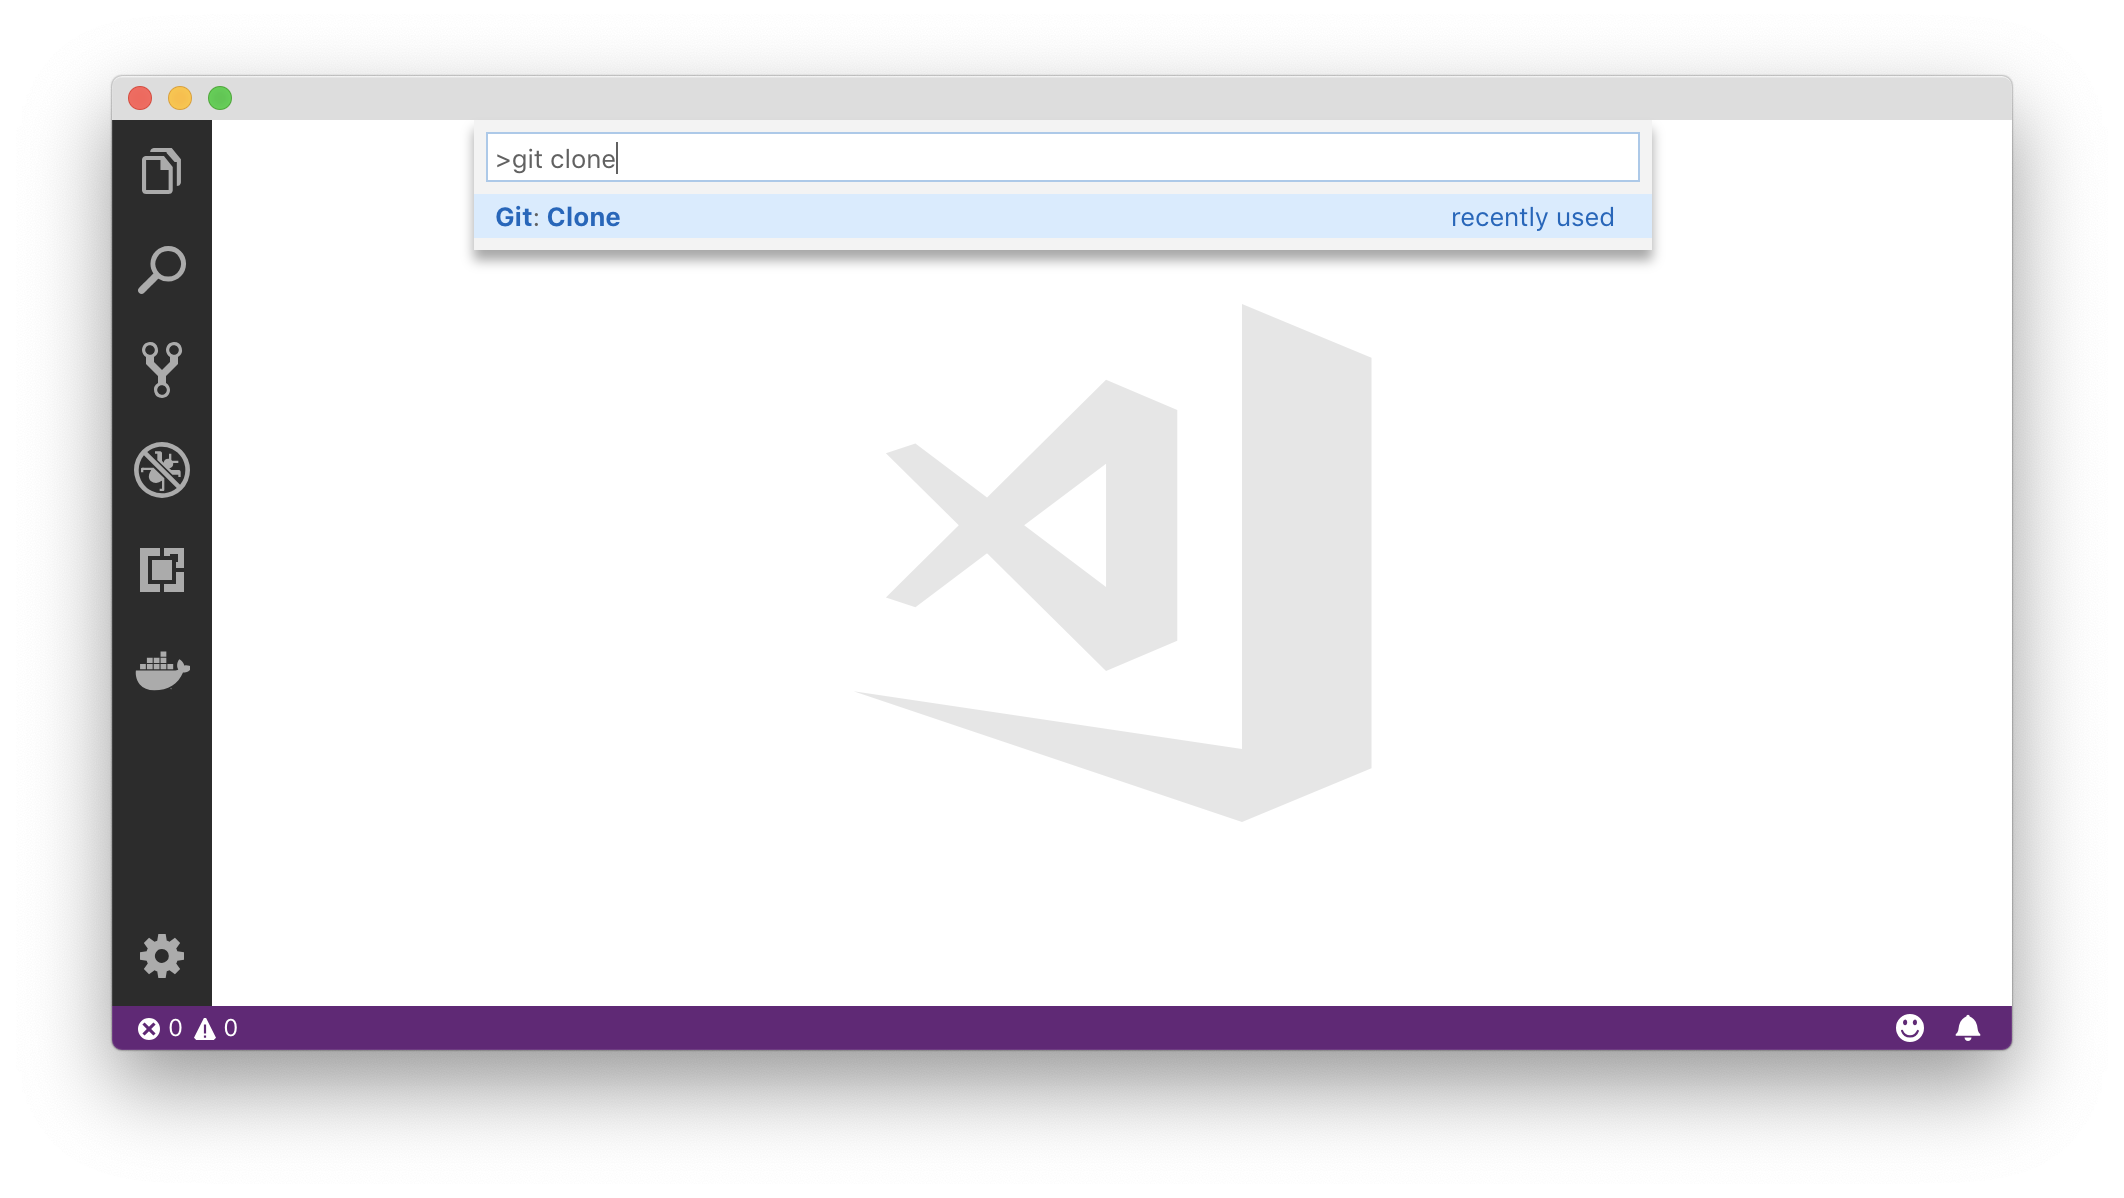
- Paste in the URL of the repository in the new window and press Enter:
https://github.com/jboswell-maker/github-slideshow.git - Select the location in which to save the repository and click Choose folder. Then, open the location you selected.
- The repository folder should now be open in your VS Code project. Click on
mainat the bottom left of the VS Code window. This will bring up the Command Palette with the commands related to Git branches.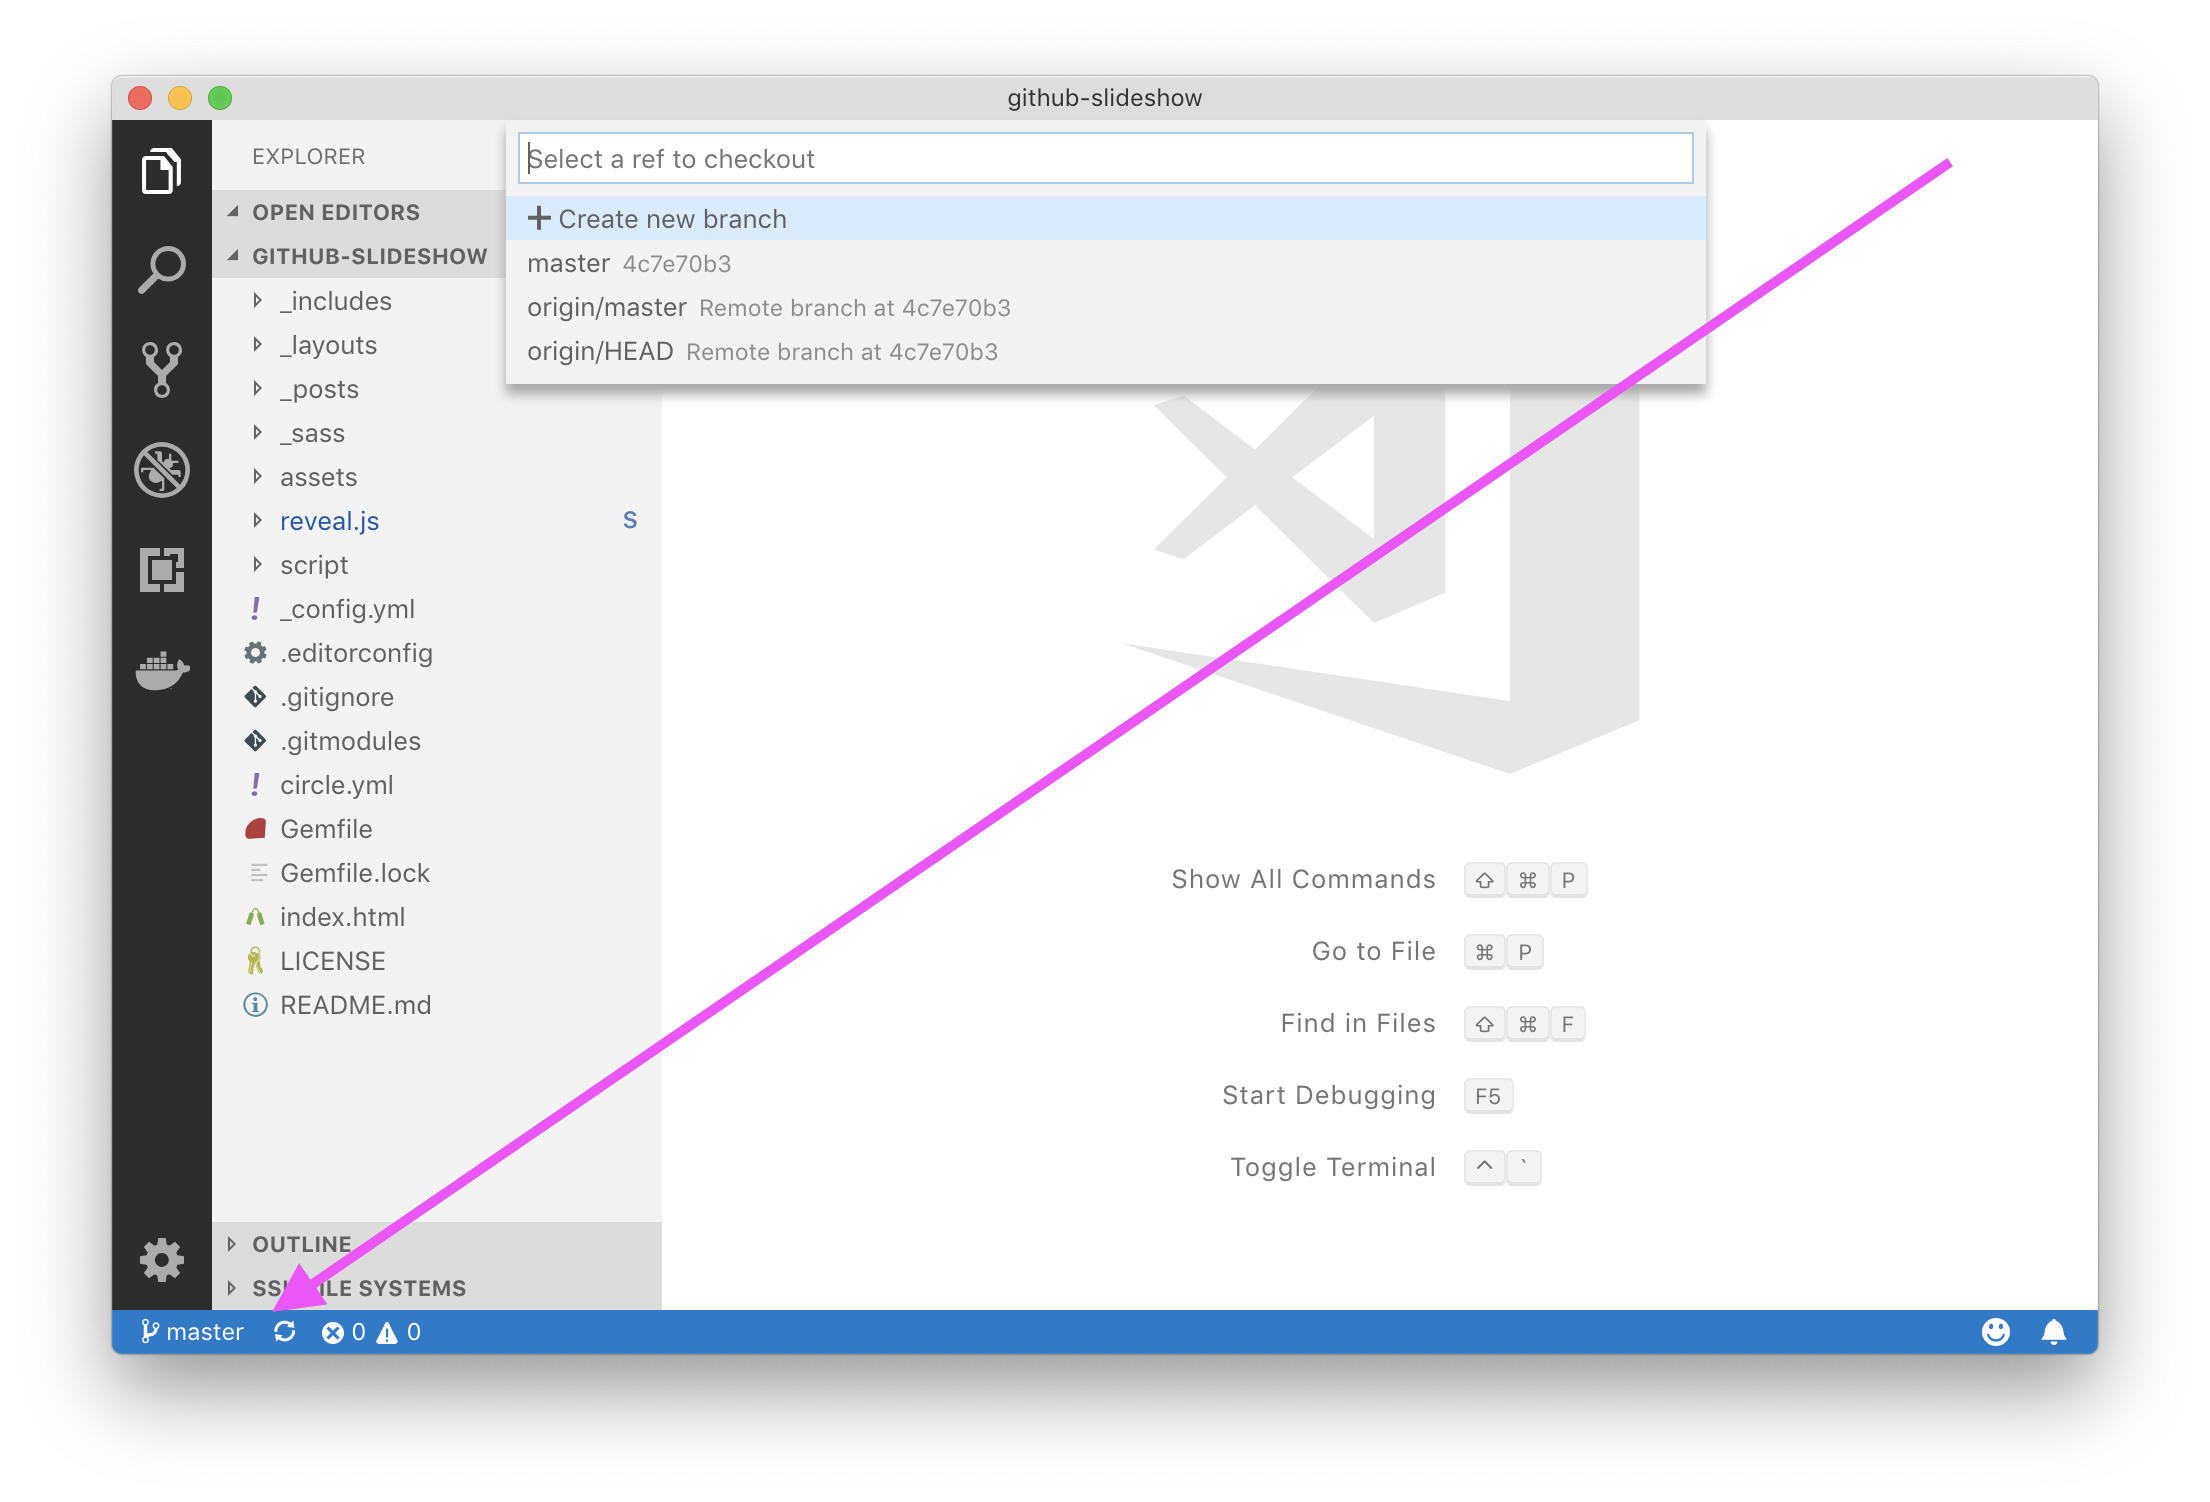
- Click Create new branch and enter any branch name you'd like, such as
my-slide. Then press Enter. - When asked to select the ref to create the branch from, select
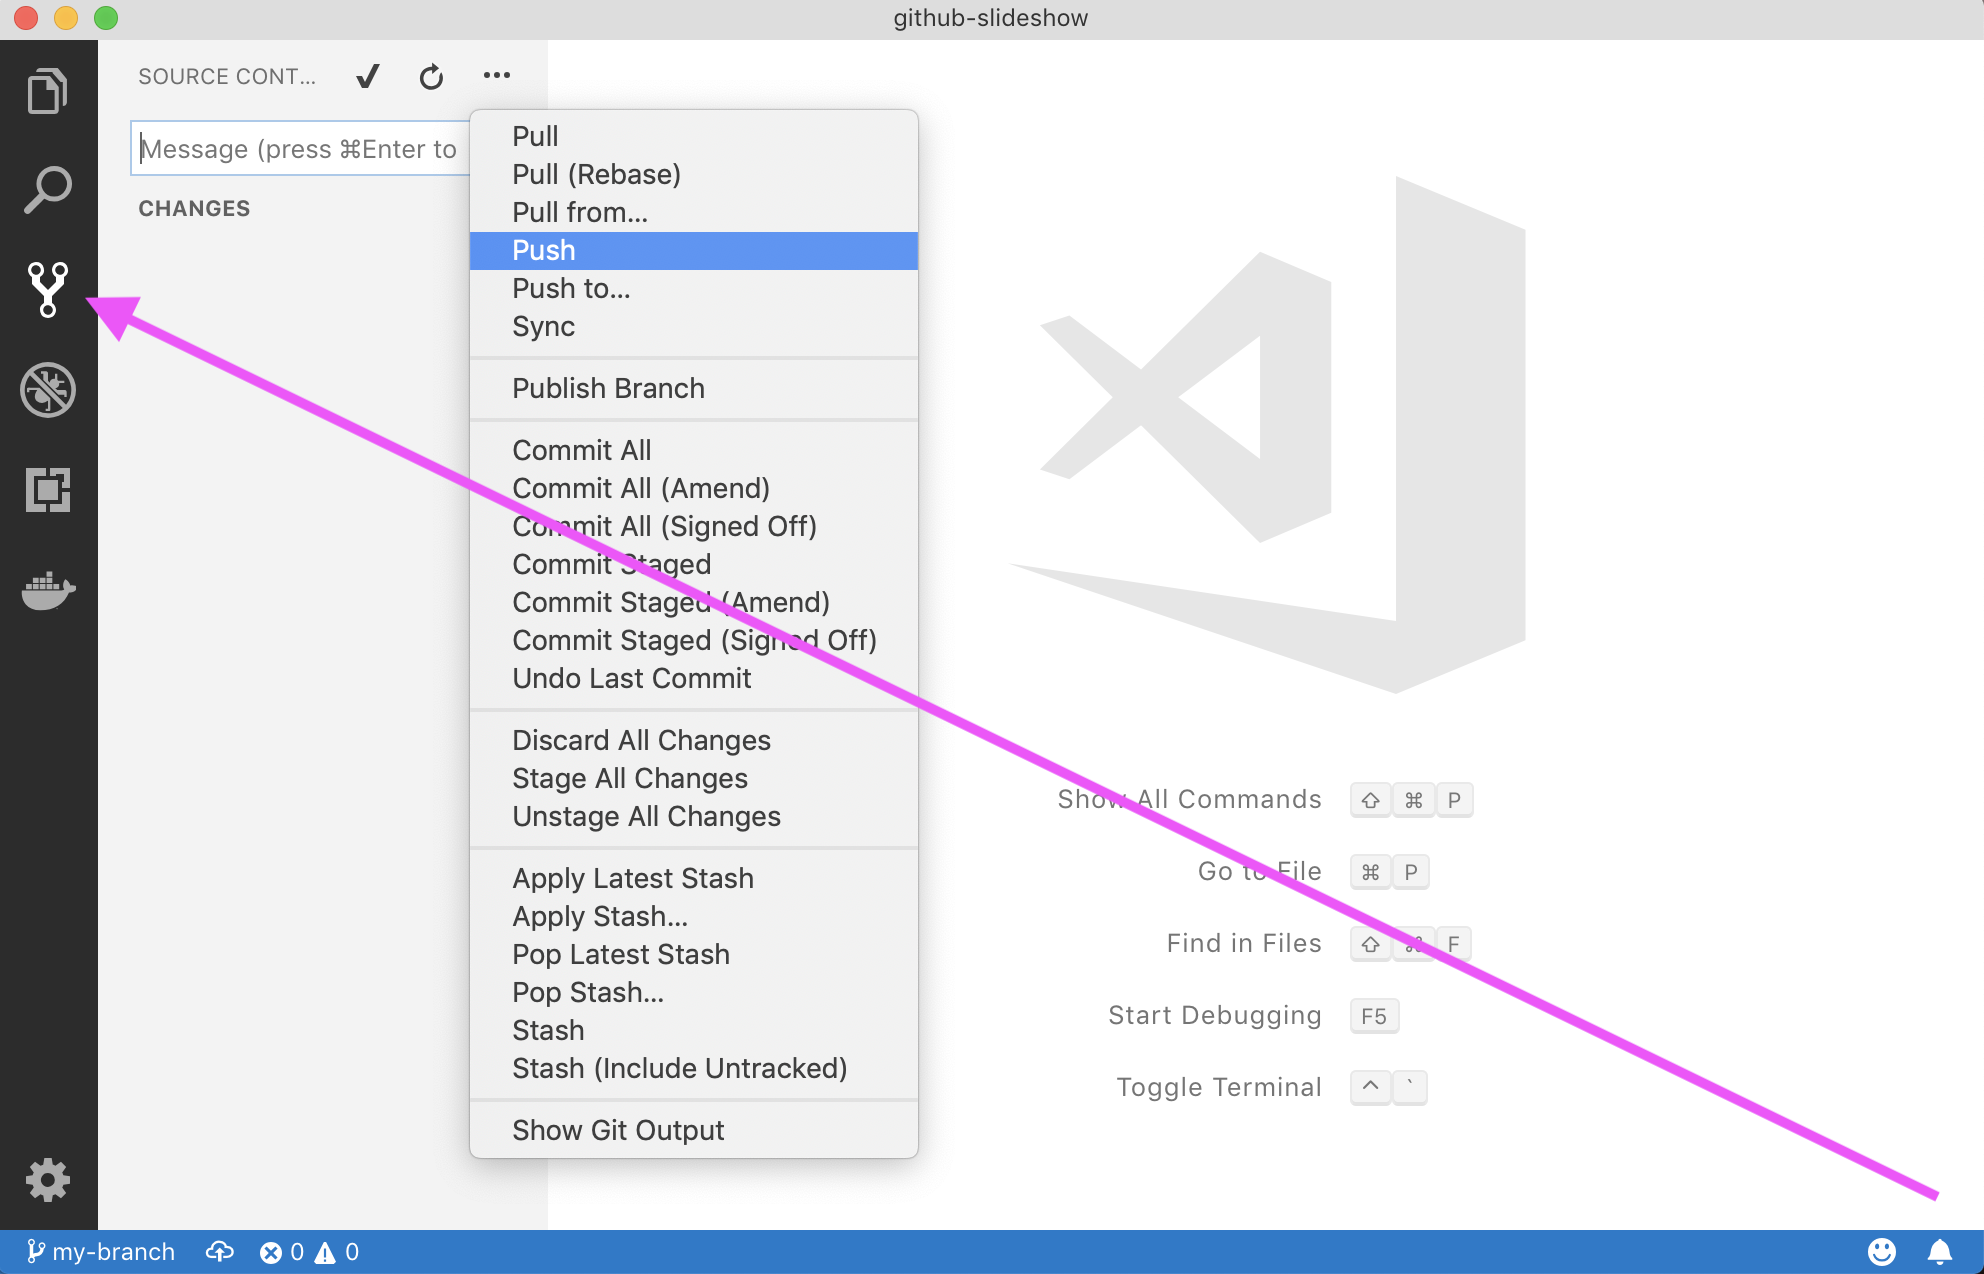
main. - Go to the Source Control view, click on the ellipsis (...) and select Push. Confirm the dialog box asking you to publish the branch.
Introduction to GitHub flow
Now that you're familiar with issues, let's use this issue to track your path to your first contribution.
People use different workflows to contribute to software projects, but the simplest and most effective way to contribute on GitHub is the GitHub flow.
:tv: Video: Understanding the GitHub flow
Read below for next steps