 Wengier
commented
4 years ago
Wengier
commented
4 years ago @rderooy Corrections about DOS versions: MS-DOS version 7.0 is only included in Windows 95 (or 95A), which introduced VFAT support but without support for FAT32 or LBA drives. The MS-DOS version included in Windows 95 OSR2 and Windows 98 is 7.10, with support of FAT32 and LBA drives (up to 2TB). For example, if you set "VER SET 7 10", you will be able to use DOS commands from Windows 98 instead of getting the error message "Incorrect MS-DOS version". PC-DOS version 7.x is very different from MS-DOS version 7.x.
 rderooy
 joncampbell123
 Allofich
 arromdee
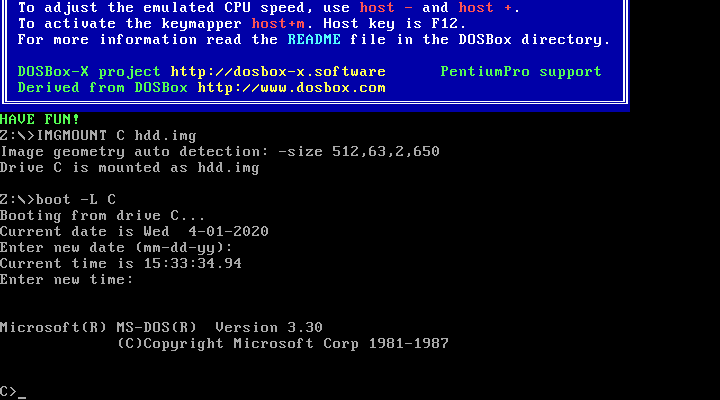
Is your feature request related to a problem? Please describe. I would like to contribute to the Wiki, in particular to write a guide on setting up old DOS versions in DOSBox-X. Could you give me access to edit pages and create new pages on the DOSBox-X wiki?
To give you an idea, here is a draft version I have been working on:
DOS Installation Guide
This guide explains how to boot regular Microsoft MS-DOS or IBM PC-DOS in DOSBox-X, including Hard disk images. Before going through this guide, consider if you really need this as the integrated DOS in DOSBox-X is more convenient for regular use. Booting regular DOS is normally not necessary to run DOS applications such as games or even Windows version up to 3.11 in DOSBox-X. And even if you need to have a specific DOS version, you can change the version of the integrated DOS in DOSBox-X with the VER command (e.g. "VER SET 6 22" and DOSBox-X will claim to be version 6.22, instead of the default 5.00).
General guidelines
This document assumes that you have MS-DOS or PC-DOS disk images. Getting these images files is outside the scope of this document.
DOS versions
Unless noted otherwise, the MS-DOS and PC-DOS versions are equivalent for this document. There are various limitations that DOS imposes that are dependant on the version. A few milestones:
DOS editions
MS-DOS was licensed by many clone manufacturers and in the early days these OEM editions were often 'personalized' to the manufacturer, and therefore it is possible that these older OEM specific editions don't work in DOSBox-X. An example is the Tandy licensed version of MS-DOS, which will not work unless you set machine=tandy.
Booting DOS from disks
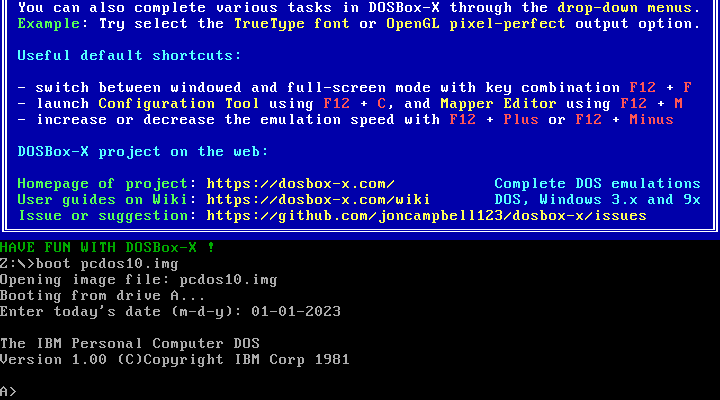
Booting DOS from a disk image is pretty straight forward. Start DOSBox-X and you should find yourself at the DOSBox-X Z:\> prompt. This is not real DOS, but a 'simulated' DOS that is compatible with most DOS games and applications. Now type something equivalent to
Assuming that dos.img is an uncompressed DOS disk image in your current working directory, it should start it. This even works for IBM PC-DOS 1.00.
Creating a DOS 2.0 HDD image
TBD...
Creating a DOS 3.0-3.2 HDD image
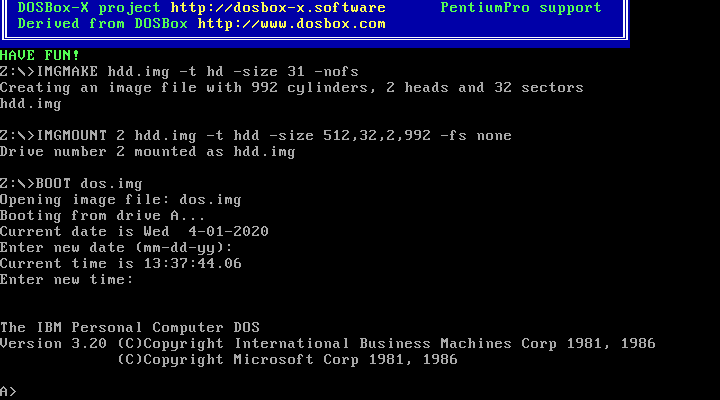
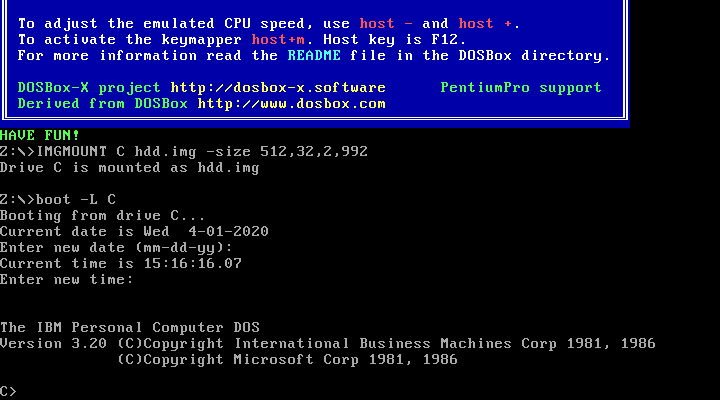
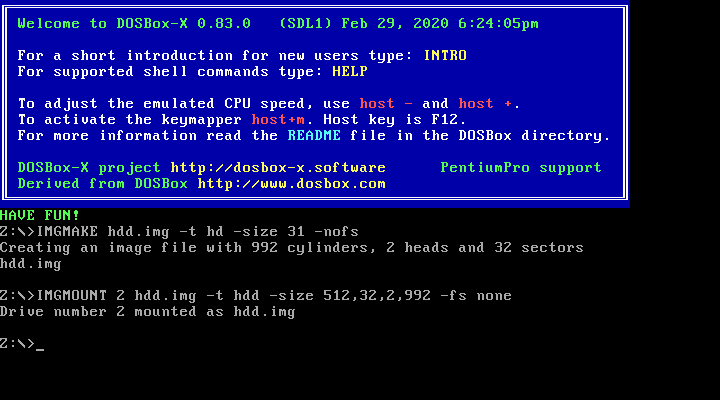
First we start DOSBox-X and create an empty HDD image file. Note that due to DOS limitations, the size cannot exceed 31MB, and you can only have a single DOS partition per HDD.
If you specify a smaller size value then 31MB for the IMGMAKE command, pay close attention to the output of IMGMAKE as you will need to adjust the IMGMOUNT size parameter values accordingly. The IMGMOUNT size parameter should be 512,
<sectors>,<heads>,<cylinders>.Assuming that your uncompressed DOS 3.0-3.2 image is named dos.img and in your current working directory, it should boot DOS from the disk image. These early DOS versions did not have an installer, so the preparation and installation is a manual process. We need to start with creating partitions.
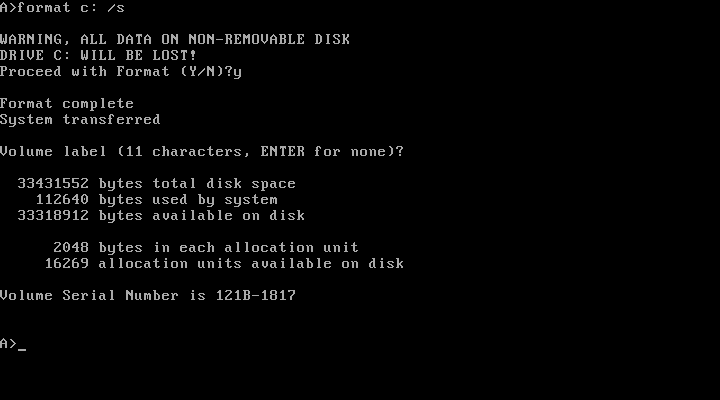
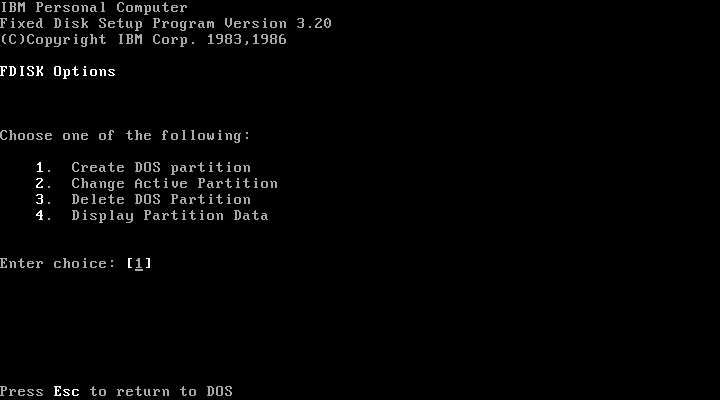
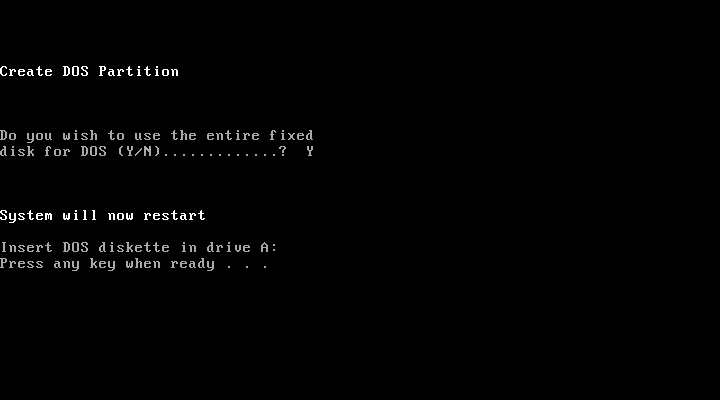
Run FDISK and select to create a new DOS partition. After your finished, DOS will reboot DOSBox-X and your again at the DOSBox-X Z:\> prompt. At this point are HDD image is partitioned, but not yet formatted or made bootable, so that is what we need to do next.
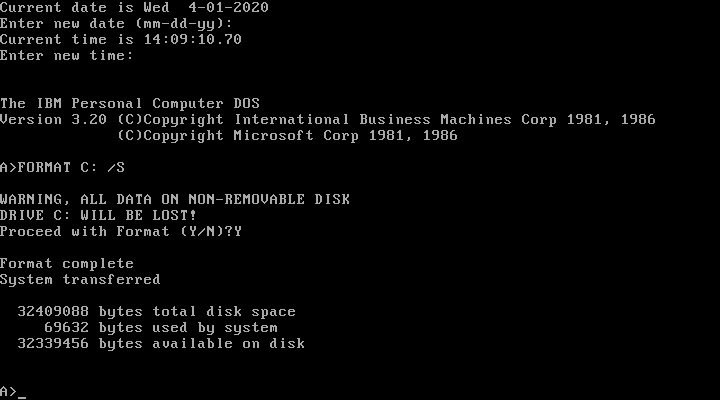
We have now again booted from the disk image, and are ready to format the C: and transfer the system files.
We can optionally copy over the rest of the disk at this point
You can also create a AUTOEXEC.BAT and CONFIG.SYS on the HDD with the EDLIN editor. From the DOSBox-X menu bar select Main and then select Reset guest system. We are again at the DOSBox-X Z:\> prompt.
Our setup is now complete and all that is left is how to boot the image normally. From the DOSBox-X Z:\> prompt this can be accomplished with
You probably don't want to memorize those last two commands, so do yourself a favour and create yourself a DOSBox-X .conf file and place those commands in the [Autoexec] section of that config file.
Creating a DOS 3.3 HDD image
Creating a DOS 3.3 HDD image is nearly identical to that of DOS 3.0-3.2 above with a few small notes
Creating a PC-DOS 4.0 HDD image
TBD...
Creating a MS-DOS 4.0x HDD image
First of all, consider if you really, really want to use MS-DOS 4.x as it was considered a very buggy release. If you decide to continue, and you have the choice, do yourself a favour and use the 3.5" version as it will minimize the amount of disk swapping required.
MS-DOS 4.0x on 5.25" media consists of the following six disks
MS-DOS 4.0x on 3.5" media consists of the following three disks
OEM versions could have additional disks such as a Diagnostic disk.
Starting with MS-DOS 4 the process to create a HDD image with DOSBox-X, should be easier. But unfortunately there is some kind of compatibility issue between DOSBox-X and the MS-DOS 4.0x installer. If you let DOSBox-X create a image that is already partitioned and formatted the MS-DOS 4.0x installer will not offer the option to install to the HDD.
In these examples we still use a 32MB HDD. MS-DOS 4.0x supports HDDs up to 4,095MB split into two partitions of 2,047MB each. Since DOSBox-X supports only HDD images with primary partitions, 2,047MB is our effective maximum HDD size.
Bare-bones install
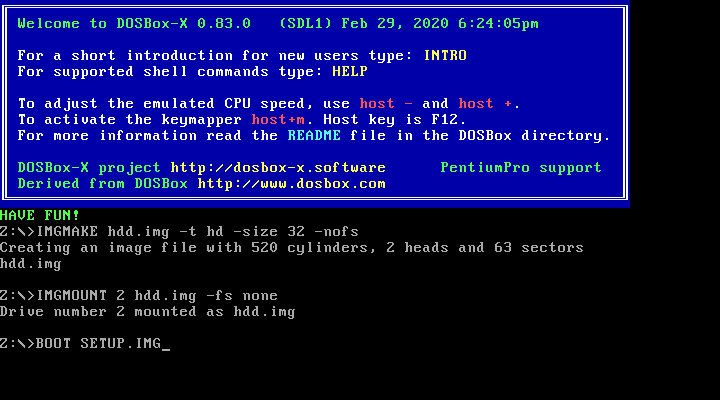
If we decide to do just an absolute minimal install, and effectively skip the MS-DOS 4.0x install program, we don't need to worry about the buggy MS-DOS 4.0x installer, and we can take a shortcut.
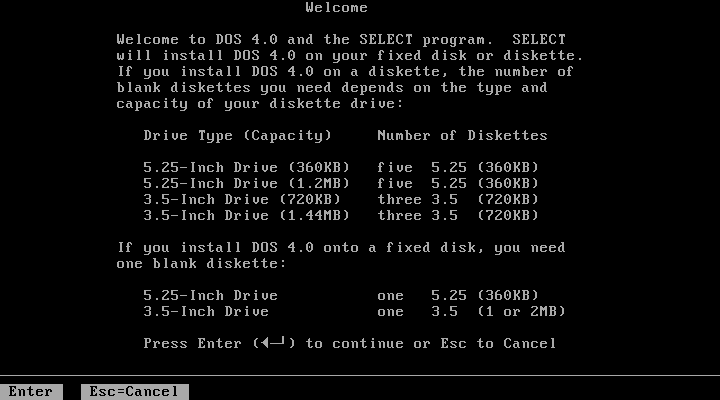
Now we need to boot from the first MS-DOS 4.0x disk, which is called either Setup or Install depending on the media type.
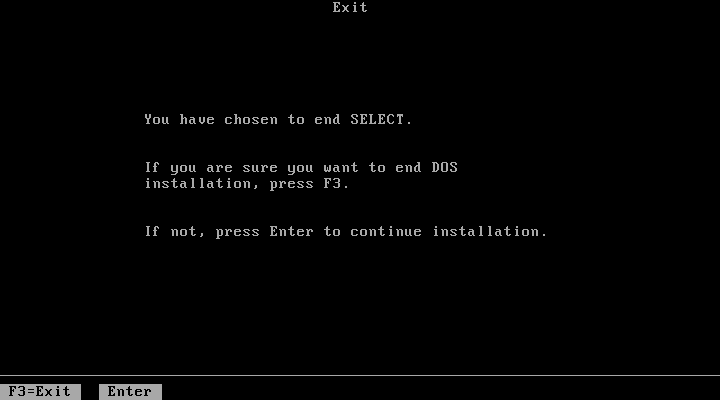
When at the Welcome screen (3.5" media) or prompted to insert the SELECT disk (5.25" media), simply press ESC instead followed by F3 to drop to the MS-DOS prompt and run the following command:
The HDD image is now bootable and we can optionally copy some of the DOS utilities from the diskette to the HDD.
Full install from 3.5" media
First of all the MS-DOS 4.0x installer can corrupt its own installation diskettes, as such you should change the permission of the disk images in the host OS such that the image files are READ-ONLY. In turn DOSBox-X will treat them as if the disks have the write-protect set.
We first need to create a HDD disk image without partition and filesystem and mount it.
If you specify a different size value then 32MB for the IMGMAKE command, pay close attention to the output of IMGMAKE as you will need to adjust the IMGMOUNT size parameter values accordingly. The IMGMOUNT size parameter should be 512,,,.
During install, the installer will insist on a blank disk to be labelled "SELECT COPY". Unfortunately will it seems the installer should allow to use the B: drive for this purpose this does not seem to work in practice.
For the first stage of the install, we only need to use the Setup and the blank disk (SELECT_COPY).
It is important that you keep track of the order of the disks that you specify on the BOOT line, as you will need to switch between them using either a keyboard shortcut or the "Swap floppy" option on the DOSBox-X menu bar located under the DOS heading. Unfortunately at this point there is no visual indication in DOSBox-X itself, as to which diskette is the current one inserted, you can however look at the DOSBox messages logged to the console if you have it open to see a message as to which disk is currently inserted. When you cycle through them one by one, once you reach the end, you will simply go back to the first.
Note that while the first MS-DOS 4.0x 3.5" disk is labelled "Setup" the installer will actually refer to it as "INSTALL".
Let the installer create the primary partition, and reset the guest system once it asks you to press Ctrl-Alt-Del. You will now be again at the DOSBox-X Z:\> prompt and we need to mount the images again. There is now a partition, but not yet a filesystem, and as such DOSBox-X's autodetect does not yet work and we still need to fully specify all the parameters again.
Notice how we have now specified all the disks on the BOOT line, plus the SELECT_COPY disk. We need to go through all the installer questions a second time, and again we need to create the backup copy. Once you get to the partition question, select to skip and the install will then ask for the Operating and finally (if you elected to install it) the Shell disk. After this it will ask to reset the computer, so use the Reset guest system option in DOSBox-X to go back to the Z:\> prompt.
Full install from 5.25" media
This process is basically the same as for the 3.5" media, but you have more disks and they are labelled differently.
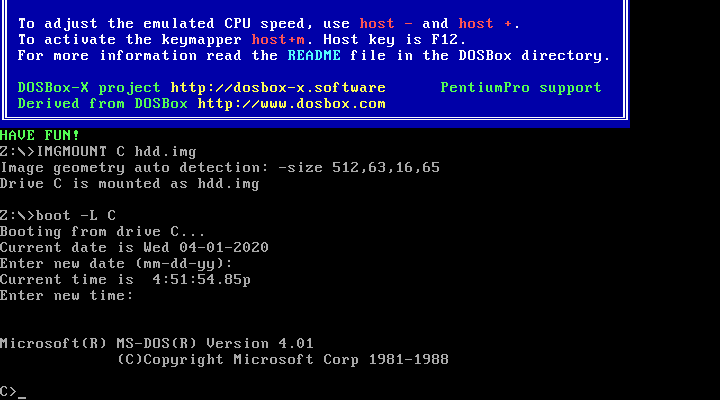
Booting MS-DOS 4.0x from HDD
Now that we have created a bootable HDD image we can boot it from the DOSBox-X Z:\> prompt with the following commands:
Creating a MS-DOS 5.0+ HDD image
TBD...