Open wangfudong opened 4 years ago
PyVista (and VTK to my knowledge) can only render textures by point-based UV coordinates. So, you need that vt
array to map back to the v
vertices 1-to-1. Without knowing which vertices are repeated and the order of vt
with respect to those, I can't think of a way to do this beside interpolating.
Also, can you share a pv.Report()
? meshio
very much complains about the mesh you shared for me.... so I wrote my own custom parser to demonstrate.
Here is a way to do this by interpolating the cell texture coordinates to the vertices:
import pyvista as pv
import numpy as np
import pandas as pd
shirts_path = './models/shirts_simple.obj'
img_file = './models/up_dog.jpg'
tex = pv.read_texture(img_file)
#### Manually parse the OBJ file because meshio complains
raw_data = pd.read_csv(shirts_path, header=None, comment="#",
delim_whitespace=True, names=["type", "a", "b", "c"])
groups = raw_data.groupby("type")
v = groups.get_group("v")
f = groups.get_group("f")
vt = groups.get_group("vt")[["a", "b"]].values.astype(float)
vertices = v[["a", "b", "c"]].astype(float).values
fa = np.array([(int(x[0]), int(x[1]), int(x[2])) for x in f["a"].str.split("/")])
fb = np.array([(int(x[0]), int(x[1]), int(x[2])) for x in f["b"].str.split("/")])
fc = np.array([(int(x[0]), int(x[1]), int(x[2])) for x in f["c"].str.split("/")])
faces = np.c_[fa[:,0], fb[:,0], fc[:,0]] - 1 # subtract 1
#### End manual parsing
# Create the mesh
cells = np.c_[np.full(len(faces), 3), faces]
mesh = pv.PolyData(vertices, cells)
# Generate the tcoords on the faces
ctcoords = np.c_[fa[:,1], fb[:,1], fc[:,1]] - 1 # subtract 1
ui, vi = ctcoords[:,0], ctcoords[:,1]
cuv = np.c_[vt[:,0][ui], vt[:,1][vi]]
mesh.cell_arrays["Texture Coordinates"] = cuv
# Interpolate the cell-based tcoords to the points
remesh = mesh.cell_data_to_point_data()
# Register the array as texture coords
remesh.t_coords = remesh.point_arrays["Texture Coordinates"]
# Plot it up, yo!
remesh.plot(texture=tex, notebook=0)
And the texture renders on the mesh:
However, since the texture coordinates were interpolated, I suspect this is causing some distortion of the texture along the seam:
FYI, https://github.com/pyvista/pyvista/pull/865 enables the option for smooth_shading
with textures:
What I would recommend is separating the mesh you have into two separate OBJ files/meshes and render both of them separately to avoid the texture folding back on itself at the seam and to have 1-to-1 mapping between v
and vt
Thank you very much for your quick reply and help!
Yes. The original pv.read_meshio() will raise ValueError when it checks the narray lengths of verts/vt/faces of the input obj file, like ValueError: narray length of (8399) != required length (8168)
. I have commented out the error-checking code blocks in the files ./pyvista/utilities/helpers.py
(in function raise_not_matching()), ./pyvista/core/datasetattributes.py
(lines around 126 and 205), such that mesh = pv.read_meshio(shirts_path)
could get pass.
Thank you for your code of interpolating the cell texture coordinates, it helps me a lot.
I will try your recommendation first. Moreover, I think I can try to find out the verts lying on the seam by checking whether the vert_id having 2 corresponding uv coordinates, and duplicate them twice such that the total verts will be increased from 8168 to 8399, then establish 1-to-1 cooresponding between vt
and the final verts.
Hi, I have tried to modify the original shirts by find out the verts lying on the seam and duplicate them twice. Now it can be visualized normally (with smooth_shading=True
), however, there is a conspicuous seam:
I think this is becuase the normals (of verts on the seam) estimated by pyvista have changed after my modification. For example, in the original obj file, the vert_id 2073
, which lies on the seam, is connected by 6 faces,
[2074, 26, 2073], [2070, 2074, 2073], [2073, 26, 2281], [2281, 2280, 2073], [2073, 23, 2070], [2280, 23, 2073]
After my duplicating it in the new obj file, the 2 new vert_ids are 2073
and 8261
. Note that, these 2 vertices have the same coordinates since vert_id 8261
is duplicated from vert_id 2073
. The 6 faces above are now,
[2074, 26, 2073], [2070, 2074, 2073], [2073, 26, 2281], [2281, 2280, 2073]
and [8261, 23, 8256], [8269, 23, 8261]
.
(Note that, the vert_ids 2070, 2280
are also lie on the seam, and their duplicated new vert_ids are 8256, 8269
.)
Therefore, in the new obj file, the normals of 2073, 8261
are different to the normals of 2073
in the old obj file.
How can I assign my own Normals
to a mesh in pyvista? Since the configure smooth_shading=True
will tell pyvista to compute the normals of the new obj file, I want to assign another Normals
before the visulization. However, I can not assign to the mesh any point_arrays
or cell_arrays
with new Normals
.
A small issue. The visulization result looks a little dark, how to make it more bright? Just like the img on the right,
My code:
import pyvista as pv
import numpy as np
import pandas as pd
def fusion_model(verts, vt, fs, vt_tuple):
# find out the verts lying on the seam (iff a vert owning 2 corresponding vt coordinates)
# establish the mapping between verts and vts
vert_vt_map = {}
init = -np.ones(verts.shape[0])
for fi in np.arange(fs.shape[0]):
v_id = fs[fi,:]
vt_id = vt_tuple[fi,:]
for ids in np.arange(3):
if init[v_id[ids]] < 0:
init[v_id[ids]] = vt_id[ids]
vert_vt_map[v_id[ids]] = [vt_id[ids]]
elif len(vert_vt_map[v_id[ids]]) == 1 and vert_vt_map[v_id[ids]] != vt_id[ids]:
tmp = vert_vt_map[v_id[ids]][0]
vert_vt_map[v_id[ids]] = [tmp, vt_id[ids]]
# add additional verts by duplicating these verts on the seam
verts_add = []
verts_add_id = {}
cnt = 0
verts_num = verts.shape[0]
for i in np.arange(verts.shape[0]):
if len(vert_vt_map[i]) == 2:
verts_add_id[i] = verts_num + cnt
verts_add.append( verts[i] )
cnt += 1
verts_new = np.vstack((verts,np.asarray(verts_add)))
# calculate the re-ordered faces ids
fs_new = fs
for fi in np.arange(fs.shape[0]):
v_id = fs[fi,:]
vt_id = vt_tuple[fi,:]
for ids in np.arange(3):
if len(vert_vt_map[v_id[ids]]) == 2 and vt_id[ids] == vert_vt_map[v_id[ids]][1]:
fs_new[fi,ids] = verts_add_id[v_id[ids]]
# re-order vts, such that verts_new and vts_new are 1-to-1 corresponding
vts_new = np.zeros(vt.shape)
for fi in np.arange(fs.shape[0]):
v_id = fs[fi,:]
vt_id = vt_tuple[fi,:]
for ids in np.arange(3):
vts_new[v_id[ids]] = vt[vt_id[ids]]
return verts_new, vts_new, fs_new
if __name__ == '__main__':
shirts_path = './models/shirts_simple.obj'
img_file = './models/up_dog.jpg'
tex = pv.read_texture(img_file)
#### Manually parse the OBJ file because meshio complains
raw_data = pd.read_csv(shirts_path, header=None, comment="#",
delim_whitespace=True, names=["type", "a", "b", "c"])
groups = raw_data.groupby("type")
v = groups.get_group("v")
f = groups.get_group("f")
vt = groups.get_group("vt")[["a", "b"]].values.astype(float)
vertices = v[["a", "b", "c"]].astype(float).values
fa = np.array([(int(x[0]), int(x[1]), int(x[2])) for x in f["a"].str.split("/")])
fb = np.array([(int(x[0]), int(x[1]), int(x[2])) for x in f["b"].str.split("/")])
fc = np.array([(int(x[0]), int(x[1]), int(x[2])) for x in f["c"].str.split("/")])
faces = np.c_[fa[:,0], fb[:,0], fc[:,0]] - 1 # subtract 1
vt_tuple = np.c_[fa[:,1], fb[:,1], fc[:,1]] - 1
#### End manual parsing
# find out the verts lying on the seam and modify the old shirts
verts_new, vts_new, fs_new = fusion_model(vertices, vt, faces, vt_tuple)
# Create the mesh
cells = np.c_[np.full(len(faces), 3), fs_new]
mesh = pv.PolyData(verts_new, cells)
mesh.t_coords = vts_new
# Plot it up, yo!
mesh.plot(texture=tex, notebook=0, cpos='xy', smooth_shading=True)
Well. There's a lot going on here. But if your goal is to have the visualization look like the image on the right in your above post, then you actually want to turn off lighting (think of this more of shadows) and not worrying about plotting with the normals at all.
p = pv.Plotter(window_size=(1032, 1032))
p.add_mesh(mesh, texture=tex, lighting=False)
p.set_background((19/255, 19/255, 36/255),
(130/255, 134/255, 243/255))
p.show(cpos='xy')
Though you bring up a good point/feature request. We should fix up the smooth shading option a bit more in PyVista to allow custom normals and not forcefully recompute them (though, often this recomputing is necessary)
Thanks~
Yes. By setting lighting=False
, the mesh looks more bright and the seam can be ignored.
Looking forward to the convenient features allowing custom normals.
Looking forward to the convenient features allowing custom normals
Would you be able to open a feature request in the main PyVista repo about this?
Also, is this issue resolved?
Sorry for my missing this email that was covered up with a mass of other emails ==
Would you be able to open a feature request in the main PyVista repo about this?
Also, is this issue resolved?
Shall I try to ''open a feature request in the main PyVista repo about this'' now ?
And I will check whether the issue about allowing custom normals is resolved.
Shall I try to ''open a feature request in the main PyVista repo about this'' now ?
That'd be great if you can, otherwise, we can keep this issue open to remind us to get around to it eventually
PyVista (and VTK to my knowledge) can only render textures by point-based UV coordinates. So, you need that
vt
array to map back to thev
vertices 1-to-1. Without knowing which vertices are repeated and the order ofvt
with respect to those, I can't think of a way to do this beside interpolating.Also, can you share a
pv.Report()
?meshio
very much complains about the mesh you shared for me.... so I wrote my own custom parser to demonstrate.Here is a way to do this by interpolating the cell texture coordinates to the vertices:
import pyvista as pv import numpy as np import pandas as pd shirts_path = './models/shirts_simple.obj' img_file = './models/up_dog.jpg' tex = pv.read_texture(img_file) #### Manually parse the OBJ file because meshio complains raw_data = pd.read_csv(shirts_path, header=None, comment="#", delim_whitespace=True, names=["type", "a", "b", "c"]) groups = raw_data.groupby("type") v = groups.get_group("v") f = groups.get_group("f") vt = groups.get_group("vt")[["a", "b"]].values.astype(float) vertices = v[["a", "b", "c"]].astype(float).values fa = np.array([(int(x[0]), int(x[1]), int(x[2])) for x in f["a"].str.split("/")]) fb = np.array([(int(x[0]), int(x[1]), int(x[2])) for x in f["b"].str.split("/")]) fc = np.array([(int(x[0]), int(x[1]), int(x[2])) for x in f["c"].str.split("/")]) faces = np.c_[fa[:,0], fb[:,0], fc[:,0]] - 1 # subtract 1 #### End manual parsing # Create the mesh cells = np.c_[np.full(len(faces), 3), faces] mesh = pv.PolyData(vertices, cells) # Generate the tcoords on the faces ctcoords = np.c_[fa[:,1], fb[:,1], fc[:,1]] - 1 # subtract 1 ui, vi = ctcoords[:,0], ctcoords[:,1] cuv = np.c_[vt[:,0][ui], vt[:,1][vi]] mesh.cell_arrays["Texture Coordinates"] = cuv # Interpolate the cell-based tcoords to the points remesh = mesh.cell_data_to_point_data() # Register the array as texture coords remesh.t_coords = remesh.point_arrays["Texture Coordinates"] # Plot it up, yo! remesh.plot(texture=tex, notebook=0)
And the texture renders on the mesh:
However, since the texture coordinates were interpolated, I suspect this is causing some distortion of the texture along the seam:
@banesullivan I want to map texture in almost the same way as you did here. but my obj file format is a bit different and I have no .mtl file and "vt" key in the pandas' data frame. I generate my obj file from Pifu-HD and want to texturize it from png file here is the obj file and segmented png file. Any suggestion to resolve this problem. Thanks
Description
Dear Pyvista-Team,
Thank you for your amazing contributions ! I have found a problem of applying textures with multi 2D uv maps:
I have an obj file in a standard Wavefront .obj format, looks like this:
mtllib upper.mtl v 0.087744 0.280746 0.026054 v 0.096368 0.290851 0.008842 v 0.092829 0.298936 0.000274 v 0.088663 0.290136 0.014576 v 0.088268 0.255024 0.054397 ...... vt 0.298072 0.661321 vt 0.300275 0.666815 vt 0.297550 0.665329 vt 0.295570 0.664305 vt 0.295251 0.660191 ...... g upper usemtl UPPER f 2039/1/2039 2/2/2 2042/3/2042 f 2042/3/2042 4/4/4 2041/5/2041 f 2041/5/2041 1/6/1 2039/1/2039 f 2039/1/2039 2042/3/2042 2041/5/2041 f 2042/3/2042 2/2/2 2040/7/2040 ......
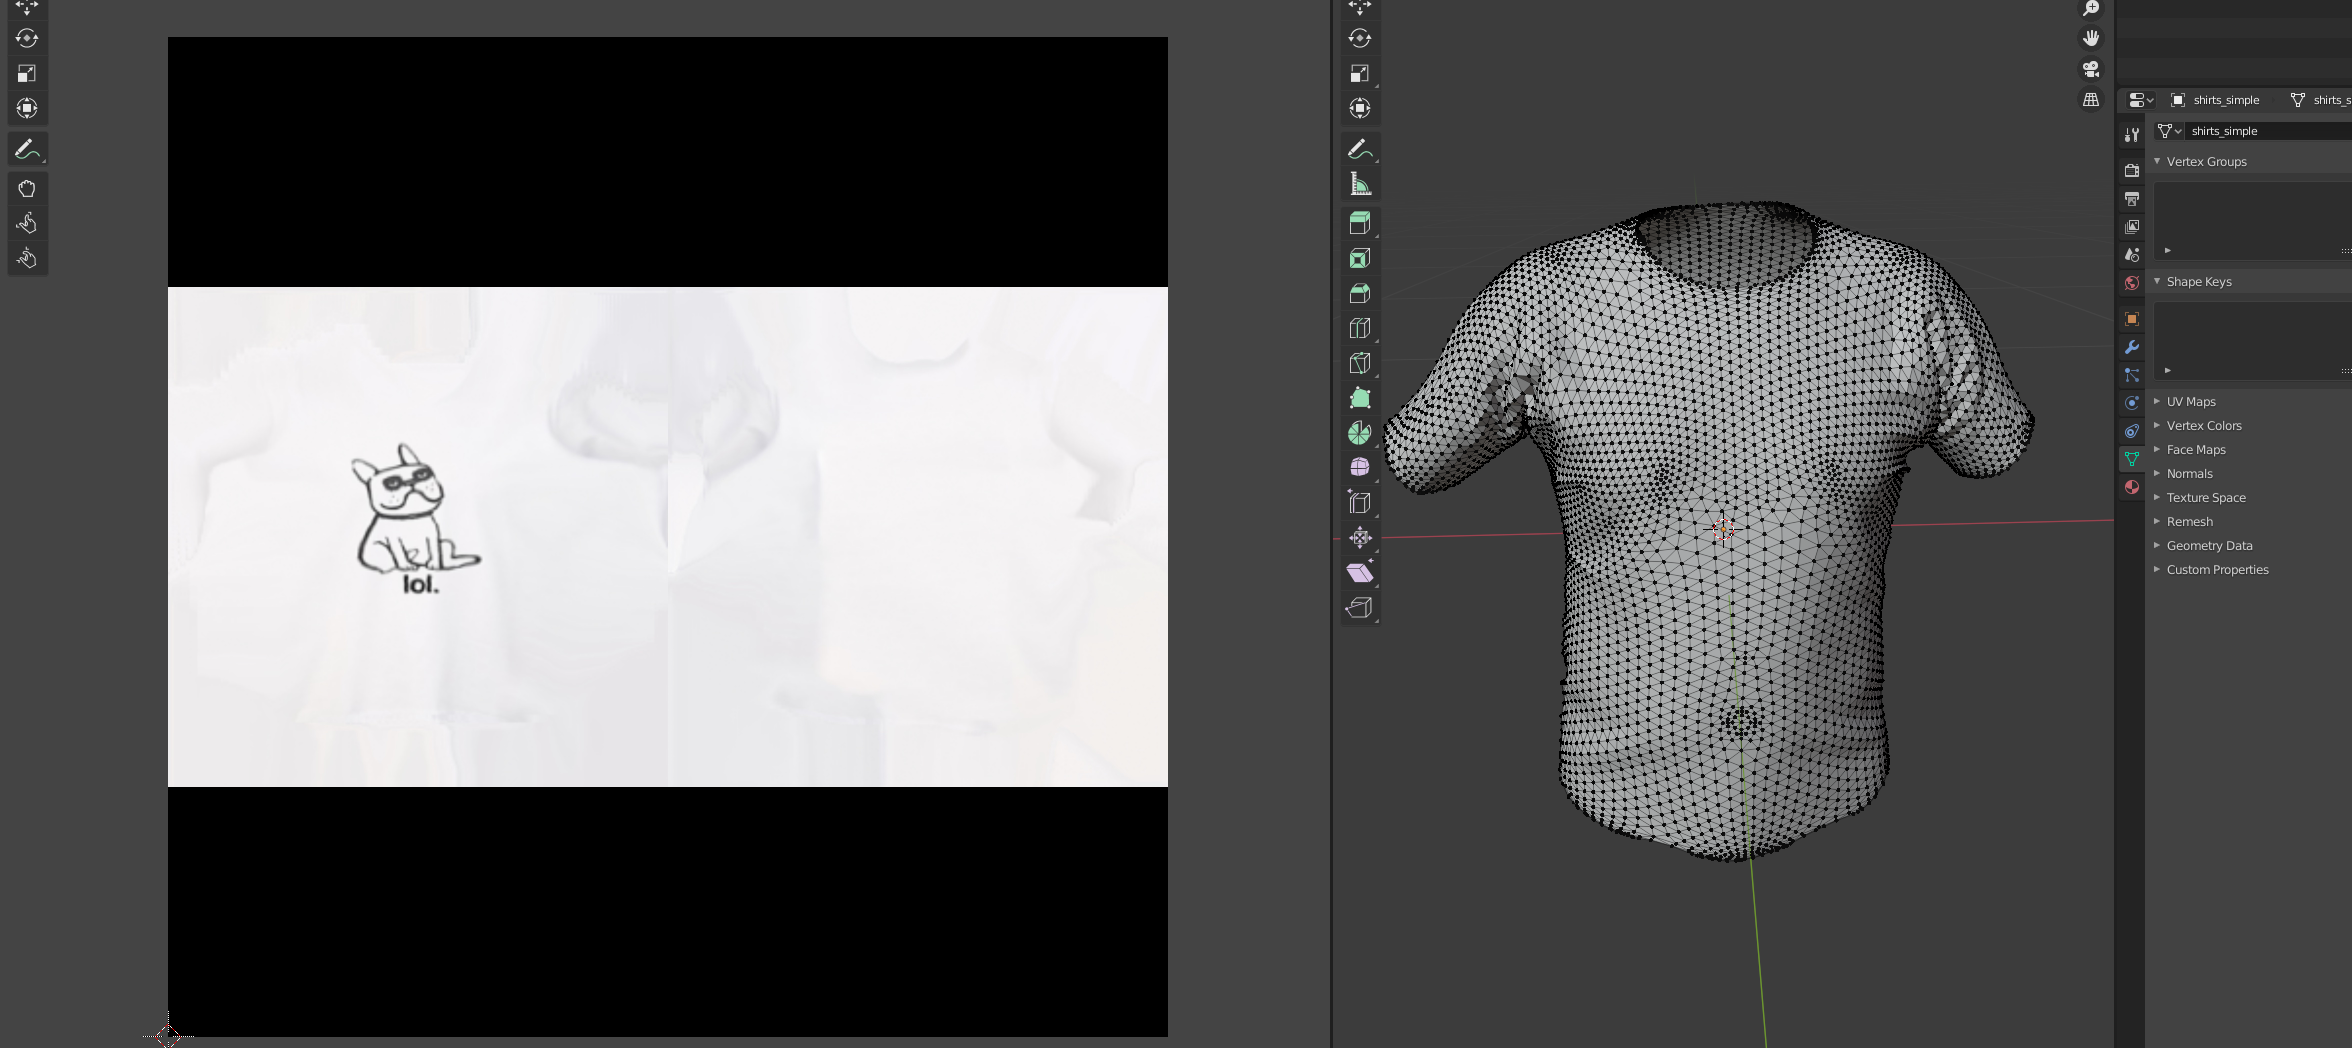
It has 8168 verts and 16116 faces. Since the uv map of this 3D object (in fact, it is a shirt) is divided into two parts, front and back, each vert lying on the seam between the front and back will have 2 corresponding uv parameters in the uv map; thus, it has 8399 uv parameters ( i.e., the field 'vt' is 8399x2), which is more than 8168. The shirts and its uv maps look like this, opened with blender 2.83,
In the .mtl file, I have attached an texture image,
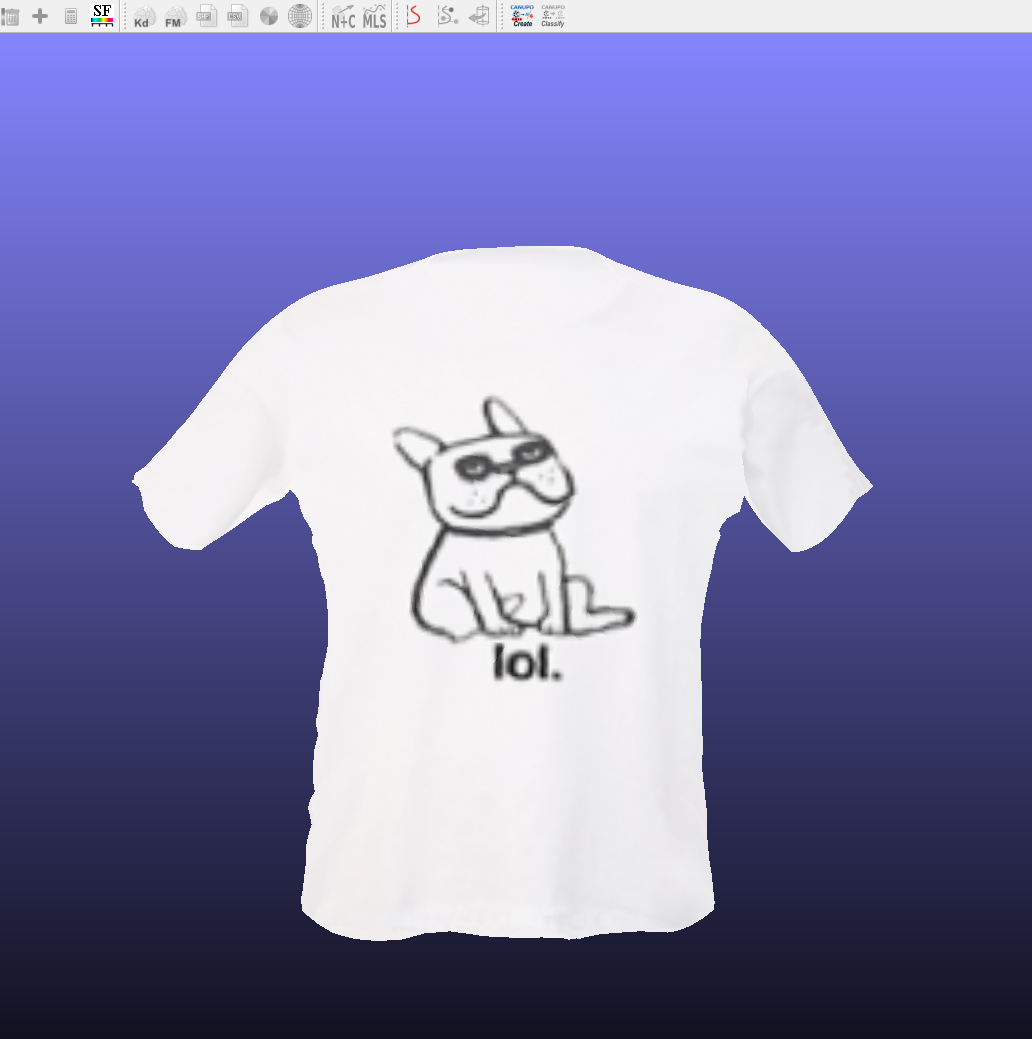
And then, I can open the whole obj file with texture image by some 3D tools, like CloudCompare,
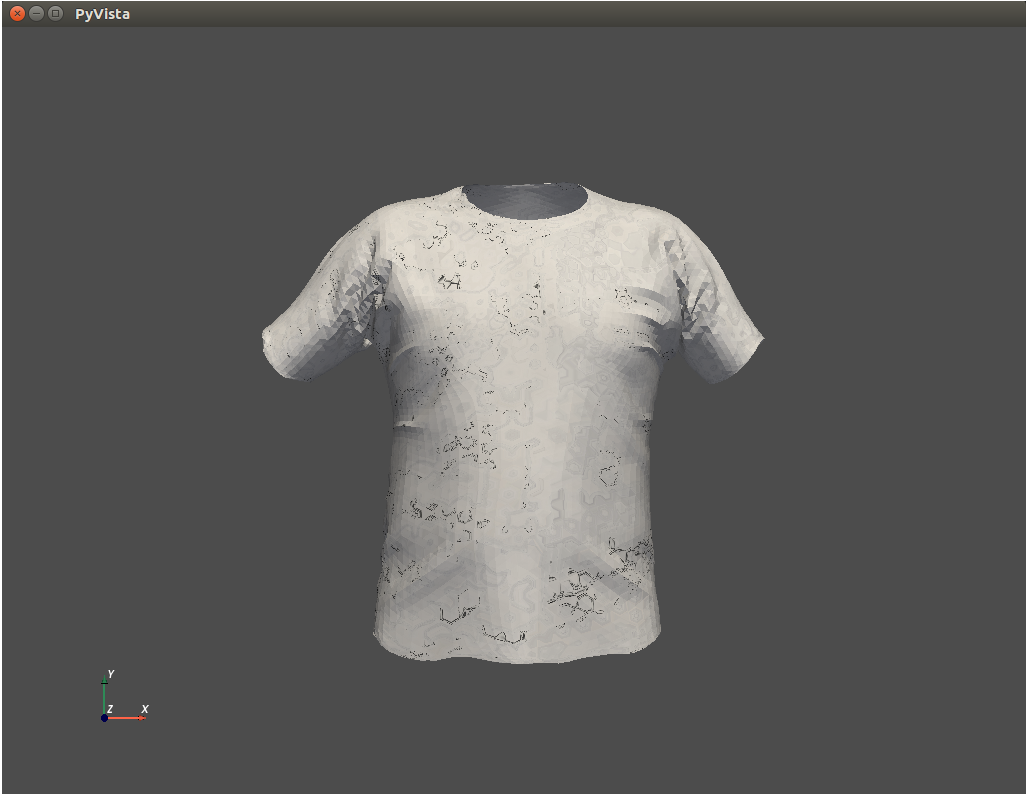
However, I can not use Pyvista to visualize it. I used python3.6 and Pyvista 0.25.3.
The output looks strange,
I guess there are two reasons resulting in this bad case, 1) the fields 'v' and 'vt' are not one-to-one corresponding, 2) the vert_ids and vt_ids are differently ordered in the filed 'f', for example, "f 2039/1/2039 2/2/2 2042/3/2042" means that the triangle face has vertex ids (2039, 2, 2042), while the vt ids are (1, 2, 3). When I use mesh=pyvista.read_meshio() to load the obj file, the mesh.cells only contains vert_ids, like (2039, 2, 2042), and the visulizer use these ids to render the texture image onto the obj model, rather than use the vt ids, like (1, 2, 3).
Example Data
I have uploaded the .obj/.mtl files and texture image in the models.zip folder. models.zip