Thank you for sharing this great work. I am using it for a custom segmentation model, It's performing really well.
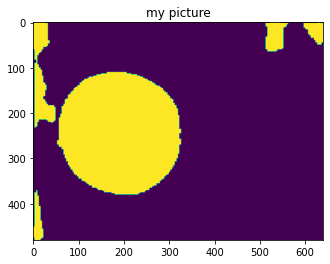
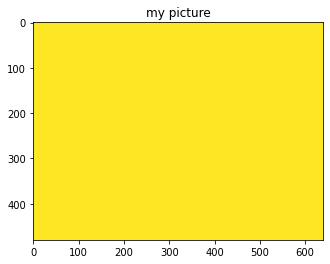
Now I tried to convert it to an onnx model by following #24 thread, after converting it, I tried to pass the same image from the onnx and PyTorch model and got the following results:
PyTorch output image:
Onnx output image:
can you please have a look at the jupyter notebook code and let me where I am lacking:
import torch
import glob
import os
import imutils
import sys
import cv2
import time
from argparse import ArgumentParser
from PIL import Image
import numpy as np
from torchvision.transforms import functional as F
from tqdm import tqdm
from matplotlib import pyplot as plt

from utilities.print_utils import *
from transforms.classification.data_transforms import MEAN, STD
from utilities.utils import model_parameters, compute_flops

from configs import segmentation_config as args # pass the args from pythoon config file

## get model
from data_loader.segmentation.custom_dataset_loader import CUSTOM_DATASET_CLASS_LIST
seg_classes = len(CUSTOM_DATASET_CLASS_LIST)  # ['background', 'object']

from model.segmentation.espnetv2 import espnetv2_seg
args.classes = seg_classes
model = espnetv2_seg(args)

num_params = model_parameters(model)
flops = compute_flops(model, input=torch.Tensor(1, 3, args.im_size[0], args.im_size[1]))
print_info_message('FLOPs for an input of size {}x{}: {:.2f} million'.format(args.im_size[0], args.im_size[1], flops))
print_info_message('# of parameters: {}'.format(num_params))

print_info_message('Loading model weights')
weight_dict = torch.load(args.weights_test, map_location=torch.device('cpu'))
model.load_state_dict(weight_dict)
print_info_message('Weight loaded successfully')

model = model.to(device="cpu")
model.eval()

## get image
rgb_image_path = "data/rep_rgb.jpg"
def data_transform(img, im_size):
    img = img.resize(im_size, Image.BILINEAR)
    img = F.to_tensor(img)  # convert to tensor (values between 0 and 1)
    img = F.normalize(img, MEAN, STD)  # normalize the tensor
    return img

image = cv2.imread(rgb_image_path)

im_size = tuple(args.im_size)

# get color map for pascal dataset
if args.dataset == 'pascal':
    from utilities.color_map import VOCColormap
    cmap = VOCColormap().get_color_map_voc()
else:
    cmap = None

image = Image.fromarray(cv2.cvtColor(image, cv2.COLOR_BGR2RGB))

w, h = image.size

img = data_transform(image, im_size)
img = img.unsqueeze(0)  # add a batch dimension
img = img.to("cpu")
img.shape        # torch.Size([1, 3, 384, 384])

# passed image from pytorch model
img_out = model(img)
img_out = img_out.squeeze(0)  # remove the batch dimension

# show pytorch model image
plt.imshow(img_out)
plt.title('my picture')
plt.show()

# +++++++++++++++++++++++++++++++++++++++++++++++++++++++++++
# converted PyTorch  model to onnx
PATH_ONNX = "deploy.onnx"
dummy_input = torch.randn(1, 3, 384, 384, device='cpu')

torch.onnx.export(model,
          dummy_input,
          PATH_ONNX,
          input_names = ['image'],
          output_names= ['output'],
          verbose=True,
          opset_version=11)

# load onnx model
onnx_path  = "deploy.onnx"
net = cv2.dnn.readNetFromONNX(onnx_path)

rgb_image_path = "data/rep_rgb.jpg"
s_image = cv2.imread(rgb_image_path)
s_image = cv2.cvtColor(s_image, cv2.COLOR_BGR2RGB)

blob = cv2.dnn.blobFromImage(s_image, 1.0 / 255, (384, 384), MEAN, swapRB=False, crop=False)

net.setInput(blob)
preds = net.forward()
onnx_image = torch.from_numpy(preds)
onnx_image = onnx_image.squeeze(0)
onnx_image.shape        #  torch.Size([2, 384, 384])

plt.imshow(onnx_image)
plt.title('my picture')
plt.show()
Hello Sachin,
Thank you for sharing this great work. I am using it for a custom segmentation model, It's performing really well. Now I tried to convert it to an onnx model by following #24 thread, after converting it, I tried to pass the same image from the onnx and PyTorch model and got the following results:
PyTorch output image:
Onnx output image:
can you please have a look at the jupyter notebook code and let me where I am lacking:
Thank you in advance.