 counselorbot[bot]
commented
2 years ago
counselorbot[bot]
commented
2 years ago ⚡️ You're ready for Serverless!
Move on to the next issue.

Closed counselorbot[bot] closed 2 years ago
counselorbot[bot]
commented
2 years ago Move on to the next issue.
counselorbot[bot]
commented
2 years ago Go ahead and merge this branch to main to move on. Great work finishing this section!

⚠️ If you receive a
Conflictserror, simply pressResolve conflictsand you should be good to merge!
Week 3 Step 2 ⬤⬤◯◯◯◯◯◯◯ | 🕐 Estimated completion: 10-20 minutes
Upload it!
This week, you will be going through steps to upload images to blob storage using Azure's SDK.
✅ Task:
test+ the correct file extensionBUNNIMAGE_ENDPOINT, add your blob url to your repository secrets with the nameblob_url.bunnimage/index.json thebunnimagebranch🚧 Test Your Work
To test your work, you'll be using Postman to send a POST request in Postman with an image in the body to your function url. You should see a response similar to the below:
❓ How do I attach an image to my POST request?
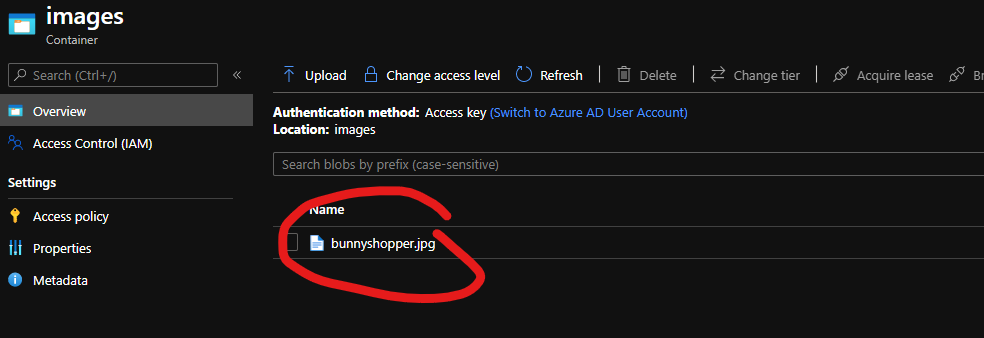
1. Get your `bunnimage` function url 2. Use Postman to make a POST request to your functional url 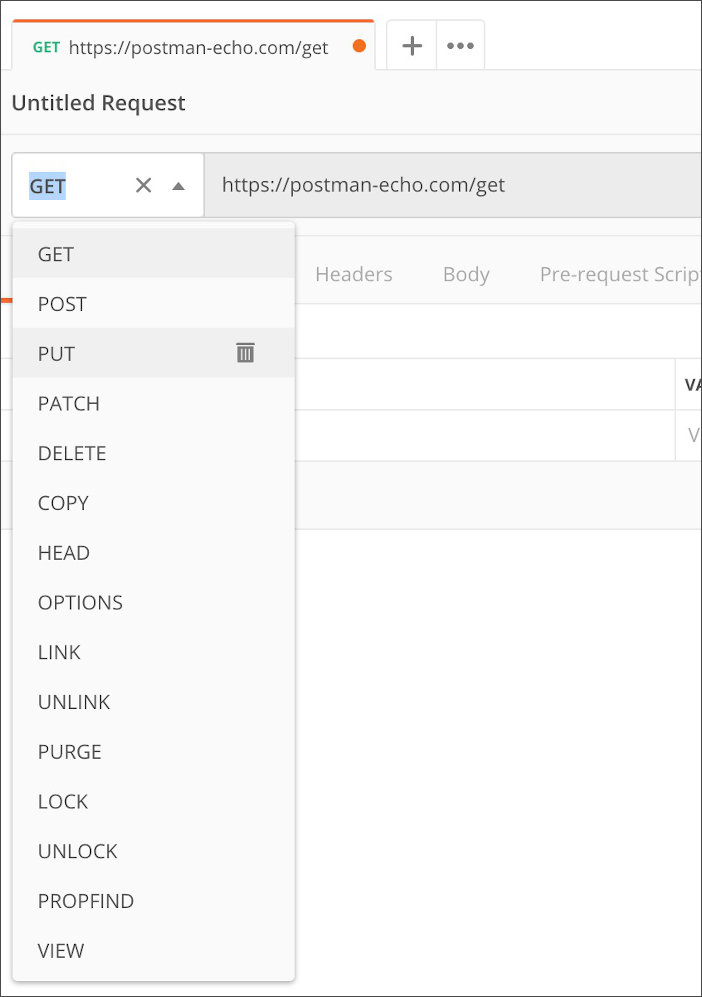 3. You will need to send body data with your request: - The Body tab in Postman allows you to specify the data you need to send with a request - You can send various different types of body data to suit your API - Website forms often send data to APIs as multipart/form-data - You can replicate this in Postman using the form-data Body tab - Be sure to check File instead of Text, since we'll be posting an image instead of a JSON object 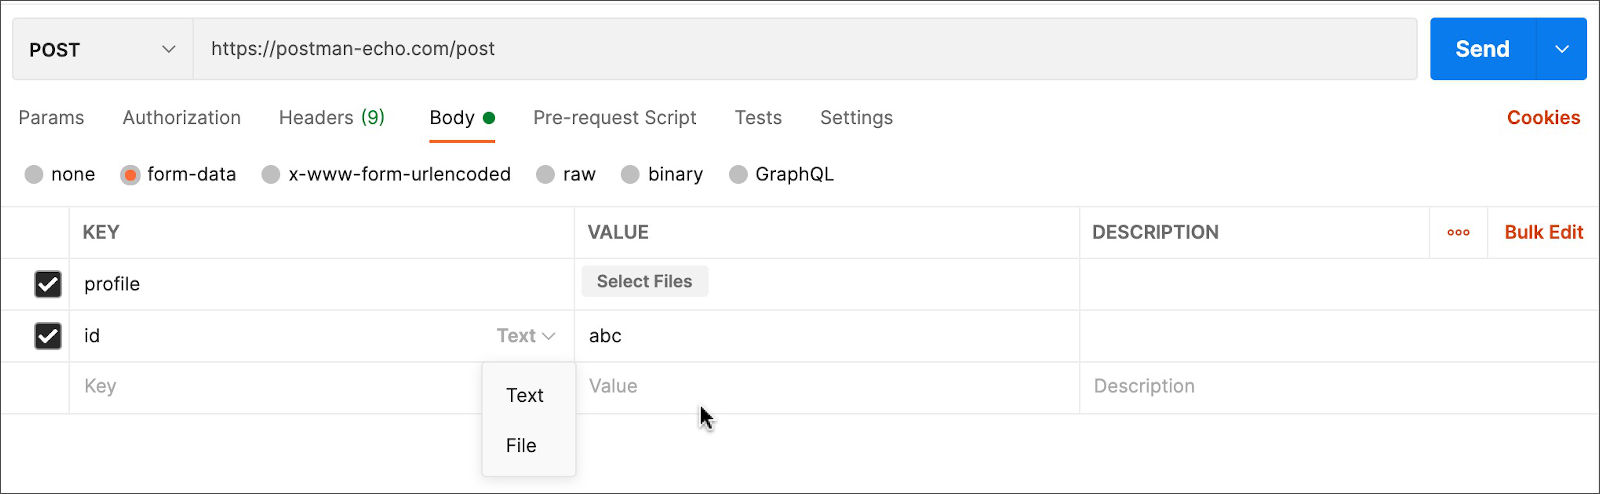❓ How do you check your blob storage container to see if the image is stored there?
Writing our First Azure Function to Upload an Image
❓ How do I initialize packages in code?
1. Use this [tutorial](https://docs.microsoft.com/en-us/azure/azure-functions/functions-how-to-use-azure-function-app-settings) to add in your own connection string from your storage container - The storage container is the one you created in step 1 - Navigate to the container and find your connection string 2. Add the following lines of code to the top of your index.js file: ```js const multipart = require("parse-multipart") const connectionString = process.env.AZURE_STORAGE_CONNECTION_STRING; const { BlobServiceClient } = require("@azure/storage-blob"); ``` - Take note of the `process.env` value being assigned to `connectionString`. `AZURE_STORAGE_CONNECTION_STRING` is the name of the environment variable.❓ How do I find my secret strings?
These are the same ones you added in your repository secrets in step 1. Here is a review:1: Reviewing
parse-multipartto receive an imageIn your main
module.exportsfunction, you'll want to use theparse-multipartlibrary to parse the image from the POST request. Then you'll determine the fle extension, and then upload the file using anuploadFile()function we'll write later on.❓ Can we review syntax for `parse-multipart`?
To parse a request's body, you can use the following lines of code: ```js const boundary = multipart.getBoundary(req.headers['content-type']); const body = req.body; const parsedBody = multipart.Parse(body, boundary); ```2: Uploading the image
Let's start out by writing the function we can call to upload an iamge.
⬇ Uploading the image blob to your container
Our
uploadFilefunction will be an asynchronous function that uses theBlobServiceClientto get a reference to the container, create a blob, and upload the data to that blob.❓ What should my parameters be?
The signature of your `uploadFile()` function should look something like: ```js async function uploadFile(parsedBody, ext) ```:question: How can I get a reference to the container?
```js const blobServiceClient = BlobServiceClient.fromConnectionString(connectionString); const containerName = "❓ How can I create a blob?
```js const blobName = 'test.' + ext; // Create the container const blockBlobClient = containerClient.getBlockBlobClient(blobName); // Get a block blob client ``` Based on previous code we've written and logic, fill in the blanks!❓ How can I upload data to the blob?
```js const uploadBlobResponse = await blockBlobClient.upload(parsedBody[0].data, parsedBody[0].data.length); ```Heading back to the
module.exportsmain function:exclamation: Name your image file as
test.pngortest.jpg(depending on the submitted file extension) in our code for testing purposes.❓ How can I determine file extension?
You can use a series of if-else statements like the ones below: ```js let filetype = parsedBody[0].type; if (filetype == "image/png") { ext = "png"; } else if (filetype == "image/jpeg") { ext = "jpeg"; } else if (filetype == "image/jpg") { ext = "jpg" } else { username = "invalidimage" ext = ""; } ```❓ How can I upload the file?
In this case, we'll just call the `uploadFile()` function that we wrote earlier. ```js let responseMessage = await uploadFile(parsedBody, ext); context.res = { body: responseMessage }; ```4: Add your Blob URL as a secret
You'll need to add your Blob URL to the github repository as a secret so we can test it! Name our secret to
blob_urland set it equal to your blob url, which should look like "https://bunnimagestorage.blob.core.windows.net". To find your url, simply place your storage account name in this template:📹 Walkthrough Video