Week 1 Step 2
Getting Started
Downloading an IDE
This week, you will be going through steps to set up tools needed to be successful in this camp. If you are already familiar with some, feel free to skip to the end and complete the task to move on.
Visual Studio Code
:computer: Download VSCode and install some extensions!
**Visual Studio Code (or VSCode) was downloaded from this link: https://code.visualstudio.com** Inside VSCode, you downloaded four extensions: **Azure Account, Azure App Service, Azure Functions, and Live Server.** All of the Azure extensions allow you to work on your Azure Function App in VS code instead of working directly through the Microsoft portal. Live Server is a quick and temporary testing server, and you can use it to test HTML pages. To launch, right click on your html file and press "Open with Live Server" or click "Go Live" in the bottom right corner:

:question: What is an IDE and why do we need it?
Before we start coding, we need to install an IDE. An IDE is a software application that provides comprehensive facilities to computer programmers for software development. An IDE normally consists of at least a source code editor, build automation tools, and a debugger. Although there are hundreds of IDEs to choose from, we are going to use Visual Studio Code due to its popularity and integration with Azure (via extensions and libraries).:exclamation: OK, how do I install it?
To install VSC, go to: https://code.visualstudio.com/download and choose your operating system (ie. Windows, Mac, Linux, etc). Then click **Download** and run the installer (usually a `.exe` or `.zip` file). After it's installed, open it up and try it out. If you need some help navigating VSC, check out this super helpful YouTube video.Make sure to use Dark Theme unless you want to live life on the edge...
:pencil: Task 2: Code and export a JavaScript function named hello that returns "Hello World" in a file named helloworld.js. Commit the file to the root directory of a new branch called week1.
:exclamation: Why and how do I export a function?
JavaScript enables the ability to [export functions](https://developer.mozilla.org/en-US/docs/web/javascript/reference/statements/export) in a program so that you can access them in other parts of the program via the import statement. In this case, we want to export your programs in order to run them across the testing code. Let's say your function name is `hello`. To export it, add this line of code at the very bottom of your file outside of your function: `module.exports = hello`. Example: ```js function hello() { // your code } module.exports = hello ``` When you commit the file, we will try to run the function by importing it and compare it's output to the expected output like so: ```js let hello = require('../../helloworld.js') let output = hello() ``` #### How does this apply to code in the real world? Just like you can import code from modules other people have written, you can also **import functions you wrote from *other files* to reuse them.** In function oriented programming, you use functions over and over again to save code. If you want to use the function `hello()` in another file, you would need to import it.:exclamation: Can I have more detailed steps?
1. Create a new file 2. Name the file helloworld.js 3. Write your code 4. If you have node installed on your computer, open terminal on VS Code and type 'node helloworld.js' 5. If you have not installed node on your computer, you will need to do that first: https://nodejs.org/en/download/ 6. Tip: to test your function, call it in your code. 7. Create a new branch named `week1` and commit your `helloworld.js` file in the root directory.:camping: Make sure you export the function, and commit helloworld.js to the root directory of a new branch week1 in this repository to move on!
Note: From now on, you will never need to close an issue. The Counselor will do that for you, create new issues, and new comments for further instructions!

 2. Choose “Function App” (it should be in the list of popular resources, with the lightning logo, but you should also be able to search it in the marketplace)
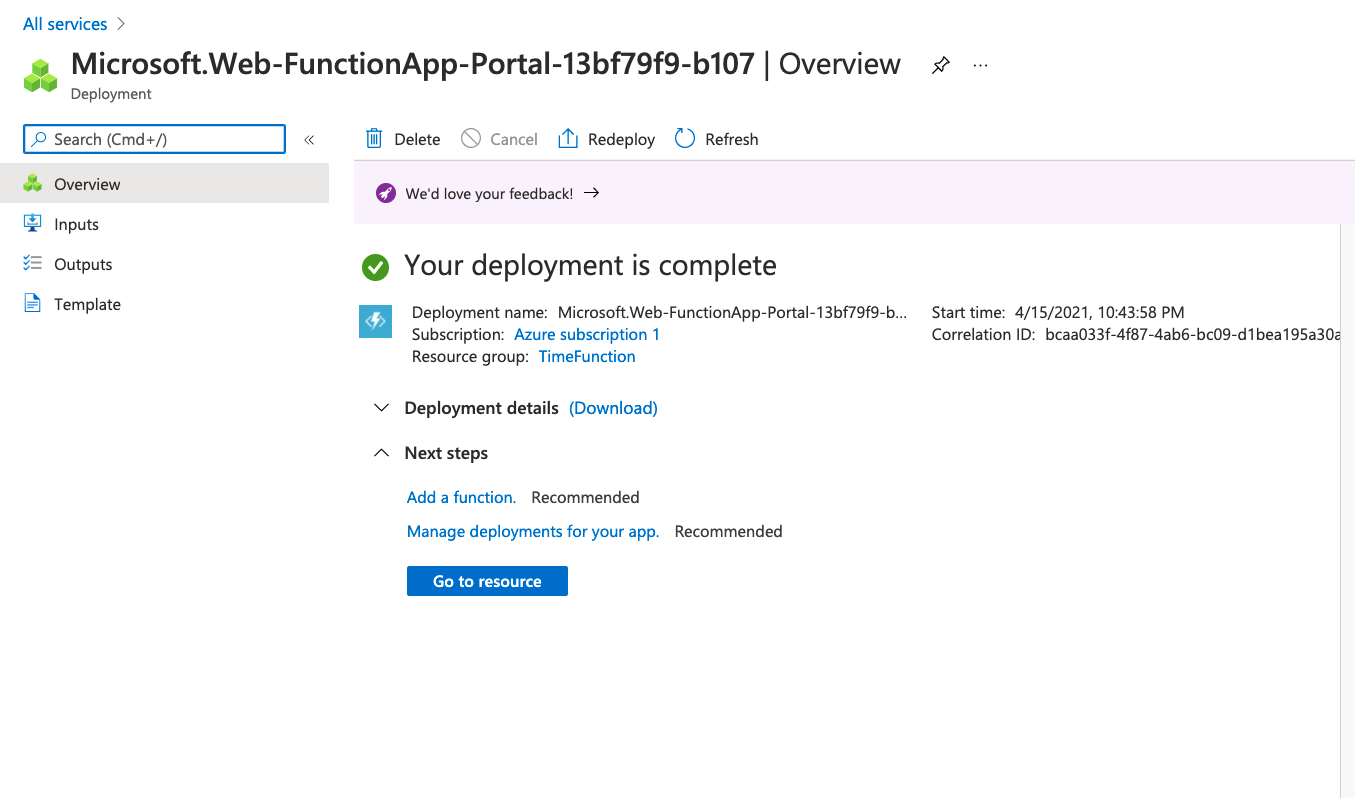
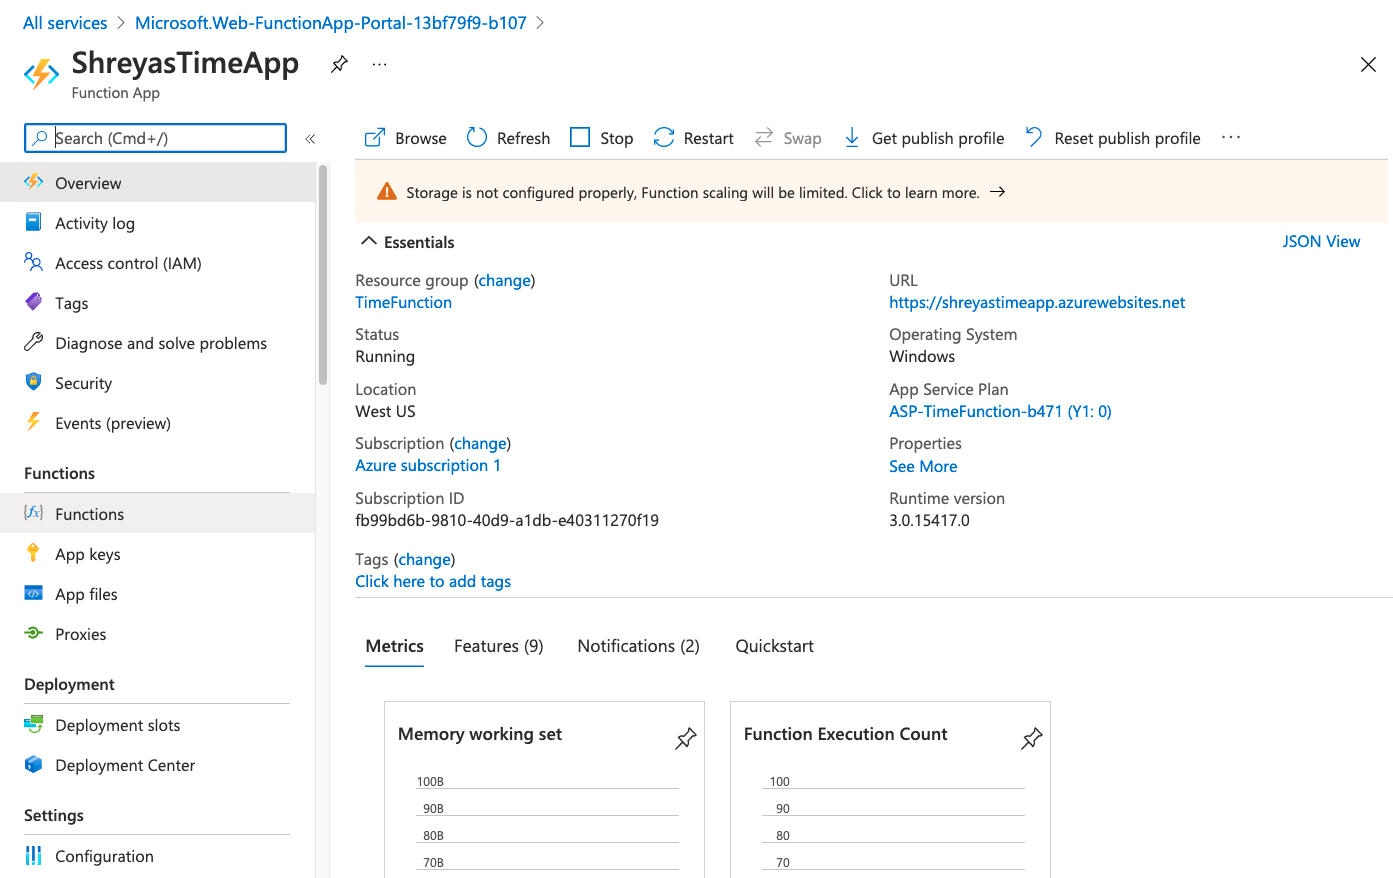
 3. Create a new resource group, with a unique resource name (related to what your app does e.g. "TimeFunction"). Add a unique Function App name as well (e.g. "ShreyasTimeApp").
4. Make sure the "Code" button is selected next to Publish, the Runtime stack is Node.js, and the Version selected is 12 LTS
 5. Select your region
6. All of the other tabs in this step should be correctly filled (you can double-check them if you want), so you should be ready to click "Review+Create" and then “Create”
7. Deploying may take a few minutes – be patient! Once the function is deployed, open it.

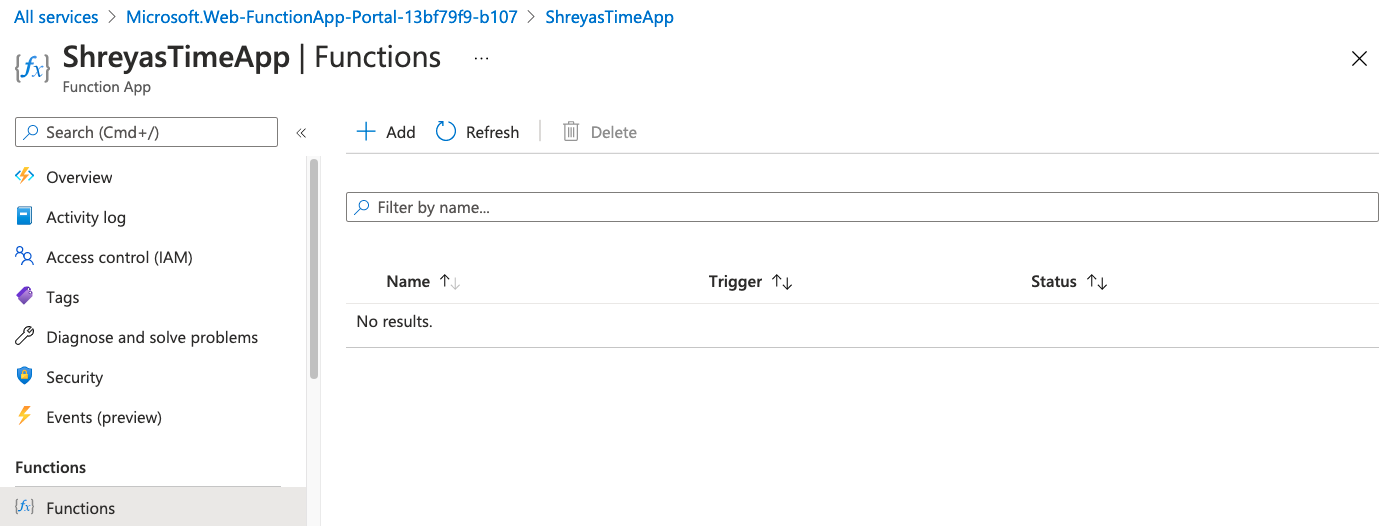
9. Go to the “Functions” tap on the left (with symbol {fx}).

10. Click “Add” on this page, and then search “HTTP trigger” (in the side window that opens)

12. Click “Add” (at the bottom of the side window) – creating this HTTP trigger may take a few seconds, so remember: patience!
5. Select your region
6. All of the other tabs in this step should be correctly filled (you can double-check them if you want), so you should be ready to click "Review+Create" and then “Create”
7. Deploying may take a few minutes – be patient! Once the function is deployed, open it.

9. Go to the “Functions” tap on the left (with symbol {fx}).

10. Click “Add” on this page, and then search “HTTP trigger” (in the side window that opens)

12. Click “Add” (at the bottom of the side window) – creating this HTTP trigger may take a few seconds, so remember: patience!
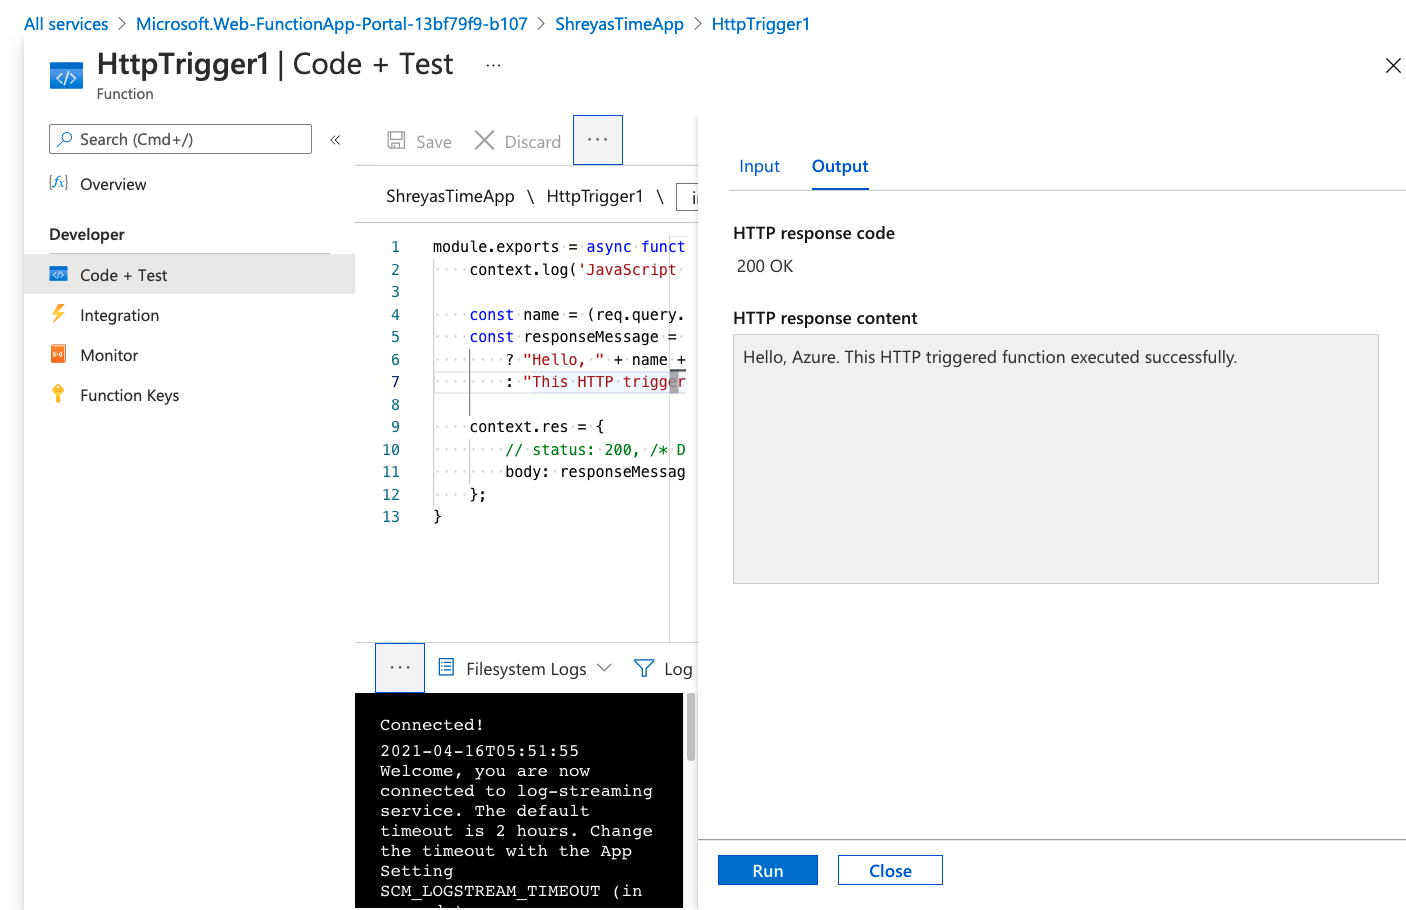
 11. Once this trigger is created, it should automatically open. Click the “Code + Test” tab on the left side, and you should be able to see and edit the code.
 12. Click “Save” and “Refresh” (in that order, and refresh only once the trigger has completely saved) when you have finished writing your code (or in between – it never hurts).
13. Click “Test/Run” once you are ready to try out your new trigger function. If it all works smoothly, and the code has no errors, you should receive an output that says "Hello, Azure. This HTTP triggered function executed successfully."

12. Click “Save” and “Refresh” (in that order, and refresh only once the trigger has completely saved) when you have finished writing your code (or in between – it never hurts).
13. Click “Test/Run” once you are ready to try out your new trigger function. If it all works smoothly, and the code has no errors, you should receive an output that says "Hello, Azure. This HTTP triggered function executed successfully."

 2. Run the function and check the HTTP response content - make sure that the output now contains your name.
 3. Next, let's try to use the body to change the name. In the input body, change "Azure" to another name (a different name) in double quotes and run the function. You should notice that the output still contains the first name you provided. Check out the code and see if you can figure out why this is.
 Try editing this function on your own! *(Don't forget to save when you make changes!)*

Learning GitHub
This week, you will be going through steps to set up tools needed to be successful in this camp. If you are already familiar with some, feel free to skip to the end and complete the task to move on.
GitHub
:question: What is Github?
GitHub is a platform that is widely used in the tech industry, that enables code hosting and makes collaboration for coding a seamless process. You can use GitHub to manage your files, changes in your project, version control (the ability to revert back to previous versions of your code as well as versions developed by other programmers), and more. [Get started with GitHub](https://guides.github.com/activities/hello-world/)Check out "The Github Flow" for more information on issues, pull requests, committing, and branches!
:question: Help! How does Github work?
:question: What is a Repo?
Repositories (or repos) are essentially **folders where you can store files of code.** The repo of our camp was duplicated into your account when you clicked "Create Template" so that you can commit changes and complete each lesson. For our camp, each week is placed inside an issue. Only when you complete the week (committing the necessary code and commenting), will the issue close and you can move on to the next issue. Don’t worry – committing changes is easier than it sounds.:exclamation: How can I use GitHub Desktop to commit my code?
1. Download GitHub desktop. This is one way you can commit changes to the cabin repo to complete each lesson here. 2. To have access to the cabin repository on GitHub desktop, the name of your repo needs to be entered in the top-left corner in the box with placeholder “Filter” and “Clone Repository” should be selected.:exclamation: Help! I don't know how to use it and I need more information.
If you want to learn more about what it is and how to use it, try taking this GitHub Learning Lab Course. After finishing it, you will have a strong understanding of all the features GitHub has to offer.One very important rule... Don't work on your code in the web editor. This is bad practice, and you will regret it later.
:question: What should I do instead?
Install Github Desktop and commit from your local computer. We'll go over code editors next if you don't have one to work on your code locally. You can also use git on your commandline.:pencil: Task 1: Create a new branch named
test, add a sentence introducing yourself to the end of the README.md file, and commit the change totest. Then, make a pull request to your main branch and merge the edits.Pull Request Guidelines
Adding self introductionKey functions you should be familiar with after this task include:
:camping: To move on, make sure you commit the change and merge the branch!