 IdolCrasher
commented
11 years ago
IdolCrasher
commented
11 years ago Here is the config I used in 0.9.3
generated by Slic3r 0.9.3 on Sun Sep 30 09:04:25 2012
acceleration = 0 bed_size = 140,140 bed_temperature = 70 bridge_fan_speed = 100 bridge_flow_ratio = 1 bridge_speed = 60 brim_width = 3.15 complete_objects = 0 cooling = 1 disable_fan_first_layers = 1 duplicate = 1 duplicate_distance = 6 duplicate_grid = 1,1 end_gcode = M104 S0 ; turn off hot end\nM190 S0; turn off heated bed external_perimeter_speed = 10 extra_perimeters = 1 extruder_clearance_height = 20 extruder_clearance_radius = 20 extruder_offset = 0x0 extrusion_axis = E extrusion_multiplier = .913462 extrusion_width = .36 fan_always_on = 1 fan_below_layer_time = 720 filament_diameter = 1.7 fill_angle = 45 fill_density = 0.15 fill_pattern = honeycomb first_layer_bed_temperature = 80 first_layer_extrusion_width = .63 first_layer_height = 0.35 first_layer_speed = 30% first_layer_temperature = 210 g0 = 0 gcode_arcs = 0 gcode_comments = 1 gcode_flavor = reprap infill_acceleration = 50 infill_every_layers = 1 infill_extruder = 1 infill_extrusion_width = 0 infill_speed = 60 layer_gcode = layer_height = 0.20 max_fan_speed = 100 min_fan_speed = 100 min_print_speed = 10 notes = nozzle_diameter = 0.35 only_retract_when_crossing_perimeters = output_filename_format = [input_filename_base].gcode perimeter_acceleration = 25 perimeter_extruder = 1 perimeter_extrusion_width = 0 perimeter_speed = 30 perimeters = 1 post_process = print_center = 70,70 randomize_start = 1 retract_before_travel = 2 retract_length = 2 retract_length_toolchange = 3 retract_lift = .4 retract_restart_extra = 0 retract_restart_extra_toolchange = 0 retract_speed = 30 rotate = 0 scale = 1 skirt_distance = 10 skirt_height = 1 skirts = 1 slowdown_below_layer_time = 20 small_perimeter_speed = 20 solid_fill_pattern = rectilinear solid_infill_below_area = 70 solid_infill_every_layers = 0 solid_infill_speed = 40 solid_layers = 4 start_gcode = G28 ; home all axes support_material = 0 support_material_angle = 0 support_material_extruder = 1 support_material_extrusion_width = 0 support_material_pattern = honeycomb support_material_spacing = 2.5 support_material_threshold = 45 temperature = 185 threads = 2 top_solid_infill_speed = 30 travel_speed = 130 use_relative_e_distances = 0 z_offset = 0
 alranel
 theodeyle
 avalero
 mesheldrake
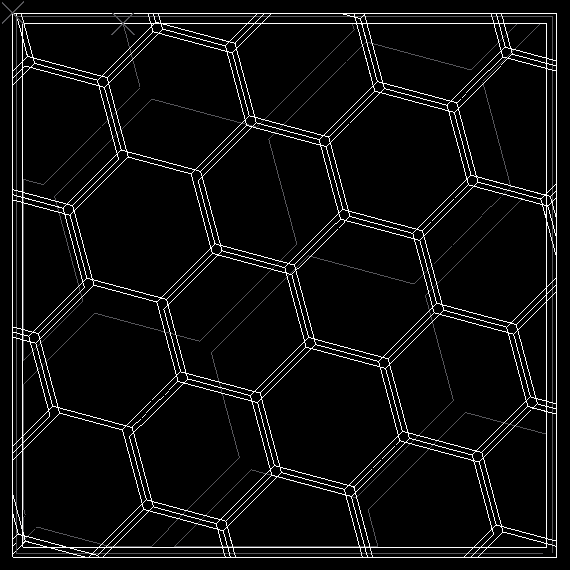


Good Day,
I have had the opportunity now to print a few objects with version 0.9.3, and have noticed a fairly significant drop in print quality.
Printed items now have a significant amount of banding. I have now proved this banding was a result of flaws in the G-Code produced by version 0.9.3
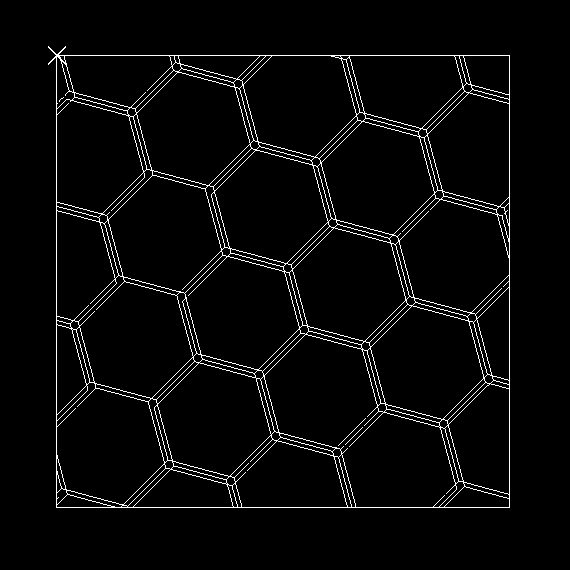
I sliced a 20mm calibration cube in both version 0.9.1 and version 0.9.3 and visualized that G-Code in Repetier.
This banding is visible in the 3D representations of the G-Code produced by 0.9.3.
The G-Code made by version 0.9.1 is silky smooth.
V. 0.9.3 Side View
V. 0.9.1 Side View
V. 0.9.3 Angle View
V. 0.9.1 Angle View
Left 9.1, Right 9.3
Version 0.9.3 also lefts gaps between infill and perimeters that 0.9.1 successfully filled in smoothly.
Top 9.3, Bottom 9.1
I am ready to provide G-Code and STLs for any of these scenarios on request.