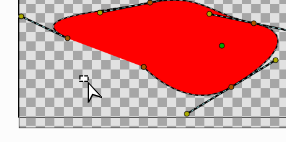
In some of those cursors you drew, I'm not sure where's its hot spot.
https://docs.microsoft.com/en-us/windows/win32/menurc/about-cursors#the-hot-spot https://www.axialis.com/tutorials/what-is-a-cursor.html http://www.rw-designer.com/hot-spot
Open Agnyy opened 4 years ago
In some of those cursors you drew, I'm not sure where's its hot spot.
https://docs.microsoft.com/en-us/windows/win32/menurc/about-cursors#the-hot-spot https://www.axialis.com/tutorials/what-is-a-cursor.html http://www.rw-designer.com/hot-spot
In some of those cursors you drew, I'm not sure where's its hot spot.
https://docs.microsoft.com/en-us/windows/win32/menurc/about-cursors#the-hot-spot https://www.axialis.com/tutorials/what-is-a-cursor.html http://www.rw-designer.com/hot-spot
It seems it is basically the tip of the cursor.
In some of those cursors you drew, I'm not sure where's its hot spot.
If I understood correctly, then like this.

Or so

Good and clear cursors are very necessary for the convenience of using the program. This affects the feel of the animation and its relationship to it. It's like a kickback for weapons in computer games. I drew the main cursors.
Coursor (2).zip
And now an explanation of the icons.
If you don’t have anything highlighted, it’s just an icon.
This mode is activated when points for selection appear.
Now it’s very difficult to understand when you need to move points. Now, when you point the tool at points on the tool, the cursor changes.
The same system for the rest of the tools. Scale Tool, Rotation Tool, Mirror Tool.
These icons now look like the first tool. Such a system was created for a reason, so it will be easier for newcomers to understand the purpose of the tools. Personally, I had to spend some time to understand why they are needed at all, but such cursors simplify understanding.
Cursors for spline tool and polygon tool. 8.1 Start drawing mode. 8.2 In the process of drawing. 8.3 Circuit closure. 8.4 add point (vertex)
Add Vertex (Trasform Tool)
Just a cross cursor. Which is now used very often. Just an updated version.
The first cursor is all clear. And the second is intended to continue the line drawing.
Cursor for sketch tool.
Cursor for Cutout Tool