visualapproach / WiFi-remote-for-Bestway-Lay-Z-SPA

Hack - ESP8266 as WiFi remote control for Bestway Lay-Z spa Helsinki
GNU General Public License v3.0
297 stars 74 forks source link

Support for 2021 units #54

Closed duststorm closed 9 months ago

duststorm commented 3 years ago

Hi,

It seems that many of the new 2021 models Lay-Z spa come with a new heating/pumping unit.

I don't know what its internals look like, but it looks like this on the outside. image image

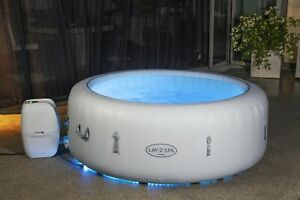
Has anyone already experience with these? I'd love to have a look inside, and know whether they are easily compatible.

dwoosnam commented 3 years ago

A Look inside the 2021 pump

So Remember, this is the 2021 pump that's boxier in shape compared to the egg pump.

20210326_101927

Things seem a lot more compact inside compared to the egg shape pump. 20210326_101951

The 6 pin contacts 20210326_102444

Coloured cables are display side, white with red are pump side. 20210326_102539

I opened up the touch display and checked the connections, and it seems like my 5v and GND should match up (my red and orange in the next pic. 20210326_165135

dwoosnam commented 3 years ago

[Following on from Discussion/Chat - EDITED]

Getting so close with my 2021 "Cube" pump.

I am currently using this LLC - https://amzn.to/3sNUL8S LLC

I have connected VA and OE on the LLC to 3.3v on the NodeMCU and after a short while (I imagine the NodeMCU boot time?) now have display (which scrolls "hello") and functionality of the buttons via the pump control panel!

The function of the pump control panel buttons works as intended. - although slightly delayed Bubbles = Bubbles Heater = Heater Pump = Pump C/F = Unit Toggle switches back and forth (can we make C the default?) Etc....

When using the control panel buttons on the pump, the web interface reacts accordingly. PUMP buttons >>> Web Interface actions Bubbles = Bubble toggle switches on and turns green Heater = Heater toggle turns on C/F = Unit (c/f) toggle switches accordingly

However, manually changing the toggles from the web interface causes some unusual effects.

WEB Interface control >>> PUMP actions Unit (F/C) = Toggles the heater Bubbles = Toggles the timer button Pump = Toggles the pump/filter (yay!) Heater = Toggles the bubbles

Again, any helpful hints would be most welcomed.

visualapproach commented 3 years ago

Do you have latest version on both the code AND the webpages uploaded to the ESP?

dwoosnam commented 3 years ago

As far as I'm aware (n00b here).

I copied the BWC_v2.0.0 folder into my Arduino/libraries folder. I'm then using the MQTT image to flash.

visualapproach commented 3 years ago

Just to be sure, with the example .ino open, upload the data also:

image

If it is still the same, do this in Chrome browser:

go to page YOUR_ESP_IP/WebSocket.js Copy the page and paste in a new comment in this issue.

dwoosnam commented 3 years ago

I remember doing the first part as the website was just giving me a 404 when I tried before doing that.

//
var connection;
connect();

function connect(){
    connection = new WebSocket('ws://'+location.hostname+':81/', ['arduino']);
    connection.onopen = function () { 
        document.getElementById('header').style = "background-color: #00508F";
    };
    connection.onerror = function (error) {
        console.log('WebSocket Error ', error);
        document.getElementById('header').style = "background-color: #FF0000";
        connection.close();
    };
    connection.onclose = function(){
        console.log('WebSocket connection closed, reconnecting in 5 s');
        document.getElementById('header').style = "background-color: #FF0000";
        setTimeout(function() {
            connect();}, 5000);
    };  
    connection.onmessage = function(e){
        handlemsg(e);}
} 

String.prototype.pad = function(String, len) { 
                var str = this; 
                while (str.length < len) 
                    str = String + str; 
                return str; 
            }

function handlemsg(e) {  
    var msgobj = JSON.parse(e.data);
    var mycolor;
    console.log(msgobj);

/*     
    doc["LCK"] = _cio.states[LOCKEDSTATE];
    doc["PWR"] = _cio.states[POWERSTATE];
    doc["UNT"] = _cio.states[UNITSTATE];
    doc["AIR"] = _cio.states[BUBBLESSTATE];
    doc["GRN"] = _cio.states[HEATGRNSTATE];
    doc["RED"] = _cio.states[HEATREDSTATE];
    doc["FLT"] = _cio.states[PUMPSTATE];
    doc["TGT"] = _cio.states[TARGET];
    doc["TMP"] = _cio.states[TEMPERATURE];
    doc["CH1"] = _cio.states[CHAR1];
    doc["CH2"] = _cio.states[CHAR2];
    doc["CH3"] = _cio.states[CHAR3]; */
    if(msgobj.CONTENT == "OTHER"){
        //if(msgobj.MQTT){
            document.getElementById('mqtt').innerHTML = "MQTT:" + msgobj.MQTT.toString();
        //}
    }
    if(msgobj.CONTENT == "STATES"){
        document.getElementById('atlabel').innerHTML = msgobj.TMP.toString();
        document.getElementById('ttlabel').innerHTML = msgobj.TGT.toString();
        var element = document.getElementById('temp');
        if (element.value == 0) element.value = msgobj.TGT;
        document.getElementById('sliderlabel').innerHTML = element.value.toString();
        document.getElementById('AIR').checked = msgobj.AIR;
        document.getElementById('UNT').checked = msgobj.UNT;
        if(msgobj.RED) {
            mycolor = "background-color: #FF0000";
            }
        else {
            mycolor = "background-color: #00FF00";
        }
        if(!(msgobj.RED || msgobj.GRN)) mycolor = "background-color: #CCC";

        document.getElementById('HTR').checked = msgobj.RED || msgobj.GRN;
        document.getElementById('htrspan').style = mycolor;
        document.getElementById('FLT').checked = msgobj.FLT;
        if(document.getElementById('UNT').checked){
            document.getElementById('temp').min = 20;
            document.getElementById('temp').max = 40;
        } else {
            document.getElementById('temp').min = 68;
            document.getElementById('temp').max = 104;
        }
        document.getElementById('dsp').innerHTML = "[" + String.fromCharCode(msgobj.CH1,msgobj.CH2,msgobj.CH3)+ "]";
    }
    if(msgobj.CONTENT == "TIMES"){
        var date = new Date(msgobj.TIME * 1000);
        document.getElementById('time').innerHTML = date.toLocaleString();

        var d = (Date.now()/1000-msgobj.CLTIME)/(24*3600.0);
        if(d > msgobj.CLINT) {
            mycolor = "background-color:#"+"900";
        } else {
            mycolor = "background-color:#"+"999";
        }
        document.getElementById('cltimer').innerHTML = d.toFixed(2);
        document.getElementById('cltimerbtn').style = mycolor;

        var df = (Date.now()/1000-msgobj.FTIME)/(24*3600.0);
        if(df > msgobj.FINT) {
            mycolor = "background-color:#"+"900";
        } else {
            mycolor = "background-color:#"+"999";
        }
        document.getElementById('ftimer').innerHTML = df.toFixed(2);
        document.getElementById('ftimerbtn').style = mycolor;

        document.getElementById('heatingtime').innerHTML = s2dhms(msgobj.HEATINGTIME);          
        document.getElementById('uptime').innerHTML = s2dhms(msgobj.UPTIME);        
        document.getElementById('airtime').innerHTML = s2dhms(msgobj.AIRTIME);      
        document.getElementById('filtertime').innerHTML = s2dhms(msgobj.PUMPTIME);      
        document.getElementById('cost').innerHTML = (msgobj.COST).toFixed(2);       
    }

};

function s2dhms(val) {
    var day = 3600*24;
    var hour = 3600;
    var minute = 60;
    var rem;
    var days = Math.floor(val/day);
    rem = val % day;
    var hours = Math.floor(rem/hour);
    rem = val % hour;
    var minutes = Math.floor(rem/minute);
    rem = val % minute;
    var seconds = Math.floor(rem);
    return days + "d " + hours.toString().pad("0", 2) + ":" + minutes.toString().pad("0", 2) + ":" + seconds.toString().pad("0", 2);
}

const settarget = 0;
const setunit = 1;
const setbubbles = 2;
const setheat = 3;
const setpump = 4;
const resetq = 5;
const rebootesp = 6;
const gettarget = 7;
const resettimes = 8;
const resetcltimer = 9;
const resetftimer = 10;

function air() {
    var sendobj = {};
    sendobj["CMD"] = setbubbles;
    sendobj["VALUE"] = document.getElementById('AIR').checked;
    sendobj["XTIME"] = Math.floor(Date.now()/1000);
    sendobj["INTERVAL"] = 0;
    connection.send(JSON.stringify(sendobj));
    console.log(JSON.stringify(sendobj));
}
function unt() {
    var sendobj = {};
    sendobj["CMD"] = setunit;
    sendobj["VALUE"] = document.getElementById('UNT').checked;
    sendobj["XTIME"] = Math.floor(Date.now()/1000);
    sendobj["INTERVAL"] = 0;
    connection.send(JSON.stringify(sendobj));
    console.log(JSON.stringify(sendobj));
}
function htr() {
    var sendobj = {};
    sendobj["CMD"] = setheat;
    sendobj["VALUE"] = document.getElementById('HTR').checked;
    sendobj["XTIME"] = Math.floor(Date.now()/1000);
    sendobj["INTERVAL"] = 0;
    connection.send(JSON.stringify(sendobj));
    console.log(JSON.stringify(sendobj));
}
function flt() {
    var sendobj = {};
    sendobj["CMD"] = setpump;
    sendobj["VALUE"] = document.getElementById('FLT').checked;
    sendobj["XTIME"] = Math.floor(Date.now()/1000);
    sendobj["INTERVAL"] = 0;
    connection.send(JSON.stringify(sendobj));
    console.log(JSON.stringify(sendobj));
}

function tempchange() {
    var sendobj = {};
    sendobj["CMD"] = settarget;
    sendobj["VALUE"] = parseInt(document.getElementById('temp').value);
    sendobj["XTIME"] = Math.floor(Date.now()/1000);
    sendobj["INTERVAL"] = 0;
    connection.send(JSON.stringify(sendobj));
    console.log(JSON.stringify(sendobj));
}

function sliderchange(){
    document.getElementById("sliderlabel").innerHTML = document.getElementById('temp').value.toString();
}

function clTimer() {
    var sendobj = {};
    sendobj["CMD"] = resetcltimer;
    sendobj["VALUE"] = 0;
    sendobj["XTIME"] = 0;
    sendobj["INTERVAL"] = 0;
    connection.send(JSON.stringify(sendobj));
    console.log(JSON.stringify(sendobj));
}

function fTimer() {
    var sendobj = {};
    sendobj["CMD"] = resetftimer;
    sendobj["VALUE"] = 0;
    sendobj["XTIME"] = 0;
    sendobj["INTERVAL"] = 0;
    connection.send(JSON.stringify(sendobj));
    console.log(JSON.stringify(sendobj));
}
function reboot() {
    var sendobj = {};
    sendobj["CMD"] = rebootesp;
    sendobj["VALUE"] = 0;
    sendobj["XTIME"] = 0;
    sendobj["INTERVAL"] = 0;
    connection.send(JSON.stringify(sendobj));
    console.log(JSON.stringify(sendobj));
}

function zero() {
    var sendobj = {};
    sendobj["CMD"] = resettimes;
    sendobj["VALUE"] = 0;
    sendobj["XTIME"] = 0;
    sendobj["INTERVAL"] = 0;
    connection.send(JSON.stringify(sendobj));
    console.log(JSON.stringify(sendobj));
}
visualapproach commented 3 years ago

How bizarre. In chrome again - shift+ctrl I (right click/inspect) and click the tab "console". Press UNIT on webpage and there should be a message in the console "CMD:1, VALUE:1, XTIME:0, INTERVAL:0" Can you confirm that please. CMD should be "1".

visualapproach commented 3 years ago

When you press buttons on the pump with the ESP connected, does the pump behave as expected? (Bubbles = bubbles and so on)

dwoosnam commented 3 years ago

It's cold out, so I've closed the pump back up and I'm just powering the NodeMCU via MicroUSB on my desk now, so this might affect readings.

But, as requested....

Unit: {"CMD":1,"VALUE":true,"XTIME":1617474336,"INTERVAL":0}

Bubbles: {"CMD":2,"VALUE":true,"XTIME":1617474371,"INTERVAL":0}

Pump: {"CMD":4,"VALUE":true,"XTIME":1617474403,"INTERVAL":0}

Heater: {"CMD":3,"VALUE":true,"XTIME":1617474423,"INTERVAL":0}

When using the buttons on the pump, they work as expected. And, the strange thing is, the related items on the web interface change to match.

eg.

If I then click the bubbles toggle on the web interface, the bubble motor stays on and the display/control panels acts as though I've pressed the timer button.

visualapproach commented 3 years ago

dwoosnam.zip

Okay, replace your files in the library/BWC... with attached files. (Unzip to the library/BWC... directory) Recompile and upload. Then with everything connected, go to chrome console as above. Press a button on the web interface, like UNIT. Note what it says in console "OTHER.....lastButton:" Press UNIT on the pump and look if it is the same. You can copy the console and post here if you want, but try to mark where you press different buttons.

dwoosnam commented 3 years ago

This is a difficult task. Being bombarded every second with information in that console window, along with some delays on button presses from the web interface side, and confusion when pressing web interface buttons in anger. but hopefully this makes some sense to you.

control panel:

lock: LastButton: "10"

timer: LastButton: "30"

unit: LastButton: "89"

heat (turns on heat and pump): LastButton: "1012"

bubbles: LastButton: "1212"

pump: LastButton: "1112"

down: LastButton: "1312"

up: LastButton: "20"

power: LastButton: "00"

web interface

unit: LastButton: "00" ----> doesn't change at all, though pressing in anger resulted in a "1112"?

pump: LastButton: "1112"

bubbles: LastButton: "1012" x2 LastButton: "30"

heater: LastButton: "1212"

There was some weird goings on with the temperature slider, different outputs that seemed to be where i put the slider along the bar Set target temperature down: LastButton: "1312"

set target temperature up: LastButton: "89"

visualapproach commented 3 years ago

LOL, I wonder how the controller can tell the difference between an ordinary press and a press in anger! It appears they (Bestway) has changed some button codes on this model, but it's not 100% consistent. Maybe has to do with it beeing a difficult task to read the info scrolling by. I think I'll do another version for you to run. Call you back but maybe not today.

dwoosnam commented 3 years ago

A press in anger is more me just pressing the same button multiple times just to get it to do what it's meant to rather than something else. Haha.

I wish I had the skillset to check this all myself. I do appreciate your time and effort, as I'm sure will the others that get this pump that are looking into making it smart. Cheers.

visualapproach commented 3 years ago

Hi again @dwoosnam replace your files with this version. Connect it to the pump and go to webinterface. There is a new row at the top that reports a special code for every button you press on the display control panel. Note the corresponding code for all the following:

NOBTN LOCK TIMER BUBBLES UNIT HEAT PUMP DOWN UP POWER

dwoosnam2.zip (Use the mqtt with gpio example)

dwoosnam commented 3 years ago

Nothing obvious of note shows in the GUI, but in Inspect/Console I can see the PressedButton: codes, which differ to the LastButton: codes I previously sent, I hope this is what you want.

NOBTN - This seems to remember the last button press from before a reboot. But after a while has changed to "ffff" LOCK 0100 TIMER 0300 BUBBLES 1212 UNIT 0809 HEAT 1012 PUMP 1112 DOWN 1312 UP 0200 POWER 0000

visualapproach commented 3 years ago

If you also upload LittleFS files, the webinterface will be updated :-) Or you can go to YOUR_IP/upload.html and browse for the new index.html-file in the data-folder and upload to the ESP. Not important, but it makes it easier. When testing buttons you will have to keep them pressed e few seconds so you catch the button when the page is updating. There should be a code like 1B1B when no button is pressed. image

dwoosnam commented 3 years ago

Updated and now see the button press option in the GUI. They match all the previous codes I got from the console.

There isn't a 1B1B as such. The no-button FFFF only seems to show when turning on for the first time. Each command is repeated contstantly in the console until the next button is pressed as per screenshot. (excuse the touchpad writing!) Capture

NOBTN ffff LOCK 0100 TIMER 0300 BUBBLES 1212 UNIT 0809 HEAT 1012 PUMP 1112 DOWN 1312 UP 0200 POWER 0000

visualapproach commented 3 years ago

hm, No button is not shown here either. I'll see if I can get it to display correct

visualapproach commented 3 years ago

Stupid cut&paste error Here, replace with this file, and recompile+upload. No need to update LittleFS data files this time. BWC_8266.zip

visualapproach commented 3 years ago

When we establish NOBTN code, I'll update another file for you to test, and hopefully everything will work fine

dwoosnam commented 3 years ago

After recompiling and uploading, it's still not giving me a direct no button code. (I hope i'm right in assuming NOBTN translates as "no button")

On a fresh power on from the mains, it's showing me code 0809, even without pressing anything and the console keeps giving the same output every 2 seconds.

EDIT: After going out for a few hours and leaving the pump on with the NodeMCU connected, I've come bak and the pump is reporting FFFF again which i can only assume is the NOBTN code.

visualapproach commented 3 years ago

You are assuming correct. Maybe I should explain exactly what happens, so we talk about the same thing.

Every 2 seconds or so the ESP sends a request to the control panel. The control panel answers with 16 bits (two bytes, or one word if you like). Depending on what buttons are pressed that exact moment, the answer will be some particular value. So in my case, when I don't press any button the answer will always be 1B1B (Hexadecimal representation of the bits 0001 1011 1011). The FFFF at startup can be disregarded since that is likely because all pins are high (1) before data communication has started properly. 16 bits of 1's is hex FFFF. So, after startup sequence is finished (give it a minute or two, to establish wifi, time etc) you SHOULD se a constant value like 1b1b or whatever they decided in your model. And pressing a button while the request is being done, should change the value to 1212 or whatever. And after releasing the button you should see the same value again, like 1b1b.

When you press LOCK button on the control panel I guess it says code:0100. What happens when you release that button? Still 0100 or switching to 0809 or anything else?

dwoosnam commented 3 years ago

Thank you for your explaination.

It seems that the answer to your last question is that on the press of a control panel button, the command changes. But it continues to return that same code of the last button press until the next button press. The following example shows a long pres on UNLOCK, UNIT, HEATER and then UP. unlock-unit-heater-up

For example. I turned bubbles on and then bubbles off, then disconnectecd the power, and reconnected the power. This shows that on boot up (after the websocket disconnection) the first command is 0809. lastcomand

When the unit was set to C, it seemed that on a power cycle, it reverted to F. But when on F, it doesn't revert back to C. despite the 0809 code appearing to be the first button press after the reboot.

a reboot of the ESP from the web interface seems to keep the last button press in memory. rebootesp

And then another power cycle at the mains thows 0000 into the story to mix it up.... 0000

visualapproach commented 3 years ago

You make a great job logging your testing! Appreciate that. It appears that the new BWC_8266.zip is not in play. I can be wrong, but to be absolutely sure I give you another file with a unique text so we can tell what version is actually running. I think you know what you are doing but sometimes the IDE is playing tricks on you, an sometimes other things go wrong. Recompile and upload with this file in the library: BWC_8266.zip Then in console there should be a (v3) suffix to the codes

dwoosnam commented 3 years ago

Thank you for your kind words, I'm glad it looks like I know what I'm doing! :D It's my first ESP project. It's in my interest to give you as much information as possible. I don't want to waste your time, which I am very thankful for!

Just to be clear;

So I should be ready to test again tomorrow, too dark now. I hope I'm not going to wear the screws out on this new pump!

visualapproach commented 3 years ago

Oh, yes - Make sure you only have one copy of the files in library folder or arduino IDE will choose the wrong version! Move every copy of BWC... out of library except the one you want to use. Annoying as f but that's the way it is.

dwoosnam commented 3 years ago

Got rid of all the other versions in my Arduino/library folder and re-uploaded last night. I am back in work this week, but have managed to get the ESP all connected into the pump this morning and it seems to be happily spitting out 1b1b(v3) in the console and on the web interface. I hope that this is a good thing.

visualapproach commented 3 years ago

Great! That's good. I'm also at work this week but I'll adjust the program to the new codes. Call you back :)

visualapproach commented 3 years ago

@dwoosnam -> Updated with 2021 codes. Crossing fingers. BWC_8266.zip Check if this works as expected. Replace old files and compile, upload and upload LittleFS! Did you know you can upload over the air so you don't have to use the screwdriver every time?

dwoosnam commented 3 years ago

I've seen there's an OTA update available.... But I can't find the instructions. Why did I wait this long to check about it?! 🤣

visualapproach commented 3 years ago

Have the ESP on and then start arduino IDE and you should see a port "BWC at 192.168.xx.yy" along with the COM1 etc. If you're on a PC that is. Sometimes if it's not showing it helps to restart the pc.

dwoosnam commented 3 years ago

OTA has just opened a new world for me, especially as it's started snowing here today for some reason! I have an issue in that LittleFS doesn't seem to like updating OTA, I get an authentication error - though it doesn't prompt for user or password.

The lid currently isn't screwed on properly anyway, so I'll drag it back in for a final flash and a bit of glue gun love on the bread board because I'm not going to change a thing now!

But... That aside, your genius shows no bounds. My web interface controls the things it's meant to, as does HomeAssistant/MQTT (found in the discussions).

I feel like I've taken a massive amount of your time and you and your patience should be rewarded! Thank you so much!

Out of curiosity now, does this get linked into the existing code, for any future updates, or is this strictly a 2021 pump code, just for me it seems!

visualapproach commented 3 years ago

OTA has just opened a new world for me, especially as it's started snowing here today for some reason! I have an issue in that LittleFS doesn't seem to like updating OTA, I get an authentication error - though it doesn't prompt for user or password.

Yes it's an annoying bug in the IDE I think, but if you first upload the sketch and give it the password, and directly after upload LittleFS it usually works. If it doesn't just visit the /upload.html page and upload the new files. In this case only index.html and websockets.js

But... That aside, your genius shows no bounds. My web interface controls the things it's meant to, as does HomeAssistant/MQTT (found in the discussions).

That made my day, and I forced the kids to read that, haha. Thank you!

I feel like I've taken a massive amount of your time and you and your patience should be rewarded! Thank you so much!

No problem, I want it to work on newer models as well, and now it does thanks to your testing and time.

Out of curiosity now, does this get linked into the existing code, for any future updates, or is this strictly a 2021 pump code, just for me it seems!

I am going to update existing code. Just have to decide how one should choose the right pump. Probably a checkbox or something in the webinterface and an MQTT command.

Cheers, and thanks for contributing!

dwoosnam commented 3 years ago

Happy to help. My kids will just be happy that they can use the hot tub again because I wont have the pump half open!

I want to look into the audio/beep/sound feature, but I'll give it a break for that!

Thank you again for all your help. Take a relax in your tub!

visualapproach commented 3 years ago

Updated the code to support 2021 models. You need to edit a line in a file to enable, see readme on main page.

sjeffrey101 commented 3 years ago

wow..... well done guys. this is great. I almost brought a new unit 2 weeks ago as my heater element has failed. But didnt want to loose this functionality so i managed to locate a used heater, just need to swap it over, and hopefully it will work. IF not i'll be getting a new one for sure.

dwoosnam commented 3 years ago

Just to update this I have managed an OTA update to the latest version - with a manual update of each of the web files through the web interface - and all is working ok. The all controls still function over MQTT in HomeAssistant. Screenshot_20210416-114522_Home Assistant

visualapproach commented 3 years ago

I really like you people in this community! Smart, friendly and bother to report success!

rucati commented 3 years ago

Hi As I am waiting for the level shifters and cables to come in, would it be possible to add: 1) extra pictures on how to safely disassemble the 2021 shell (adding pictures or video on how to disassemble the unit past the touch panel all over to the main body shell, not breaking the plastic bits so I can reassemble too! I am a bit lost after unscrewing and taking off the lid from the touch panel). 2) add MQTT and Lovelace settings/files to get HA setup up and running? (or where to find them elsewhere) Thanks for all the effort so far! As I have the 2021 too, I was hoping for this post to come! Great project and community!

visualapproach commented 3 years ago

Hi

As I am waiting for the level shifters and cables to come in, would it be possible to add:

1) extra pictures on how to safely disassemble the 2021 shell (adding pictures or video on how to disassemble the unit past the touch panel all over to the main body shell, not breaking the plastic bits so I can reassemble too! I am a bit lost after unscrewing and taking off the lid from the touch panel).

2) add MQTT and Lovelace settings/files to get HA setup up and running? (or where to find them elsewhere)

Thanks for all the effort so far! As I have the 2021 too, I was hoping for this post to come! Great project and community!

Hi,

  1. I don't have one so someone else maybe can tell.
  2. There are some examples in this forum. When I get my tub up again I might share the setup. I also have HA. Thanks and have a nice day
dwoosnam commented 3 years ago

@rucati Taking the lid off is easy it's just 6 screws underneath the ridge around the middle of the pump. Gently lift the top half as it is only connected by the display cable. (Which our esp8266 sits in-between) Check my photo post near the top of this issue.

As for the Lovelace / HA setup, I just copied all the config from #52 and used that and set it up as above.

acidkewpie commented 3 years ago

Thanks for documenting this, I just got a Helsinki 2021 and also found an API to monitor my solar panels this morning. So combining the two I should be able to develop a solution to cleverly route all free electricity into the spa and cut my costs even further!

dwoosnam commented 3 years ago

Love this idea @TheRocketSurgeon! I feel my solar setup is pretty locked down, though it's possible that I just down know how to access it.

acidkewpie commented 3 years ago

Love this idea @TheRocketSurgeon! I feel my solar setup is pretty locked down, though it's possible that I just down know how to access it.

Exactly what I thought when I woke up this morning! Mine's Solaredge if that happens to match.

visualapproach commented 3 years ago

I don't have solar power and know little about it, but just to point out an option - I have installed a Shelly 3EM module (energy monitor on incoming power to the house) on which I can see current (no pun intended) energy consumption and also returned energy. Zero in my case, but that could be used to trigger the hot tub on or off. I have it set up in Home Assistant such that heating turns off before my breakers pop, and then on again when the load is lower. The Shelly can even use MQTT but I haven't needed that since there is an integration already in HA.

GSzabados commented 3 years ago

Exactly what I thought when I woke up this morning! Mine's Solaredge if that happens to match.

SolarEdge has an official integration for Home Assistant (cloud) and a local custom component through modbus. (If you do use Home Assistant.) It makes easy to match the solar with MQTT and add some smart control.

There is a topic of the Wifi enabled hot tubs (On the HA Community Forum.), where people shared some ideas how do they use solar power with the hot tub.

I am just playing with the idea to purchase a Maldives, but what really stopping me at this point is the missing wifi component. I saw that some work has been done already and it looks promising. #64 The possibility of the integration to HA makes it so tempting, disregarding that the solar investment is still on the way for the house.

@dwoosnam, what solar model do you have? Most of them has some sort of API solution if they are connected to any monitoring. (Growatt, Enphase-Envoy, Huawei, Fronius, Tesla, etc. just to mention a few.)

dwoosnam commented 3 years ago

@GSzabados without going in the attic to check, I think it's ABP. The usage stats do get sent back to company that installed it, but I was under the impression that it was sent by SMS. It was installed about 7 years ago.

GSzabados commented 3 years ago

I think it's ABP

That is a tough one. To be honest, I have never heard of it. But I have seen a Growatt documentation recently dated from 2015 where they already had an API to access data. But if you are not aware what method it using for transfer, then most likely you are right and it would be something simple, like SMS or GPRS/EDGE. IoT evolved a lot during the past 7 years. But that doesn't mean your inverter has no way to communicate any other way. ModBus is one of the good examples. I would ask the installer that is there any option to get real time data. Maybe installing a smart meter, or having a smart meter with some output would put you at the same position, as @visualapproach suggested with the Shelly 3EM. Don't you have a smart meter installed by any chance from the electricity supplier? (Many companies has additional dongle options for their inverters as well, for wifi or 3G/LTE connection, but with a 7 years old model that is a good question.)

dwoosnam commented 3 years ago

@GSzabados we had a smart meter installed the other day though from a different electricity supplier to the solar panels. At the moment, as I understand, the setup is as follows: Panels > attic (inverter > solar electricity meter (with sim card?)) > Ground floor( Main distribution board and smart meter) I suppose an email to the solar company would be a good starting point. The worst they can say is no! Thanks!

GSzabados commented 3 years ago

@dwoosnam, generally the inverter will provide production data. The smart meter will provide production and consumption data as well. (Basically what you used from the grid and what you produced to the grid.)

I would try to get some information about the smart meter first. The state of the actual production what you will really need, as you would like to know when you have excess power to spare.

I don't know which country are you from, but in Poland there is a kind of gentleman's agreement where your produced excess power is used by the grid, and you can get it back from the grid later at 80%. It makes sense as the electricity provider works as a storage and the yearly contracts uses those during the winter period. Anyhow...

If you are from the UK, there are most providers have smart meters and some has public access to the data, or the meter can be queried locally. I came across recently a custom made SmartThings integration for Geo connected smart meters, and someone posted that it was ported to OpenHab as well.

https://community.smartthings.com/t/smart-meter-uk-build-an-app-device-handler-for-api/214649

I would try to get some information what the smart meter can he used for and how you can access real time consumption data.