Closed zhuangjinxin closed 6 years ago
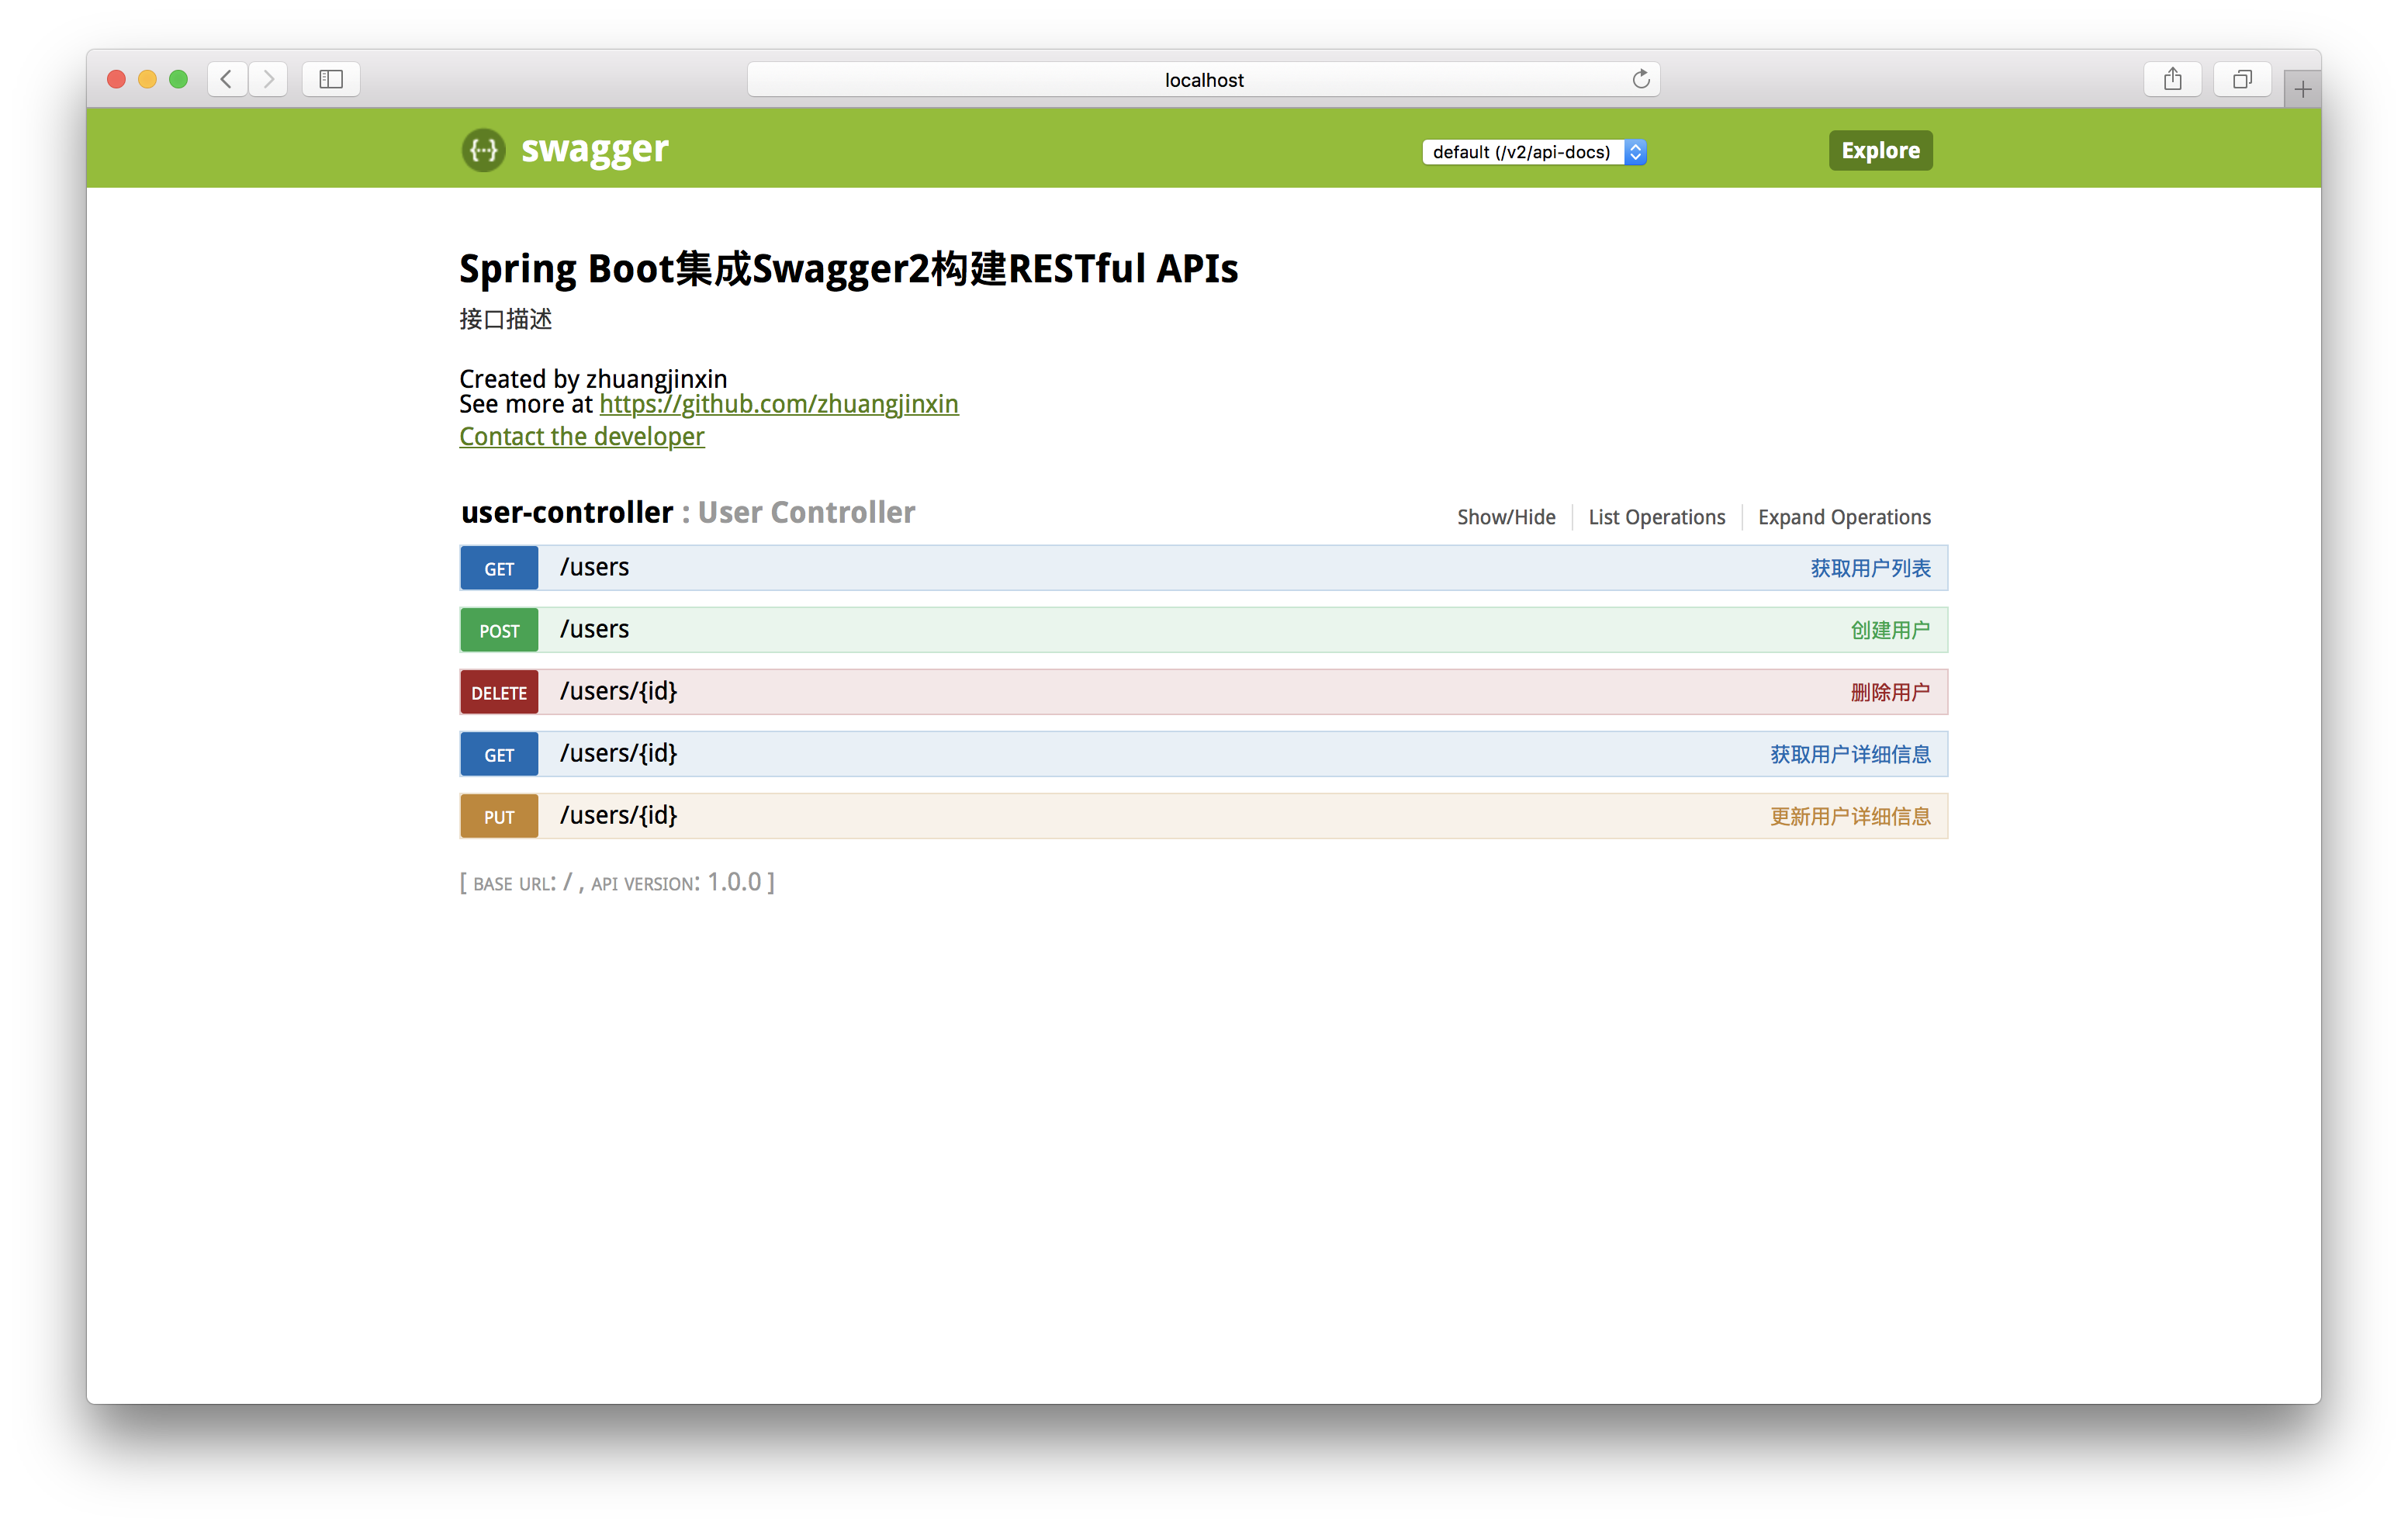
SpringBoot集成Springfox Swagger2构建RESTful APIs文档效果图:
添加项目依赖:
dependencies {
compile group: 'org.springframework.boot', name: 'spring-boot-starter-web', version: '1.5.2.RELEASE'
compile group: 'io.springfox', name: 'springfox-swagger2', version: '2.6.1'
compile group: 'io.springfox', name: 'springfox-swagger-ui', version: '2.6.1'
}
添加Swagger2配置
@Configuration
@EnableSwagger2
public class Swagger2 {

@Bean
public Docket createRestApi() {
    return new Docket(DocumentationType.SWAGGER_2)
            .apiInfo(apiInfo())
            .select()
            .apis(RequestHandlerSelectors.basePackage("sample.springfox.swagger2"))
            .paths(PathSelectors.any())
            .build();
}

private ApiInfo apiInfo() {
    return new ApiInfoBuilder()
            .title("Spring Boot集成Swagger2构建RESTful APIs")
            .description("接口文档描述")
            .contact(new Contact("zhuangjinxin", "https://github.com/zhuangjinxin", "zhuangjinxin@hotmail.com"))
            .version("1.0.0")
            .build();
}
}
编写RESTful API:
@RestController
@RequestMapping(value="/users")
public class UserController {

static Map<Long, User> users = Collections.synchronizedMap(new HashMap<Long, User>());

@ApiOperation(value="获取用户列表", notes="获取用户列表")
@RequestMapping(value={""}, method= RequestMethod.GET)
public List<User> getUserList() {
    List<User> r = new ArrayList<User>(users.values());
    return r;
}

@ApiOperation(value="创建用户", notes="根据User对象创建用户")
@ApiImplicitParam(name = "user", value = "用户详细实体user", required = true, dataType = "User")
@RequestMapping(value="", method=RequestMethod.POST)
public String postUser(@RequestBody User user) {
    users.put(user.getId(), user);
    return "success";
}

@ApiOperation(value="获取用户详细信息", notes="根据url的id来获取用户详细信息")
@ApiImplicitParam(name = "id", value = "用户ID", required = true, dataType = "Long")
@RequestMapping(value="/{id}", method= RequestMethod.GET)
public User getUser(@PathVariable Long id) {
    return users.get(id);
}

@ApiOperation(value="更新用户详细信息", notes="根据url的id来指定更新对象,并根据传过来的user信息来更新用户详细信息")
@ApiImplicitParams({
        @ApiImplicitParam(name = "id", value = "用户ID", required = true, dataType = "Long"),
        @ApiImplicitParam(name = "user", value = "用户详细实体user", required = true, dataType = "User")
})
@RequestMapping(value="/{id}", method=RequestMethod.PUT)
public String putUser(@PathVariable Long id, @RequestBody User user) {
    User u = users.get(id);
    u.setName(user.getName());
    u.setAge(user.getAge());
    users.put(id, u);
    return "success";
}

@ApiOperation(value="删除用户", notes="根据url的id来指定删除对象")
@ApiImplicitParam(name = "id", value = "用户ID", required = true, dataType = "Long")
@RequestMapping(value="/{id}", method=RequestMethod.DELETE)
public String deleteUser(@PathVariable Long id) {
    users.remove(id);
    return "success";
}
}
项目启动,访问http://localhost:8080/swagger-ui.html即可!
http://localhost:8080/swagger-ui.html
说明:
SpringBoot集成Springfox Swagger2构建RESTful APIs文档效果图:
添加项目依赖:
添加Swagger2配置
编写RESTful API:
项目启动,访问
http://localhost:8080/swagger-ui.html即可!说明: