Bouncefetch 


"bounces should be read by humans" – we don't think so!
Bouncefetch is a Ruby CLI application which searches an IMAP account for bounce mails, categorizes them and maintains a list of failed recipients which you can export to do whatever you want (unsubscribe, require reconfirmation, etc.).
Features
- easy and flexible configuration (now support multiple configs as well)
- classifies bounces with the build-in rules (custom ones are easily added)
- maintains an exportable database of failed recipients and their causes (no actual database required)
- export to CSV file or post to remote http(s) endpoint (perfect for automatisation)
- interactive inspect mode to define new rules
- few dependencies (ruby and the mail gem (pry is optional))
Requirements
- Git (optional if you download the archive instead of cloning the repository)
- Ruby >= 1.9.3 (2.0 highly recommended!)
- Bundler gem (
gem install bundler) - IMAP credentials
Installation
Choose and cd into the directory where you want to install Bouncefetch and clone the project:
cd /opt
git clone https://github.com/2called-chaos/bouncefetch.git
cd bouncefetch
Copy the sample configuration and edit it to your needs (see Configuration):
cp config/config.rb.example config/config.rb
vim config/config.rb
If you want to define custom rules (and you want, sooner or later) do the same with the example rule file. It just contains comments so you don't have to bother with it for now.
cp config/custom_rules.rb.example config/custom_rules.rbInstall dependencies:
bundle installOptionally: Make the executable available in your $PATH by either
- adding
/opt/bouncefetch/bin(or whatever you have choosen) to your path (recommended)
» How to add a directory to my path - symlinking the executable
ln -s /opt/bouncefetch/bin/bouncefetch /usr/local/bin/bouncefetch
Usage
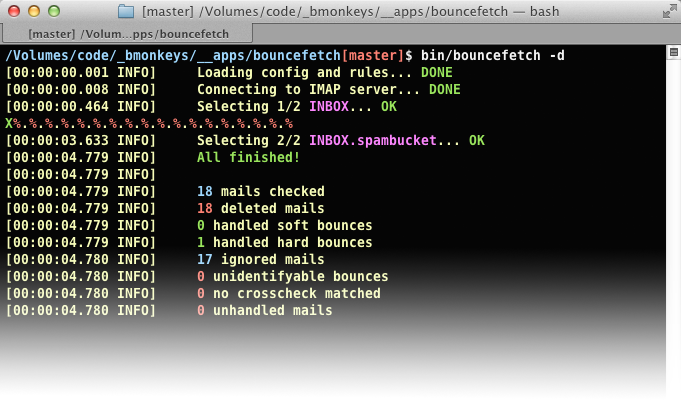
Usage: bouncefetch [options]

# General settings
-d, --dryrun                     Don't alter IMAP account or registry
-m, --monochrome                 Don't colorize output
-t, --throttle-ignore            Disable IMAP throttle detection
-i, --inspect                    Open pry shell for every mail which is unidentifyable, unmatched or has
                                 no matching crosscheck. Use --shell beforehand to get more help on pry.
--config NAME                    Use a different config file (default: config)

# Registry & Export
-s, --statistics                 show statistics about the registry and candidates
-c, --candidates                 list unsubscribe candidates (use export to get csv)
-e, --export FILE                export unsubscribe candidates to file and remove them from the registry
                                 use with --dryrun to not alter registry (same for --remote)
-r, --remote RESOURCE            post unsubscribe candidates to URL and remove them from the registry
                                 refer to the readme for information about how we post the data
-o, --output col1,col2           columns to include for --candidates --export --remote
                                 default: ref,sbounces,hbounces,sbounces_dates,hbounces_dates,sbounces_reasons,hbounces_reasons

# Miscellaneous
-h, --help                       Shows this help
-v, --version                    Shows version and other info
-z                               Do not check for updates on GitHub (with -v/--version)
    --upgrade                    Update bouncefetch (only works with git)
    --mailboxes                  List all availables mailboxes in your IMAP account
    --shell                      Open pry shell
Configuration
config.rb » identification_header
When a mail bounces you typically get a copy of the original mail you've send. To identify the user it is best to add a custom header to all mails you send out. If your users have the ability to change their email addresses it would be a good idea to set this header to the user database id or some kind of token.
If you can't or don't want to use this you can leave it blank and bouncefetch will try to determine it by other means.
Defining rules
Rules are pretty easy to define. You should add them to custom_rules.rb so that you are able to update the shipped default set rules.rb without hassle. You still may want to take a look inside for examples.
There are 3 different possibilities to define a rule:
- string matches if string is in mail body (case insensitive)
- regexp matches if body matches regex (use i modifier for case insensitivity)
- block matches if the block returns a truethy value (yields the mail object). You can pass a descriptive name as first argument (see the examples).
You can also pass an second argument crosscheck which defaults to true and can be set to false. When set to false and the mail matches this rule it does not require a matching crosscheck.
rule("foo", false)
rule("blub", false) {|m| "…" }
What happens with unhandled emails?
If you'd run bouncefetch and then take a look into your IMAP account you might find:
- unread messages no search query have matched this mails so bouncefetch never got this mail
- read messages the mail got fetched by bouncefetch but couldn't be handled, possible causes:
- unmatched no rule has matched
- no crosscheck a rule has matched but no crosscheck did
- no candidate mail was handled but no candidate reference could be found
- leave mapping a rule matched but the cause mapping in config.rb is set to
leave - fail bouncefetch totally failed and raised an exception
Best strategy is to run bouncefetch once normally and then with -i resp. --inspect. This will open
up an interactive pry session which let you easily investigate and test new rules.
Export
You can export the candidates to a CSV file to further process the data. Only candidates which have reached your configured limits will be exported.
bouncefetch -e candidates.csvAfter successfully writing the CSV to disk the exported candidates will be removed from the internal database. If you don't want this use -d resp. --dryrun.
bouncefetch -de candidates.csvBy default all columns will be exported which are:
- reference reference of your identification_header or email address
- soft/hard_bounces amount of soft/hard bounces registered
- soft/hard_bounce_dates dates (without time) when the bounces were registered (separated by
@@@) - soft/hard_bounce_reasons the rule conditions which have matched each bounce (separated by
@@@)
You can specify which columns should be exported by passing -o resp. --output argument (note the shortened names):
bouncefetch -e candidates.csv -o ref,sbounces,hbounces,sbounces_dates,hbounces_dates,sbounces_reasons,hbounces_reasonsRemote export
Remote export functions like the normal CSV export (same behaviour/options) but POSTs the data as array to a remote HTTP(S) endpoint.
Bouncefetch POSTs a JSON string on query key candidates "candidates" => "JSON encoded string"
This is an example of the parsed JSON:
> JSON.parse(params[:candidates])
=> "foo@example.com" => {
     "reference" => "foo@example.com",
     "soft_bounces" => 0,
     "hard_bounces" => 1,
     "soft_bounce_dates" => [],
     "hard_bounce_dates" => ["2014-06-03"],
     "soft_bounce_reasons" => [],
     "hard_bounce_reasons" => ["account is disabled"]
   },
   "bar@example.com" => {
     "reference" => "bar@example.com",
     "soft_bounces" => 0,
     "hard_bounces" => 1,
     "soft_bounce_dates" => [],
     "hard_bounce_dates" => ["2014-06-04"],
     "soft_bounce_reasons" => [],
     "hard_bounce_reasons" => ["unrouteable address"]
   }
Todo
- Handle bounces where the original email is attached rather than inline (currently attachments are ignored)
- Handle bounces with no body to at least check the subject (currenlty mails with no body will be fail-skipped)
- Increase performance (it's a bit slow)
Contributing
I started this project to create a comprehensive ruleset to classify bounces so please contribute! You can contribute by giving feedback, propose rules or report issues.
If you want to contribute code directly:
- Fork it (click to fork)
- Create your feature branch (
git checkout -b my-new-feature) - Commit your changes (
git commit -am 'Add some feature') - Push to the branch (
git push origin my-new-feature) - Create new Pull Request
License
Copyright © 2014 Sven Pachnit (sven@bmonkeys.net).
Released under the MIT License, see LICENSE.txt for details.
More from bmonkeys
- http://blog.bmonkeys.net
- https://de.gamesplanet.com
- https://github.com/2called-chaos/dle Directory List Edit – Edit file structures in your favorite editor!
- https://github.com/2called-chaos/ts3r A little framework to build teamspeak 3 bots.