Aurora
The Aurora library allows for manipulating bitmaps and images in a programmatically way. It was originally built for generating different types of backgrounds, but provides much more features today. Aurora is superfast and uses GPU acceleration where possible. A quickstart guide can be found below!
DISCLAIMER: Please note that Aurora is currently still in alpha-status and that some bugs might still be present. All features described in this document are working and tested, but it's possible for some bugs to have been overlooked. Please report any issues in the issue tracker.
Requirements:
Aurora only supports API 16 or higher. This means that Aurora is compatible with 95% of currently active Android devices.
Installation:
Aurora is available from jCenter. Just add the following line to your build.gradle:
compile 'be.abyx:aurora:0.15'Features
Find closest color in a set
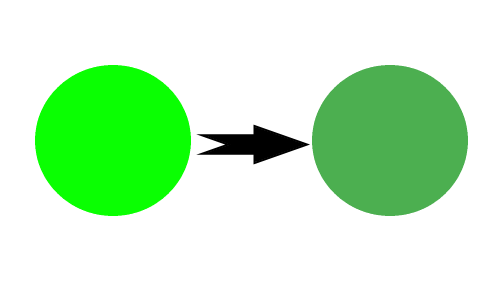
Aurora can, given a specific color, determine the color that's visually the most similar and is part of some predefined set of colors (such as the set of material design colors). This allows you to create backgrounds that fit perfectly.
Generate blurry background based upon image
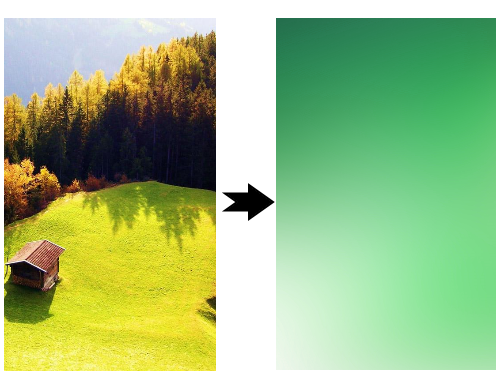
Aurora can also generate a blurry background that perfectly fits the color scheme of a given image. This gives a very nice effect when using the image itself as a foreground illustration and placing the generated Bitmap behind it!
Automatically crop images with magic crop
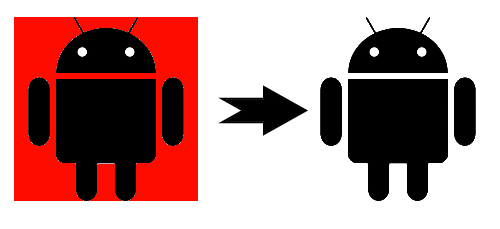
Use magic crop to automatically remove white backgrounds from logo's, illustrations, cliparts or other images. No need to manually specify bounds, Aurora will automatically detect what's part of the background of an image and what's not.
Automatically rectangular crop
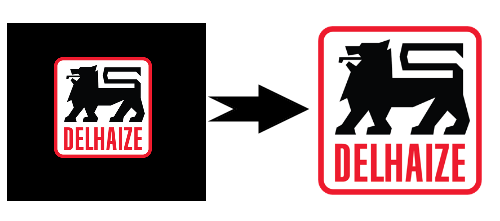
Crop images to only include the interesting part (without a big border of whitespace around them). This crop is also fully automatic and will intelligently detect the edges of an image.
Shape background
Draw a shape (with a specific padding) around a bitmap. Aurora supports both circles as rectangles at the moment.

Masive parallelism
True masive parallelism! Aurora's processes for manipulating images and rendering backgrounds scale to use 100's of cores and are being processed very fast!

Quickstart
Last checked for Aurora v0.15
Find closest color in a set
Given a specific color, packed as an Android color, find the color that resembles it the most (visually) from a specific set of colors. Aurora comes with a set of the most occurring colors and a set containing a selection of Google's material design colors.
The ColourPaletteFactory class is used for constructing a ColourPalette. This is an object that contains all colors from which the visually most appealing will be chosen. Right now only a default color set and a material design color set is supported, but you can always add your own by using the ColourParser.
This code snippet is used for determining the material design color that's visually most resembles green:
ColourPaletteFactory factory = new ColourPaletteFactory(getApplicationContext());
ColourPalette materialPalette = factory.getMaterialColourPalette();
int closestColor = materialPalette.matchToClosestColour(Color.GREEN);
Generate blurry background based upon image
There are some different factories that can be used to create renderers for blurry backgrounds. The DefaultAuroraFactory works CPU-only and does not use any RenderScript at all. This means that it's slower than the ParallelAuroraFactory, but it can also be used on devices without RenderScript. The ParallelAuroraFactory is much faster and uses RenderScript as often as possible. It's recommend to always use the ParallelAuroraFactory when possible. Following code snippet demonstrates how one can generate a blurry background that's based off the dominant color of a Bitmap named bm.
// Initialize this Bitmap yourself
Bitmap bm;
FactoryManager manager = new FactoryManager();
AuroraFactory factory = manager.getRecommendedAuroraFactory(appContext);
Bitmap gradient = factory.createAuroraBasedUponDrawable(bm, new BlurryAurora(appContext), 1200, 1920);
Automatically crop images with magic crop
An image that comes with a non-transparent background can automatically be converted to one that HAS a transparent background. This method is not the same as simply setting all pixels with a specific background color to transparent, as that may result in strange results. Aurora will instead try to figure out the bounds of for example a logo and only remove the background that falls out of these bounds. It uses an algorithm known as the floodfill algorithm to determine the edges of the image.
The CropUtility class provides a method to perform this magic crop. Following code snippet demonstrates how magic crop works for a Bitmap named bm that has a white background. The tolerance value is a value between 0 and 1 that can be set as a tuning parameter and determines how much a pixel's color value must diverge from the given background color before being not considered part of the background. By setting this value to 0 only pixels that are 100% white will be considered part of the background. When set to 1, all colors will be considered part of the background and the Bitmap will be completely cleared.
// Initialize this Bitmap yourself
Bitmap bm;
CropUtility cropUtility = new CropUtility();
// Background color is white and tolerance value is 0.25
Bitmap cropped = cropUtility.magicCrop(bm, Color.WHITE, 0.25f);
Automatically rectangular crop
Sometimes some images come embedded inside of a very large white rectangle (this happens quite often when searching for images on Google). This rectangle can be very annoying as it ruins the scaling of different images with different sized padding. The automatic rectangular crop functionality that's also provided by the CropUtility will look for the straight edges of a Bitmap and will crop the image up until that point.
Following code snippet demonstrates how rectangular crop can be used. Please note that this method also provides a tolerance tuning parameter. This parameter works the same as described above.
// Initialize this Bitmap yourself
Bitmap bm;
CropUtility cropUtility = new CropUtility();
Bitmap cropped = cropUtility.magicCrop(bm, Color.WHITE, 0.25f);
Speed
Aurora is fully built with speed in mind and uses RenderScript. This allows us to speed up all computations by using the device's built-in GPU. Following are some speed tests that were performed on a OnePlus 3T and a Nexus 5.
Coming soon...