As of summer 2020 this repository has been deprecated and is no longer maintained.


The DevOps Platform: Overview
The DevOps Platform is a tools environment for continuously testing, releasing and maintaining applications. Reference code, delivery pipelines, automated testing and environments can be loaded in via the concept of Cartridges.
The platform runs on a docker container cluster so it can be stood up for evaluation purposes on just one server using local storage, or stood up in a multi-data centre cluster with distributed network storage. It will also run anywhere that docker runs.
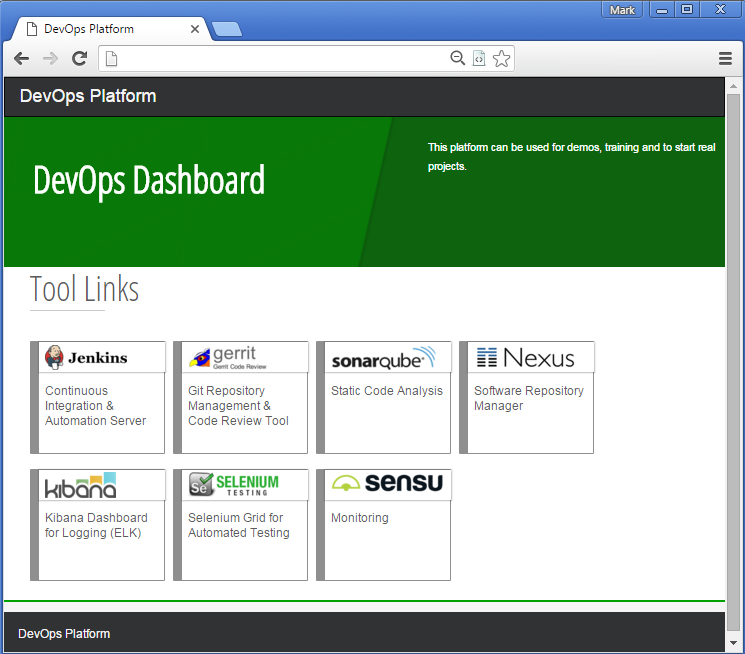
Here is the front page:
Once you have a stack up and running, you can log in with the username and password created upon start-up.
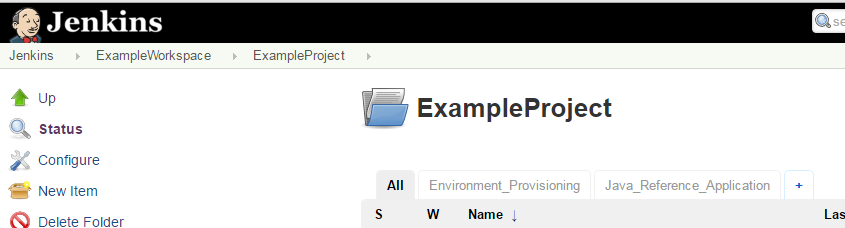
If you provisioned your stack using the start-up CLI, an example workspace containing an example project and an example cartridge will all have been pre-loaded in Jenkins:
Once you have explored this the next step is to create your own Workspace and Project and then load another cartridge using a 'Load Cartridge' job in the 'Cartridge Management' folder (that automatically gets created in any Project). The cartridge development cartridge also helps create your own cartridges.
Quickstart Instructions
These instructions will spin up an instance in a single server in AWS (for evaluation purposes). Please check the prerequisites.
NB. the instructions will also work in anywhere supported by Docker Machine, just follow the relevant Docker Machine instructions for your target platform and then start at step 3 below and (you can set the AWS_VPC_ID to NA).
-
Create a VPC using the VPC wizard in the AWS console by selecting the first option with 1 public subnet.
-
On the "Step 2: VPC with a Single Public Subnet" page give your VPC a meaningful name and specify the availability zone as 'a', e.g. select eu-west-1a from the pulldown.
-
Once the VPC is created note the VPC ID (e.g. vpc-1ed3sfgw)
-
Clone this repository and then in a terminal window (this has been tested in GitBash):
-
Run:
./quickstart.sh$ ./quickstart.sh Usage: ./quickstart.sh -t aws -m <MACHINE_NAME> -c <AWS_VPC_ID> -r <AWS_DEFAULT_REGION> -z <VPC_AVAIL_ZONE>(optional) -a <AWS_ACCESS_KEY>(optional) -s <AWS_SECRET_ACCESS_EY>(optional) -u <INITIAL_ADMIN_USER> -p <INITIAL_ADMIN_PASSWORD>(optional) ...- You will need to supply:
- the type of machine to create (aws, in this example)
- a machine name (anything you want)
- the target VPC
- If you don't have your AWS credentials and default region stored locally in ~/.aws you will also need to supply:
- your AWS key and your secret access key (see getting your AWS access key) via command line options, environment variables or using aws configure
- the AWS region id in this format: eu-west-1
- a username and password (optional) to act as credentials for the initial admin user (you will be prompted to re-enter your password if it is considered weak)
- The initial admin username cannot be set to 'admin' to avoid duplicate entries in LDAP.
- AWS parameters i.e. a subnet ID, the name of a keypair and an EC2 instance type (these parameters are useful if you would like to extend the platform with additional AWS EC2 services)
- You will need to supply:
-
For example (if you don't have ~/.aws set up):
./quickstart.sh -t aws -m adop1 -a AAA -s BBB -c vpc-123abc -r eu-west-1 -u user.name -p userPassword-
N.B. If you see an error saying that docker-machine cannot find an associated subnet in a zone, go back to the VPC Dashboard on AWS and check the availablity zone for the subnet you've created. Then rerun the startup script and use the -z option to specify the zone for your subnet, e.g. for a zone of eu-west-1c the above command becomes:
./quickstart.sh -t aws -m adop1 -a AAA -s BBB -c vpc-123abc -r eu-west-1 -u user.name -p userPassword -z c
-
-
-
If all goes well you will see the following output and you can view the DevOps Platform in your browser
########################################################## SUCCESS, your new ADOP instance is ready! Run this command in your shell: source ./conf/env.provider.sh source credentials.generate.sh source env.config.sh You can check if any variables are missing with: ./adop compose config | grep 'WARNING' Navigate to http://<PROXY IP> in your browser to use your new DevOps Platform! Login using the following credentials: Username: YOUR_USERNAME Password: YOUR_PASSWORD -
Log in using the username and password you specified in the quickstart script:
<INITIAL_ADMIN_USER> / <INITIAL_ADMIN_PASSWORD> -
Update the docker-machine security group in the AWS console to permit inbound http traffic on ports 80 and 443 (from the machine(s) from which you want to have access only), also UDP on 25826 and 12201 from 127.0.0.1/32.
General Getting Started Instructions
The platform is designed to run on any container platform.
Provision Docker Engine(s)
To run in AWS (single instance) manually
-
Create a VPC using the VPC wizard in the AWS console by selecting the first option with 1 public subnet
-
Create a Docker Engine in AWS (replace the placeholders and their <> markers):
docker-machine create --driver amazonec2 --amazonec2-access-key <YOUR_ACCESS_KEY> --amazonec2-secret-key <YOUR_SECRET_KEY> --amazonec2-vpc-id <YOUR_VPC_ID> --amazonec2-instance-type m4.xlarge --amazonec2-region <YOUR_AWS_REGION, e.g. eu-west-1> <YOUR_MACHINE_NAME> -
Update the docker-machine security group to permit inbound http traffic on port 80 (from the machine(s) from which you want to have access only), also UDP on 25826 and 12201 from 127.0.0.1/32
-
Set your local environment variables to point docker-machine to your new instance:
eval $(docker-machine env <YOUR_MACHINE_NAME>)
To run locally
-
Create a local Docker Engine (replace the placeholders and their <> markers):
docker-machine create --driver virtualbox --virtualbox-memory 2048 <YOUR_MACHINE_NAME> -
Set your local environment variables to point docker-machine to your new instance:
eval $(docker-machine env <YOUR_MACHINE_NAME>)
To run with Docker Swarm
Create a Docker Swarm that has a publicly accessible Engine with the label "tier=public" to bind Nginx and Logstash to that node
Launching
- Run: export TARGET_HOST=\<IP_OF_PUBLIC_HOST>
- Run: export CUSTOM_NETWORK_NAME=\<CUSTOM_NETWORK_NAME>
- Create a custom network: docker network create $CUSTOM_NETWORK_NAME
- Run: docker-compose -f compose/elk.yml up -d
- Run: export LOGSTASH_HOST=\<IP_OF_LOGSTASH_HOST>
- Source all the required parameters for your chosen cloud provider.
- For example, for AWS you will need to source AWS_VPC_ID, AWS_SUBNET_ID, AWS_KEYPAIR, AWS_INSTANCE_TYPE and AWS_DEFAULT_REGION. To do this, make a copy of the env.aws.provider.sh.example file in /conf/provider/examples and save it as env.provider.aws.sh in /conf/provider. You can then replace all the tokens with your values.
- You should then run: source ./conf/env.provider.sh (this will source all the provider-specific environment variable files you have specified).
- The provider-specific environment variable files should not be uploaded to a remote repository, hence they should not be removed from the .gitignore file.
- Run: source credentials.generate.sh [This creates a file containing your generated passwords, platform.secrets.sh, which is sourced. If the file already exists, it will not be created.]
- platform.secrets.sh should not be uploaded to a remote repository hence do not remove this file from the .gitignore file
- Run: source env.config.sh
- If you delete platform.secrets.sh or if you edit any of the variables manually, you will need to re-run credentials.generate.sh in order to recreate the file or re-source the variables.
- If you change the values in platform.secrets.sh, you will need to remove your existing docker containers and re-run docker-compose in order to re-create the containers with the new password values.
- When creating a new instance of ADOP, you must delete platform.secrets.sh and regenerate it using credentials.generate.sh, else your old environment variables will get sourced as opposed to the new ones.
- Choose a volume driver - either "local" or "nfs" are provided, and if the latter is chosen then an NFS server is expected along with the NFS_HOST environment variable
- Pull the images first (this is because we can't set dependencies in Compose yet so we want everything to start at the same time): docker-compose pull
- Run (logging driver file optional): docker-compose -f docker-compose.yml -f etc/volumes/\<VOLUME_DRIVER>/default.yml -f etc/logging/syslog/default.yml up -d
Required environment variable on the host
- MACHINE_NAME the name of your docker machine
- TARGET_HOST the dns/ip of proxy
- LOGSTASH_HOST the dns/ip of logstash
- CUSTOM_NETWORK_NAME: The name of the pre-created custom network to use
- [OPTIONAL] NFS_HOST: The DNS/IP of your NFS server
Using the platform
Generate ssl certificate
Create ssl certificate for jenkins to allow connectivity with docker engine.
- RUN : source ./conf/env.provider.sh
- RUN : source credentials.generate.sh
- RUN : source env.config.sh
- RUN : ./adop compose gen-certs ${DOCKER_CLIENT_CERT_PATH}
Note : For Windows run this command from a terminal (Git Bash) as administrator.
Load Platform
- Access the target host url
http://<TARGET_HOST>with the your username and password- This page presents the links to all the tools.
- Click: Jenkins link.
- Run: Load_Platform job
- Once the Load_Platform job and other downstream jobs are finished your platform is ready to be used.
- This job generates a example workspace folder, example project folder and jenkins jobs/pipelines for java reference application.
- Create environment to deploy the reference application
- Navigate to
http://<TARGET_HOST>/jenkins/job/ExampleWorkspace/job/ExampleProject/job/Create_Environment - Build with Parameters keeping the default value.
- Navigate to
- Run Example pipeline
- Navigate to
http://<TARGET_HOST>/jenkins/job/ExampleWorkspace/job/ExampleProject/view/Java_Reference_Application/ - Click on run.
- Navigate to
- Browse the environment
- Click on the url for your environment from deploy job.
- You should be able to see the spring petclinic application.
- Now, you can clone the repository from gerrit and make a code change to see the example pipeline triggered automatically.
Define Default Elastic Search Index Pattern
Kibana 4 does not provide a configuration property that allow to define the default index pattern so the following manual procedure should be adopted in order to define an index pattern:
- Navidate to Settings > Indices using Kibana dashboard
- Set index name or pattern as "logstash-*"
- For the below drop-down select @timestamp for the Time-field name
- Click on create button
User Feedback
Documentation
Documentation can be found on our GitHub Pages site.
Issues
If you have any problems with or questions about this project, please contact us through Gitter or a GitHub issue.
Contribute
You are invited to contribute new features, fixes, or updates, large or small; we are always thrilled to receive pull requests, and do our best to process them as fast as we can. You can find more information in our documentation.
Before you start to code, we recommend discussing your plans through a GitHub issue, especially for more ambitious contributions. This gives other contributors a chance to point you in the right direction, give you feedback on your design, and help you find out if someone else is working on the same thing.
Roadmap
We use this working Roadmap to evolve and summarise plans for future features and the merge of existing PRs.