Globe graphic template
A basic template to get you up and running fast. Scaffolds the html, css, and js necessary for a responsive iframe graphic, hassle-free.
- Quick start
- Quick start: advanced
- Basic workflow
- ai2html workflow
- How to deploy
- Where is my published graphic?
- Multiple iframes in a single article
- Why iframes?
- When not to use iframes
Instructions
Setup project
In Terminal, navigate to your project directory (command line tutorial). Then run:
curl -Lk https://goo.gl/xlXWDl > Makefile; make basic;That's it. You are now ready to do work. (see advanced version setup)
To see your graphic, open index.html in a browser or run make server if you have light-server.
Basic workflow
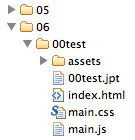
All your code should go in the src folder:
- html:
src/index.html - css:
src/main.css - js:
src/main.js - assets: put your images, audio, etc. in
src/assets
Please note: If you ever find yourself needing to make an absolute path reference, remember to use '//' not 'http://'.
ai2html workflow
To integrate ai2html output into this generator, first make sure to follow instructions in Setup project. Then:
- Move your
.aifile to thesrcfolder and call itonline.ai. - In Illustrator, run the ai2html script.
- It will create an ai2html-settings text block. Modify the
image_output_pathsetting. Change it from blank toassets/.
Now, every time you run the ai2html script:
- In your project directory, run the following terminal command:
make ai2html
To deploy, follow the instructions in the How to deploy section.
Style guide
The template comes equipped with base.css, a stylesheet containing reset, default Globe styles, typography, and layouts. See here for documentation and best practices.
How to deploy
- Create project folder and a blank jpt like normal in workbench. Make sure to choose type web from the dropdown in the second field before creating.
- Copy over the files inside the src folder to Methode. You can drag and drop from desktop to Workbench.
- If you have assets, you must create the folder in Methode before copying over those files
- Paste the contents of methode.jpt into your jpt
- Critical: paste in the path to the jpt at the top of the jpt in
window.pathToJPT = ''
Important If you ever make changes to the CSS and file and have to republish, make sure to update the version in the src/index.html file so it will cache bust the previous one. (Simply look for main.css?version in the file and update the number.)
Note: Add <p:style src='https://apps.bostonglobe.com/common/css/igraphic/igraphic-0.1.0.css'/> to the top of the jpt if using as an igraphic.
Portalpub files
Click on each of the files in the folder and right-click actions --> portalpubBG initially, and each time you change any of the files.
Where is my published graphic?
Once you've published all the files, you can access the index.html - the actual graphic - by modifying this url appropriately:
https://c.o0bg.com/rw/Boston/2011-2020/WebGraphics/<SECTION>/BostonGlobe.com/<YEAR>/<MONTH>/<SLUG>/index.html- Example:
https://c.o0bg.com/rw/Boston/2011-2020/WebGraphics/Metro/BostonGlobe.com/2015/09/hut/index.html
Multiple iframes in a single article
In methode.jpt, replace all occurences of ${storyID}-1 with incrementing numbers for each additional graphic. So if you have two graphics, the second should be ${storyID}-2. There are two places, one near the top and one near the bottom.
In general, it is unwise to reuse a jpt in multiple articles. Changing this number in a jpt will cause it to disappear from previously published articles.
Setup advanced
This requires node, and uses webpack with babel transform and stylus.
curl -Lk https://goo.gl/xlXWDl > Makefile; make advanced;If using advanced setup, run npm start to compile and preview
Live reload
Light-server lets you setup a local server for live reloading when a file changes, and so that others in the building can see what you are working on.
Make sure to have node and light-server installed. Check by typing node --version and light-server --version in Terminal.
In the root of your project run make server. Hitting ctrl + c will stop the process.
Changes to any file in the src folder will trigger your browser to reload.
How to include javascript libraries
Here is a list of the currently available libraries:
- jquery: DOM operations
- lodash: utilities
- d3: Visualization
- jplayer: HTML5 audio/video
- raf: Request Animation Frame polyfill
- velocity: Animation
- waypoints: Scroll triggers
- imager: Responsive images with lazy load
- picturefill: Responsive images
- lazysizes Lazy loading
- mapbox: Maps
- moment: Time and dates
- vivus: SVG line path animation
To use, just add a script tag in the src/index.html page where it says "". jQuery is included but commented out by default. Simply uncomment to include. If there is a library you would like added, talk to Russell.
Why iframe?
I'm glad you asked...
- No Globe conflicts: The iframe gives the graphic a safety bubble. No worrying about the scope of variables, or how Globe stylesheets or scripts might affect your graphic. This also future-proofs your graphic. If (and when) the Globe introduces new namespacing, or changes a js lib you were relying on, you don't have to worry.
- No inter-graphic conflicts: If there are multiple graphics in a single story, you don't have to worry about namespacing conflicts here either, even if you re-use your own code or a generator of some sort.
- No cross-origin issues: Since all content is on the same domain and relatively referenced, there will never be strange cross-origin issues (like on audio files...).
- Simpler development: No need to simulate the Globe environment. Things will look and behave 100% the same locally and in production.
- Long term viability: Since you are writing code oustide of the Globe ecosystem, you don't have to do anything hacky or magical that might be Methode specific. You create a standalone web project. It will work when we start using another CMS.
- Embeddable: The small snippet of code in
methode.jptcan be integrated into almost any other CMS, which means other news organization or blogs can run our graphics (if we so desire).
When not to use iframes
Iframes are great for the reasons mentioned above. If your graphic necessitates having one of the following features however, you might want to reconsider your design or the use of iframe.
- If you need to have a fixed element while the user scrolls
- If a user action jumps the scroll bar
While there are workarounds that involve setting up messaging between the parent and child, anything involving manipulating the scroll position is advised against.
Get parent height
Sometimes you want to do a thing based on the height of the browser (ie. make a map take up 2/3 of the browser). In order to get the height of the parent window, you must add this to src/main.js (just below the line init() at the bottom):
    (function setupRequest() {
        if(window.pymChild) {
            /*** get parent height.... ***/
            window.pymChild.sendMessage('height-request', true);
            window.pymChild.onMessage('height-send', function(msg) {
                var initialHeight = +msg;
                /*** call a function here, passing it the "initialHeight" variable ***/
                //example: createChart(initialHeight);
            });
        } else {
            setTimeout(setupRequest, 30);
        }
    })();
License & Credits
Released under the MIT open source license. See LICENSE for details.
Super thanks to NPR Visuals team for pym.js.