Tuya.Net
.NET Standard 2.0 library to interface with Tuya WiFi smart devices over LAN, without using the cloud.
Full documentation: https://clusterm.github.io/tuyanet/
Description
This library controls and monitors Tuya compatible WiFi Smart Devices (Plugs, Switches, Lights, Window Covers, etc.) using the local area network (LAN). Tuya devices are designed to communicate with the Tuya Cloud but most also expose a local area network API, allowing us to directly control the devices without using the cloud.
Installation
You can use NuGet:
PM> Install-Package TuyaNetDependencies
- .NET Standard 2.0
- Newtonsoft.Json (>= 13.0.1)
How communication with Tuya devices works at all
Every Tuya device broadcasts to local network UDP packets with short info about itself. This data is encrypted with AES but the encryption key is the same for every device and it can be easily decrypted. This packet is sent every 5 seconds and contains data with a unique device ID, device type ID and protocol version.
Also, every device can accept TCP connection and proceed requests. Every request contains command code and JSON string. JSON string is encrypted with AES using local key. This key is assigned by the Tuya Cloud server and is unique for each device. So you need to create a Tuya developer account and request this key from the server.
Most requests must contain base JSON values:
{
    "gwId": "DEVICE_ID",
    "devId": "DEVICE_ID",
    "uid":  "DEVICE_ID",
    "t": "CURRENT_TIME"
}
Where DEVICE_ID is a device ID and CURRENT_TIME is a Unix timestamp as a string.
Every response contains command code, JSON and return code (0 = success).
Most devices are controlled via data points (DPs). Every data point has a number and a value. Usually you can send DP_QUERY (0x0A) command and receive ra esponse like
{
    "devId": "DEVICE_ID",
    "dps":{
        "1": true,
        "2": false,
        "9": 0,
        "10": 0
    }
}
dps is a dictionary with data points and current values. This is the response from the "2 in 1" smart switch. 1 is a state of switch #1, 2 is a state of switch #2, 9 and 10 are timer values. Please note that DPs numbers are strings. DPs values can be of any type.
Usually you can change DPs values using CONTROL (0x07) command and JSON like:
{
    "gwId": "DEVICE_ID",
    "devId": "DEVICE_ID",
    "uid":  "DEVICE_ID",
    "t": "CURRENT_TIME",
    "dps":{
        "1": false
    }
}
This request will turn off switch #1.
Don't worry, this library will help you to create requests automatically.
How to obtain local key
-
Download Smart Life mobile app: for Android or for iOS.
-
Register your device using this app.
-
Open iot.tuya.com, create developer account and log in.
-
Click on
Cloud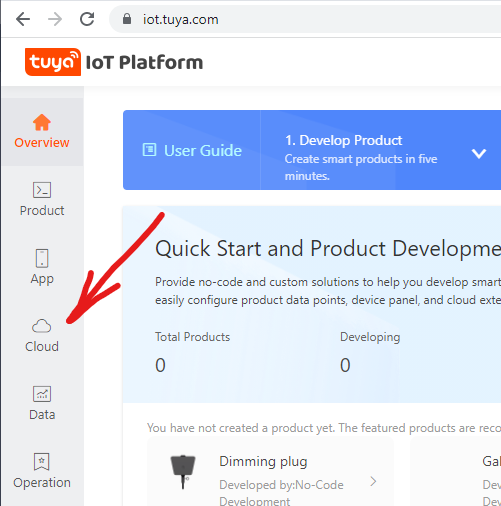
-
Click on the
Create Cloud Projectbutton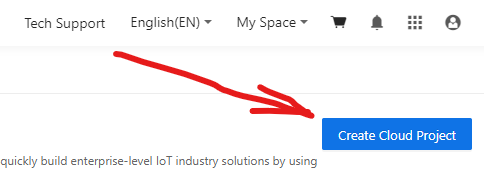
-
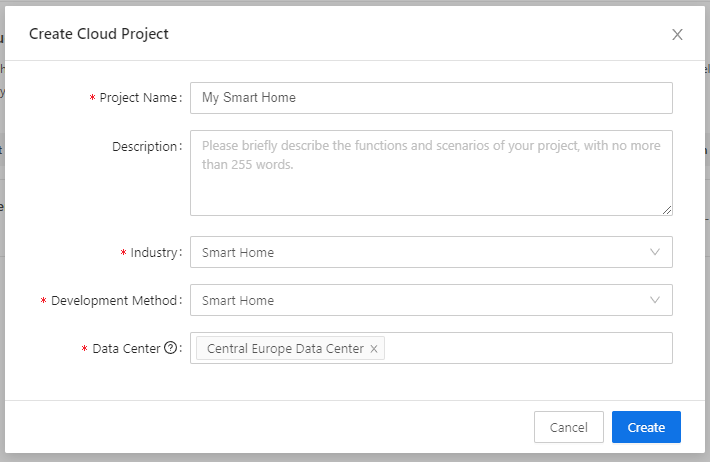
Enter any name for your project, select "Smart Home" for industry and development method. You can select any data center but you must remember which one you chose.
-
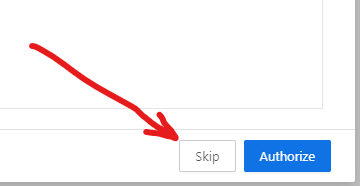
Skip Configuration Wizard.
-
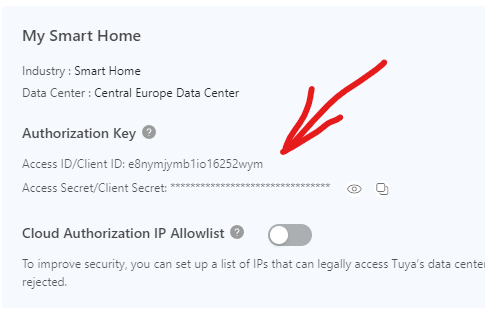
Copy and save your Access ID and Access Secret.
-
Select
Devices.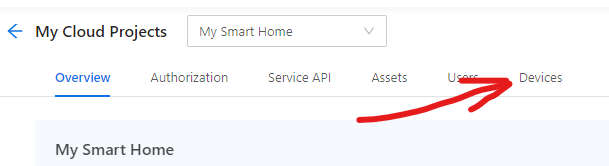
-
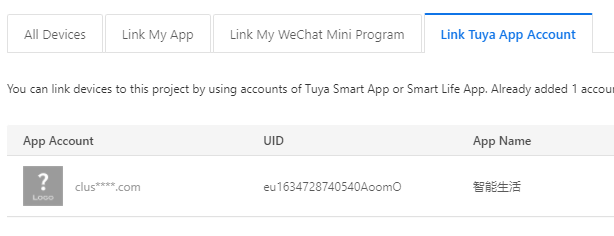
Select
Link Tuya App Account.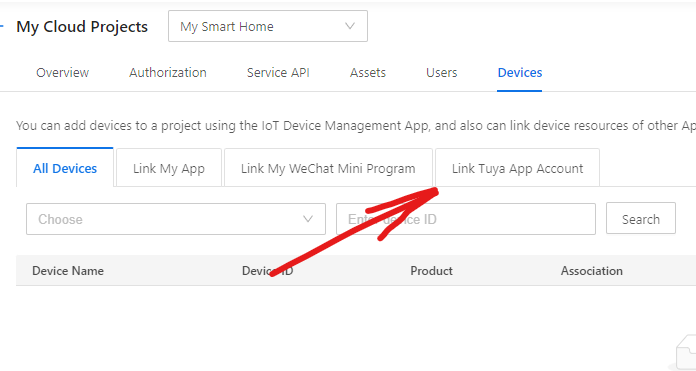
-
Click on
Add App Accountand it will display a QR code.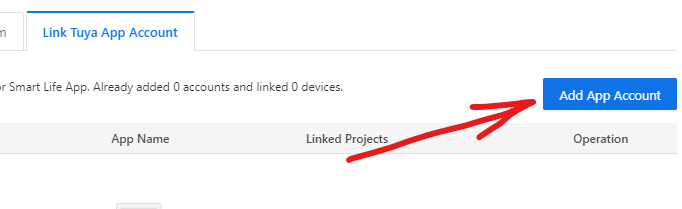
-
Scan the QR code using your mobile phone and Smart Life app by going to the "Me" tab and clicking on the QR code button [..] in the upper right hand corner of the app. Your account should appear on the list.
-
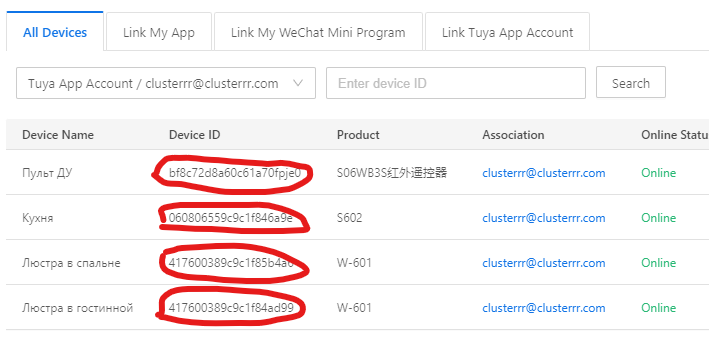
Now open the
Devicestab.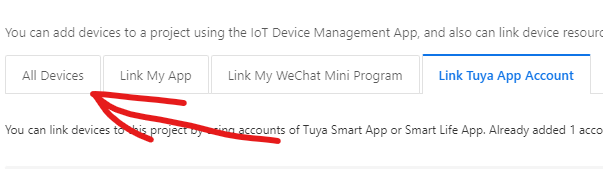
-
You should see list of your devices. Copy and save at least one device ID.
-
Click on the
Service APItab.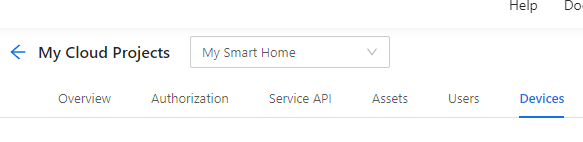
-
Click on
Go to Authorize
-
Add
IoT CoreAPI (subscribe to it first).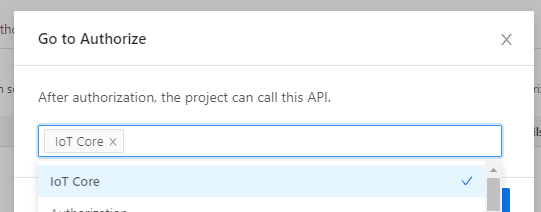
-
Now you can retrieve local keys of your devices using
TuyaApiclass:var api = new TuyaApi(region: TuyaApi.Region.CentralEurope, accessId: ACCESS_ID, apiSecret: API_SECRET); var devices = await api.GetAllDevicesInfoAsync(anyDeviceId: DEVICE_ID); foreach(var device in devices) { Console.WriteLine($"Device: {device.Name}, device ID: {device.Id}, local key: {device.LocalKey}"); }region- the region of the data center that you have selected on iot.tuya.comaccessIDandapiSecret-Access IDandAccess Secretfrom iot.tuya.comanyDeviceId- ID of any of your smart devices (to fetch user ID).
Network scanner for Tuya devices
You can use TuyaScanner class to catch and decode broadcast UDP packets from devices:
static void Main(string[] args)
{
    var scanner = new TuyaScanner();
    scanner.OnNewDeviceInfoReceived += Scanner_OnNewDeviceInfoReceived;
    Console.WriteLine("Scanning local network for Tuya devices, press any key to stop.");
    scanner.Start();
    Console.ReadKey();
    scanner.Stop();
}

private static void Scanner_OnNewDeviceInfoReceived(object sender, TuyaDeviceScanInfo e)
{
    Console.WriteLine($"New device found! IP: {e.IP}, ID: {e.GwId}, version: {e.Version}");
}
You can use it to retrieve the device's IP address, ID, and protocol version. Remember that your computer must be on the same network as your devices to receive broadcasts.
How to communicate with devices
You should now have:
- Device IP address - from scanner or from your router
- Device local encryption key - retrieved via
TuyaApi - Device ID - from scanner or from iot.tuya.com
There is TuyaDevice class, you need create instance of it:
var dev = new TuyaDevice(ip: DEVICE_IP, localKey: DEVICE_KEY, deviceId: DEVICE_ID);It uses protocol version 3.3 by default but you can specify version 3.1 as well:
TuyaDevice dev = new TuyaDevice(ip: DEVICE_IP, localKey: DEVICE_KEY, deviceId: DEVICE_ID, protocolVersion: TuyaProtocolVersion.V31);Now you can encode requests:
byte[] request = device.EncodeRequest(TuyaCommand.DP_QUERY, "{\"gwId\":\"DEVICE_ID\",\"devId\":\"DEVICE_ID\",\"uid\":\"DEVICE_ID\",\"t\":\"CURRENT_TIME\"}");Send it:
byte[] encryptedResponse = await device.SendAsync(request);And decode response:
TuyaLocalResponse response = device.DecodeResponse(encryptedResponse);
Console.WriteLine($"Response JSON: {response.JSON}");
How to set DPs:
byte[] request = device.EncodeRequest(TuyaCommand.CONTROL, "{\"gwId\":\"DEVICE_ID\",\"devId\":\"DEVICE_ID\",\"uid\":\"DEVICE_ID\",\"t\":\"CURRENT_TIME\"},\"dps\":{\"1\":false}}");
byte[] encryptedResponse = await device.SendAsync(request);
TuyaLocalResponse response = device.DecodeResponse(encryptedResponse);
Console.WriteLine($"Response JSON: {response.JSON}");
Too complicated, isn't it? There is more simple way. You can use FillJson() method to fill standard fields automatically:
byte[] request = device.EncodeRequest(TuyaCommand.CONTROL, device.FillJson("{\"dps\":{\"1\":false}}"));
byte[] encryptedResponse = await device.SendAsync(request);
TuyaLocalResponse response = device.DecodeResponse(encryptedResponse);
Console.WriteLine($"Response JSON: {response.JSON}");
Also, there is SendAsync() overload that accepts command ID with JSON, encodes it, and returns decoded data:
TuyaLocalResponse response = await device.SendAsync(TuyaCommand.CONTROL, device.FillJson("{\"dps\":{\"1\":false}}"));Finally, there are GetDps() and SetDps() methods:
Dictionary<int, object> dps = await device.GetDpsAsync();
// Change multiple values at once
Dictionary<int, object> newDps = await device.SetDpsAsync(new Dictionary<int, object> { { 1, false }, { 2, true } });
// Change single value
newDps = await device.SetDpAsync(1, true);
Some devices may have dynamically changed values, such as timers. They need to be updated before reading:
newDps = await device.UpdateDpsAsync(new int[] { 9, 10 });Or just:
newDps = await device.UpdateDpsAsync(9, 10);IR Remote Control
Since version 1.0.3 you can control infrared remote controls. There is TuyaIRControl class for it. You can learn button from real remote control using GetButtonCodeAsync method (it returns Base64-encoded pulses sequences) and simulate button press using SendButtonCodeAsync method.
Example:
string codeBase64 = await ir.GetButtonCodeAsync(10000, retries: 1);
Console.WriteLine($"Button code learned: {codeBase64}");
while (true)
{
    await ir.SendButtonCodeAsync(codeBase64);
    Console.WriteLine("Button press simulated");
    await Task.Delay(1000);
}
Automatic local key refresh
You can create TuyaDevice object without local key but with API key/secret like this:
var dev = new TuyaDevice(ip: DEVICE_IP, region: API_REGION, accessId: ACCESS_ID, apiSecret: API_SECRET, deviceId: DEVICE_ID);Then obtain local key:
await dev.RefreshLocalKeyAsync()Using the Cloud API
You can use official Tuya Cloud API.
Example of device specifications request:
var api = new TuyaApi(region: TuyaApi.Region.CentralEurope, accessId: ACCESS_ID, apiSecret: API_SECRET);
var devspec = await api.RequestAsync(TuyaApi.Method.GET, $"/v1.1/devices/{DEVICE_ID}/specifications");
devspec will contain JSON with all device data points with descriptions and possible values.
Credits
- TinyTuya https://github.com/jasonacox/tinytuya by Jason Cox For Python version of the library inspired me
- Tuya Smart Plug API https://github.com/Marcus-L/m4rcus.TuyaCore by Marcus Lum For some ideas and algorithms
- TuyAPI https://github.com/codetheweb/tuyapi by codetheweb and blackrozes For protocol reverse engineering, additional protocol reverse engineering from jepsonrob and clach04
Contacts
- My site (Russian): https://clusterrr.com
- Email: clusterrr@clusterrr.com
- Telegram: https://t.me/Cluster_M
- Donations: https://www.donationalerts.com/r/clustermeerkat