AdeptiScanner-GI
OCR-based inventory scanner for Genshin Impact, with both a manual and automatic mode.
Please read instructions below before using. Download link for the latest version can be found here
AdeptiScanner requires some tools produced by Microsoft to work, they're commonly used in games so you're likely to already have them.
- If the scanner throws an error on startup, you may be missing them. Download links for their installers can be found here. You need both x86 and x64
Warnings and important notes
- For the automated scanning mode of this program to work, it needs to run as admin.
- While using the auto mode, the program will take control of your mouse. You can press escape during the scan to pause it. Do not move or use your mouse during auto unless paused.
- According to my interpretation of the Genshin TOS, use of this scanner should be allowed as I do not believe it causes an unfair competitive advantage. To my knowledge, nobody has gotten in trouble for the use of this or similar programs so far, but if you're worried about it I suggest avoiding the auto mode.
- AdeptiScanner relies on specific colour values to identify the contents of the image
- Anything that changes in-game colours can mess up the results. Examples of programs/features that can interfere is Reshade, Windows Night Light, F.lux, Nvidia Filters and Colourblind compensation tools.
- Image sharpening also affects colours in this way. The most common example of this is "Radeon Image Sharpening" in AMD Radeon Software.
Updating for a new version
- There's an optional in-app update checker, which can notify you of game data updates and scanner updates
- Game data updates can be handled with a single click
- Scanner updates will open the download page for the new version, and export your settings so the new version can import them next time you run it
- You can manually update game data by replacing the
ArtifactInfo.jsonfile insideScannerFileswith an updated one. Latest version can be found here
Weapon Mode
- Weapon mode is used the same way as regular (Artifact) mode
- Sorting your weapon list by level is recommended, to avoid missing low-rarity weapons you actually care about
- When using Auto functionality in weapon mode, the scan will stop when all weapons on a page are identical to an already scanned one, as opposed to when one is for artifact mode
Character import via enka.network
- (optional) Scan your artifacts and/or weapons
- This lets AdeptiScanner show which characters you own but haven't imported yet
- Make sure your profile showcase is set to show character details
- If you changed this setting, exit to title screen and then go back in to quickly refresh your showcase data
- Open the
Characterstab in AdeptiScanner, enter your UID and click Fetch - Change your showcased characters and repeat from step 3.
- If you followed step 1, the text box below the Fetch button should show a list of characters you've yet to import but own according to your artifact/weapon scan results
- You can exit to title screen and then go back in to quickly refresh your showcase data
How to prepare for scanning
- Setting the game to windowed mode with a resolution of 1600x900 is recommended, but not required
- Other aspect ratios and resolutions are likely to work, but not tested to the same degree
- Fullscreen mode works, but requires the
Advanced->Process handle featuressetting to be enabled (Enabled by default)
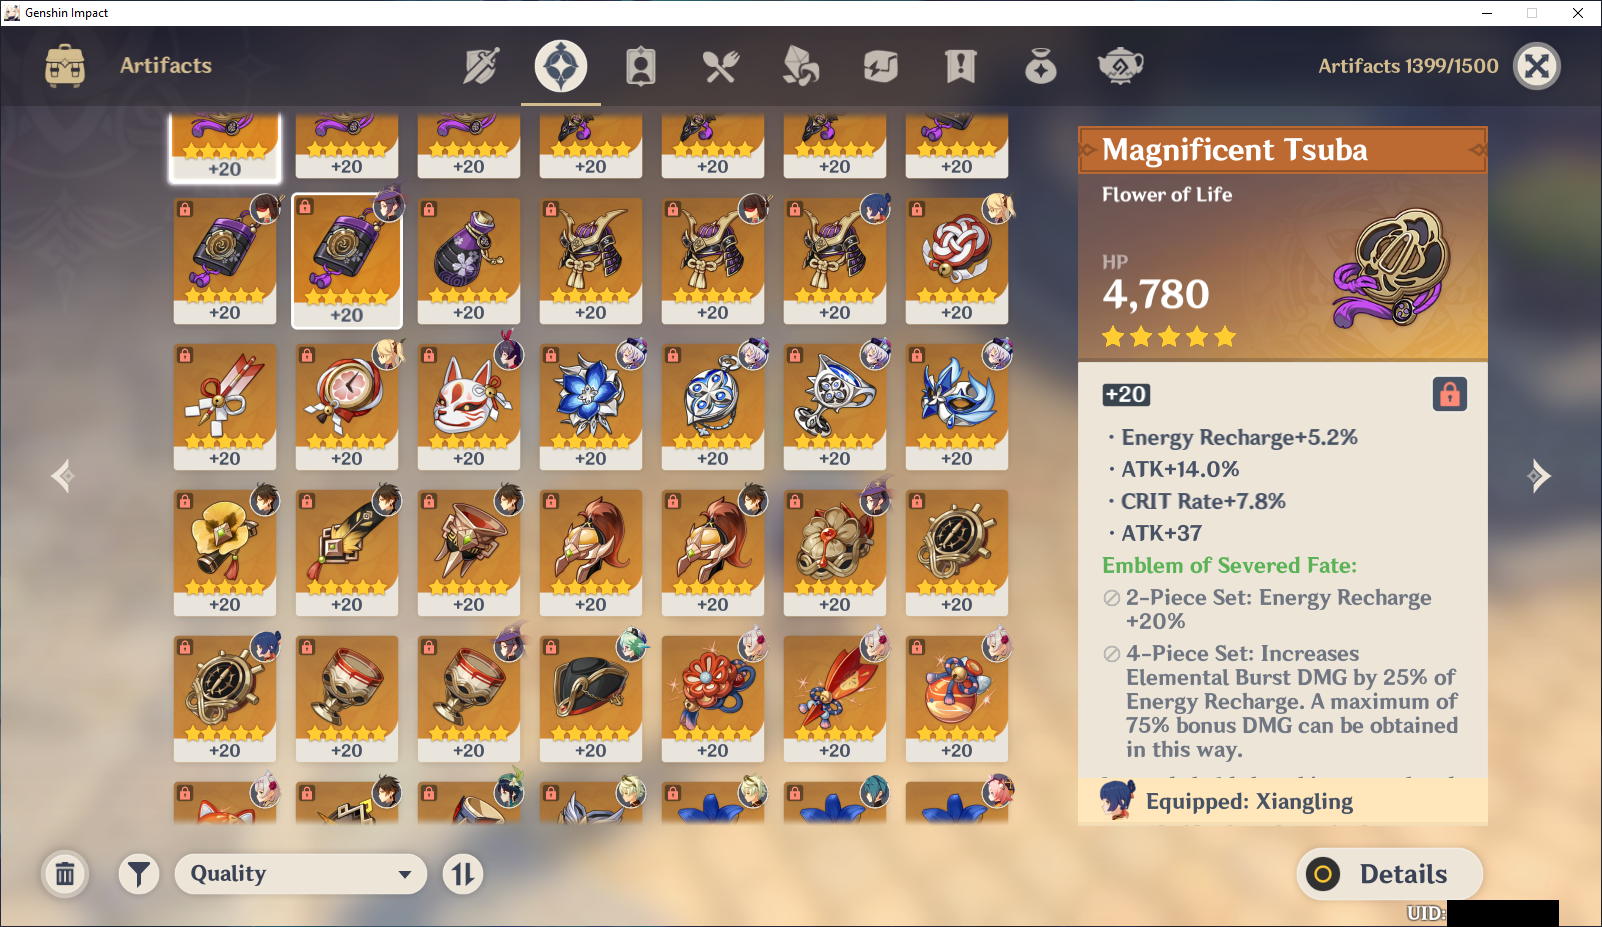
- Open the artifact section on your main backpack and select a 5 star artifact with a full length item description
- Press "Capture"
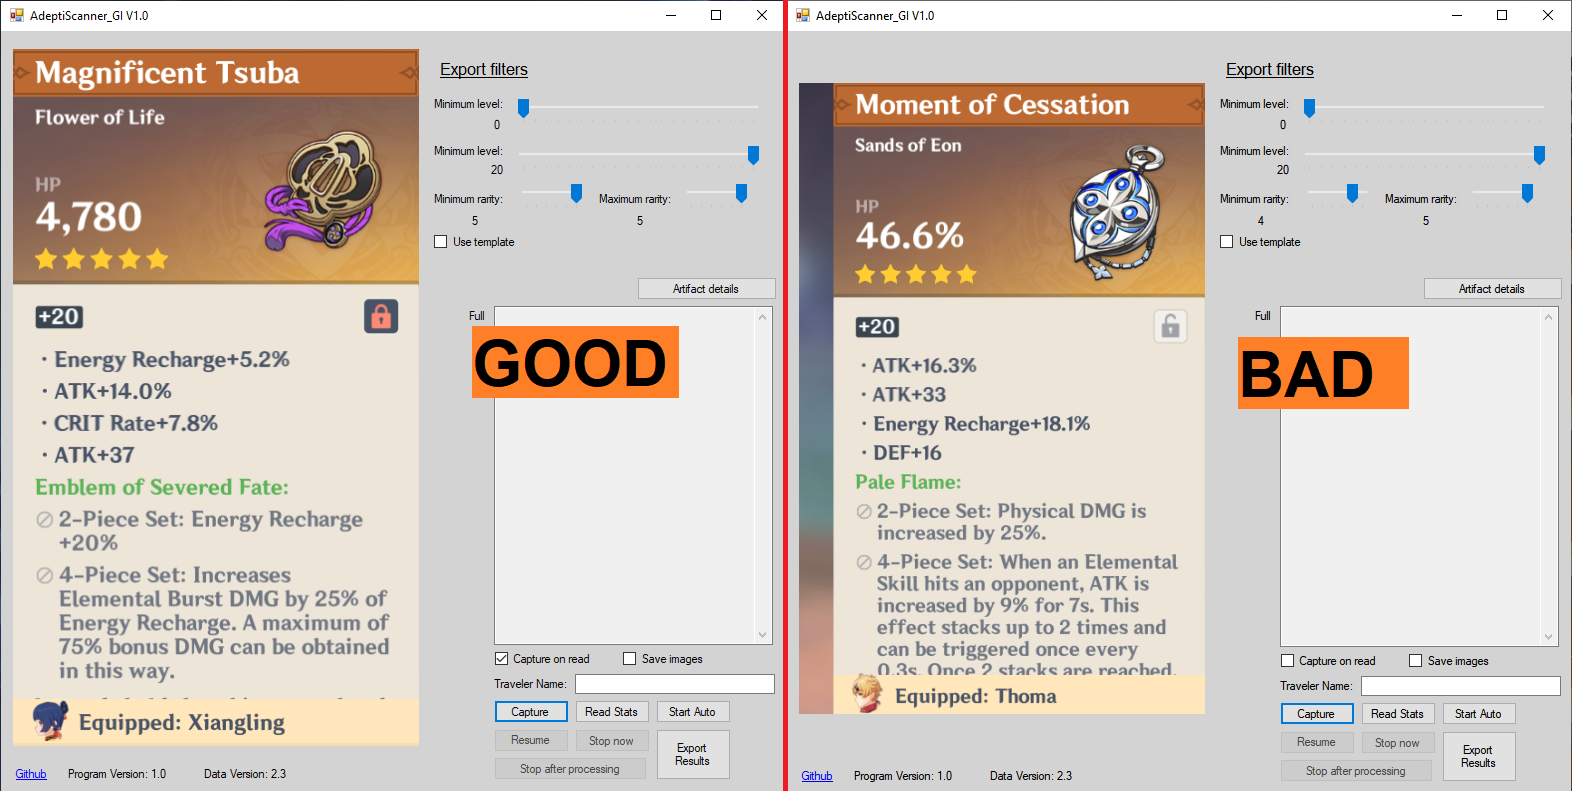
- Make sure the preview matches the good example, if it doesn't, try moving your camera around a bit in-game to change the background and repeat again from step 2

- Make sure the preview matches the good example, if it doesn't, try moving your camera around a bit in-game to change the background and repeat again from step 2
- Enter your in-game name / traveler name in the
Traveler Nametext box.- Not entering this will cause any scanned artifacts that are equipped on your Traveler to be incorrectly detected as either equipped on the wrong character or not equipped at all
- There is an equivalent setting for Wanderer name
You're now ready for manual or automatic artifact scanning
Manual scanning
- Follow the instructions under
How to prepare for scanning. Do not move the game window and do not cover the captured area while scanning - Select the artifact you wish to scan and press the
Read Statsbutton- The scanner is mainly tested for 4 and 5 star artifacts. While it has the information about all tiers of artifacts, it may be unable to read some lower tier ones
- Repeat step 2 for every artifact you wish to manually scan
Automated scanning
- While using the auto mode, the program will take control of your mouse. You can press escape during the scan to pause it.
- Do not move or use your mouse during auto unless paused.
- Automated scanning will only work properly if this program is being run as admin
- Automated scanning will scroll through your entire artifact inventory, filtering is applied on export
- Follow the instructions under
How to prepare for scanning - Scroll your artifact list so the stars for the top row and the white/beige label for the bottom row are both fully visible with some margin.

- Press the
Start Autobutton- During the scan, you can press the escape button on your keyboard to pause it
Resumewill make the scanner resume the scanStop after processingwill make the scanner stop scrolling through new artifacts immediately, but finish processing all scanned onesStop nowwill make the scanner immediately exit automated scanning, not saving any scanner artifacts
- The scanner will automatically stop once it thinks it's done scrolling through the artifact list or finds an artifact with identical stats to a previous one.
- If this happens too early (for example, due to two artifacts being identical), you can manually scroll to the next screen and press
Start Auto. Results of the previous run is not automatically deleted.
- If this happens too early (for example, due to two artifacts being identical), you can manually scroll to the next screen and press
- Follow the instructions under
Exporting results
- Scan artifacts using manual, automatic scanning or a combination of the two
- Configure the
Export Filterssection according to your wishes- You can use a template file that everything except artifact details will be copied from. To do this, place a GOOD-format json in the
ScannerFilesfolder and rename it toExportTemplate.json - If you wish, you can combine the artifacts of multiple GOOD-format jsons with the
Advanced->Load Artifact Filebutton. There is no duplicate detection when doing this
- You can use a template file that everything except artifact details will be copied from. To do this, place a GOOD-format json in the
- Press the
Export Resultsbutton, your results will be placed in a timestamped file in theScannerFilesfolder- You can change your export filters and press the export button more than once if you so wish, each export will appear as a separate file
Special information when not running as admin or without Process handle features
Click to expand
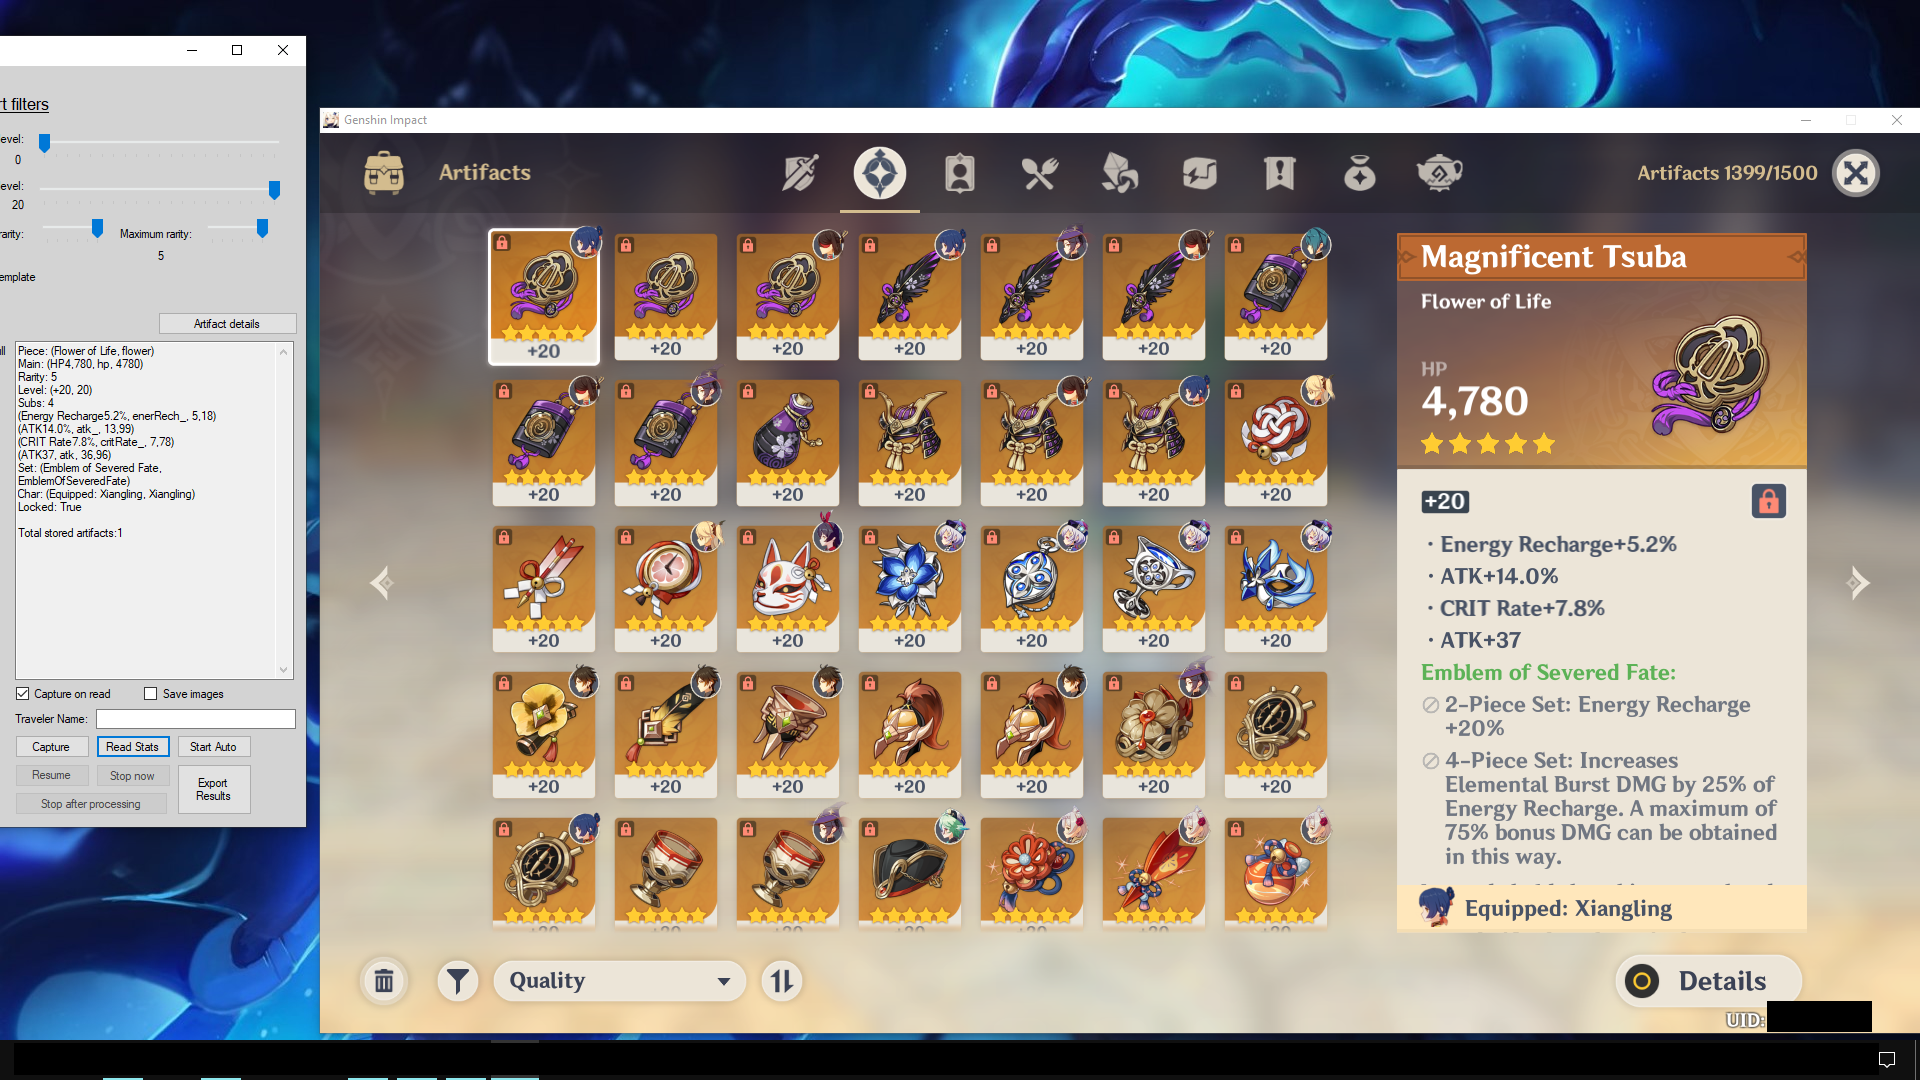
### Under these conditions, the following extra requirements apply - Fullscreen-mode genshin is not supported - The capture process cannot automatically switch focus to the game, as such the game window must not be covered during the capture process or any other feature that scans the game window - To capture the game, it must be on your primary monitor, cover the middle of said screen , and have a visible white window header (can be "faked" using notepad or similar) - Example image of meeting these conditions on a 1080p monitor How to contact
- Create an issue or pull request on this repo
- I haven't created a discord, as I have no idea how much interest there will be. If one is needed in the future I'll create one
- I'm in the community-created Genshin Dev Discord, same username as on here
- I'm also in the Genshin Optimizer Discord. Feel free to @ me for smaller issues, but for longer things it's better to stick to the Genshin Dev discord or DMing me
Acknowledgements
- Character importing relies on the API Enka.Network
- Some functions used are heavily based on code from WFInfo, an OCR-based companion program for Warframe
- The tesseract model used was trained and provided by the creator of this similar program
- The main purpose of this scanner is to more easily import your artifacts into Genshin Optimizer, but it should be compatible with any other program that uses the GOOD format