Umbraco GodMode
Diplo God Mode makes Umbraco developers invincible!
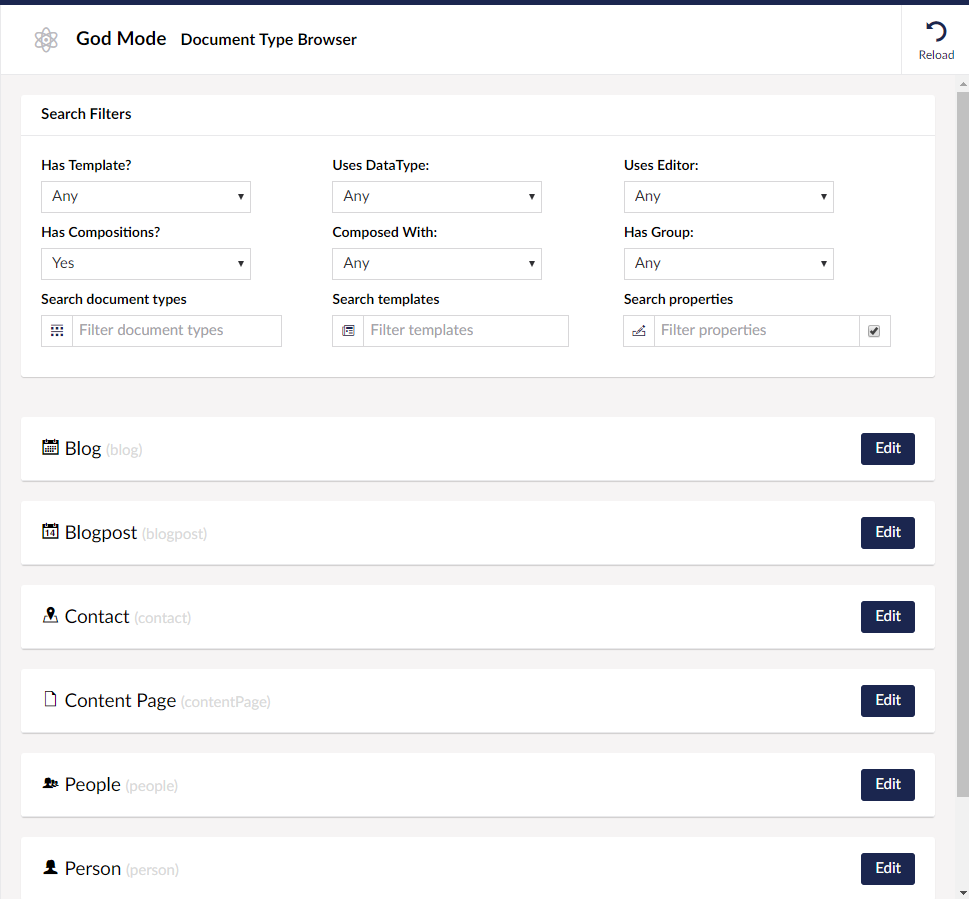
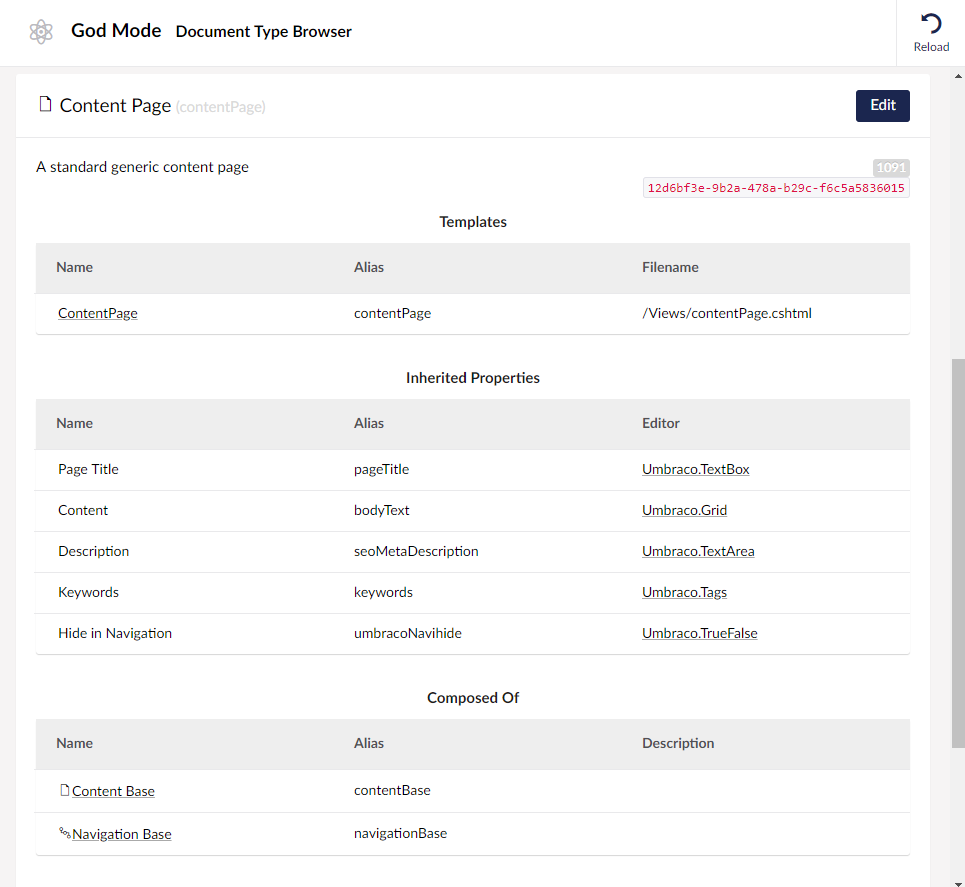
This custom tree in the Settings section of Umbraco 13 (other versions available) allows you to browse, query and search your document types and compositions; your templates and partials; your datatypes and property editors; your media library; your custom controllers and models. It also provides diagnostics about your Umbraco set-up and the server it is running on.
For instance, you can:
- Quickly search doc types, templates, editors, media etc.
- Easily see which doc types inherit from any of your compositions
- See which document types use which property editor or data type instance
- Distinguish between element types and types that vary by culture or segment
- See which partials are used by all your templates (and which are cached)
- Find out which data types are being used (or not)
- View all content pages in a searchable and filterable table (using fast, server-side pagination) and view nuCache data
- View all Umbraco members and filter them by assigned group
- Browse all media in the Media Library and filter by type
- List all tags and the content associated with the tag. Find orphaned tags
- See which controllers (Surface, API and RenderMvc) are being used and in what namespaces and DLLs
- View all generated models (that inherit from
PublishedContentModel) - View services injected into the IOC container, registered Content and URL Finders
- Clear internal Umbraco caches and even restart App Pool
- View diagnostics and configuration settings about your Umbraco site and hosting environment
- Warm up compilation of all templates ("views") in a single bound... erm, click.
Screenshots


See more in https://github.com/DanDiplo/Umbraco.GodMode/tree/v9/Screenshots
Demo
YouTube: https://www.youtube.com/watch?v=xLjTV5LMp44&t=7s (old v7 version)
Blog Post: https://www.diplo.co.uk/blog/web-development/god-mode-comes-to-umbraco-9/ (v9 version)
Download & Installation
*Important!: This is for Umbraco 13 and above. Use v10 for Umbraco 10/11. Use v9 branch for Umbraco 9. Use v8 branch for the Umbraco 8 version or the v7 branch for the Umbraco 7 version. See the pattern?
NuGet: https://www.nuget.org/packages/Diplo.GodMode/
dotnet add package Diplo.GodMode
PM> Install-Package Diplo.GodMode
Our Umbraco: https://our.umbraco.org/projects/developer-tools/diplo-god-mode/
Thanks
This code is indebted to a lot of people in the Umbraco Community. But a particular thanks to Søren Kottal for his help and to Sebastiaan "Cultiv" Janssen for some code I borrowed for the environment diagnostics. Also thanks to everyone who maintains Umbraco docs.
Usage
After installation you should see an new God Mode tree in the Settings (Third Party) section within Umbraco.
If you don't, try clearing your browser cache.
Hiding Features and Diagnostics
You can now hide features and diagnostics via optional configuration. You will need to add a new section into appSettings.json in this format:
  "GodMode": {
    "FeaturesToHide": [
    ],
    "Diagnostics": {
      "GroupsToHide": [
      ],
      "SectionsToHide": [
      ],
      "KeysToRedact": [
      ]
}FeaturesToHide: These are the main sections you see in the tree in Umbraco. So you could hide the entire DocType Browser or the Diagnostics section here. The value you put in can either be the name of the section or the alias.
Diagnostics: The three arrays in here are used to hide areas within the Diagnostics tree that might reveal sensitive data. You can hide an entire Group, a Section or a particular Key.
This is best illustrated with an example config from appSettings.json:
  "GodMode": {
    "FeaturesToHide": [
      "Services",
      "Content Browser"
    ],
    "Diagnostics": {
      "GroupsToHide": [
        "Server Configuration",
        "Umbraco Configuration"
      ],
      "SectionsToHide": [
        "MVC Version"
      ],
      "KeysToRedact": [
        "Database Settings:ConnectionString",
        "ConnectionStrings:umbracoDbDSN",
        "Server Settings:Current Directory",
        "Environment Settings:LocalTempPath"
      ]
    }
  }
In the example above the Services and Content Browser tree are hidden from the UI.
Then, in the Diagnostics tree we are hiding the entire Service Configuration group as well as the entire Umbraco Configuration group.
Following this we are hiding just the MVC Version (which appears within the MVC Configuration group).
Then, finally, we are redacting specific keys. These are based on the Section name and the key name combined with a colon. For example, Database Settings:ConnectionString means the key ConnectionString within the Database Settings section. It will have it's value replaced with xxxxxxxxxxxx to redact the value. The only exception to this rule is within the Environment Config group where you just need to add the key name (without the section prefix). For instance, ConnectionStrings:umbracoDbDSN will hide the database connection string within the Environment Config group.
Note: When you change these values you will need to restart your site for the configuration to be applied.
Building / Developing
The v13 repository comes with two solutions:
Diplo.GodMode - this is the GodMode plugin source code.
Diplo.GodMode.TestSite - this is a demo Umbraco 13 site that can be used to view and test the plugin.
Clone the project and ensure you are in the v13 branch. You should see a folder called Umbraco.GodMode.
Within this folder there are the two projects - Diplo.GodMode is the plugin source code and Diplo.GodMode.TestSite is a test Umbraco site that is "connected" to the plugin, so that when you build this project it pulls in the latest version of the plugin.
Note Update the <version> tag in Diplo.GodMode.csproj and also in package.manifest for telemetry.
CLI - using DOTNET command line
When you first clone the code then open a command line prompt within the Diplo.GodMode.TestSite folder and type: dotnet restore
If you are using CLI then CD to the Diplo.GodMode folder and type dotnet build to build the plugin.
After this CD back to Diplo.GodMode.TestSite and do the same - type dotnet build (you may see a couple of warnings, don't worry!).
To run in a browser type dotnet run in the current Diplo.GodMode.TestSite folder. You should see the CLI report that it is listening on a couple of ports eg.
Now listening on: https://localhost:44349
Now listening on: http://localhost:56911
Note: To run on HTTPS locally you may need to install a local dev cert: dotnet dev-certs https --trust
Go to one of these addresses in your browser and it should kickstart the Umbraco installation procedure. Add your login details and you are good to go! (You may see some errors about the DB, but it will create a fresh install, and install the starter kit). Once logged in to the Umbraco back-end go to the Settings section and you should see the God Mode tree at the bottom, under "Third Party".
When you make changes to the plugin project - Diplo.GodMode - then rebuild the test site and it should pull in these changes. Scripts will be copied to the App_Plugins folder. To ensure you get latest copies of JS etc. then I run with the development console open in my browser with the cache disabled.
You can login to the test site backend using the following credentials:
username: test@example.com
password: DiploGodMode!
Using Visual Studio
Within the Diplo.GodMode folder you should see a VS solution file called Diplo.GodMode.sln which you can open in Visual Studio. This enables you to edit the source code for the plugin. The AngularJS and HTML etc. are all in the 'App_Plugins/DiploGodMode/backoffice' folder. You should be able to build this in the usual way (CTRL-SHIFT-B).
To run the test site open the Diplo.GodMode.Testsite.sln solution in the Diplo.GodMode.Testsite folder. Build this solution.
If it doesn't build or you see the message: Error NU1105 Unable to find project information for 'Diplo.GodMode\Diplo.GodMode.csproj'. If you are using Visual Studio, this may be because the project is unloaded or not part of the current solution so run a restore from the command-line. then open the folder containing the solution in a command prompt and type dotnet restore to restore the project.
After this you should be able to build it and then run the site using CTRL-F5 to launch. When you launch for the first time it will install Umbraco and the starter kit as well as the plugin. Whenever you rebuild this project it will pull in the latest changes from the main plugin. So you can have both solutions running simultaneously. See the CLI notes for more info.
Creating NuGet Package
Type dotnet pack at the command line. The package should be created in bin\Debug\ folder. To set the version update the properties in the project.
Extra Info
See https://our.umbraco.com/documentation/Fundamentals/Setup/Install/