Node.js Controller and MQTT API for Anki Overdrive
The node-mqtt-for-anki-overdrive project contains two main components to control Anki Overdrive cars.
- Controller (Node.js application) running on MacBooks or notebooks to invoke commands and receive messages via CLI (command line interface) using the Anki Drive Bluebooth Low Energy interface.
- MQTT interface to invoke commands from cloud platforms like IBM Bluemix and receive events from cars in the cloud. This allows for example to build collision prevention software as demonstrated below.
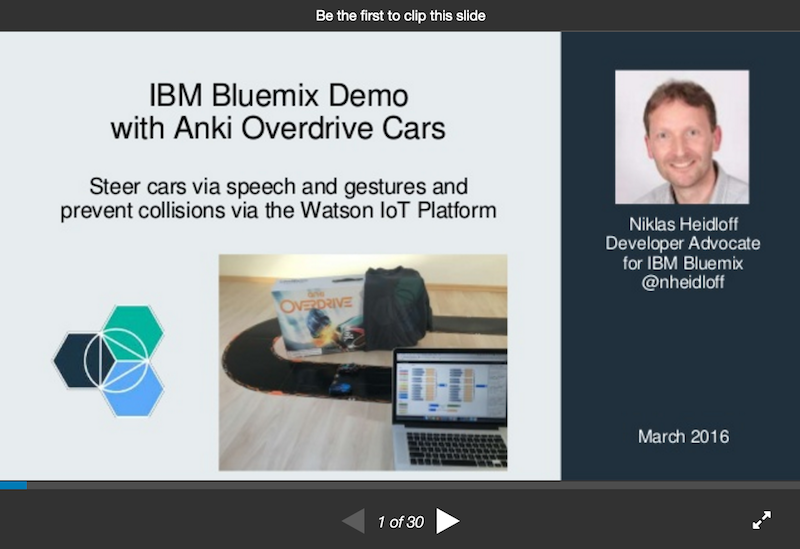
In order to run this project I used the Anki Overdrive Starter Kit. Additionally you need a device to run the Node.js application which also supports Bluetooth Low Energy. I tested it with a MacBook Pro successully (without additional adapter). Check out the photo of the setup.
Disclaimer: I followed the documentation on the Anki Drive SDK site. The code below works for my current setup. I haven't checked other platforms, firmware versions etc. For some data, esp. the offsets, I had to guess how to interpretate the data from the cars since I hadn't found any documentation.
Author: Niklas Heidloff @nheidloff
Setup of the Node.js Controller
Make sure the following tools are installed and on your path.
Invoke the following commands from your git directory.
git clone https://github.com/IBM-Bluemix/node-mqtt-for-anki-overdrive.git
cd node-mqtt-for-anki-overdrive
npm install
You need to find out the Peripheral ID of the cars you want to connect to. Turn on the charged cars, make sure Bluetooth is enabled on your MacBook and from the new directory run this command:
node discovery.js
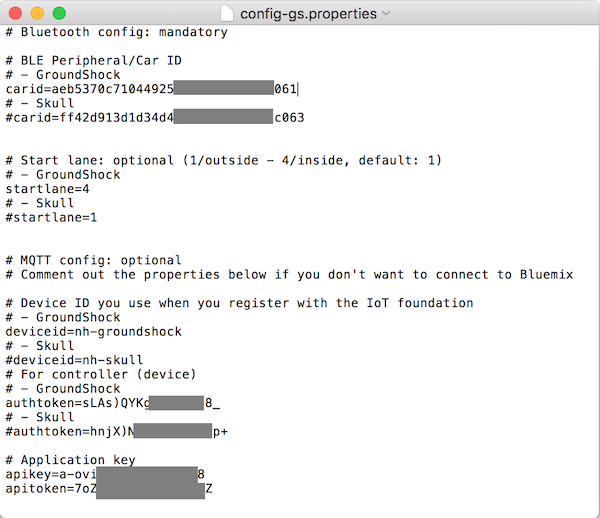
In the root directory of the project you should create one config file per car. By default the application looks for the file 'config-gs.properties'. I use this file for my GroundShock car and 'config-skull.properties' for Skull. Copy the peripheral ids in these files and define a start lane (see below for more). You can use the file 'config-sample.properties' as starting point.
Usage of the CLI
To start the controller(s) invoke one of the following commands.
node controller.js
node controller.js config-gs.properties
node controller.js config-skull.properties
When the controller is running you can find out more about the available commands by typing 'help'.

Setup of MQTT and Bluemix Internet of Things
The project supports MQTT to remote control the cars. I have used IBM Bluemix and the Internet of Things service. It should also be possible to use other MQTT providers but this might require to fix one or two hardcoded places in the code.
The usage of MQTT is optional. If you don't want to use it just comment out the MQTT configuration in the config files.
In order to perform the following steps, you need to register on Bluemix.
Next create a new Bluemix application based on the Internet of Things Foundation Starter. After this add the Internet of Things Foundation service to it.
For each car you need to register a device with the Internet of Things Foundation dashboard. As device type use 'ankisupercar'. As device names use 'nh-groundshock' and 'nh-skull'. You can also use other device names but in this case you'll have to do some changes to the Node-RED flow later. After you've registered the device(s) copy the 'authtoken'(s) in the config file(s).
In the last step you need to create a new application key in the dashboard. The 'apikey' and the 'apitoken' need to be copied in the config file(s) as well.
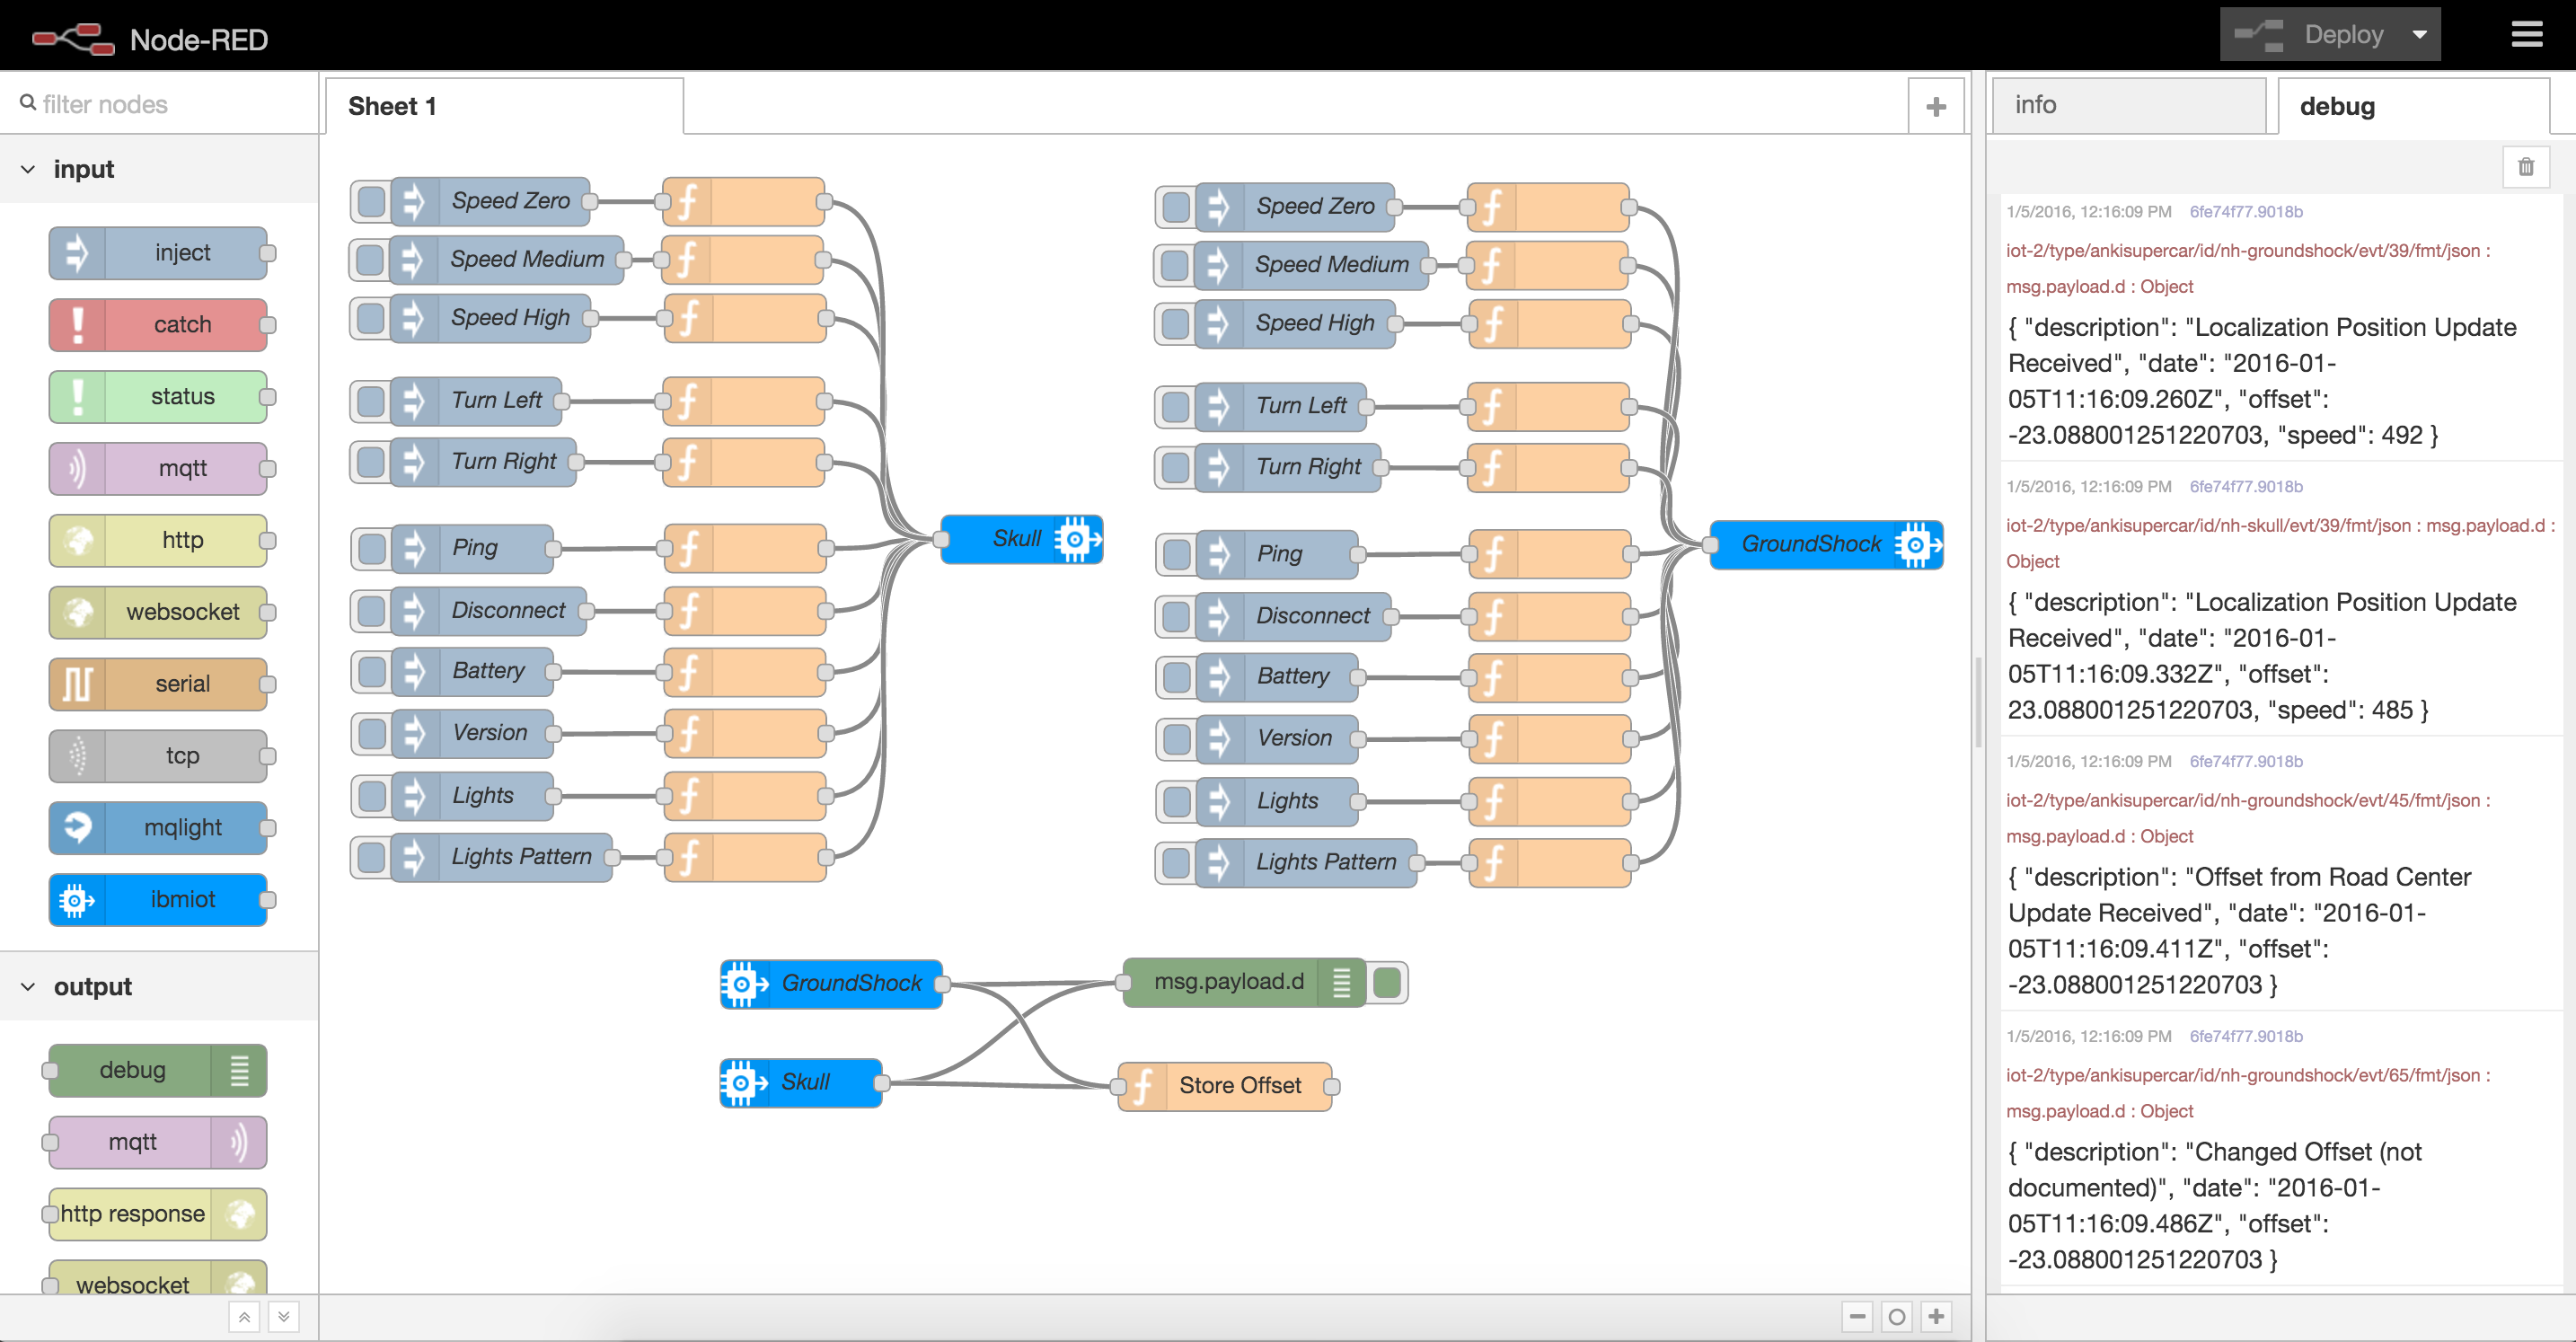
Open Node-RED in a browser, for example http://anki.mybluemix.net/red/#. Copy the content of node-red.json in the clipboard, import it into Node-RED and deploy the flow.
Remote Controlling the Cars
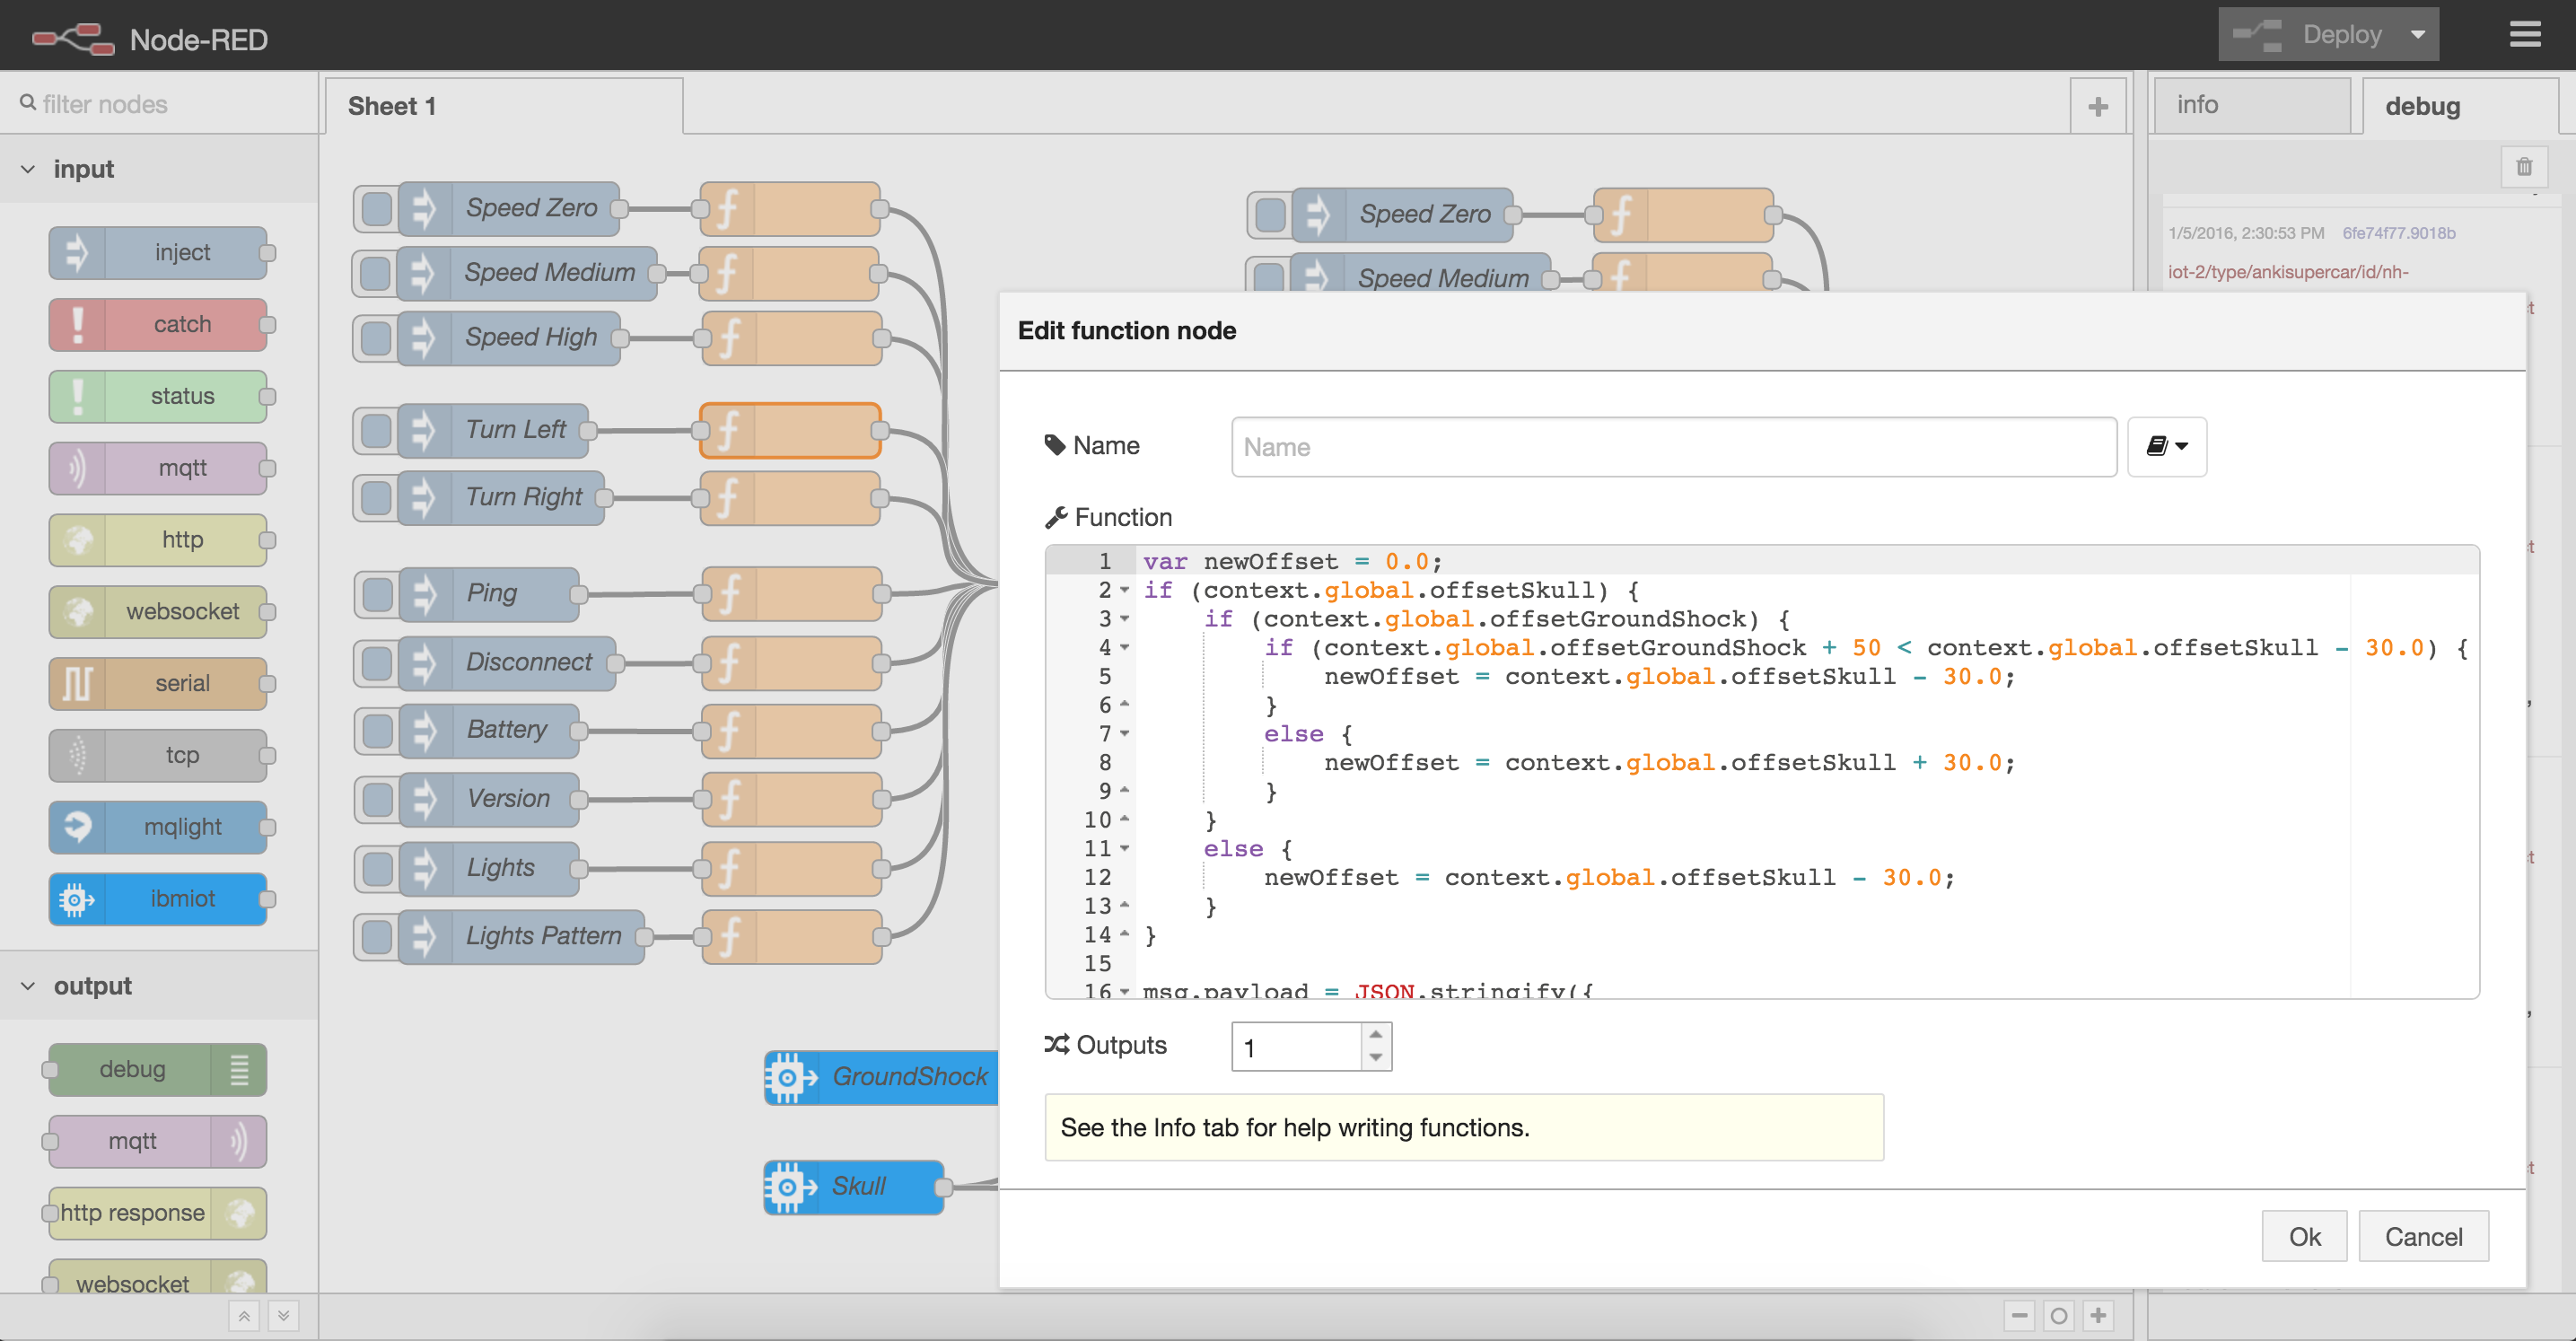
After you have connected the cars with the controllers you can invoke commands by clicking on the grey nodes in the Node-RED flow. The events that the cars send are displayed in the debug tab in the right sidebar.
Collision Prevention
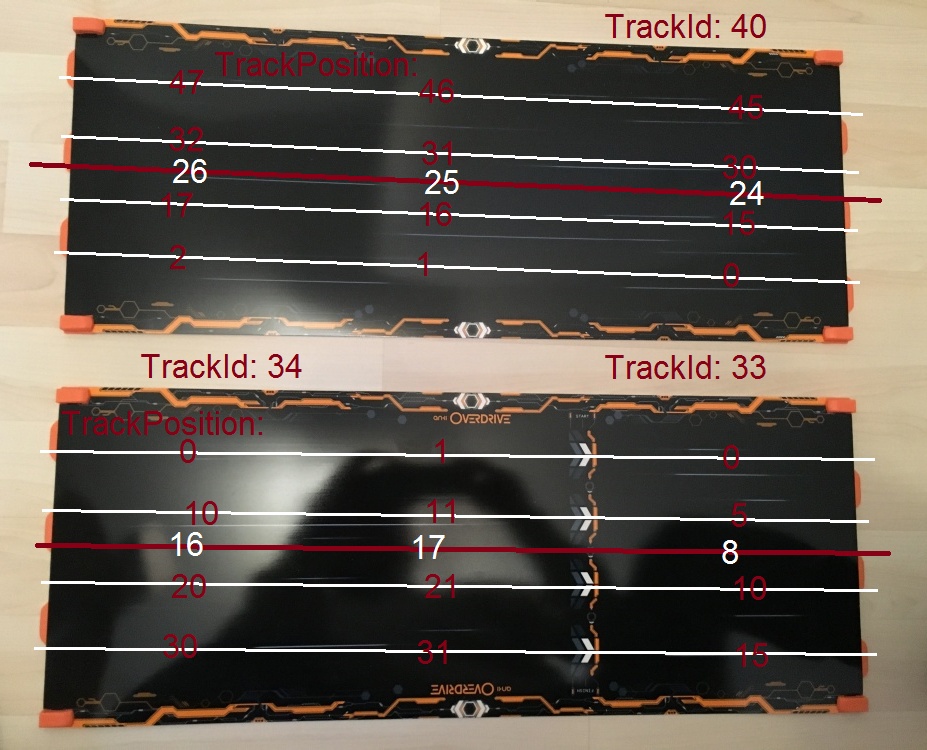
In order to understand the collision prevention feature you need to understand how offsets work. Here is a quick diagram that explains the possible offset values and the purpose of the 'startlane' parameter in the config files.

I've developed a simple sample that shows that GroundShock and Skull can never collide. The cars send status updates about their current offset which is tracked in the cloud (Node-RED flow). When Skull (red car) wants to turn left the flow checks whether it would still have enough distance to GroundShock (blue car) and vise versa.
Controlling the Cars via Voice
The cars can be steered via speech by using the Watson Speech to Text service and the Watson Natural Language Classifier. Four types of commands are currently implemented: move, stop, turn left, turn right.
To use this capability another application needs to be hosted on Bluemix based on the GitHub project sphero-bluemix-speech. Follow the instructions to register another IoT device (type: watson; id: speech) and add the credentials to your application.
Additionally you need to use an extended version of the Node-RED flow. To optimize the quality of the received text the flow uses the Watson classifier service which you need to create via Bluemix. The classifier needs to be trained as documented with the provided training data. The classifier id together with the user name and password need to be pasted into the flow and then the flow needs to be deployed.
Controlling the Cars via Kinect
The cars can be steered via Kinect. Follow in instructions in the separate project Controller to connect Kinect with Bluemix and check out the screenshots. The commands from Kinect are received in the Node-RED flow and then forwarded to the cars.
Controlling the Cars via Leap Motion
The cars can be steered via Leap Motion. Follow in instructions in the separate project Sample to connect Leap Motion with Bluemix and check out the screenshots. The commands from Leap Motion are received in the Node-RED flow and then forwarded to the cars.
