WARNING: This repository is no longer maintained :warning:
This repository will not be updated. The repository will be kept available in read-only mode.
Create a virtual assistant for iOS using Watson Assistant
![]()
![]()
Table of Contents
Summary
This IBM Cloud Starter Kit will showcase the Watson Assistant service on iOS. We'll walk through setting up Xcode, installing dependencies, and running the application.
By running this code, you'll understand how to:
- Interact with the Watson Assistant service
- Use the Watson Swift SDK
- Integrate Watson Assistant and Swift to create a virtual assistant
Flow
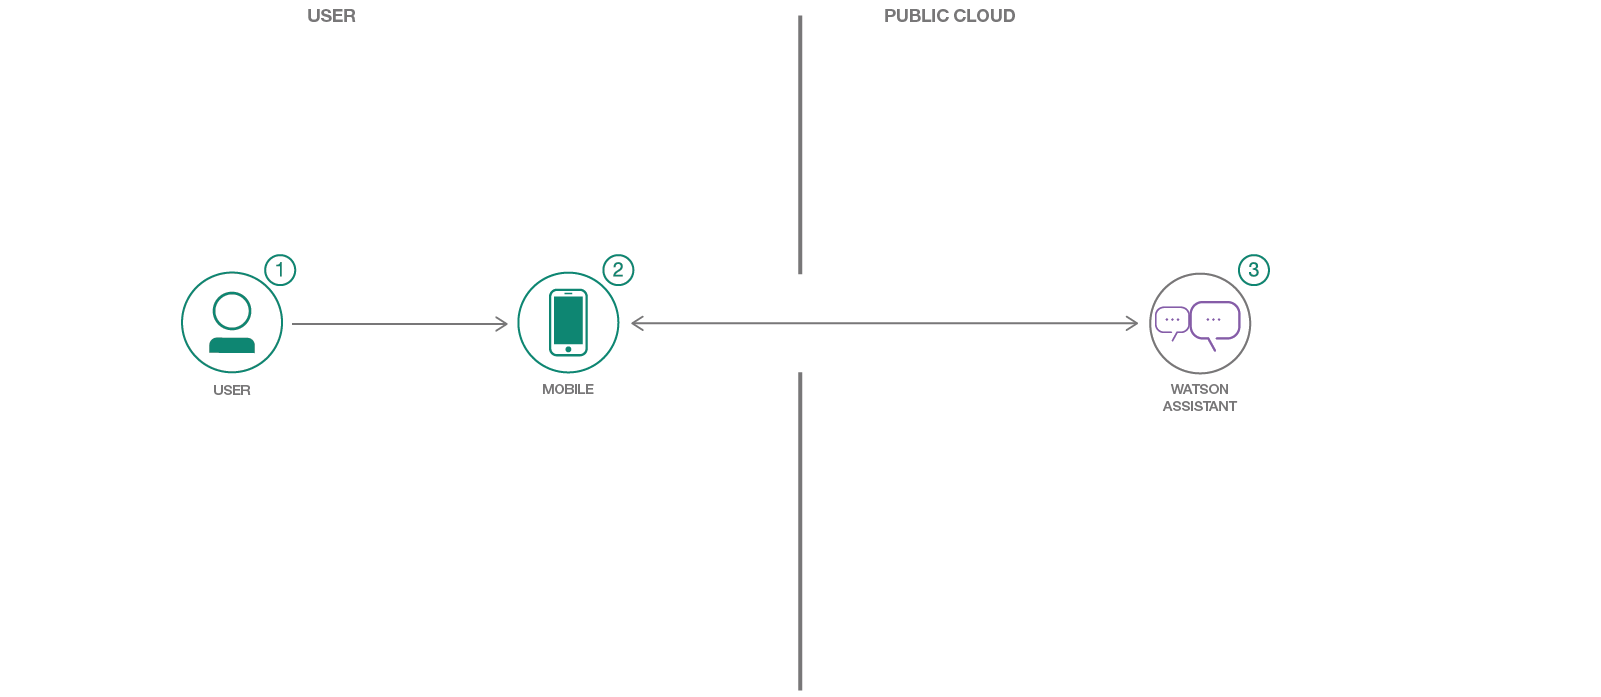
- The user enters a message with an iOS device.
- The message is sent to the IBM Watson Assistant service, the sent message is displayed on the iOS device.
- Watson Assistant responds and sends a message back to be displayed on the iOS device.
Included Components
- IBM Watson Assistant: Build, test and deploy a bot or virtual agent across mobile devices, messaging platforms, or even on a physical robot.
Featured technologies
- Swift: Swift is a general-purpose, multi-paradigm, compiled programming language developed by Apple Inc. for iOS, macOS, watchOS, tvOS, and Linux.
Requirements
- iOS 10.0+
- Xcode 10+
- Swift 5+
- CocoaPods
- If not installed, run:
sudo gem install cocoapods
- If not installed, run:
Steps
1. Use CocoaPods to create an Xcode workspace
For this starter, a pre-configured Podfile has been provided, which includes the Watson SDK. To download and install the required dependencies, run the following command in your project directory:
$ cd {APP_Name}
$ pod install
NOTE: If the CocoaPods repository was not configured, we'd have to run
pod setupfirst.
Now open the Xcode workspace to see what the project looks like. We can also use Xcode to run the application with Xcode's simulator, which we'll do in a few steps.
$ open {APP_Name}.xcworkspaceNOTE: If you run into any issues during the pod install, it is recommended to run a pod update by running:
pod update; pod install
2. Configure Watson Assistant
Ensure you have a running Watson Assistant service, if you do not, create one by going to the link below:
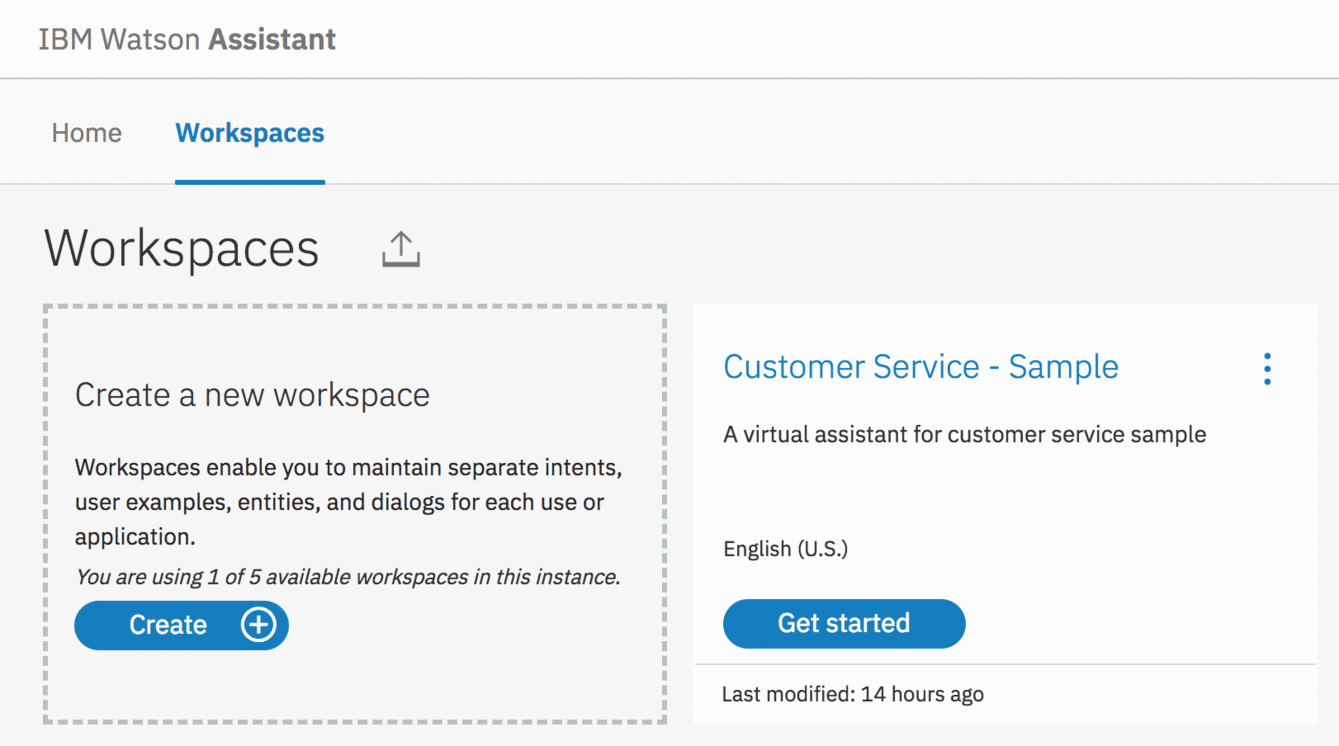
Every chatbot needs a dialog, right? To make things easier we've coded this application to look at the available conversations for a specified Watson Assistant service and use the first workspace it finds.
To easily obtain a conversation dialog we can simply launch the Watson Assistant Tool and view the sample conversation that is provided by Watson Assistant. This is enough to get your application running locally.
(Optional) 2.1 Specify your own assistant
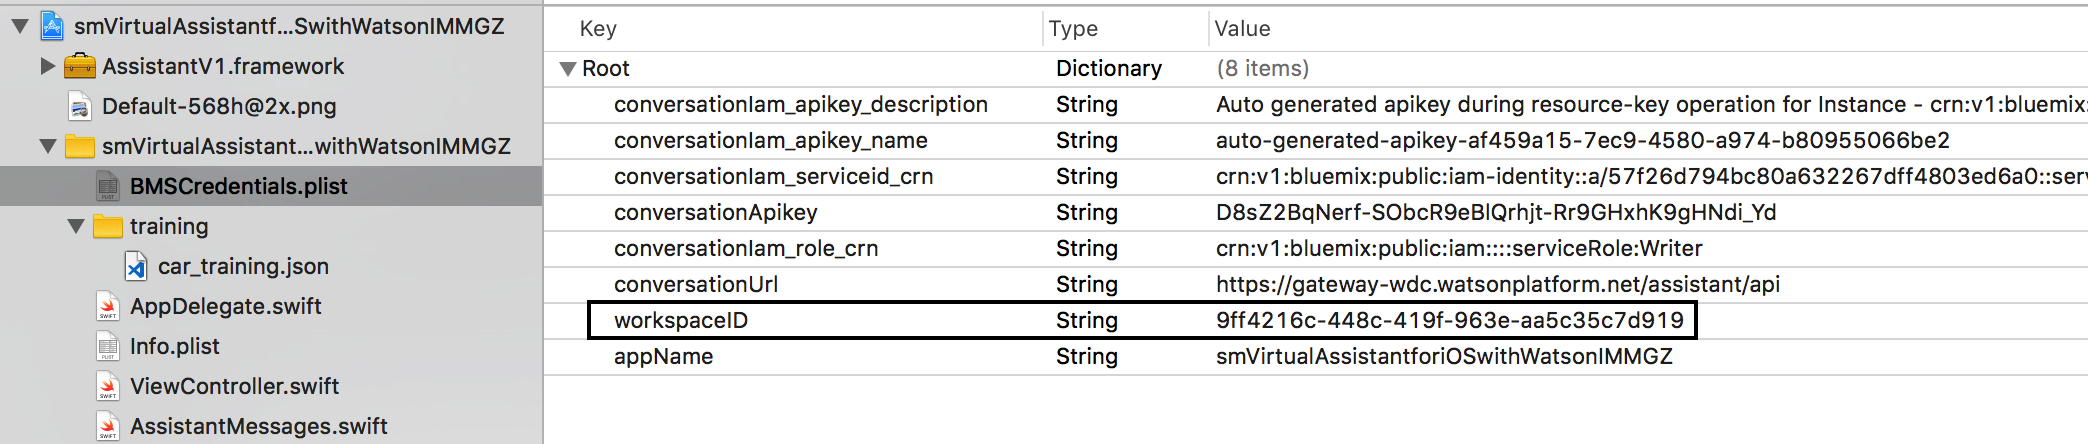
If you prefer to specify your own conversation you can import or create a new dialog with the Watson Assistant Tool. To do that, follow the documentation online. Once created we need to find the workspace ID. See the image below as a guide to finding the workspace ID.
Once we have the workspace ID we'll need to let our application know about it. We need to update BMSCredentials.plist by adding a workspaceID entry, like below:
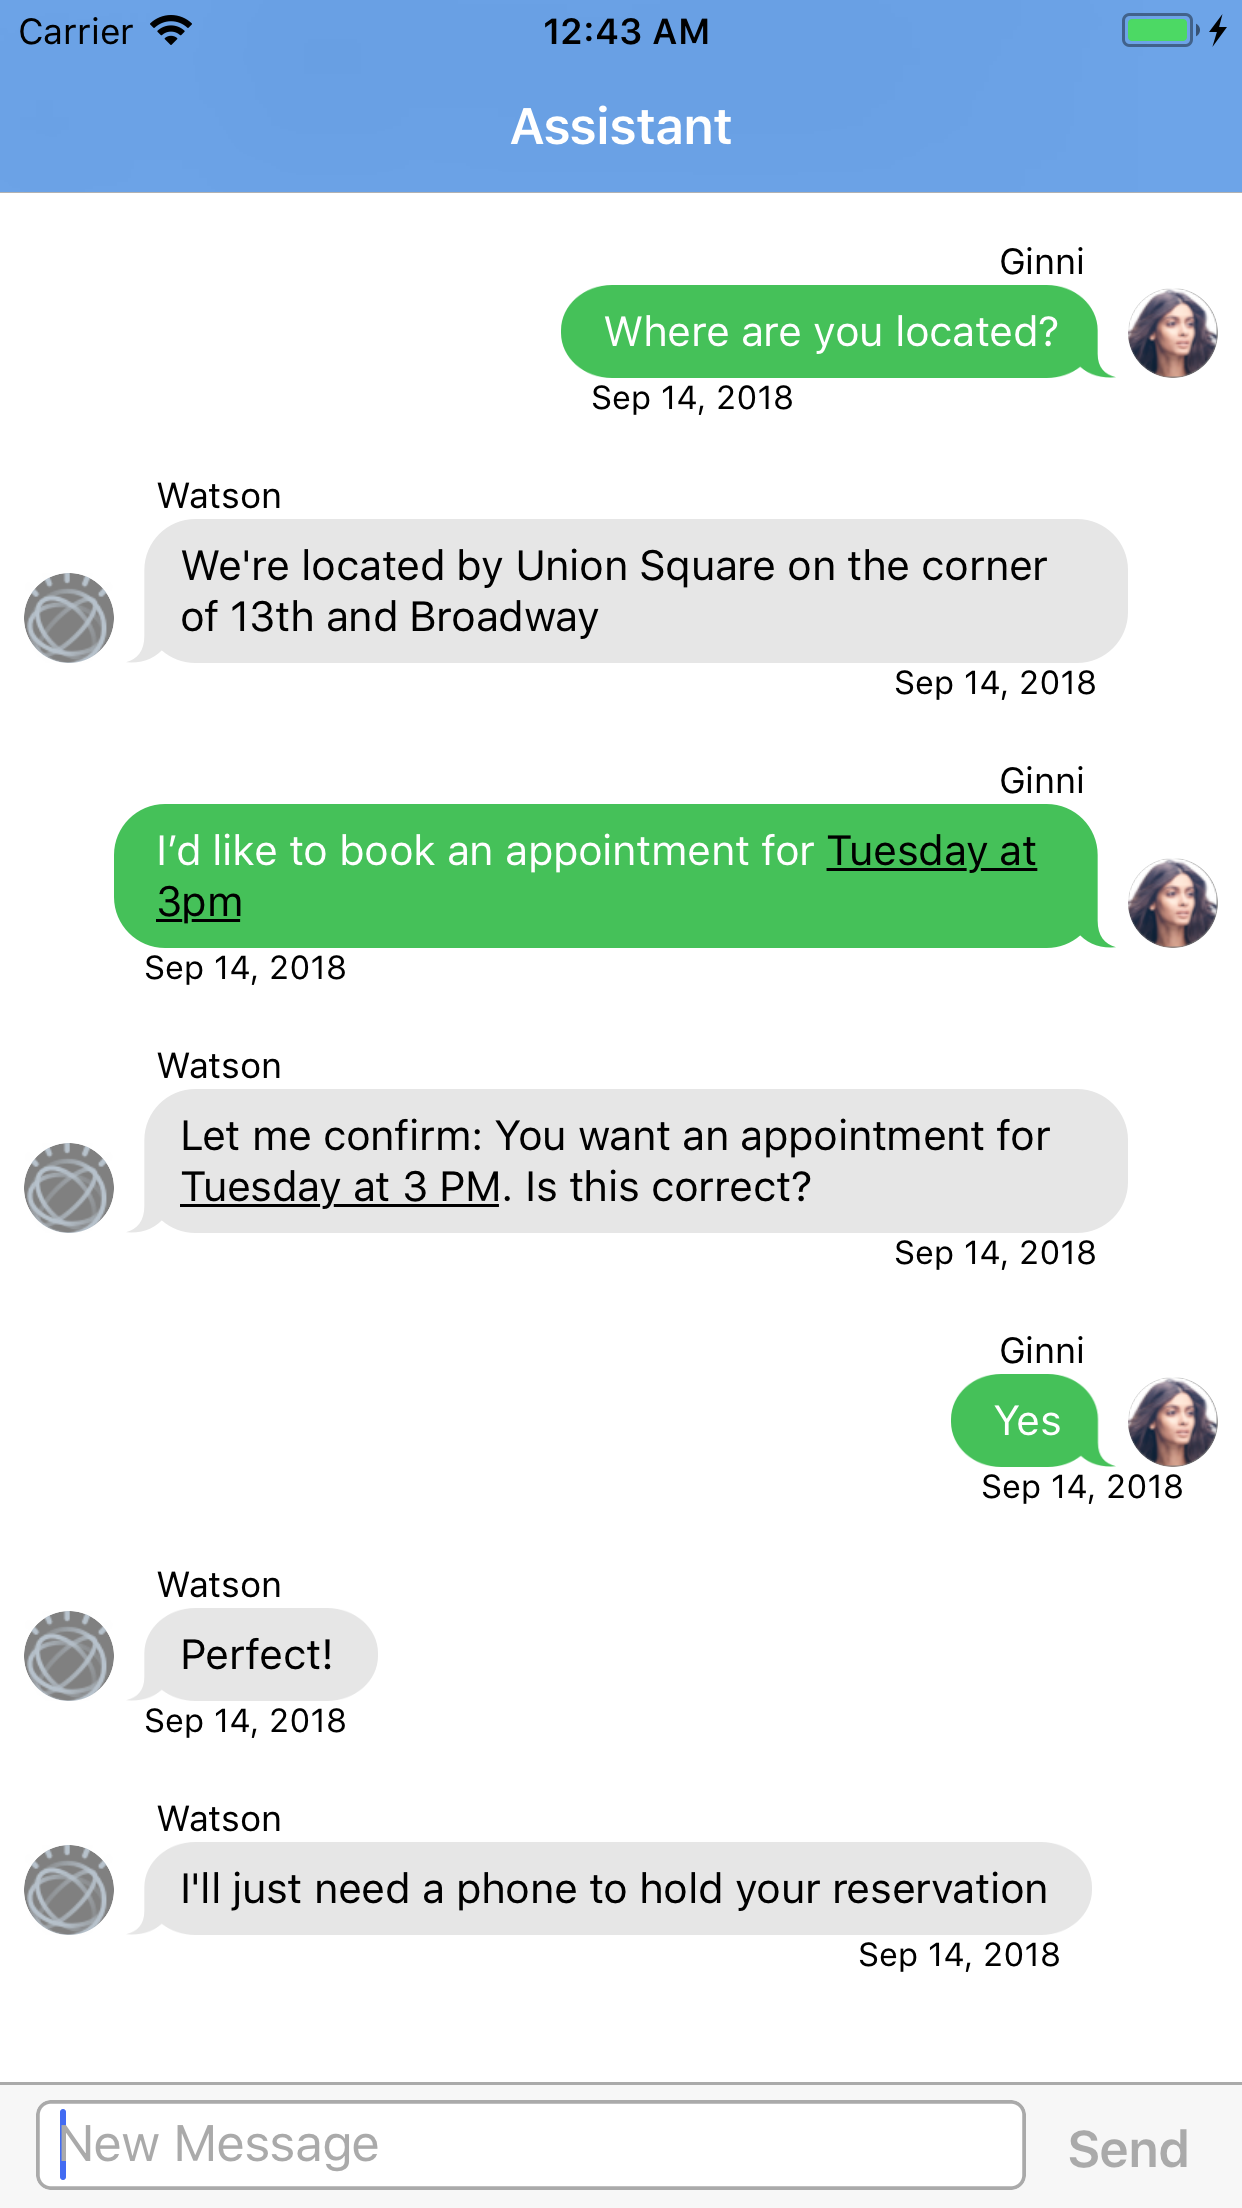
Sample Output
You can now run the application on a simulator or physical device. Try a few queries for yourself:
- Where are you located?
- What are your hours?
- I'd like to book an appointment?
A quick snapshot of a conversation.
A full walkthrough of a sample conversation.
License
Links
- Swift Programming Guide: Tutorial on Swift app development.
- Add a Service to Your App: Learn how to add a resource to your cloud-native app.
Learn More
- Other Starter Kits: Enjoyed this Starter Kit? Check out our other Starter Kits.
- Architecture Center: Explore Architectures that provide flexible infrastructure solutions.
- IBM Watson Assistant Docs