The files on this Github repository should be considered "beta", for the most recent stable release please install the FED3 library from the Arduino IDE as decribed below. See the [Wiki](https://github.com/KravitzLabDevices/FED3_library/wiki) for documentation on how to use the library. This library is in development, please report bugs using Issues.
## Do you have custom FED3 code you want to add to the libary?
[Submit it here!](https://kravitzlab.com/submit-custom-fed3-code)
---
## Installation instructions
### 1. Install the [Arduino](www.arduino.cc) IDE.
### 2. Add the Adafruit Feather M0 board definitions.
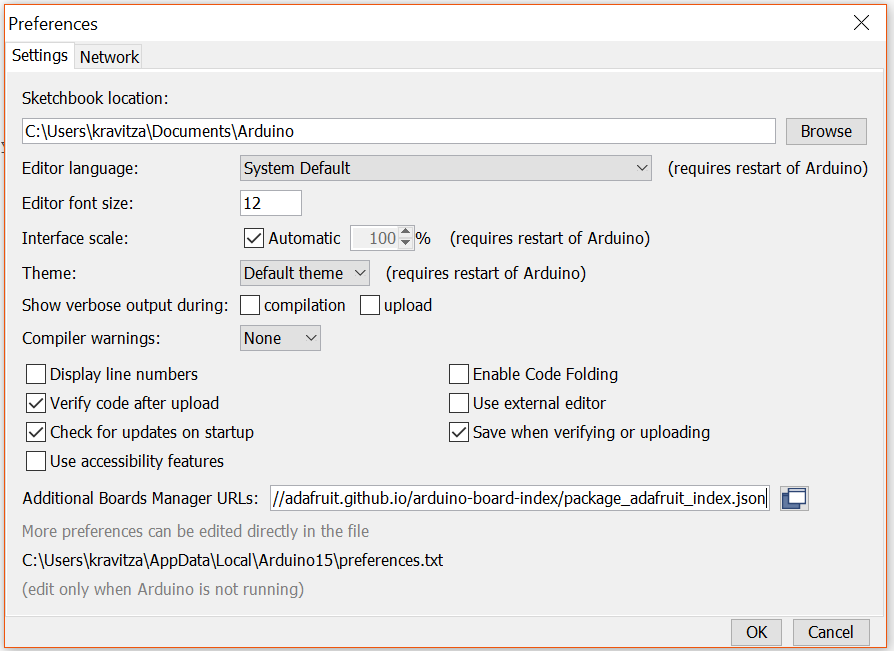
To allow the Arduino IDE to flash the FED3, go to File>Preferences and paste the following link into the field for Additional boards.
`https://adafruit.github.io/arduino-board-index/package_adafruit_index.json`
Then click Tools>Board>Boards Manager and type "Arduino SAMD" in the search bar. Install this, it will take ~5 minutes. Then search for "Adafruit SAMD" and install this as well. 
See more details instructions on this step [here](https://learn.adafruit.com/adafruit-feather-m0-adalogger/using-with-arduino-ide).
### 3. Install the FED3 library from the Arduino IDE
Search for the FED3 libary in the Arduino library manager and install the latest version.

### 4. Install dependency libraries in your Arduino libraries folder
Navigate to the FED3 library in your Arduino libraries folder (usually: `Documents\Arduino\libraries\FED3_library\`) and look in the \extras directory for the FED3_support_libraries.zip file. Unzip the contents of this folder.

Copy the extracted libraries to `\Arduino\libraries\`.
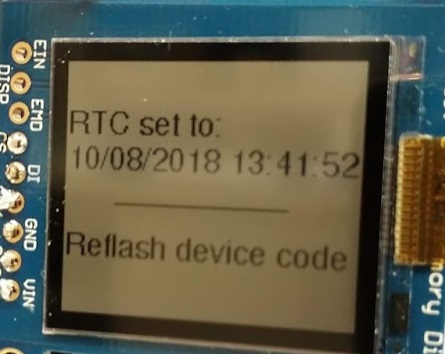
### 5. Set the real time clock (RTC) on the FED3.
Open the "SetClock" example sketch in the Arduino IDE and flash this code to the FED3. You should see a message on the screen with the correct local time, indicating that the RTC was set correctly.
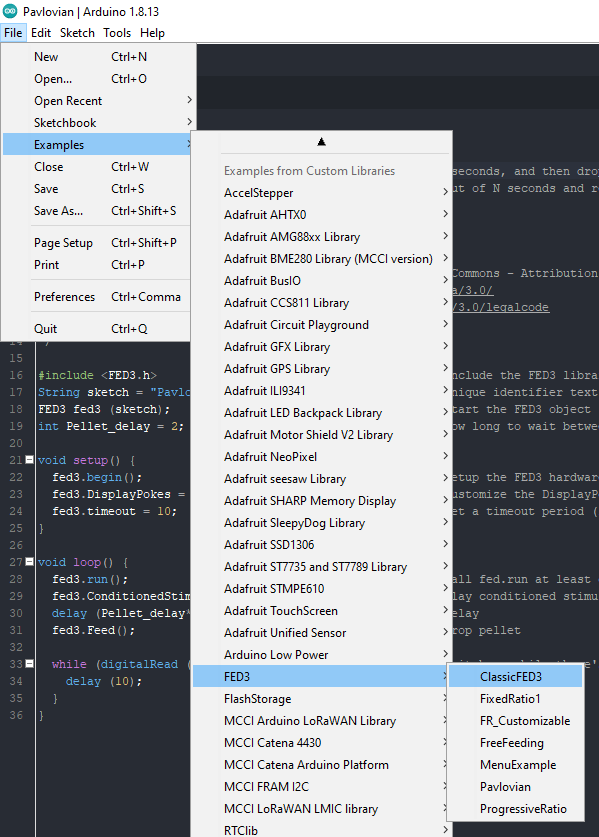
### 6. Flash an example (ClassicFED3 is a good one to start with)
Check out the example FED3 programs by clicking File > Examples > FED3
### 7. Start coding!
Check out the [functions](https://github.com/KravitzLabDevices/FED3_library/wiki/3.-Functions) and [variables](https://github.com/KravitzLabDevices/FED3_library/wiki/2.-Variables) of the FED3 library to start making custom programs.