Develop a NativeScript plugin 
This repo is heavily based on @NathanWalker's Plugin Seed. Thanks, Nathan!
- TL;DR
- Long Description
- Contribute
- Get Help
TL;DR
The NativeScript plugin seed is built to be used as a starting point by NativeScript plugin developers. To bootstrap your plugin development execute the following:
git clone https://github.com/NativeScript/nativescript-plugin-seed nativescript-yourpluginwherenativescript-yourpluginis the name of your plugin.cd nativescript-yourplugin/srcnpm run postclonenpm run demo.iosornpm run demo.androidto run the demo.
Long Description
What is NativeScript plugin seed?
The NativeScript plugin seed is built to be used as a starting point by NativeScript plugin developers. What does the seed give you out of the box?
- the plugin structure with option for easy development and debugging (see Development setup section below)
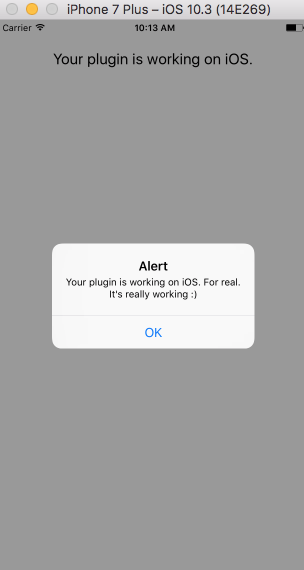
- a simple working plugin
- a demo project working with the plugin. It is useful during development and for running tests via Travis CI
- a guideline how to structure your plugin README file that will be published to NPM
- a shell script to create your plugin package
- a proper
.gitignoreto keep GitHub tidy - a proper
.npmignoreto ensure everyone is happy when you publish your plugin to NPM.
Plugin folder structure
| Folder/File name | Description |
|---|---|
| demo | The plugin demo source code (optional during postclone setup) |
| demo-angular | The plugin demo source code (optional during postclone setup) |
| src | The plugin source code |
| src/platform/android | Plugin Android specific configuration |
| src/platform/ios | Plugin ios specific configuration |
| src/README | Your plugin README stub explaining how other developers can use your plugin in their applications. Used when you publish your plugin to NPM. On postclone step, the README in the root is replaced with this one. |
| src/scripts | The postclone script run when you execute npm run postclone. Feel free to delete it after you have executed the postclone step from the Getting started section |
| publish | Contains a shell script to create and publish your package. Read more on creating a package and publishing in the Publish to NPM section |
Getting started
- Open a command prompt/terminal and execute
git clone https://github.com/NativeScript/nativescript-plugin-seed nativescript-yourpluginto clone the plugin seed repository into thenativescript-yourpluginfolder wherenativescript-yourpluginis the name of your plugin.. - Open a command prompt/terminal and navigate to
nativescript-yourplugin/srcfolder usingcd nativescript-yourplugin/src - Execute
npm run postcloneto:- configure your github username - it will be changed in the package.json for you
- configure your plugin name - all files and classes in the seed will be renamed for you
- stub your plugin README.md file
- add TypeScript NativeScript application which is setup to use your plugin from its local
srcfolder - add Angular NativeScript application which is setup to use your plugin from its local
srcfolder - create a new repository for your plugin
Now you can continue with the development of your plugin by using the Development setup described below.
NOTE: The plugin seed is updated to use the latest version of NativeScript. If you are not ready to upgrade, you can checkout a tagged version that is compatible with your NativeScript version.
Development setup
For easier development and debugging purposes continue with the following:
Open a command prompt/terminal, navigate to src folder and run npm run demo.ios, npm run demo.android, npm run demo-angular.ios, npm run demo-angular.android to run the demo applications created during postclone.
Now go and make a change to your plugin. It will be automatically applied to the demo project.
NOTE: Any changes that you need to make in a native library used in your plugin or in any other files inside src/platforms directory such as Info.plist or AndroidManifest.xml can't be directly reflected in the demo applications. You need to use npm run demo.reset or npm run demo-angular.reset and run the application again.
Linking to CocoaPod or Android Arsenal plugins
You will want to create these folders and files in the src folder in order to use native APIs:
platforms --
  ios --
    Podfile
  android --
    include.gradle
Doing so will open up those native apis to your plugin :)
Take a look at these existing plugins for how that can be done very simply:
It's highly recommended to generate typings for the native libraries used in your plugin. By generating typings you'll be able to see what APIs exactly are exposed to Javascript and use them easily in your plugin code
Generating typings for iOS
- Run the command for typings generation as explained in the documentation
- Open
demo/typings/x86_64and copy thed.tsfiles that you plan to use in your plugin tosrc/platforms/ios/typings - Open
src/references.d.tsand add a reference to each of the files added tosrc/platforms/ios/typings
NOTE: Swift APIs that are not exported to Objective-C are not supported. This means that you can only call APIs from JavaScript that are visible to the Objective-C runtime. This include all Objective-C APIs and only the subset of all Swift APIs that are exposed to Objective-C. So, to use a Swift API (class/function/method etc.) from NativeScript, first make sure that it can be used from Objective-C code. For more information which Swfit APIs can be exposed to Objective-C, see here.
Generating typings for Android
- Clone Android DTS Generator repo
- Follow the steps in the README
- Copy the generated d.ts files in
src/platforms/android/typings. Feel free to rename the generated files for readablity. - Open
src/references.d.tsand add a reference to each of the files added tosrc/platforms/android/typings
Clean plugin and demo files
Sometimes you may need to wipe away the src/node_modules, demo/node_modules and demo/platforms folders to reinstall them fresh.
- Run
npm run cleanto wipe those clean then you can can runnpm ito install fresh dependencies.
Sometimes you just need to wipe out the demo's platforms directory only:
- Run
npm run demo.resetornpm run demo-angular.resetto delete the application'splatformsdirectory only.
Sometimes you may need to ensure plugin files are updated in the demo:
- Run
npm run plugin.preparewill do a fresh build of the plugin then remove itself from the demo and add it back for assurance.
Unit testing
In order to add unit testing to the demo applications and in relation to test your plugin inside of them you should follow our latest guide here.
Publish to NPM
When you have everything ready to publish:
- Bump the version number in
src/package.json - Go to
publishand executepublish.sh(runchmod +x *.shif the file isn't executable)
If you just want to create a package, go to publish folder and execute pack.sh. The package will be created in publish/package folder.
NOTE: To run bash script on Windows you can install GIT SCM and use Git Bash.
TravisCI
The plugin structure comes with a fully functional .travis.yml file that deploys the testing app on Android emulator and iOS simulator to make sure that those apps start correctly while your plugin is linked to them. All you have to do, after cloning the repo and implementing your plugin and tests, is to sign up at https://travis-ci.org/. Then enable your plugin's repo on "https://travis-ci.org/profile/<your github user>" and that's it. Next time a PR is opened or change is committed to a branch TravisCI will trigger a build testing the code.
To properly show current build status you will have to edit the badge at the start of the README.md file so it matches your repo, user and branch.
Contribute
We love PRs! Check out the contributing guidelines. If you want to contribute, but you are not sure where to start - look for issues labeled help wanted.
Get Help
Please, use github issues strictly for reporting bugs or requesting features. For general questions and support, check out Stack Overflow or ask our experts in NativeScript community Slack channel.