Table of Contents
Features
- built from AWS's CloudFormation spec sheet: 100% coverage of all available resource and property types
- runs on any OS: developed and tested in Windows, Ubuntu, and macOS on PowerShell v3-6
- validates everything: built to make resulting templates reliable by leveraging parameter validation built into PowerShell
- goes turbo: package and deploy your templates fast with one command:
vsl vaporize
Prerequisites
- PowerShell 3+
- On Linux or macOS? Grab PowerShell 6 here!
- .NET 4.5.0+ OR .netstandard 1.3+
- if you have PowerShell 4 or greater, you're covered!
Recommended: AWS Labs cfn-flip
If you are working with YAML templates, you need to install
cfn-flip. VaporShell usescfn-flipunder the hood to work with YAML templates, as PowerShell does not natively support YAML at this time. If you are only working in JSON, thencfn-flipisn't necessary.
Installation
[Preferred] On PowerShell 5+ or have PowerShellGet installed? Install directly from the PowerShell Gallery:
Install-Module VaporShell -Scope CurrentUser[Alternative] Not on PowerShell 5+, can't install PowerShellGet, or policies blocking installation from remote sources? You're covered as well:
- Head to the Releases section in the repo
- Download the VaporShell.zip file attached to the latest release.
- If on Windows: Right-click the downloaded zip, select Properties, then unblock the file.
This is to prevent having to unblock each file individually after unzipping.
- Unzip the archive.
- (Optional) Place the module folder somewhere in your
PSModulePath.You can view the paths listed by running the environment variable
$env:PSModulePath -
Import the module, using the full path to the PSD1 file in place of
VaporShellif the unzipped module folder is not in yourPSModulePath:# In $env:PSModulePath Import-Module VaporShell # Otherwise, provide the path to the manifest file: Import-Module -Path C:\MyPSModules\VaporShell\2.6.2\VaporShell.psd1
Tips
Working with Credentials
If you are planning on packaging or deploying to CloudFormation, you will need to setup credentials in your local Shared Credentials file. If you are using the AWS command-line interface (CLI) and already have setup credentials, then you should be ready to go.
You can update or add a credential profile with Set-VSCredential:
Set-VSCredential -AccessKey $accessKey -SecretKey $secretKey -Region USWest1 -ProfileName DevAccountBare Necessities
When building templates with VaporShell, there are typically a few items that you'll want to include in your build script:
- Create a template object by calling one of these into a variable
$template = Initialize-VaporShell- Use when starting from scratch
$template = Import-VaporShell -Path .\template.json- Use when importing from an existing template to build off of
- Build out your template by using the object's ScriptMethods:
$template.AddResource()$template.AddParameter()$template.AddOutput()- etc....
- Export your template to local file or
stdout(useful for piping directly intoNew-VSStackor other functions that support TemplateBody as pipeline input)Export-VaporShell -VaporshellTemplate $template -Path .\template.json- This will output the template as
template.jsonin your working directory
- This will output the template as
Export-VaporShell -VaporshellTemplate $template- This will output the template to
stdoutas a single string
- This will output the template to
$template.ToJSON()- This script method on the template object performs the same function as
Export-VaporShell -VaporshellTemplate $templateand outputs the string template as JSON tostdout
- This script method on the template object performs the same function as
$template.ToYAML()- This does the same thing as the
ToJSON()script method, but outputs to YAML (cfn-fliprequired)
- This does the same thing as the
Examples
#1 Initialize a VaporShell object
$vsl = Initialize-VaporShell -Description "A function triggered on a timer."

#2 Add a Serverless function with local code as the CodeUri and a schedule of 5 minutes (split into multiple lines for readability)
$samFunction = New-SAMFunction `
    -LogicalId "ScheduledFunction" `
    -Handler "index.handler" `
    -Runtime "nodejs6.10" `
    -CodeUri ".\code" `
    -Events (Add-SAMScheduleEventSource -LogicalId Timer -Schedule "rate(5 minutes)")
$vsl.AddResource($samFunction)
$TemplateFile = ".\sched-func.yaml"

#3 Save the template as YAML using the VaporShell object's ToYAML() method (uses cfn-flip to convert to/from YAML)
$vsl.ToYAML($TemplateFile)

<#4 Package and deploy (vsl vaporize) the template file (--tf $TemplateFile) as a change set with parameters:
    - stack name (--sn) 'sched-func'
    - S3 bucket also named 'sched-func' (defaults to the stack name if --s3 is not passed)
    - capabilities: CAPABILITY_IAM (--caps iam)
    - Verbose (--v) enabled
    - Force (--f) enabled (make sure that the bucket is created and objects are uploaded)
    - Watch (--w) the stack events in colorized output after executing the change
#>
vsl vaporize --tf $TemplateFile --sn sched-func --caps iam --v --f --w
Check out the Examples page for more.
In Action
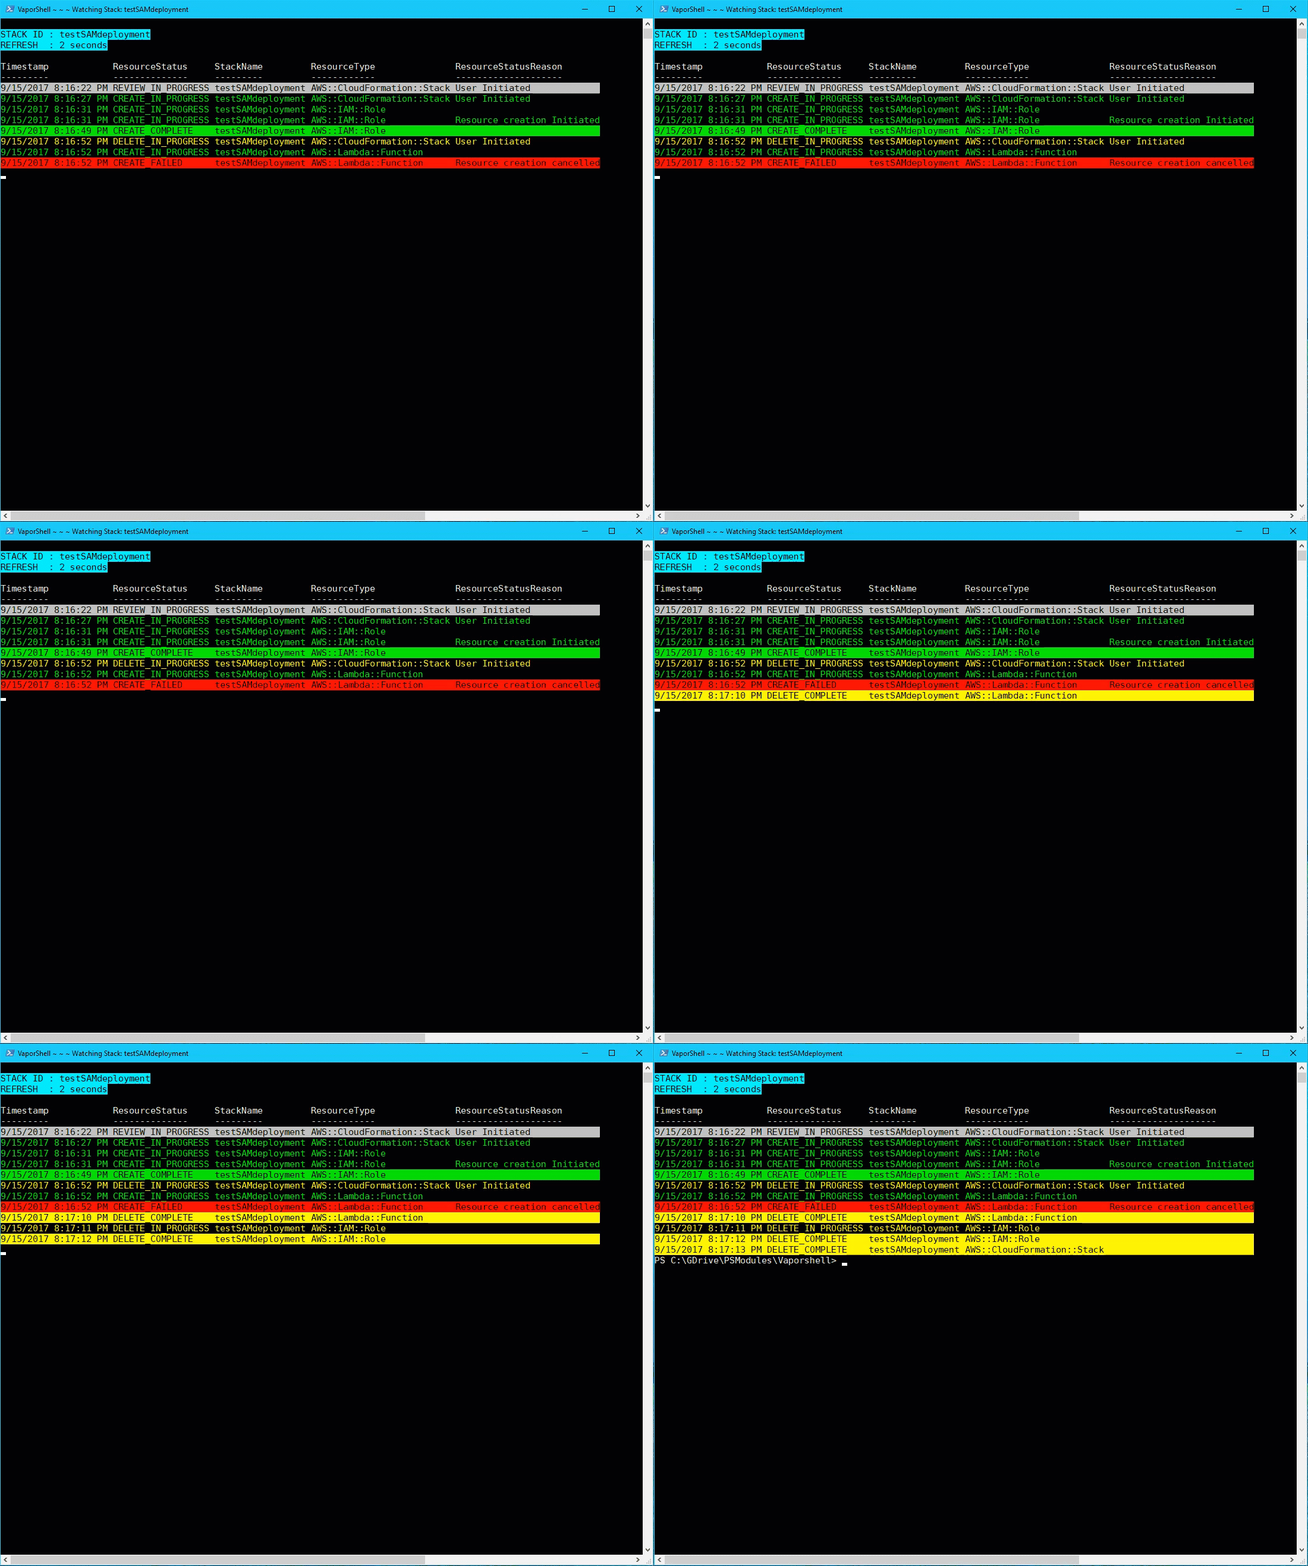
This is a deployment being watched via Watch-Stack $stackName to show stack creation and deletion mid-deploy:


