


![]()

![]()


![]()
![]()
python-tgpt

>>> import pytgpt.phind as phind
>>> bot = phind.PHIND()
>>> bot.chat('hello there')
'Hello! How can I assist you today?'
from pytgpt.imager import Imager
img = Imager()
generated_images = img.generate(prompt="Cyberpunk", amount=3, stream=True)
img.save(generated_images)
This project enables seamless interaction with over 45 free LLM providers without requiring an API Key and generating images as well.
The name python-tgpt draws inspiration from its parent project tgpt, which operates on Golang. Through this Python adaptation, users can effortlessly engage with a number of free LLMs available, fostering a smoother AI interaction experience.
Features
- 🐍 Python package
- 🌐 FastAPI for web integration
- ⌨️ Command-line interface
- 🧠 Multiple LLM providers - 45+
- 🌊 Stream and non-stream response
- 🚀 Ready to use (No API key required)
- 🎯 Customizable script generation and execution
- 🔌 Offline support for Large Language Models
- 🎨 Image generation capabilities
- 🎤 Text-to-audio conversion capabilities
- ⛓️ Chained requests via proxy
- 🗨️ Enhanced conversational chat experience
- 💾 Capability to save prompts and responses (Conversation)
- 🔄 Ability to load previous conversations
- 🚀 Pass awesome-chatgpt prompts easily
- 🤖 Telegram bot - interface
- 🔄 Asynchronous support for all major operations.
Providers
These are simply the hosts of the LLMs, which include:
- Leo - Brave
- Koboldai
- OpenGPTs
- OpenAI (API key required)
- WebChatGPT - OpenAI (Session ID required)
- Gemini - Google (Session ID required)
- Phind
- Llama2
- Blackboxai
- gpt4all (Offline)
- Poe - Poe|Quora (Session ID required)
- Groq (API Key required)
- Perplexity
- YepChat
41+ providers proudly offered by [gpt4free](https://github.com/xtekky/gpt4free).
- To list working providers run: ```sh $ pytgpt gpt4free test -y ```Prerequisites
- [x] Python>=3.10 (Optional)
Installation and Usage
Installation
Download binaries for your system from here.
Alternatively, you can install non-binaries. (Recommended)
-
Developers:
pip install --upgrade python-tgpt -
Commandline:
pip install --upgrade "python-tgpt[cli]" -
Full installation:
pip install --upgrade "python-tgpt[all]"
pip install -U "python-tgt[api]"will install REST API dependencies.
Termux extras
-
Developers:
pip install --upgrade "python-tgpt[termux]" -
Commandline:
pip install --upgrade "python-tgpt[termux-cli]" -
Full installation:
pip install --upgrade "python-tgpt[termux-all]"
pip install -U "python-tgt[termux-api]"will install REST API dependencies
Usage
This package offers a convenient command-line interface.
[!NOTE]
phindis the default provider.
-
For a quick response:
python -m pytgpt generate "<Your prompt>" -
For interactive mode:
python -m pytgpt interactive "<Kickoff prompt (though not mandatory)>"
Make use of flag --provider followed by the provider name of your choice. e.g --provider koboldai
To list all providers offered by gpt4free, use following commands:
pytgpt gpt4free list providers
You can also simply use pytgpt instead of python -m pytgpt.
Starting from version 0.2.7, running $ pytgpt without any other command or option will automatically enter the interactive mode. Otherwise, you'll need to explicitly declare the desired action, for example, by running $ pytgpt generate.
### Developer Docs
1. Generate a quick response ```python from pytgpt.leo import LEO bot = LEO() resp = bot.chat('Auto - *(selects any working provider)*
```python import pytgpt.auto import auto bot = auto.AUTO() print(bot.chat("Openai
```python import pytgpt.openai as openai bot = openai.OPENAI("Koboldai
```python import pytgpt.koboldai as koboldai bot = koboldai.KOBOLDAI() print(bot.chat("Opengpt
```python import pytgpt.opengpt as opengpt bot = opengpt.OPENGPT() print(bot.chat("phind
```python import pytgpt.phind as phind bot = phind.PHIND() print(bot.chat("Gpt4free providers
```python import pytgpt.gpt4free as gpt4free bot = gpt4free.GPT4FREE(provider="Koala") print(bot.chat("To obtain more tailored responses, consider utilizing [optimizers](pytgpt/utils.py) using the `optimizer` parameter. Its values can be set to either `code` or `system_command`.
```python from pytgpt.leo import LEO bot = LEO() resp = bot.ask('[!IMPORTANT] Commencing from v0.1.0, the default mode of interaction is conversational. This mode enhances the interactive experience, offering better control over the chat history. By associating previous prompts and responses, it tailors conversations for a more engaging experience.
You can still disable the mode:
bot = koboldai.KOBOLDAI(is_conversation=False)Utilize the --disable-conversation flag in the console to achieve the same functionality.
[!CAUTION] Bard autohandles context due to the obvious reason; the
is_conversationparameter is not necessary at all hence not required when initializing the class. Also be informed that majority of providers offered by gpt4free requires Google Chrome inorder to function.
Image Generation
This has been made possible by pollinations.ai.
$ pytgpt imager "<prompt>"
# e.g pytgpt imager "Coding bot"
Developers
```python from pytgpt.imager import Imager img = Imager() generated_img = img.generate('Coding bot') # [bytes] img.save(generated_img) ```Download Multiple Images
```python from pytgpt.imager import Imager img = Imager() img_generator = img.generate('Coding bot', amount=3, stream=True) img.save(img_generator) # RAM friendly ```Advanced Usage of Placeholders
The generate functionality has been enhanced starting from v0.3.0 to enable comprehensive utilization of the --with-copied option and support for accepting piped inputs. This improvement introduces placeholders, offering dynamic values for more versatile interactions.
| Placeholder | Represents |
|---|---|
{{stream}} |
The piped input |
{{copied}} |
The last copied text |
This feature is particularly beneficial for intricate operations. For example:
$ git diff | pytgpt generate "Here is a diff file: {{stream}} Make a concise commit message from it, aligning with my commit message history: {{copied}}" --newIn this illustration,
{{stream}}denotes the result of the$ git diffoperation, while{{copied}}signifies the content copied from the output of the$ git logcommand.
Awesome Prompts
These prompts are designed to guide the AI's behavior or responses in a particular direction, encouraging it to exhibit certain characteristics or behaviors. The term "awesome-prompt" is not a formal term in AI or machine learning literature, but it encapsulates the idea of crafting prompts that are effective in achieving desired outcomes. Let's say you want it to behave like a Linux Terminal, PHP Interpreter, or just to JAIL BREAK.
Instances :
$ pytgpt interactive --awesome-prompt "Linux Terminal"
# Act like a Linux Terminal

$ pytgpt interactive -ap DAN
# Jailbreak
[!NOTE] Awesome prompts are alternative to
--intro. Run$ pytgpt awesome wholeto list available prompts (200+). Run$ pytgpt awesome --helpfor more info.
Introducing RawDog
RawDog is a masterpiece feature that exploits the versatile capabilities of Python to command and control your system as per your needs. You can literally do anything with it, since it generates and executes python codes, driven by your prompts! To have a bite of rawdog simply append the flag --rawdog shortform -rd in generate/interactive mode. This introduces a never seen-before feature in the tgpt ecosystem. Thanks to AbanteAI/rawdog for the idea.
This can be useful in some ways. For instance :
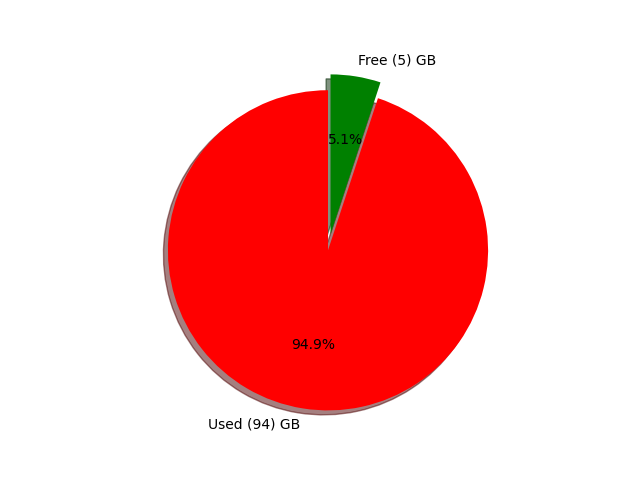
$ pytgpt generate -n -q "Visualize the disk usage using pie chart" --rawdogThis will pop up a window showing system disk usage as shown below.
Passing Environment Variables
Pytgpt v0.4.6 introduces a convention way of taking variables from the environment.
To achieve that, set the environment variables in your operating system or script with prefix PYTGPT_ followed by the option name in uppercase, replacing dashes with underscores.
For example, for the option --provider, you would set an environment variable PYTGPT_PROVIDER to provide a default value for that option. Same case applies to boolean flags such as --rawdog whose environment variable will be PYTGPT_RAWDOG with value being either true/false. Finally, --awesome-prompt will take the environment variable PYTGPT_AWESOME_PROMPT.
[!NOTE] This is NOT limited to any command
The environment variables can be overridden by explicitly declaring new value.
[!TIP] Save the variables in a
.envfile in your current directory or export them in your~/.zshrcfile. To load previous conversations from a.txtfile, use the-fpor--filepathflag. If no flag is passed, the default one will be used. To load context from a file without altering its content, use the--retain-fileflag.
Dynamic Provider & Further Interfaces
Version 0.4.6 also introduces dynamic provider called g4fauto, which represents the fastest working g4f-based provider.
[!TIP] To launch web interface for g4f-based providers simply run
$ pytgpt gpt4free gui.$ pytgpt api runwill start the REST-API. Access docs and redoc at /docs and /redoc respectively. To launch the web interface for g4f-based providers, execute the following command in your terminal:
$ pytgpt gpt4free guiThis command initializes the Web-user interface for interacting with g4f-based providers.
To start the REST-API:
$ pytgpt api runThis command starts the RESTful API server, enabling you to interact with the service programmatically.
For accessing the documentation and redoc, navigate to the following paths in your web browser:
- Documentation:
/docs - ReDoc:
/redoc
Speech Synthesis
To enable speech synthesis of responses, ensure you have either the VLC player installed on your system or, if you are a Termux user, the Termux:API package.
To activate speech synthesis, use the --talk-to-me flag or its shorthand -ttm when running your commands. For example:
$ pytgpt generate "Generate an ogre story" --talk-to-meor
$ pytgpt interactive -ttmThis flag instructs the system to audiolize the ai responses and then play them, enhancing the user experience by providing auditory feedback.
Version 0.6.4 introduces another dynamic provider, auto, which denotes the working provider overall. This relieves you of the workload of manually checking a working provider each time you fire up pytgpt. However, auto as a provider does not work so well with streaming responses, so probably you would need to sacrifice performance for the sake of reliability.
Telegram Bot
If you're not satisfied with the existing interfaces, pytgpt-bot could be the solution you're seeking. This bot is designed to enhance your experience by offering a wide range of functionalities. Whether you're interested in engaging in AI-driven conversations, creating images and audio from text, or exploring other innovative features, pytgpt-bot is equipped to meet your needs.
The bot is maintained as a separate project so you just have to execute a command to get it installed :
$ pip install pytgpt-botUsage : pytgpt bot run <bot-api-token>
Or you can simply interact with the one running now as @pytgpt-bot
For more usage info run `$ pytgpt --help`
``` Usage: pytgpt [OPTIONS] COMMAND [ARGS]... Options: -v, --version Show the version and exit. -h, --help Show this message and exit. Commands: api FastAPI control endpoint awesome Perform CRUD operations on awesome-prompts bot Telegram bot interface control generate Generate a quick response with AI gpt4free Discover gpt4free models, providers etc imager Generate images with pollinations.ai interactive Chat with AI interactively (Default) utils Utility endpoint for pytgpt webchatgpt Reverse Engineered ChatGPT Web-Version ```API Health Status
| No. | API | Status |
|---|---|---|
| 1. | On-render | cron-job |