:earth_africa: Vue Language Router
Language routing and URL localization made easy.
Built on top of :vertical_traffic_light: Vue Router and :globe_with_meridians: Vue I18n.
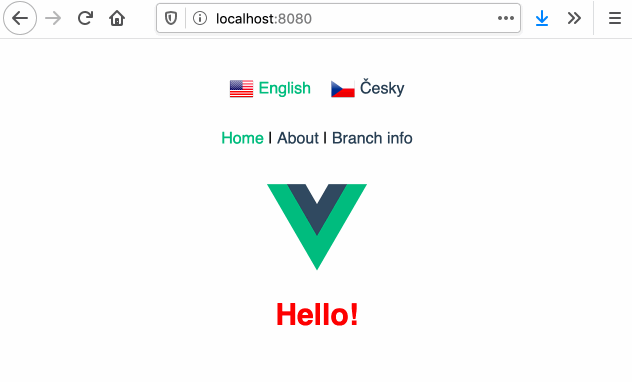
Demo
You can play with demo at Code Sandbox.
Features
:hourglass_flowing_sand: Asynchronous translation loading
:performing_arts: URL localization
:classical_building: Default language (no language prefix in URL)
:baby: Supports variables and children in routes
:car: :bike: Supports both history and hash mode
:books: Sets user-preferred language on first visit
:memo: Loads last used language when visiting site again
:fast_forward: No extra router setup
Version information
This version is compatible with Vue 2. If you need Vue 3 compatible version, please check out v2 of this project.
Installation
Vue CLI plugin (recommended)
The easiest way to install Language Router is using Vue CLI plugin for Language Router. The plugin will modify your router file, setup translation files and more.
Use this command to add Language Router to your Vue.js project:
$ vue add lang-routerManually
1. Install Language Router
$ npm i vue-lang-router2. Create translations in your app.
Note: This example uses Czech and English translations.
Example file structure:
src
└── lang
    └── translations
        ├── cs.json
        ├── en.json
        └── index.js
Create JSON files for all desired languages and reference them in index.js. Translations are loaded on demand.
/*  src/lang/translations/en.json  */

{
  "hello": "Hello!",
  "about": {
    "example": "This is an About page."
  }
}
/* src/lang/translations/cs.json */
{
"hello": "Ahoj!",
"about": {
"example": "Tohle je stránka O nás."
}
}/* src/lang/translations/index.js */
export default {
en: {
name: 'English',
load: () => { return import('./en.json'); },
},
cs: {
name: 'Česky',
load: () => { return import('./cs.json'); },
},
};In case you do not want to load translations asynchronously, you can provide messages object with translations instead of load function. For example:
export default {
  en: {
    name: 'English',
    messages: {
      hello: 'Hello!',
    },
  },
};
3. Create localized URLs in your app.
Note: Localized URLs are optional.
Example file structure:
src
└── lang
    └── localized-urls
        ├── cs.json
        └── index.js
Create JSON files for all desired languages and import them in index.js. Localized URLs need to be imported before router instantiation.
/*  src/lang/localized-urls/cs.json  */

{
  "about": "o-nas"
}
/* src/lang/localized-urls/index.js */
import cs from './cs.json';
export default { cs };Language router will parse any given path and attempt to localize its segments based on this configuration. If no match is found, the original path segment is retained.
4. Modify your router file
- Import
LangRouterand use it instead ofVueRouter. - Import translations and localized URLs and pass them to
LangRouterplugin. - Create new router instance. All the options are the same as in
VueRouter.
/*  src/router/index.js  */

import Vue from 'vue';
import LangRouter from 'vue-lang-router';

import translations from '../lang/translations';
import localizedURLs from '../lang/localized-urls';

Vue.use(LangRouter, {
  defaultLanguage: 'en',
  translations,
  localizedURLs,
});

const routes = [ /* Your routes here */ ];

const router = new LangRouter({
  routes,
  mode: 'history',
});
5. Modify your main file
Import i18n and use it in your Vue instance.
import Vue from 'vue';
import App from './App.vue';
import router from './router';
import { i18n } from 'vue-lang-router';

new Vue({
  router,
  i18n,
  render: h => h(App),
}).$mount('#app');
How to use
Using translations
To use any translated string, use $t('stringName') in your code. For more information check out Vue I18n.
Using links
Use <localized-link> component. It localizes given router path based on current language. It's a simple, yet powerful component, which takes a hassle out of generating proper links on your site.
It accepts the same options as <router-link>.
<localized-link to="/user/john-smith">John Smith</localized-link>The above code will generate a link with href value depending on various factors. Here are a few examples:
/*
Default language: "en"
Current language: "en"
Localized URLs "en": {}
Current URL: /
*/

href="https://github.com/adbrosaci/vue-lang-router/blob/master/user/john-smith"

/*
Default language: "en"
Current language: "en"
Localized URLs "en": { "user": "u" }
Current URL: /en/example
*/

href="https://github.com/adbrosaci/vue-lang-router/blob/master/en/u/john-smith"

/*
Default language: "en"
Current language: "cs"
Localized URLs "cs": { "user": "uzivatel" }
Current URL: /
*/

href="https://github.com/adbrosaci/vue-lang-router/blob/master/cs/uzivatel/john-smith"
Switching language
Use <language-switcher> component for this. The component will loop over all available languages and generate links array with properties, which you can use to create your own menu.
The wrapper element will have router-language-switcher class.
Examples:
<language-switcher v-slot="{ links }">
  <router-link :to="link.url" v-for="link in links" :key="link.langIndex">
    <img :src="https://github.com/adbrosaci/vue-lang-router/raw/master/require(`@/assets/${link.langIndex}.png`)" alt="" />
    <span>{{ link.langName }}</span>
  </router-link>
</language-switcher>
<language-switcher v-slot="{ links }" tag="ul" active-class="my-custom-class">
<li :class="link.activeClass" v-for="link in links" :key="link.langIndex">
<a :href="https://github.com/adbrosaci/vue-lang-router/blob/master/link.url">{{ link.langIndex }}</a>
</li>
</language-switcher>Properties:
- url : The localized path to the current/specified page in iterated language.
- langIndex : The index of the iterated language provided in
translations. - langName : The name of the iterated language provided in
translations. - activeClass : Returns the active class when iterated language equals current language, otherwise empty.
Accepted attributes:
- tag : Use this attribute to specify which tag should be used as a wrapper element. The default is
div. - url : Provides a specific path to generate translation links for. If omitted, current path is used.
- active-class : Defines the name of class to provide when language of the link equals current language. The default is
router-active-language.
Vue I18n customization
In case you'd like to pass in custom vue-i18n options, you can do so using i18nOptions property, for example:
/*  src/router/index.js  */

Vue.use(LangRouter, {
  defaultLanguage: 'en',
  translations,
  localizedURLs,
  i18nOptions: {
    dateTimeFormats: { ... },
    pluralizationRules: { ... },
  }
});