Kedro PyPI monitor
Installation
$ uv pip install -r requirements.txt -r dev-requirements.txt
Or, with plain pip:
$ pip install -r requirements.txt -r dev-requirements.txt
Authentication
Generate a JSON credentials file from Google BigQuery. Click to expand steps.
### Create project
1. Go to https://bigquery.cloud.google.com.
2. Sign up if you haven't already. The first TB of queried data each month is free. Each additional TB is $5.
3. Sign in on your account if you are not already;
4. Go to https://console.developers.google.com/cloud-resource-manager and click CREATE PROJECT if you don't already have one:

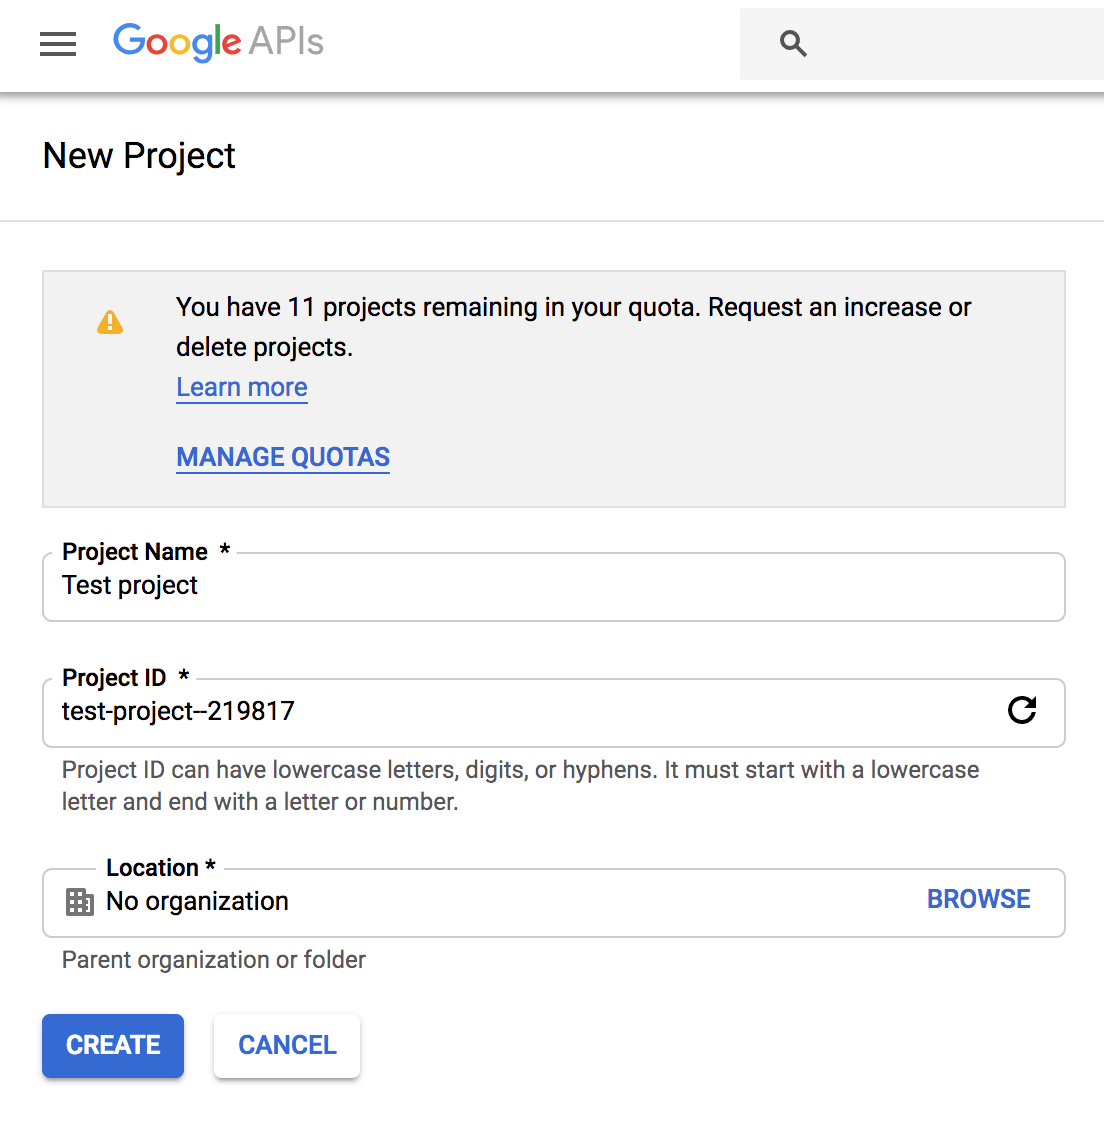
5. This takes you to [https://console.developers.google.com/projectcreate](https://console.developers.google.com/projectcreate). Fill out the form and click CREATE. Any name is fine, but I recommend you choose something to do with PyPI like pypinfo. This way you know what the project is designated for:
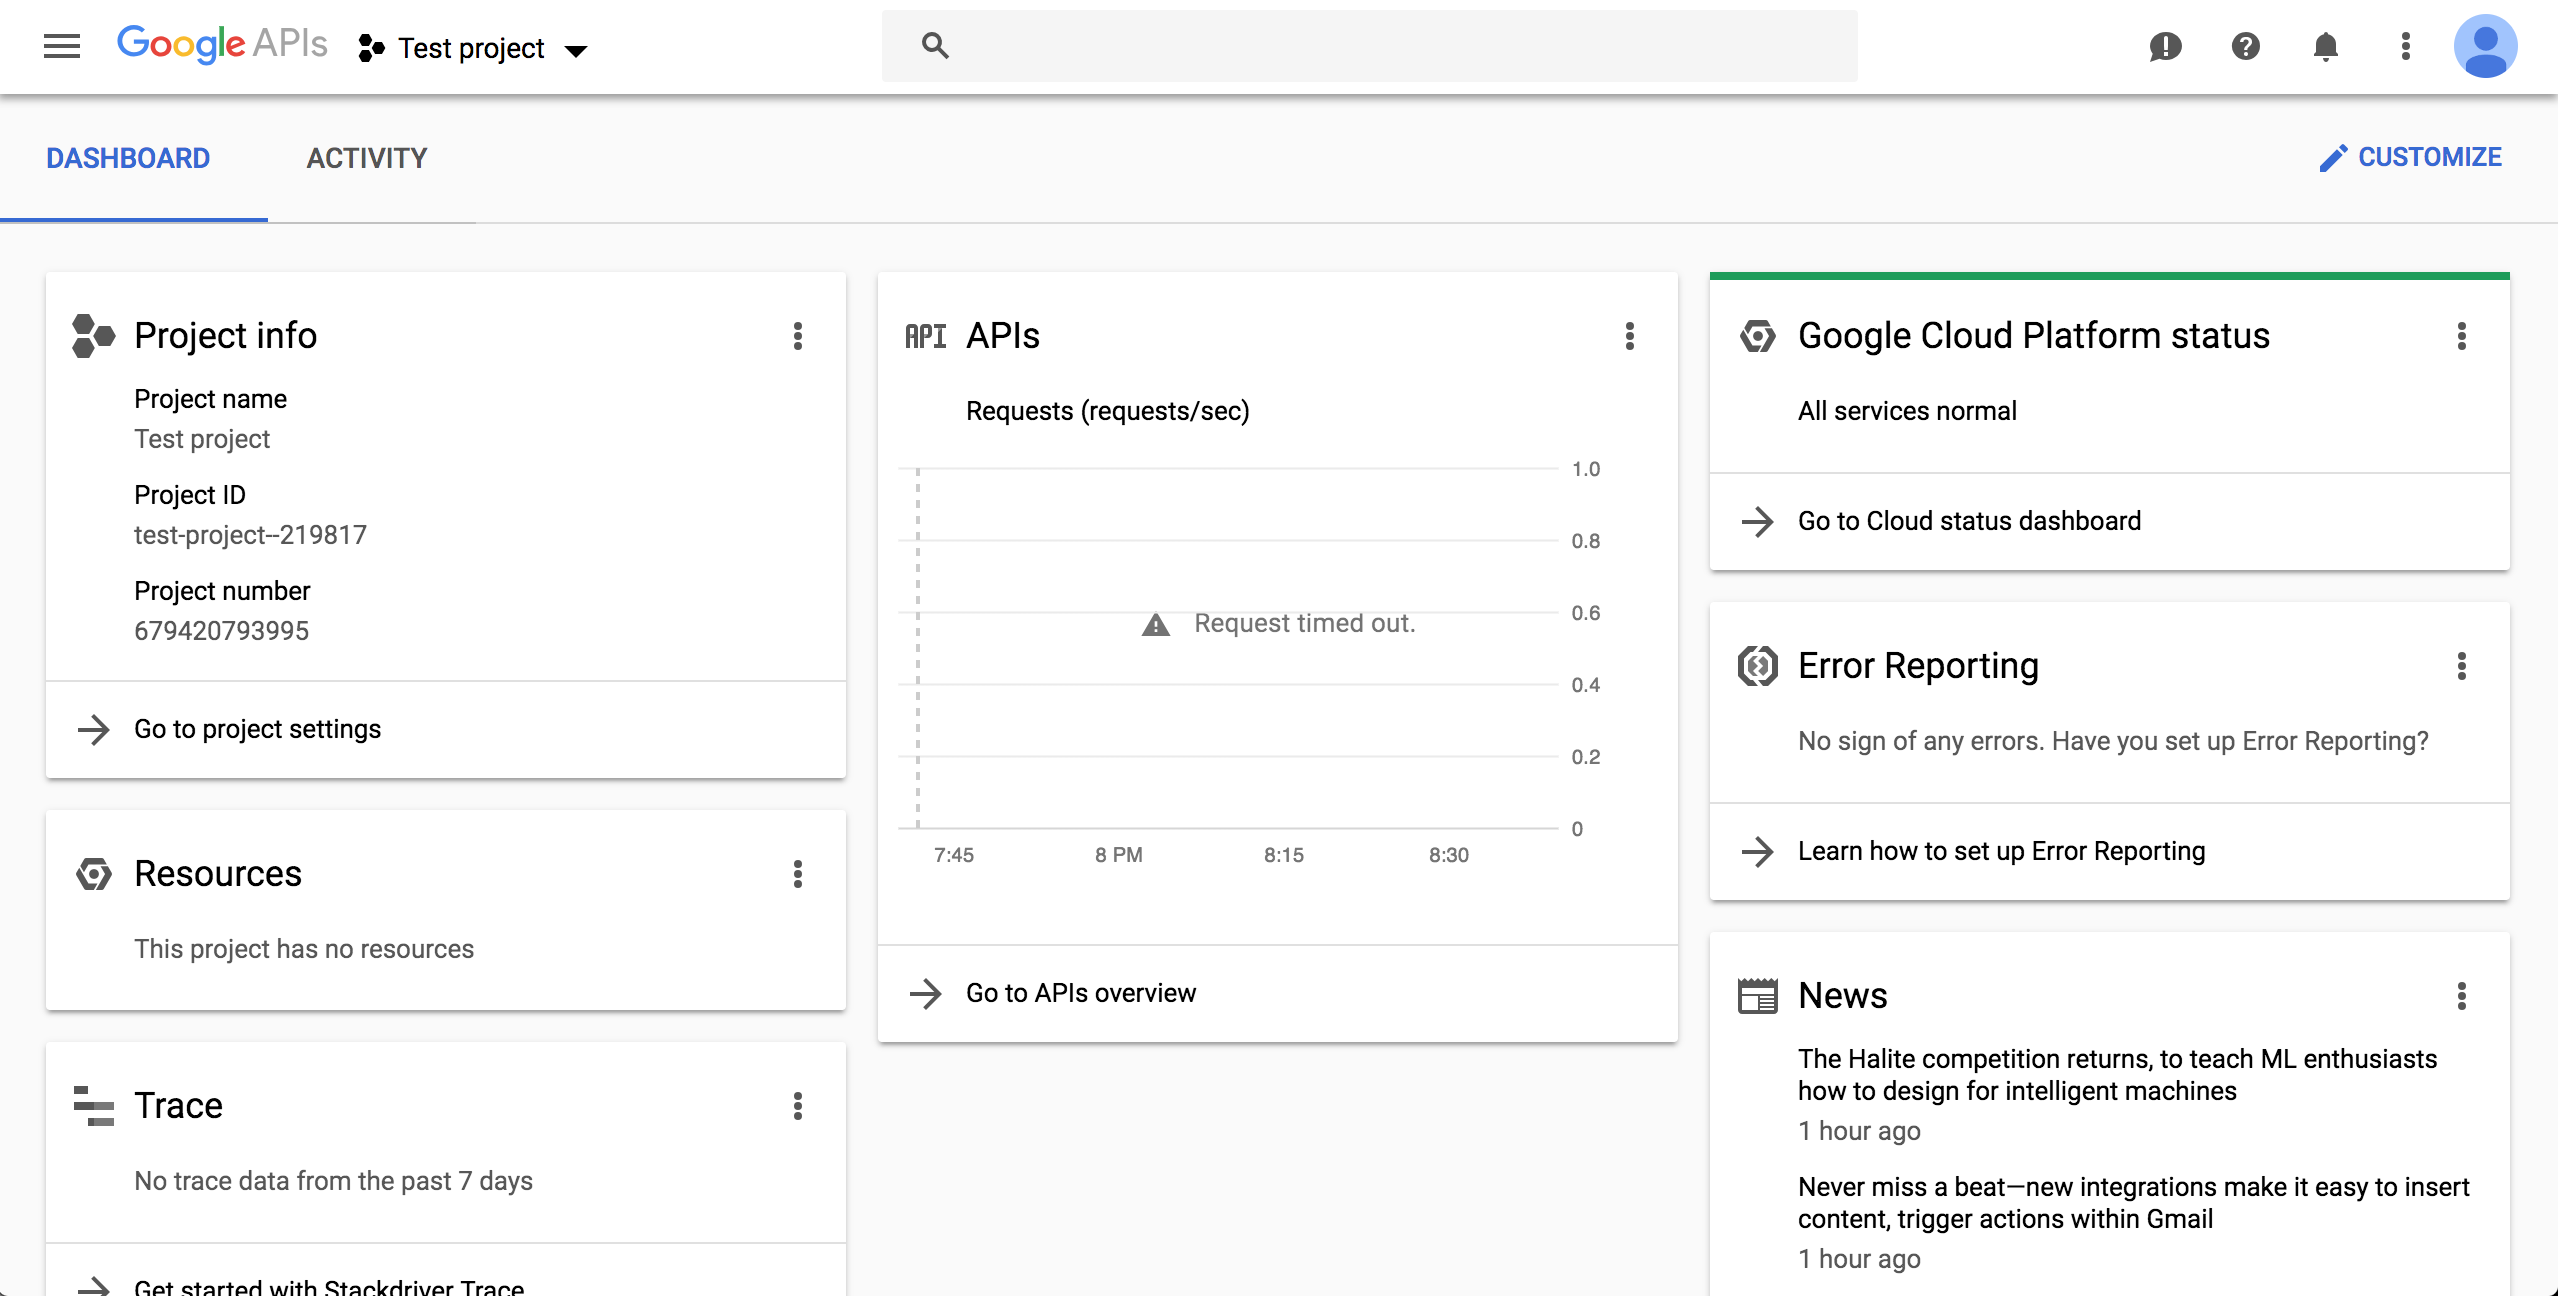
6. A while after creation, at the left-top corner, select the project name of your choice on dropdown component AND at the left-top corner "Navigation Menu", select option "Cloud Overview > Dashboard":
### Enable BigQuery API
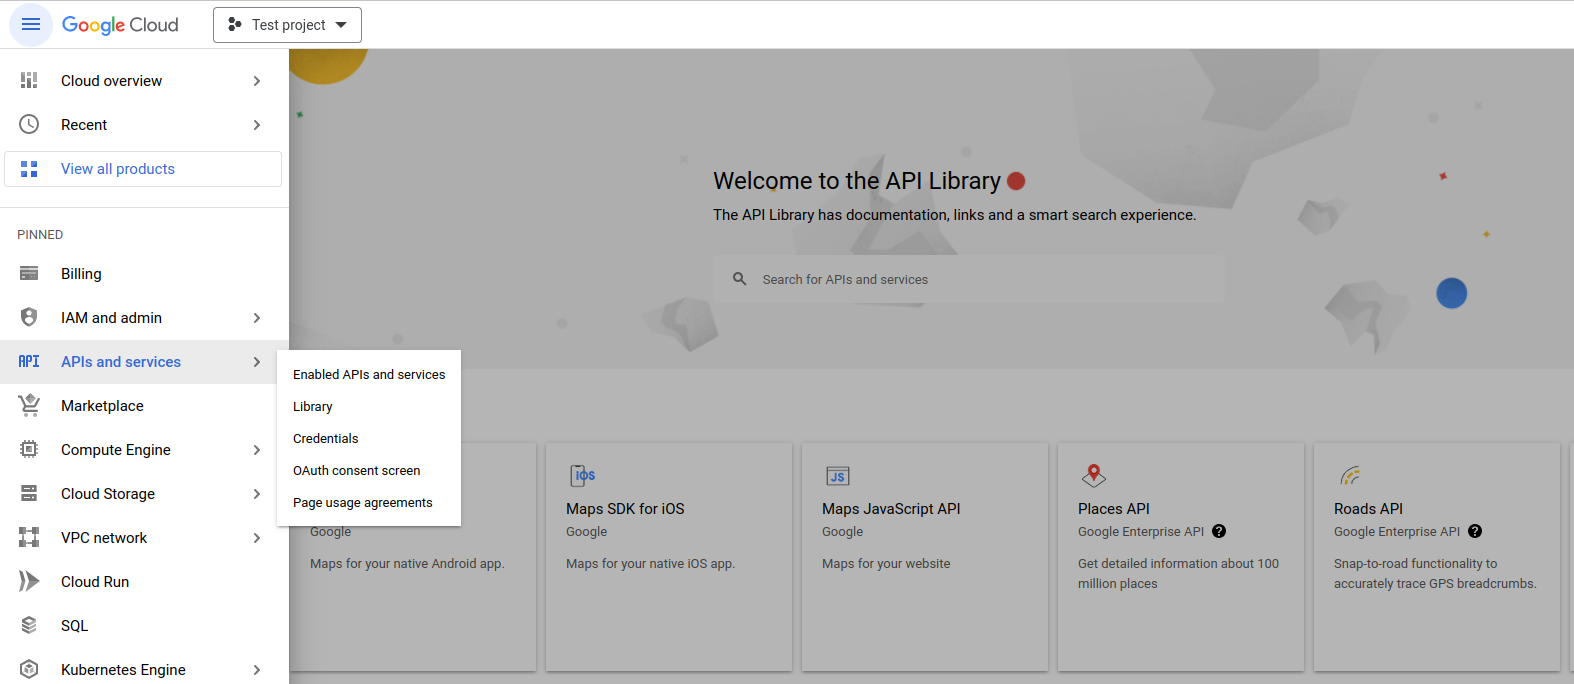
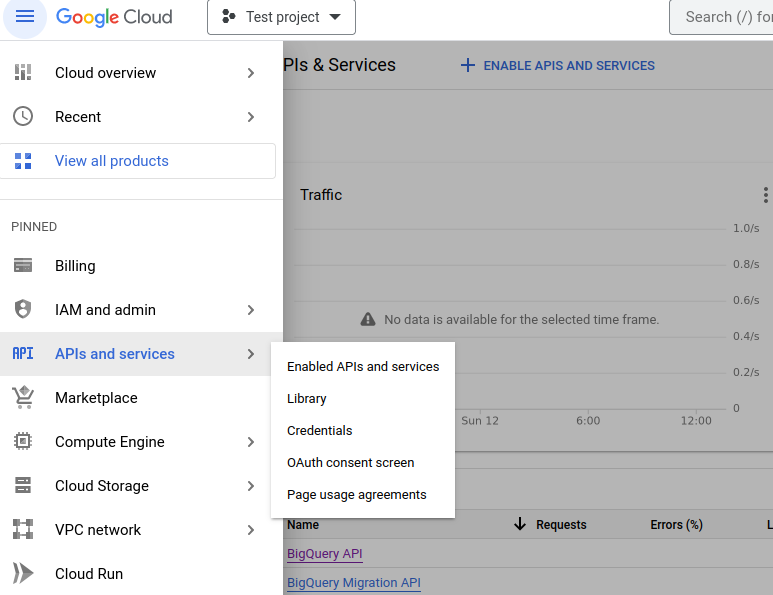
7. Click on top-left button "Navigation Menu" and click on option "API and services > Library":
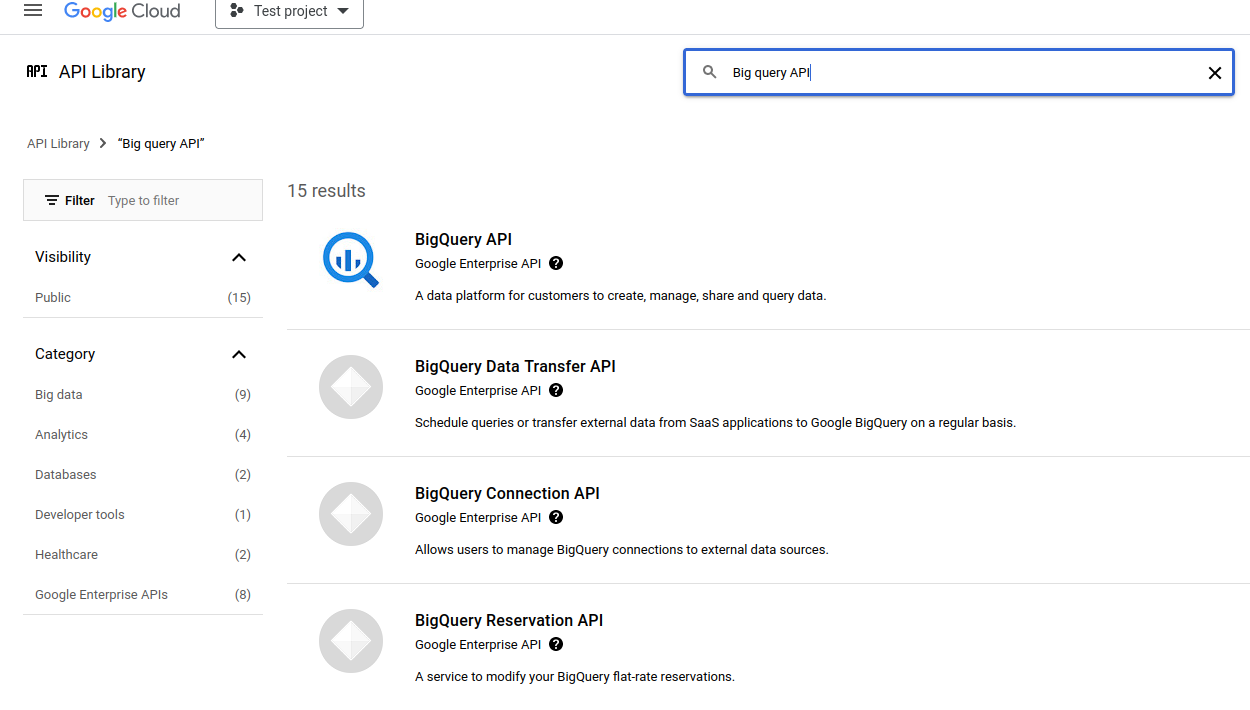
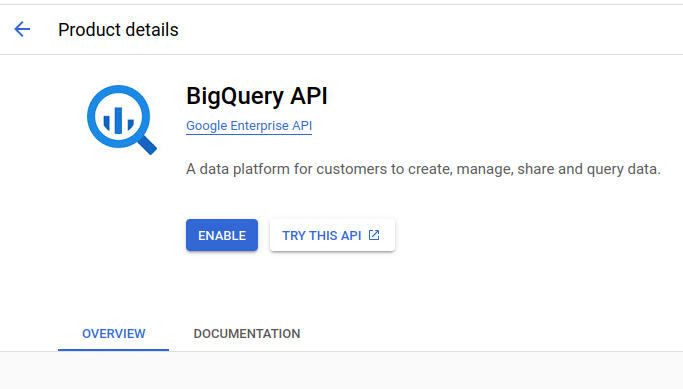
8. Perform a search with keywords "big query api" on available text field:
9. Enable Big Query API by button "Enable" press:
10. After enabling, click CREATE CREDENTIALS:
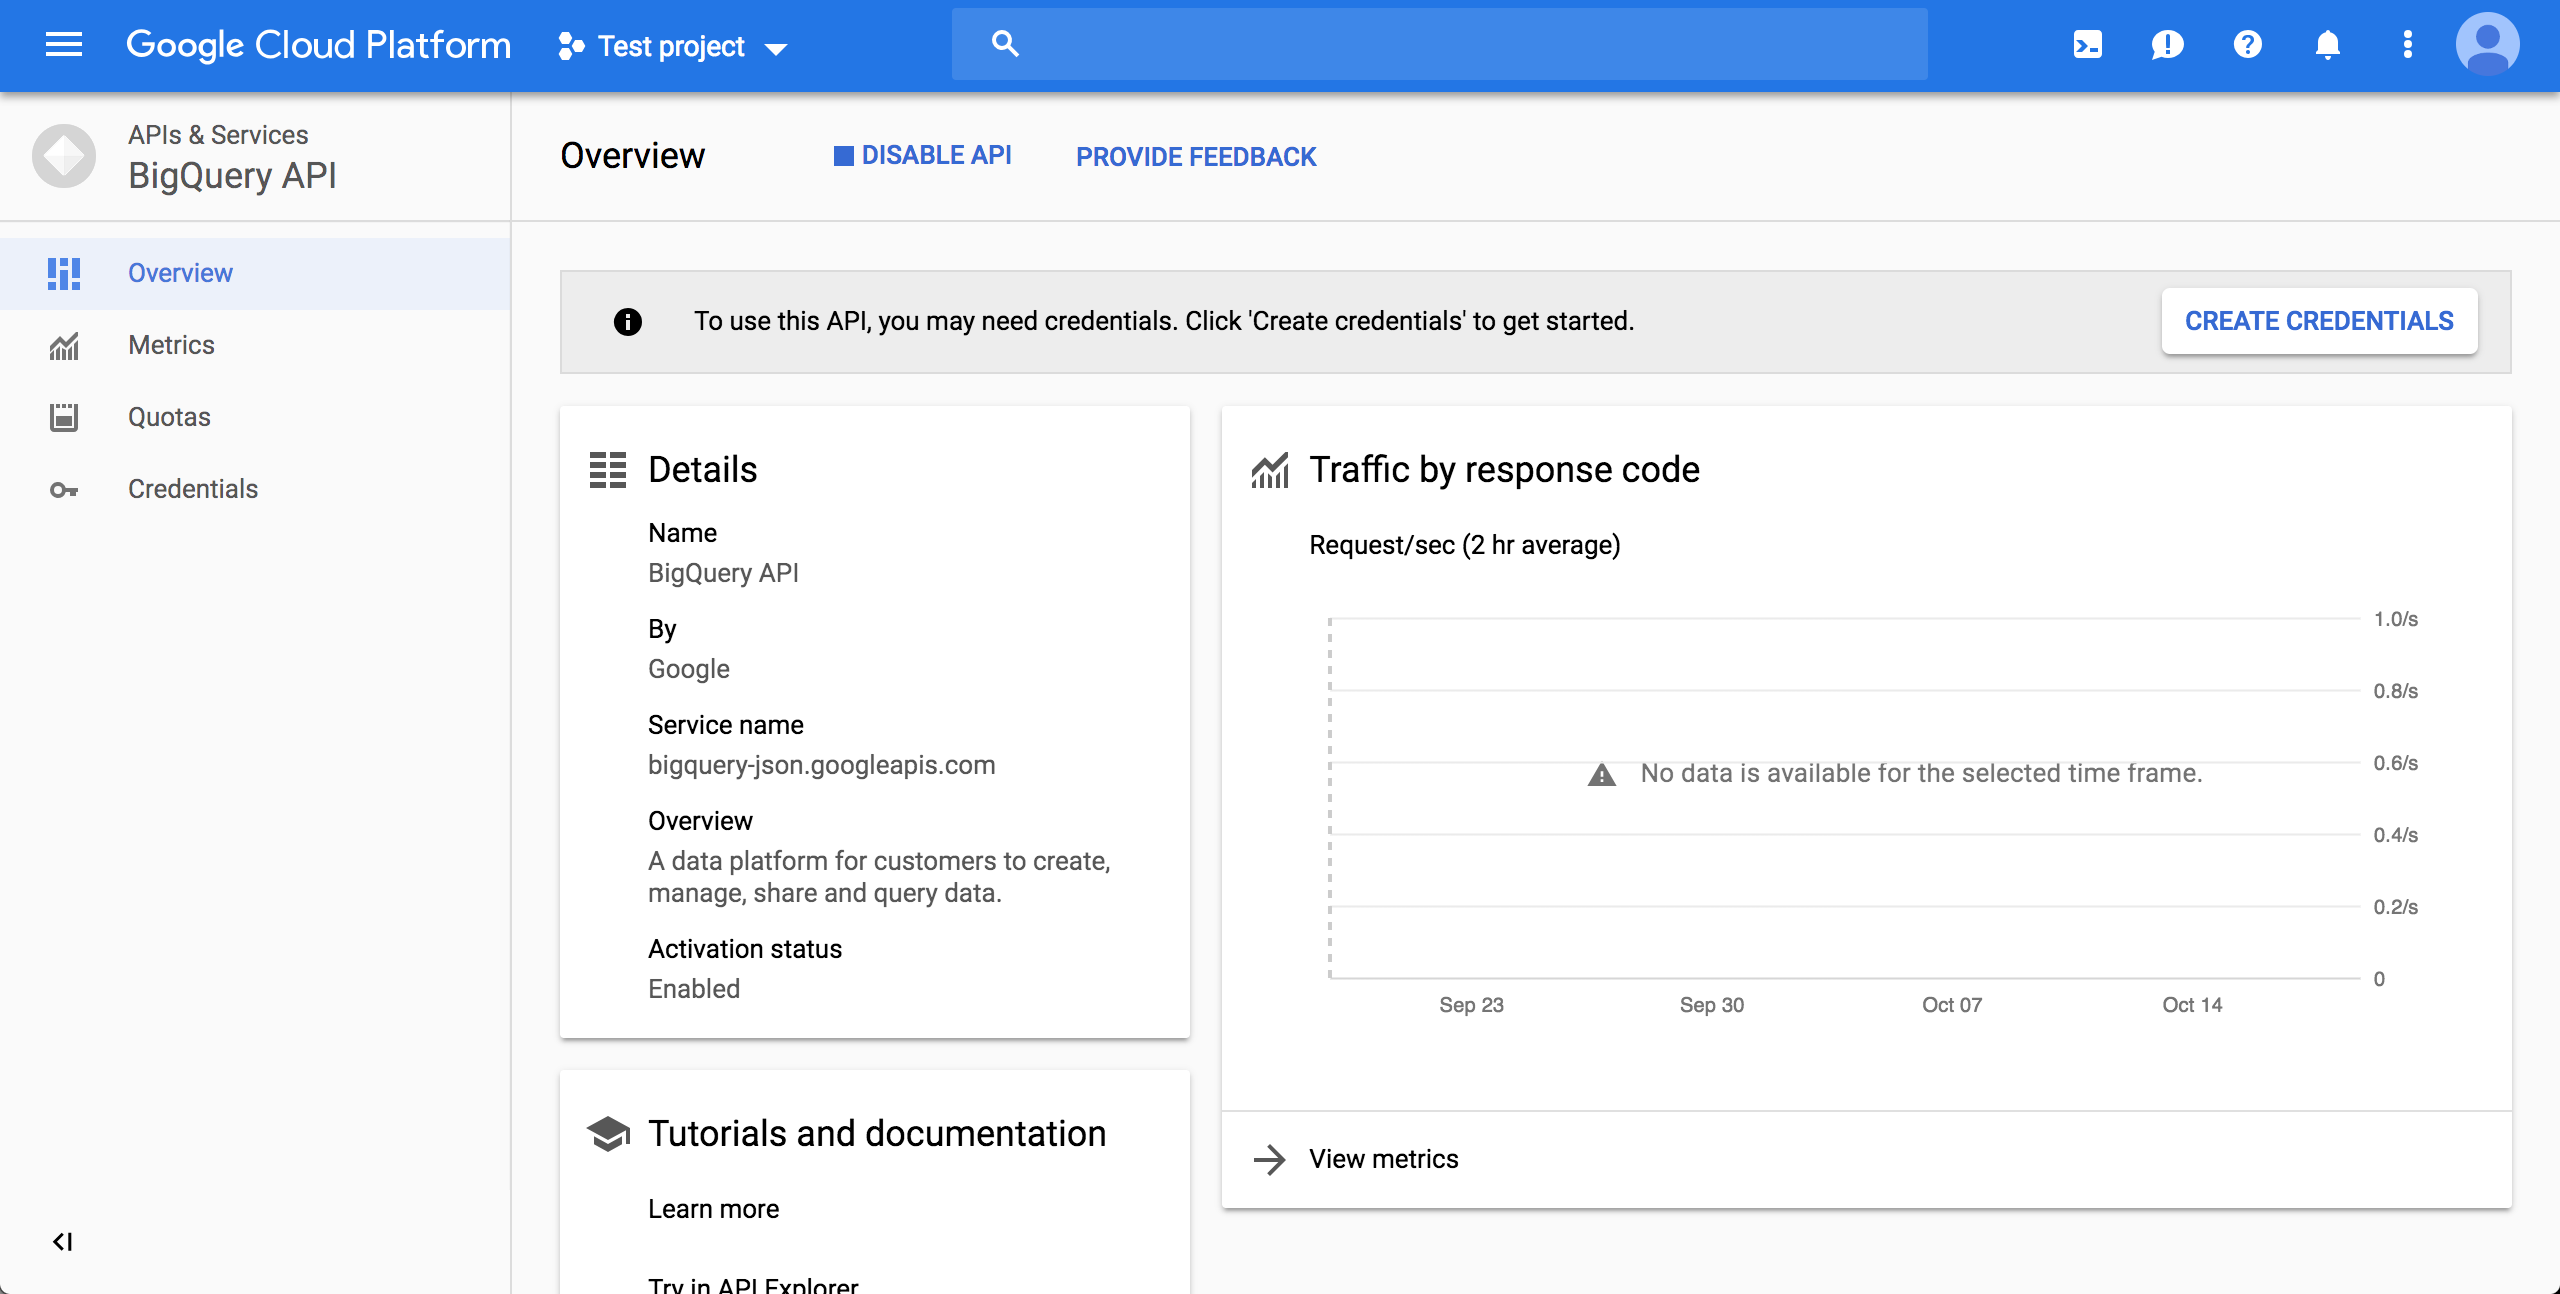
**Note**: You will be requested to go back to Big Query panel. In this case, click on top-left button "Navigation Menu", option "API and services > Enabled APIs and services" and on consequent page, on item "Big Query API":
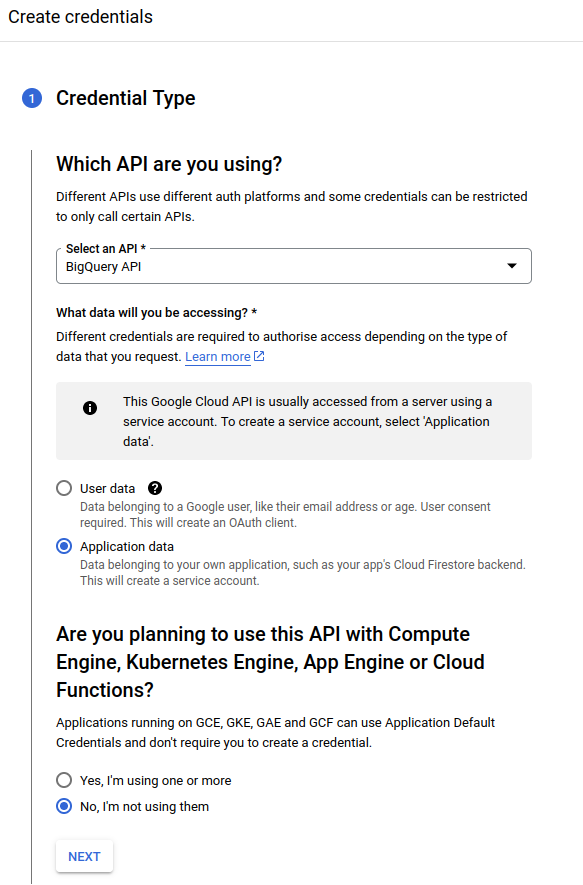
11. On the page after clicking the "CREATE CREDENTIALS" button, choose "BigQuery API", "Application Data" and "No, I'm not using them":
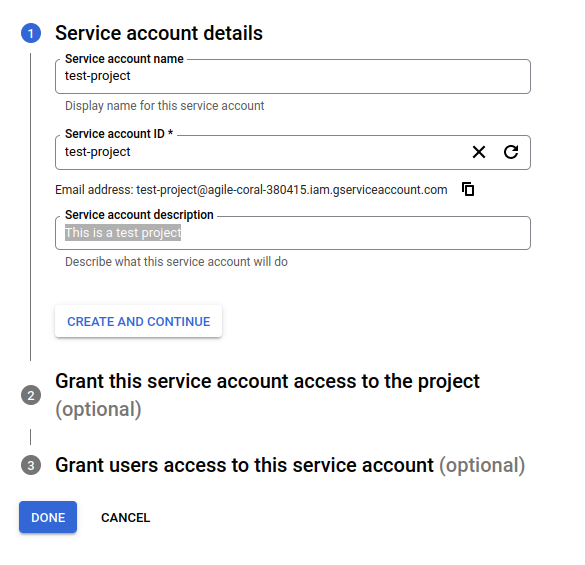
12. Fill account details and press button "Create and Continue":
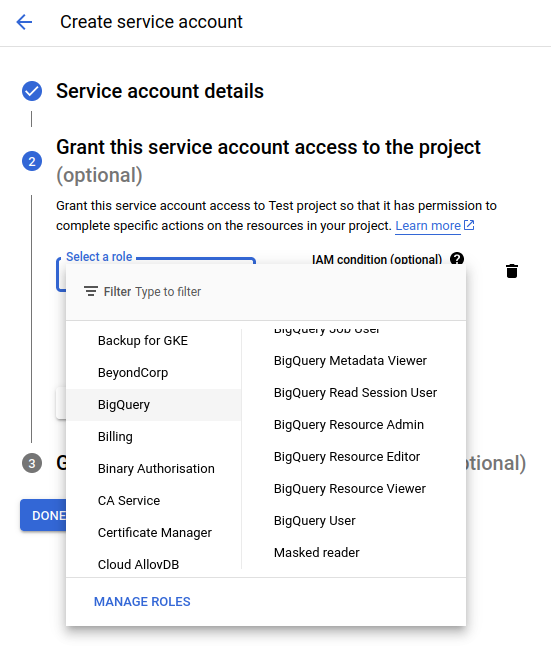
13. Select role "BigQuery User" (option path "BigQuery > Big Query User"), press button "Done":
14. On Big Query API panel (See **Note** on item *10*), click on tab "CREDENTIALS". On section "Service accounts", click on created credentials on items 11, 12 and 13.

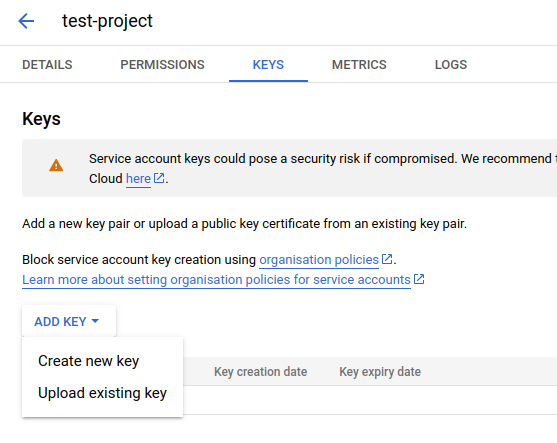
15. On page from credential click, click on tab "KEYS". On dropdown menu "ADD KEY", click on option "Create new key":
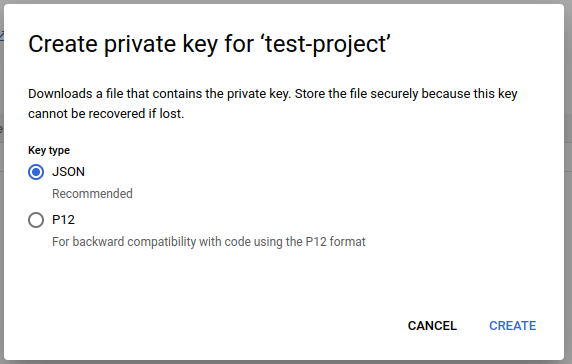
16. On appearing box, click on option "JSON" and press button "CREATE": This will start the download of credentials on a JSON file with name pattern `{name}-{credentials_hash}.json`:
Then, export the GOOGLE_APPLICATION_CREDENTIALS environment variable with the path to that file:
$ export GOOGLE_APPLICATION_CREDENTIALS=kedro-pypi-stats-xxx.json
Test
To test that the code works, run the demo pipeline:
$ KEDRO_ENV=demo kedro run --pipeline fetch_kedro_data
[08/02/24 08:43:25] INFO     Kedro project kedro-pypi-monitor                  session.py:324
[08/02/24 08:43:29] INFO     Using synchronous mode for loading and   sequential_runner.py:64
                             saving data. Use the --async flag for
                             potential performance gains.
                             https://docs.kedro.org/en/stable/nodes_a
                             nd_pipelines/run_a_pipeline.html#load-an
                             d-save-asynchronously
                    INFO     Loading data from pypi_kedro_raw             data_catalog.py:508
                             (PolarsBigQueryDataset)...
[08/02/24 08:43:33] INFO     Running node: unnest_data([pypi_kedro_raw]) ->       node.py:361
                             [pypi_kedro_unnested]
                    INFO     Saving data to pypi_kedro_unnested           data_catalog.py:550
                             (EagerPolarsDataset)...
                    INFO     Completed 1 out of 1 tasks               sequential_runner.py:90
                    INFO     Pipeline execution completed successfully.         runner.py:119