pepper_virtual
Tools to simulate a Pepper robot:
- pepper_control: provides ROS controllers for a Pepper robot, these allow to control a simulated robot as well as a real one using pepper_gazebo_plugin or pepper_moveit_config.
- pepper_gazebo_plugin: Gazebo plugin for a Pepper robot
MODIFIED VERSION that works (at least on Kinetic in 21/04/2020)
For this modified version (differs from the origin upstream) you'll also need:
- https://github.com/awesomebytes/gazebo_model_velocity_plugin
sudo apt-get install ros-kinetic-tf2-sensor-msgs- https://github.com/awesomebytes/pepper_robot IMPORTANT: Use the branch correct_chain_model_and_gazebo_enabled
Note that the provided launchfiles that have been tested are:
roslaunch pepper_gazebo_plugin pepper_gazebo_plugin_Y20.launchroslaunch pepper_gazebo_plugin pepper_gazebo_plugin_in_office.launch
Or their variants that don't need a GPU (for the laser plugin):
roslaunch pepper_gazebo_plugin pepper_gazebo_plugin_Y20_CPU.launchroslaunch pepper_gazebo_plugin pepper_gazebo_plugin_in_office_CPU.launch
And further variants that don't have the arms of the robot which reduce CPU load (useful for navigation tests, specially on underpowered computers). In my machine this used 30% less CPU on gzserver. Note that if you close/don't launch gzclient (the graphical interface of Gazebo) you'll save a lot of CPU too (more than 1 core or 110% CPU in top -c for me):
roslaunch pepper_gazebo_plugin pepper_gazebo_plugin_Y20_CPU_no_arms.launchroslaunch pepper_gazebo_plugin pepper_gazebo_plugin_in_office_CPU_no_arms.launch
Installation
This should get your workspace up and running:
mkdir -p pepper_sim_ws/src
cd pepper_sim_ws/src
git clone -b correct_chain_model_and_gazebo_enabled https://github.com/awesomebytes/pepper_robot
git clone -b simulation_that_works https://github.com/awesomebytes/pepper_virtual
git clone https://github.com/awesomebytes/gazebo_model_velocity_plugin
# In case you are missing any of these
sudo apt-get install ros-kinetic-tf2-sensor-msgs ros-kinetic-ros-control ros-kinetic-ros-controllers ros-kinetic-gazebo-ros ros-kinetic-gazebo-ros-control ros-kinetic-gazebo-plugins ros-kinetic-controller-manager ros-kinetic-ddynamic-reconfigure-python
cd ..
catkin_make
source devel/setup.bash
# Launch your preferred simulation here
roslaunch pepper_gazebo_plugin pepper_gazebo_plugin_in_office_CPU.launch

# (On another shell that you sourced the workspace) Check stuff on Rviz
rosrun rviz rviz -d `rospack find pepper_gazebo_plugin`/config/pepper_sensors.rviz
Docker
We provide a docker image which is plattform independent and containerized, meaning it can't interfere with any local ROS installations or other incompatible packages you might have. You have two options to obtain the image:
- Build it locally, from the provided dockerfile:
docker build -t awesome-pepper-sim . - Pull it from dockerhub:
docker pull frietz58/pepper-virtual:with-gazebo-files
Pulling it from dockerhub comes with the advantage of having the commited gazebo files, which otherwise have to be loaded when gazebo is started in the container. This happens automatically but takes about 30 seconds. Note that docker, per default, does not have permissions to spawn GUIs on the host system from within the container. There are a few options to address this (more about this described in this fork), but we recommend installing the docker extension "rocker" to take care of this. Then, launch the container, depending on which option you chose earlier:
- If build locally:
rocker --nvidia --x11 awesome-pepper-sim - If pulled from dockerhub:
rocker --nvidia --x11 frietz58/pepper-virtual:with-gazebo-files
Alternatively, you can use the start_docker.sh script which will setup a lot of docker flags to enable the utilization of your Nvidia GPU and your X graphical system.
Then, just as above but in the container, do:
# Launch your preferred simulation here
roslaunch pepper_gazebo_plugin pepper_gazebo_plugin_in_office_CPU.launch
In order to start a new shell in the container and, for example open RVIZ, run:
# First, find container ID with: sudo docker ps, then
docker exec -it <CONTAINER-ID> bash
# Launch RVIZ in the second shell in the container:
rosrun rviz rviz -d `rospack find pepper_gazebo_plugin`/config/pepper_sensors.rviz
You'll find a topic /pepper/laser_2 that unifies the 3 lasers of the robot in 1 topic (by reprojecting the points in a pointcloud and transforming them into base_footprint).
You'll find /pepper/cmd_vel to command the base, for example, using rosrun rqt_robot_steering rqt_robot_steering.
You can also move the joints via the follow_joint_trajectory controllers, for example, using rosrun rqt_joint_trajectory_controller rqt_joint_trajectory_controller.
Summary of changes in this simulation
-
The robot model has been modified to invert its TF tree to start in
base_footprintand from there branch up. The original model starts onbase_linkin the torso and branches differently. This setup is different to all mobile based robots I used before and became problematic when using some whole body control frameworks that also aim to use the base. The details of this process are here: pepper_description modified -
The base collision meshes has been changed to a box to simplify collision physics for the gazebo_model_velocity_plugin. This complicated non-spherical collision meshes for the wheels made the base not move properly in my experience.
-
The gazebo_model_velocity_plugin provides realistic odometry drift (on
/pepper/odom, based on real-life measured drift in our robots at the Magic Lab in the UTS Unleashed! RoboCup@Home SSPL team) with a odometry groundtruth topic (on/pepper/odom_groundtruthin a imaginary Gazebo/worldframe). It also implements velocity-related limits that make the motion of the robot behave similar to a real one. Taken from the gazebo_model_velocity_plugin README:- gazebo_ros_p3d: Publishes odometry, but it supports gaussian noise for XY & Yaw separately (and it doesn't add the noise when the robot is stopped). It allows the odom frame to be odom (which gazebo_ros_p3d doesn't for some reason).
- ros_planar_move: It moves the robot by sending velocities in Gazebo in a Twist topic, but it also implements velocity, acceleration and jerk limits to better behave like a real robot. It also stops the robot if no commands are sent for a while. Kind of a diff_drive_controller but hacky.
-
The fingers have been removed from the simulation as they were too CPU expensive to simulate and also made the simulation more unstable.
-
The laser sensor is simulated by having 3 lasers simulated in gazebo (with a GPU and a CPU version so this simulation can be run on underpowered computers) and then the script laser_publisher.py transforms these 3 into a pointcloud and transforms it to the
base_footprintframe in one single LaserScan message. This LaserScan contains many manyNaNvalues because to fit the LaserScan beams from 3 different poses (each laser) in the robot into one LaserScan with a different origin a trade-off must be made. This behaves differently than the naoqi_driver laser implementation to provide more precise laser scans. If you want to use a driver for your robot with this same kind of implementation, you can base it of: UTS Unleashed! to-be-published laser driver. -
The simulated cameras have been updated with similar to real life parameters.
If you want to simulate the RGB cameras with different resolutions you must go to pepper_robot/pepper_description/urdf/pepper1.0_generated_urdf/pepperGazebo.xacro (and/or pepperGazeboCPU.xacro) and change the CameraTop_frame <width>640</width> <height>480</height> tags.
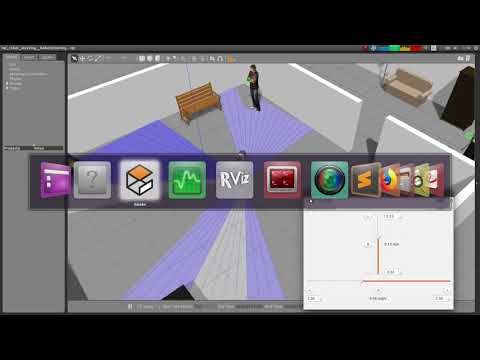
Video showing the simulation working