CTRL Library for Arduino

![]()
![]()
![]()
Welcome to CTRL! This library contains interfaces for the usage of buttons, rotary encoders, potentiometers, LEDs & multiplexers. Whether you need a nicely debounced button or encoder, a smooth yet responsive and accurate potentiometer, or a flashing LED, you've come to the right place. All these real-world objects are represented by feature-rich software counterparts. You can instantiate them in several ways to meet your project demands, and you can extend them as needed, adding whatever extra functionality you require.
The goal of this library is to offer uniform interfaces with flexible ways of implementing them, depending on how you program your devices, whether you are an experienced or beginning Arduino C++ programmer. The plan is to add more objects in the future, so stay tuned!
Before I show you some examples of how to implement this library, don't forget to take a look at the examples & documentation. There you will find detailed instructions on how to use everything. All right, let's get on with it!
Installation
Open the Arduino IDE Library manager, search for "CTRL" and hit "INSTALL".
Manual installation
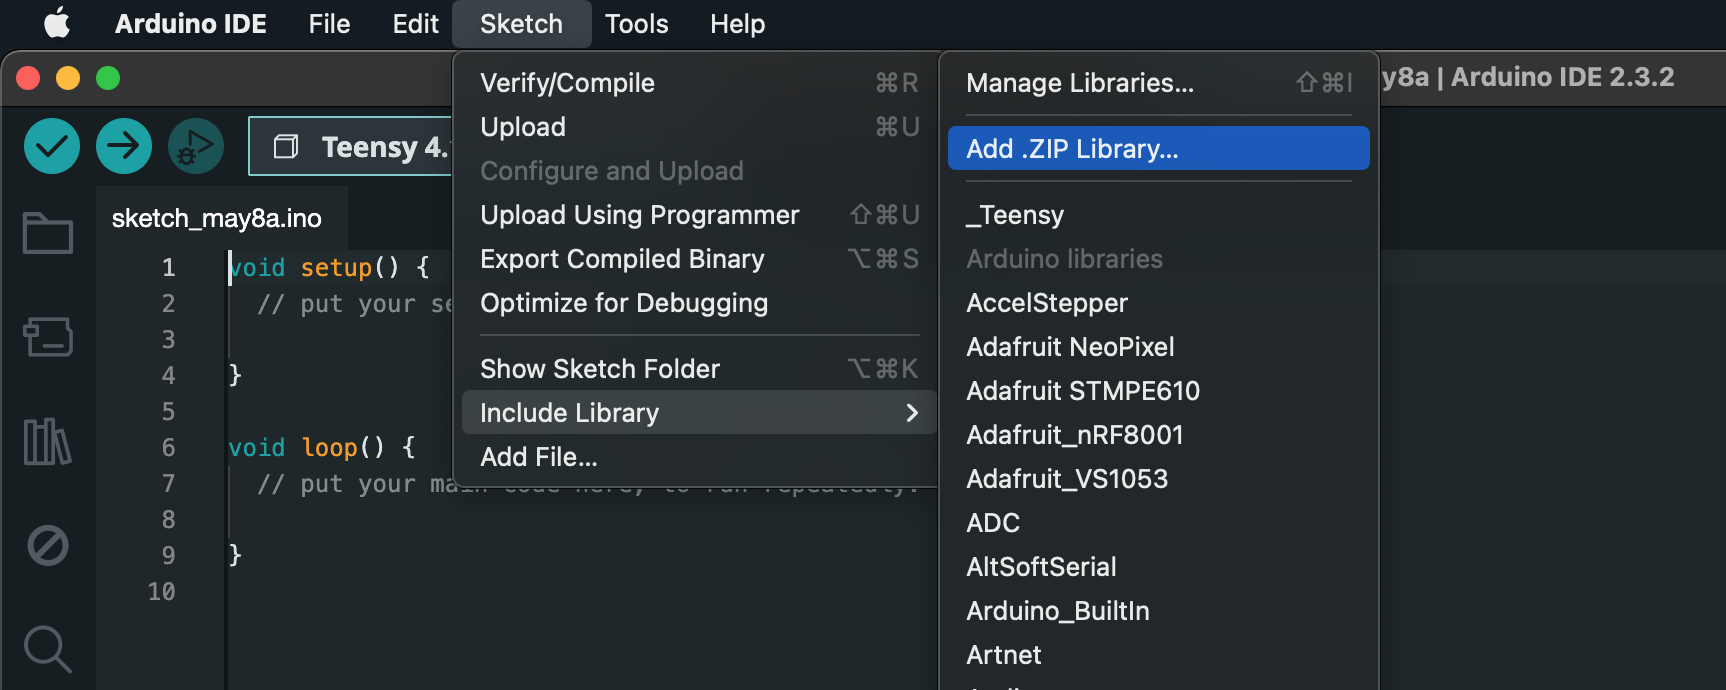
If you prefer a manual installation instead, go to the release page, and download the latest release. Next open your Arduino IDE, click on "Sketch" in the top menu, next select "Include Library" and then "Add .ZIP LIbrary". Browse to where you saved the downloaded file and import it.
Example
Once that's done, you can include the entire library in your sketch, like so:
#include <CTRL.h>If you only need a portion of the library, you can import that specific part. You can achieve this by using one or more of the includes listed below:
  #include <CtrlBtn.h>
  #include <CtrlEnc.h>
  #include <CtrlPot.h>
  #include <CtrlLed.h>
Ok, so let's draw up a simple sketch for a button:
#include <CtrlBtn.h>

void onPress() {
  Serial.println("Button pressed");
}

void onRelease() {
  Serial.println("Button released");
}

CtrlBtn button(1, 15, onPress, onRelease);

void setup() {
  Serial.begin(9600);
}

void loop() {
  button.process();
}
So, a short rundown on what's happening in the example above. First, of course, we include the CtrlBtn header. We then create the functionality for when we press down on the button by defining an onPress handler. This will execute every time the button enters a 'down' state. The onRelease handler, in turn, will be triggered as soon as the button is released and goes back 'up'. You can omit the onRelease if you don't need it (the same goes for the onPress, by the way).
After that, we create a button of the type CtrlBtn and pass it some data. The first parameter (1) tells the software what pin the button is hooked up to (this pin will be pulled HIGH on initialization, so make sure you wire the button from pin 1 to the button and from the button to ground). The second parameter (15) is the bounce duration in milliseconds. I usually set this to around 15 as it accommodates the bouncing of most buttons that I use. If you have a very 'noisy' button, you can increase this number. And then the third and fourth parameters are optional and set the onPress and onRelease handlers that we defined earlier.
Finally, all we need to do is to make sure we call the button's process method during looping so that all its data readings and functionality can be continuously processed.
And that's it! Have a look at the examples to see how to use potentiometers, rotary encoders and LED's. For more extensive and in depth information on how to hook everything up, please refer to the documentation.
P.S. If you have ideas or suggestions, feel free to contact me at johannesprins@knalgeel.com