
![]()


You can use this Module JSON link to install. Requires Foundry v11.
This Foundry VTT module provides an elevation canvas layer that lets the GM modify terrain elevation values for the scene. Elevation maps can be uploaded or downloaded for a scene. An optional auto-elevation setting adjusts token elevation when tokens are dragged or moved in the scene.
Token elevation, token vision, and lighting can be affected by terrain elevation, depending on settings.
- Lights can create shadows based on wall height and terrain elevation.
- Token vision can be shadowed based on wall height and terrain elevation.
- If auto elevation is enabled, token elevation will be adjusted as tokens are dragged or moved in the scene.
- The GM can define elevation for overhead tiles and lighting.
- Overhead tiles with defined elevation are treated as "floors" or "bridges" that affect a token elevation accordingly.
This module is still in early development stages. Many things are likely to change, including the image download/upload format.
Thanks
Special thanks to:
- dev7355608 (Perfect Vision) author for answering my many random PIXIjs questions.
- ironmonk88 (Enhanced Terrain Layer) author, from whom I borrowed some of the control layout ideas and code.
Module compatibility
Required modules
Recommended modules
- Wall Height. Wall Height is highly recommended to improve your experience with Elevated Vision. With Wall Height, you can set walls and lights to have defined heights. Elevated Vision will create shadows for elevated lights cast on lower walls, block lower-elevation lights from illuminating the higher elevation, and create shadows when elevated tokens look down at lower-elevation walls.
- Token Lean. Token Lean is a great addition because it allows tokens to "peak" over the edge of a cliff. Now updated for v10!
Problematic modules
- Should be compatible with Perfect Vision as of Elevated Vision v0.1.5. Please report any issues to the Elevated Vision git issue tracker.
- Levels should now work. When Levels or Perfect Vision are present, Elevated Vision hands off visibility testing to those modules. In theory, visibility tests should be comparable using only Elevated Vision versus using Levels or Perfect Vision. Please report potential discrepancies in the Git issue tracker. Note: If you have a "basement" level, you may need to set the elevation of the area in and around the basement to the negative elevation bottom for the basement.
- If you want real 3d, I recommend Ripper's 3d Canvas. Basic testing suggests Elevated Vision can work with 3d Canvas. It should also be possible, in theory, to use Elevated Vision's export function to export a 2d elevation map and use that as a basis to create a black-and-white heightmap, which 3d Canvas can use to warp the 3d geometry. If you figure out how to do this, or run across a bug for this, please open an issue in my Git to discuss and share with others.
Known issues
- Something is interfering with radial and token field-of-vision for overhead tile occlusion. (Full tile occlusion works fine.) Sometimes, this works fine—--for example, the barn balcony tile in the Levels Farmhouse demo uses radial occlusion properly. If you can narrow this down or figure out what is different about that barn balcony tile, please submit an issue in the Git!
Examples
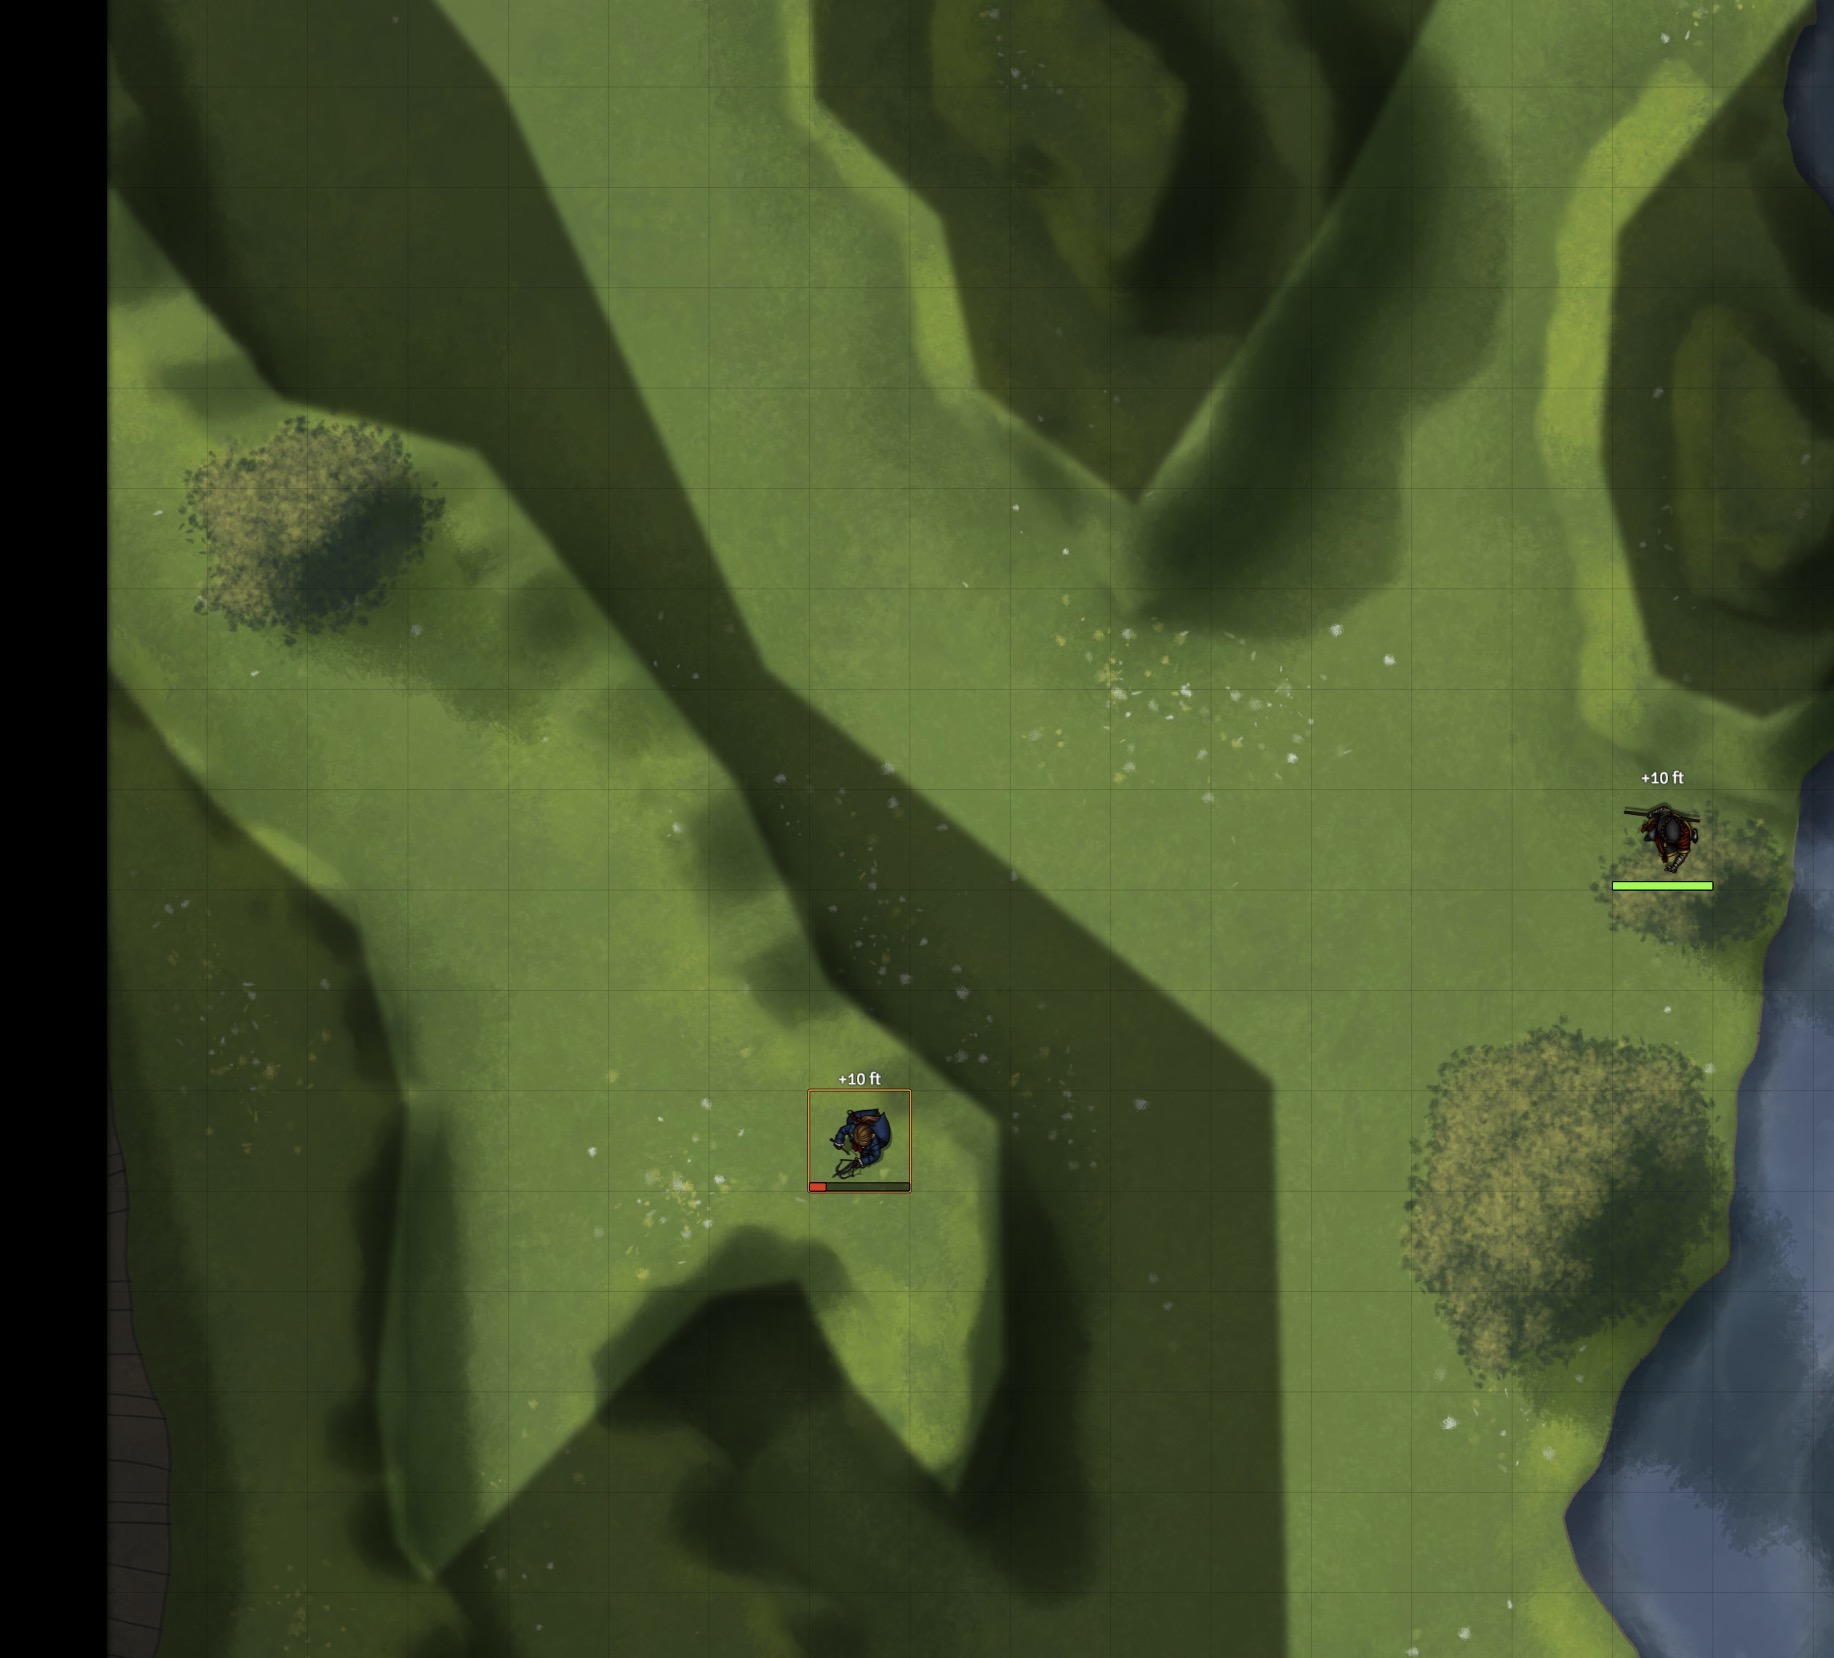
Elevated Vision allows you to designate terrain elevation height, which is then used to inform token elevation and vision.
https://user-images.githubusercontent.com/1267134/188221018-fdb2fce8-157d-45cf-9a3a-bc11450f75d2.mov
Elevated Vision also uses wall heights and terrain elevation to create shadows for lighting.
https://user-images.githubusercontent.com/1267134/188221519-d2cca9c2-f665-411f-ab79-603ab2ee6245.mov
You can use overhead tiles as bridges that a token can walk on or under.
https://user-images.githubusercontent.com/1267134/221376968-f5087048-a2ae-4d6d-afdd-29c0e482191c.mov
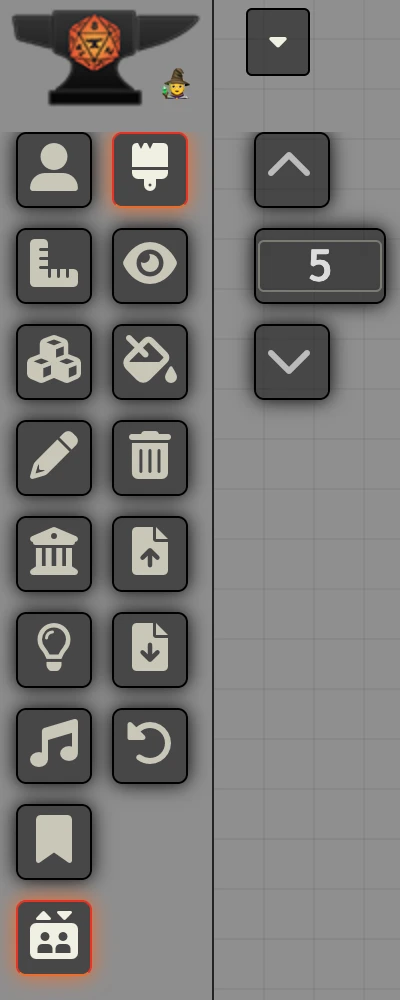
Elevation Layer
Switch to the elevation layer in the controls to modify the elevation data in a given scene.
Setting elevation
Currently four tools are provided to modify elevation in a scene.
-
Fill by grid. Click a spot on the scene to set the elevation for that grid space.
-
Fill by pixel. Paint elevation using a resizable circular brush. Press and hold the [ or ] key to decrease or increase the brush size, respectively. Hold the shift key while pressing to resize the brush faster.
-
Fill by line-of-sight. Click a spot, and all portions of the map will be set to that elevation that have line of sight to that spot. This uses the same algorithm as token vision, so it is the equivalent of a token's 360º vision from that spot, assuming global illumination.
-
Fill. Click a spot, and it will fill the space enclosed by walls. Note that if the walls are open, it may fill the entire scene. All wall types are treated as normal walls for this purpose. It should respect islands. Walls must be actually connected by endpoints, otherwise the fill will likely leak through.
Hover over a spot on the canvas to see the current elevation value. Elevation values are currently represented as different alpha values of red.
https://user-images.githubusercontent.com/1267134/188220188-c6081c54-ff81-428b-b5bd-24af3048e1ca.mov
A macro is also provided that allows the user to change every pixel that is currently at a specified elevation to a different elevation. The macro relies on method available in the console, canvas.elevation.changePixelElevationValues. For example, if the minimum elevation for a scene is set to -10, every pixel on the scene canvas will, by default, be set to -10. The macro will allow you to change every -10 value to, for example, 0.
Saving and loading elevation data
You can download the current scene data as a png file using the download button. Use canvas.elevation.downloadElevationData({ format: "image/png", fileName: "elevation"}) in the console to trigger a save. It is using PIXI.Extract, and so recognizes other image formats, such as "image/webp".
You can upload an image file and set it as the elevation data for the current scene using the upload button. Use canvas.elevation.importFromImageFile and provide the method a file location in the console to trigger the change manually. It is using PIXI.Extract, and so recognizes various image formats, such as "image/webp" or "image/png".
Currently, image data is written to and read from the red channel, with values assumed to be integers between 0 and 255. Essentially, it is a "bump" map. These values are then scaled for a given scene's elevation settings, configurable in the scene settings.
It is likely that the channel used will change in the future. Using a depth map and integrating with Foundry's depth usage is a possibility. Ultimately, I would also like to allow for "normal maps". At the moment, however, Foundry lighting is not set up to take advantage of normals for a given map (outside of maybe Ripper's 3d Canvas).
Undo and delete
Undo removes the previous action. This only works for recent actions—--exiting the elevation control layer or loading new elevation data will cause a save of data to the scene, which cannot be undone. Deletion will remove all elevation data from the scene.
Scene elevation data save is triggered when leaving the canvas layer.
Token elevation
A token is assumed to be "on the ground" if its current elevation is equal to that of the terrain. A setting allows the GM to decide if token elevation should be based on the average elevation under the token or on the point elevation at the token center. Elevation is always rounded to the nearest integer.
If a token is "on the ground" and it moves to a new location, its elevation will be automatically adjusted to that of the new location. Tokens not "on the ground" will not have their elevation adjusted.
Token vision shadows
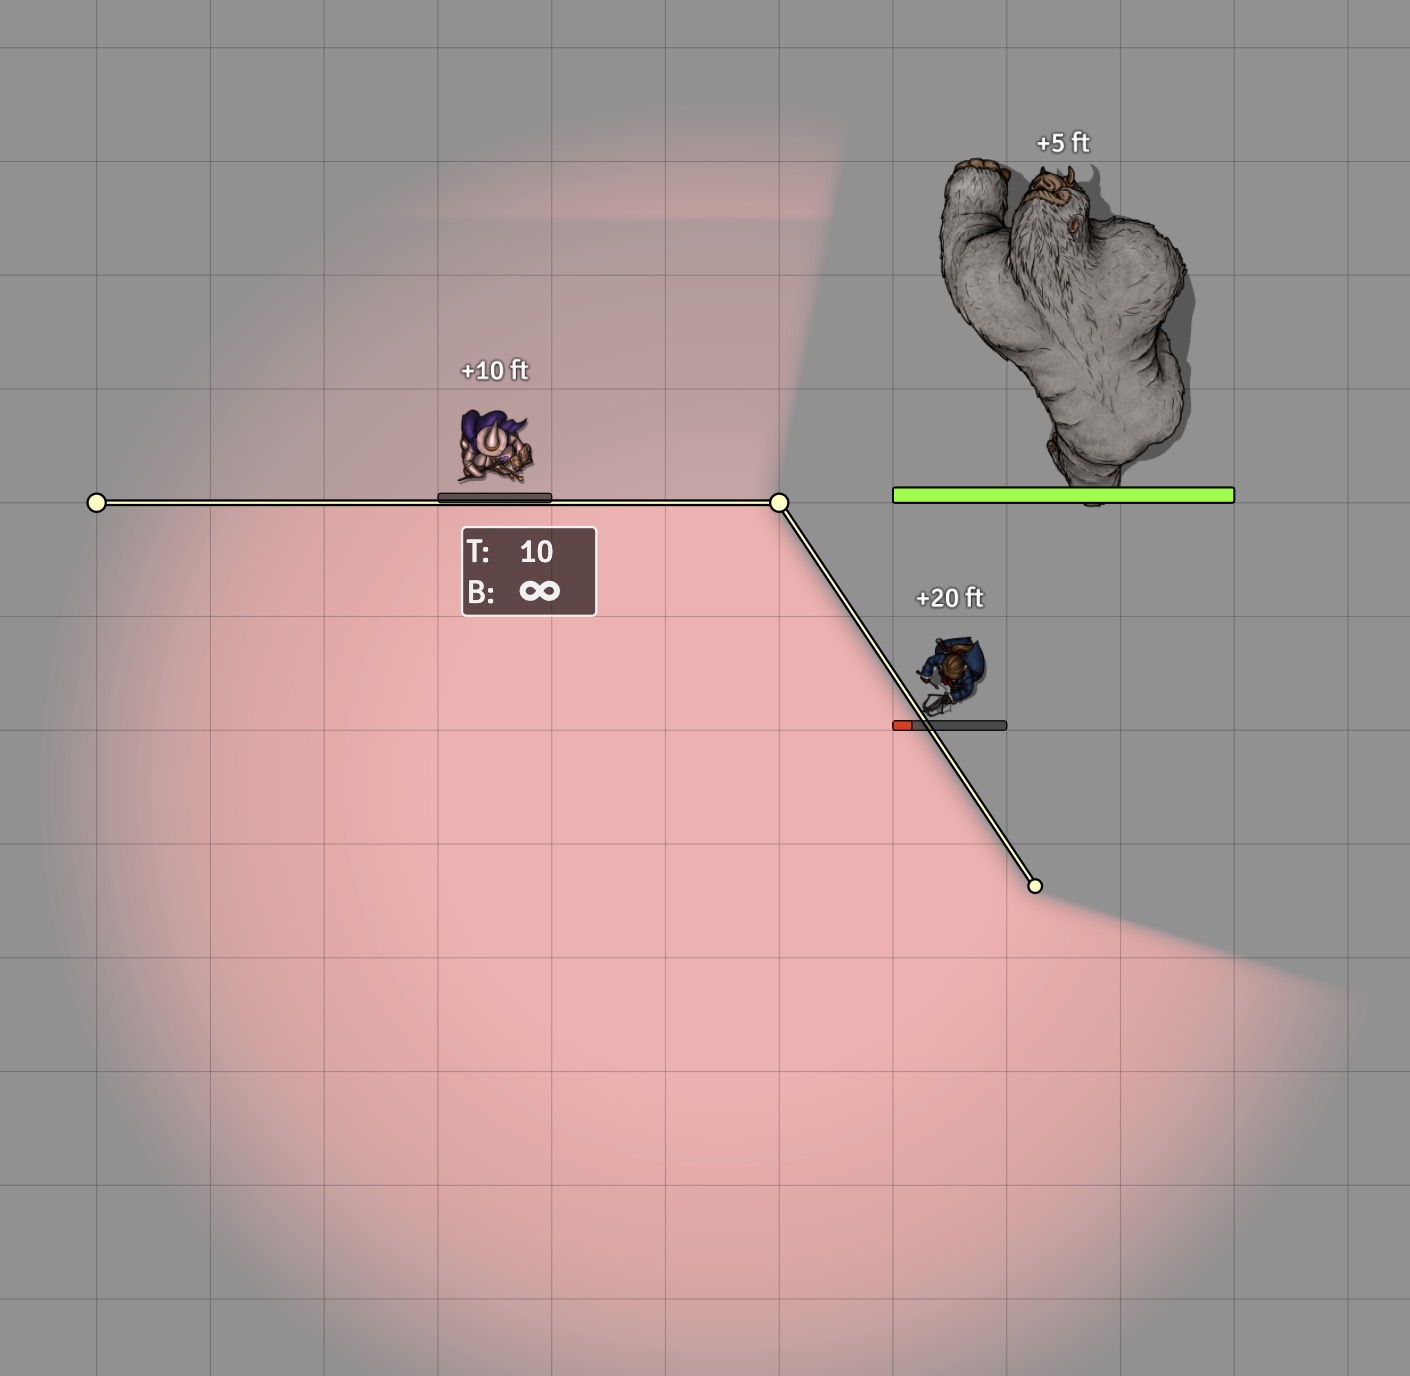
Whenever a token is above a wall with a top height lower than the token vision elevation, the wall obscures the vision of the token for the area immediately next to the wall opposite the token. As the token approaches, that obscured area becomes smaller (think of approaching a cliff and being able to see more and more of what is directly below the cliff). A token whose vision is obscured by a wall can still view other tokens on the other side of the wall if those tokens are elevated to a point sufficiently high to be seen beyond the wall.
Note: This module uses Wall Height's token height implementation. Thus, token vision is at a height of the token elevation + token height. For purposes of seeing other tokens, the token is considered viewable if either the top or bottom of the token would be visible.
For example, a token approaches a 10-foot wall. If that token is at elevation 0, it cannot see past the wall. But it can see a wizard on the other side who is flying at elevation 15.
If that token's vision is instead at elevation 15, it can see past the wall. As the token approaches closer, it sees more and more of the ground past the wall.
This token vision shadowing effect is easier to understand when using the Token Lean module, as in this video. Using token lean, the vision origination point of the token is moved closer to the cliff, causing more of the area below to appear and the commensurate shadow area to shrink. This is as if the token is creeping up to the cliff edge and looking over it.
https://user-images.githubusercontent.com/1267134/173108532-2d8732d8-3632-432d-87dc-f2a51bc62def.mov
Lighting shadows
Whenever a light's top elevation is above a wall's top elevation, the wall casts a shadow on the side of the wall opposite the light. Currently, this shadow is a visualization effect only (but see token shadows, above).
Note: This module assumes the light's top elevation is its actual elevation. Bottom elevation is ignored. Setting elevation to positive infinity causes the light to be treated as in default Foundry, with no shadows.
Lighting shadows account for terrain elevation. Thus, a wall that casts a shadow will cast less of a shadow---or none at all---over portions of the terrain that are higher than other portions.
Long term, I would like to use a more sophisticated method to render the shadow effect itself, but my WebGL knowledge is quite limited. Suggestions and PRs are welcome!
Scene Settings

Setting elevation
The minimum elevation for the scene is the lowest terrain elevation that can be set. Elevation increment is the "steps" between elevation values.
Levels users—--you have two choices when using tiles as basements as of Elevated Vision v0.4.0. If the basement is below the minimum terrain elevation, the basement will work fine but terrain elevation will be effectively ignored if the token elevation is below the minimum. Alternatively, you can set the minimum elevation to the lowest basement elevation, which would allow you to use terrain elevations in the basement.
Example: Basement tile at -10, rest of scene 0+ elevation.
Option 1: Set minimum scene elevation to 0.
- Terrain ignored if token is below elevation 0.
- Easy to use the rest of the scene because it is already at 0.
Option 2: Set minimum scene elevation to -10.
- Terrain in basement is possible. (Example: underground cavern with a hill going from -10 to -5, or even up to 20.)
- To set the rest of the scene to 0, you probably want to start by using "Fill" to set everything to 0. Then wall off the basement and fill that portion to -10.
(Currently, elevation data is stored at the pixel level, with values between 0 and 255. Those values are then scaled given a minimum elevation and elevation increment. Thus, not every elevation value can be represented in a single scene, but a fairly wide range is possible.)
Auto-elevate tokens
If enabled, tokens will use change elevation based on terrain when moving around the scene. Terrain elevation values will be used, as well as overhead tiles with finite elevation settings. A token is considered "on-the-ground" if its elevation is equal to the terrain or equal to a tile at that point. A token is "flying" if not "on-the-ground."
If a token's elevation is equal to that of an adjacent tile, it can move onto that tile. While on a tile, the token's elevation will be equal to that of the tile.
Transparent portions of tiles are considered "holes." Token averaging and the transparency threshold, discussed below, modify how transparency affects a token.
The following game settings affect how elevation is calculated:
No averaging
- Center point of the token is used for all elevation calculations.
- Generally more performant.
- Transparent pixels of a tile can cause a token to "fall" through if the center point is directly over a transparent tile pixel.
Averaging
- Entire token shape is used for all elevation calculations.
- Token elevation can accordingly be rounded to the nearest tenth of a unit.
- Less performant.
- Tiles with transparent pixels will only cause a token to "fall" through the hole if a sufficient number of pixels are transparent under the token shape.
- For purposes of moving to a tile, the tile + terrain elevation is used to determine token elevation.
No fly button present
- If token is on-the-ground, elevation will be changed accordingly.
- If token is not on-the-ground ("flying"), elevation will not change.
Fly button present
- If fly button is not enabled, token will be moved to be on-the-ground at the start of its move.
- If fly button is enabled:
- Token will not be moved to the ground.
- If the token encounters a drop more than its token height, it will "fly" (and keep its current elevation).
- Thus, flying tokens can still increase or decrease elevation when moving along terrain but "fly" when encountering terrain or tile cliffs.
Display elevation shadows
This setting controls whether shadows will be created in the scene to give a visual aid as to elevation.
- "None" disables all shadows for the scene. This is the most performant option.
- If the "Polygon" setting is enabled for a scene, token vision is shadowed based on wall height.
- If the "WebGL" setting is enabled for a scene:
- Lights create shadows based on wall height and terrain elevation.
- Token vision is shadowed based on wall height and terrain elevation.
- Depending on your scene and computer hardware, Polygons may be more performant than WebGL or vice-versa.
Game Settings

As of v0.4.0, several settings were moved to be scene-specific. Setting the elevation shadows option, elevation minimum, elevation increment, and automatic token elevation in game settings controls the default for any newly created scenes.
"Add Fly Token Control" places a "fly" button in Token Controls that affects how auto-elevation works. See discussion above.
"Average token elevation," when enabled, will use the entire token shape to calculate elevation. Otherwise, token center is used. See discussion above.
"Enhance LOS calculation" is, as it says, experimental. It can speed up the vision and lighting calculations for scenes in which a token is in an enclosed room. YMMV. Please report any bugs to the Git issue tracker.
CONFIG
As of v0.4.0, some advanced configuration options are available in CONFIG.elevatedvision. If you want to change these, you should probably use a world script to accomplish that change. Alternatively, you could change the module.js file where these configurations are located, but that would not persist through an update.
 /**
  * TravelElevation.
  * The percent threshold under which a tile should be considered transparent at that pixel.
  * @type {number}
  */
 alphaThreshold: 0.75,

 /**
  * ElevationLayer.
  * Maximum texture size used to represent elevation values.
  * @type {number}
  */
 elevationTextureSize: 4096,

 /**
  * ElevationLayer.
  * Resolution to use for the layer, as a percentage between 0 and 1.
  * 1 means the texture will be the same size as the canvas.
  * Texture will still be limited by elevationTextureSize; resolution may be rounded.
  * @type {number}
  */
 resolution: 0.25,

 /**
  * TravelElevation.
  * Permitted step size to allow tokens to move between tiles of similar elevations before flying.
  * If undefined, will use token height.
  * @type {number|undefined}
  */
 tileStep: undefined,

 /**
  * TravelElevation.
  * Permitted step size to allow tokens to move between terrains of similar elevations before flying.
  * If undefined, will use terrain height.
  * @type {number|undefined}
  */
 terrainStep: undefined,

 /**
  * TravelElevation.
  * When auto-averaging is enabled, this value will be used to average over terrain when
  * calculating token travel elevation. 0 means do not average, 1+ means test every N pixels.
  * Should be a positive number or 0. Decimals are allowed.
  * Larger numbers will make averaging faster but less precise.
  * @type {number}
  */
 averageTerrain: 2,

 /**
  * TravelElevation.
  * When auto-averaging is enabled, this value will be used to average over tiles when
  * calculating token travel elevation. 0 means do not average, 1+ means test every N pixels.
  * Should be a positive number or 0. Decimals are allowed.
  * Larger numbers will make averaging faster but less precise.
  * @type {number}
  */
 averageTiles: 2
API
Much of the underlying functionality of this module can be accessed through game.modules.get("elevatedvision").api or through canvas.elevation.
In particular, it is expected that systems and modules may wish to query the elevation layer. Key getters/setters and methods. All should be prefaced by canvas.elevation.
// Set or get the increment between elevation measurements.
elevationStep

// Set or get the minimum elevation
elevationMin

/**
 * Download the elevation data as an image file.
 * Currently writes the texture elevation data to red channel.
 * @param {object} [options]  Options that affect how the image file is formatted.
 * @param {string} [options.format] Image format, e.g. "image/jpeg" or "image/webp".
 * @param {string} [options.fileName] Name of the file. Extension will be added based on format.
 */
async downloadElevationData({ format = "image/png", fileName = "elevation"} = {})

/**
 * Retrieve the elevation at a single pixel location, using canvas coordinates.
 * @param {number} x
 * @param {number} y
 * @returns {number}   Elevation value.
 */
elevationAt(x, y)

/**
 * Calculate the average elevation for a grid space.
 * @param {number} row    Grid row
 * @param {number} col    Grid column
 * @returns {number} Elevation value.
 */
averageElevationForGridSpace(row, col)

/**
 * Retrieve the average elevation of the grid space that encloses these
 * coordinates. Currently assumes a rectangular grid.
 * @param {number} x
 * @param {number} y
 * @returns {number} Elevation value.
 */
averageElevationAtGridPoint(x, y)

/**
 * Calculate the average elevation value underneath a given rectangle.
 * @param {PIXI.Rectangle} rect
 * @returns {number} Elevation value
 */
averageElevation(rect = new PIXI.Rectangle(0, 0, this._resolution.width, this._resolution.height))

/**
 * Set the elevation for the grid space that contains the point.
 * @param {Point} p             Point within the grid square/hex.
 * @param {number} elevation    Elevation to use to fill the grid space
 * @param {object}  [options]   Options that affect setting this elevation
 * @param {boolean} [options.temporary]   If true, don't immediately require a save.
 *   This setting does not prevent a save if the user further modifies the canvas.
 * @returns {PIXI.Graphics} The child graphics added to the _graphicsContainer
 */
setElevationForGridSpace(p, elevation = 0, { temporary = false } = {})

/**
 * Construct a LOS polygon from this point and fill with the provided elevation.
 * @param {Point} origin        Point where viewer is assumed to be.
 * @param {number} elevation    Elevation to use for the fill.
 * @param {object} [options]    Options that affect the fill.
 * @param {string} [options.type]   Type of line-of-sight to use, which can affect
 *   which walls are included. Defaults to "light".
 * @returns {PIXI.Graphics} The child graphics added to the _graphicsContainer
 */
fillLOS(origin, elevation = 0, { type = "light"} = {})

/**
 * Fill spaces enclosed by walls from a given origin point.
 * @param {Point} origin    Start point for the fill.
 * @param {number} elevation
 * @returns {PIXI.Graphics}   The child graphics added to the _graphicsContainer
 */
fill(origin, elevation)
Also, canvas.elevation provides some more sophisticated classes for determining elevation at a point or at a token as well as a calculator for determining token elevation along a ray. (The latter is used in automating elevation.)
/**
 * Class to determine elevation at a given point, with methods to test separately for tile
 * elevation.
 * @example
 * pt = {x: 100, y: 200}
 * canvas.elevation.CoordinateElevationCalculator.terrainElevationAt(pt);
 *
 * // Or instantiate for more methods
 * calc = new canvas.elevation.CoordinateElevationCalculator(pt, { elevation: 20 });
 * calc.groundElevation(); // Elevation taking into account tiles given the current elevation.
 */
canvas.elevation.CoordinateElevationCalculator

/**
 * Class to determine elevation for a given token.
 * This is actually a placeholder for two classes, chosen depending on whether
 * the token averaging setting is enabled.
 * (`game.modules.get("elevatedvision").api` has both underlying classes available.)
 * This inherits from the CoordinateElevationCalculator; the major difference is that
 * token shape and token parameters will be taken into account.
 * @example
 * canvas.elevation.TokenElevationCalculator.terrainElevationAt(_token);
 *
 * // Or instantiate for more methods
 * calc = new canvas.elevation.CoordinateElevationCalculator(_token);
 * calc.groundElevation(); // Elevation taking into account tiles given the current elevation.
canvas.elevation.TokenElevationCalculator

/**
 * Class to measure elevation over a ray.
 * Determines whether terrain elevation changes.
 * Identifies points along the ray for which a tile causes an elevation change.
 * Accounts for flying.
 * @example
 * A = {x: 500, y: 100}
 * B = {x: 1000, y: 1000}
 * travelRay = new Ray(A, B)
 * tec = new canvas.elevation.TravelElevationCalculator(_token, travelRay)
 * tec.calculateTerrainElevationsAlongRay(); // Terrain elevation changes only
 * tec.calculateElevationAlongRay(_token.document.elevation); // With tile elevations
 */
canvas.elevation.TravelElevationCalculator
Wishlist for future improvements
Suggestions or PRs welcome!
- [x] Adjust fog-of-war and vision based on elevation. Currently, fog-of-war is modified by the shadow cast by walls that have a height below that of the viewing token. But the token vision and fog-of-war should also account for elevation of the terrain. For example, a wall that is 20' high should not create shadows on terrain behind it that is also 20' high.
- [ ] Improved shadow rendering for lights.
- [x] Handle Hex grids.
- [ ] Tie token vision to light shadows, with the option for light shadows to be considered dim light or no light from the perspective of the token.
- [ ] Modify terrain elevation values by "painting" using a circular or square brush
- [ ] Allow import of normal data for better shadow and shading (using an RGBA import).
- [ ] Consider switching to depth values to measure elevation on the terrain.
- [ ] Switch to alpha channel for image download/upload/internal save.
- [ ] Save only the single channel internally if no normal data is used.
- [ ] Token HUD to place the token "on the ground".
- [ ] Use mousewheel to adjust elevation setting.
- [x] Fix sizing of current elevation display.
- [ ] Better display of elevation values by color on a scene. Possibly a red to blue gradient.
- [ ] Make dependency on Wall Height module optional.
- [x] Display wall heights in elevation layer.
- [x] Adjust shadows based on terrain elevation.
- [x] Fix visual errors that can arise when moving tokens around with multiple shadows present.