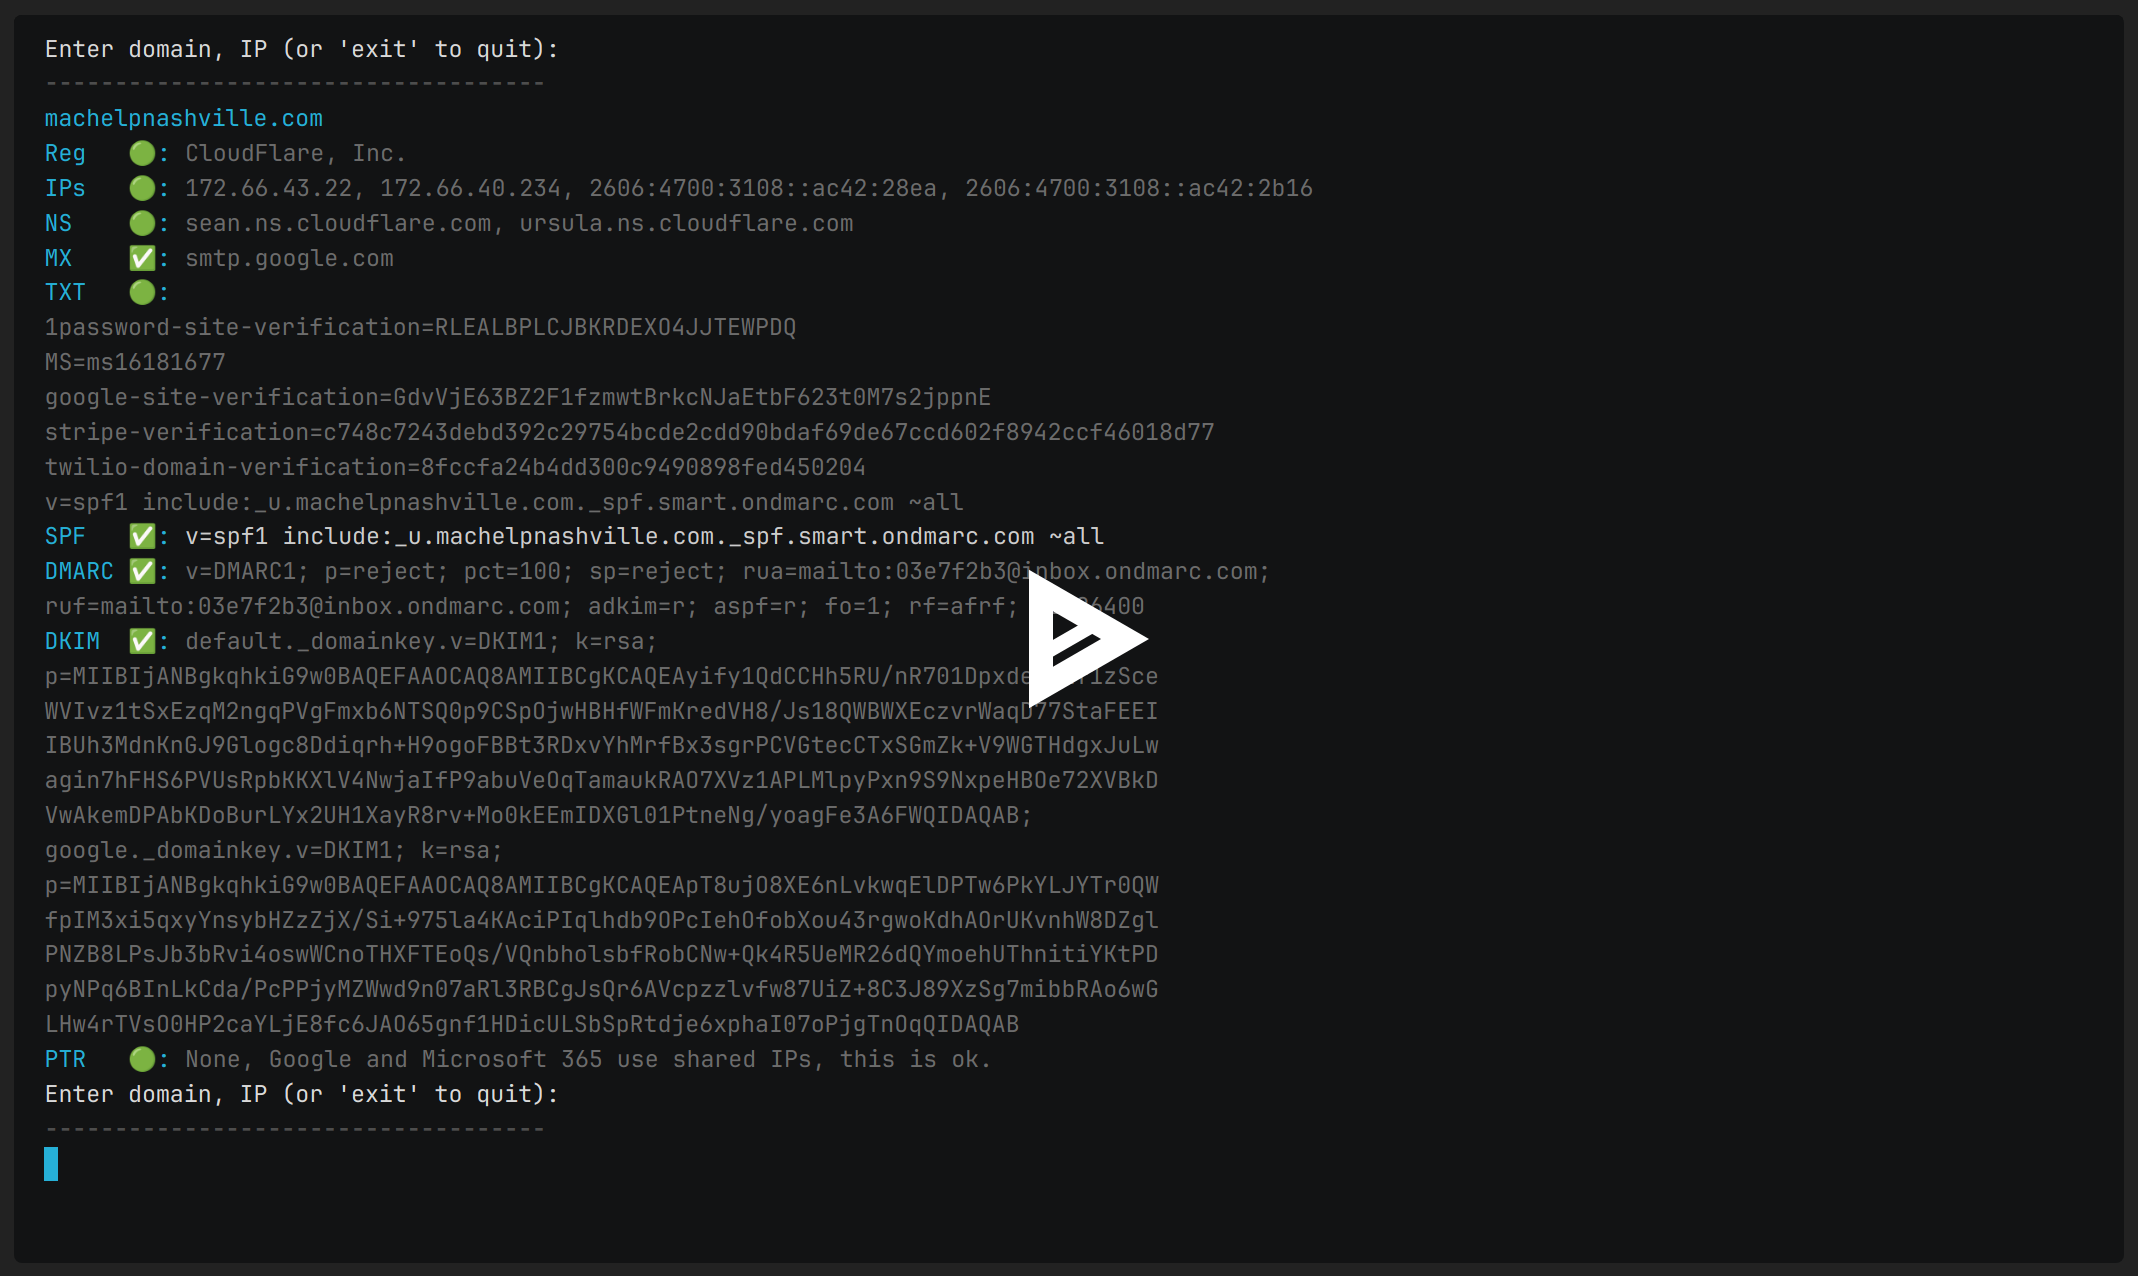
DNS Scout is a DNS troubleshooting tool that gets your email to the inbox. Checks SPF, DMARC, DKIM and MX records, for InfoSec Pros and Normies. Compatible with macOS, Ubuntu, Raspberry Pi and Kali Linux.
Features
Curated Output for Clarity: DNS Scout stands out by filtering out non-essential information, presenting users with a cleaner, more focused view of the DNS data, and optimizing for clarity and relevance.
Enhanced Interactive CLI Interface:
DNS Scout leverages readline to offer an advanced command-line interface
that's easy to see and copy/paste
Session-based Memory Cycling DNS Scout's interactive interface has a memory cycle feature, controlled by the up and down arrow keys. It helps navigate recent lookups for the session quickly. This feature is useful when conducting multiple lookups, and you need to refer to a previous entry.
Streamlined WHOIS Lookup: DNS Scout efficiently parses domain registration data, presenting the user with concise registrar details and name servers, eliminating the clutter typically seen in raw WHOIS outputs.
Clear TXT Record Display: DNS Scout lists TXT records in an easily digestible format, making tasks like SPF or DMARC verification review more straightforward.
Registrar
NS Name Servers
MX Records
Displays TXT Records, useful for checking domain verification,
SPF settings, etc.
DMARC Records
DKIM google default and 365 defaults present, just enter domain.com
PTR
ASN
Exact DNS data, no scrolling
Installation Guide for DNS Scout
Manual MacOS, Kali, Ubuntu Linux Nerd Install
Prerequisites: Go 1.21
-
Download the Binary to your home folder: Download and extract the compiled binary for your operating system from the Releases page.
-
Make It Executable: After downloading, open terminal and run:
a.cd ~/Downloads/<unzipped-folder-name>"unzipped-folder-name" is the name of the folder created when extracting the tar file.
b.sudo chmod +x dns-scout -
Move to PATH: Move the executable to a directory in your system's PATH.
For example, you can move it to /usr/local/bin/ on a Unix-based system:
a.sudo mkdir -p /usr/local/bin/
b.sudo mv dns-scout /usr/local/bin/ -
Get free token (or paid token for ASN) from ipinfo.io Website and run the "setup-api-token.sh".
If you don't need ASN data, you can skip this step. Press Enter at program launch to skip token entry.
a.cd ~/Downloads/<unzipped-folder-name>"unzipped-folder-name" is the name of the folder created when extracting the tar file.
b.sudo chmod +x setup-api-token.sh
c../setup-api-token.sh
d. if you downloaded the .deb for Linux the setup-api-token.sh is in /usr/share/doc/dns-scout/ -
Run DNS Scout: Open a new terminal window and type
dns-scoutto launch the tool.
Enter "your-domain.com" or a raw IP address like "1.1.1.1" to get started.
No need to enter "https://" or subdomains like "www" unless you are looking for specific custom records or DKIM selectors for example, so you would enter mycustomemailselector._domainkey.yourdomain.comFor MacOS users, go to System Settings > Security & Privacy and give
dns-scoutpermissions.
If you have never used macOS terminal and the colors are default "Basic" Terminal>Settings>Profiles and choose "Homebrew", at least until you discover oh my zsh.

If you see a popup when you launch DNS Scout, click "Allow" or "Open".
That's it! You've manually installed DNS-Scout.
Check out this article to learn more about email deliverability and DMARC.
Here's a breakdown of how each method of storing the API token could be useful:
Environment Variable: Useful for users running the program in a controlled
environment like a server,
where setting environment variables is common practice.
The /setup-api-token.sh script would be helpful for them.
Command-Line Argument: Useful for those who wish to specify different API tokens for different runs without changing environment variables. It could be useful for testing.


