Flush-It
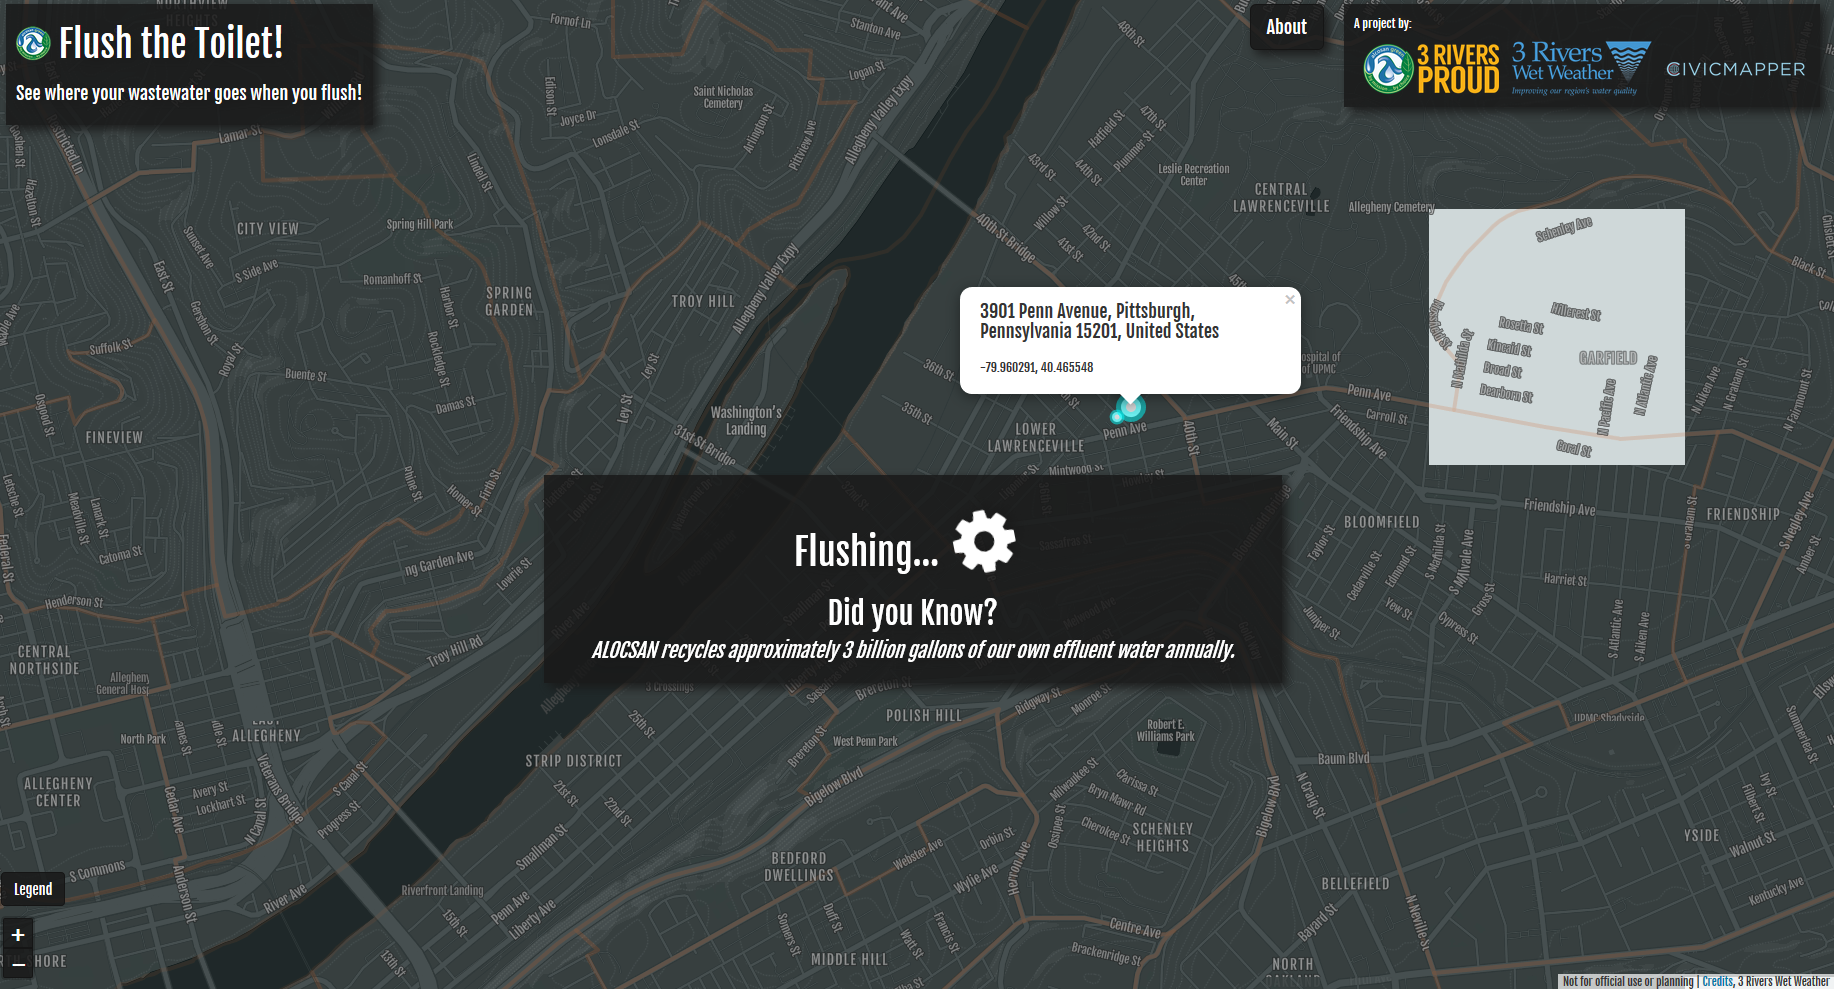
"Flush-It" is small web map application that shows how far and where the wastewater in the Allegheny County Sanitary Authority (ALCOSAN) service area from a specific address goes before getting to the ALCOSAN treatement facility. It uses data and geoprocessing services from 3 Rivers Wet Weather.
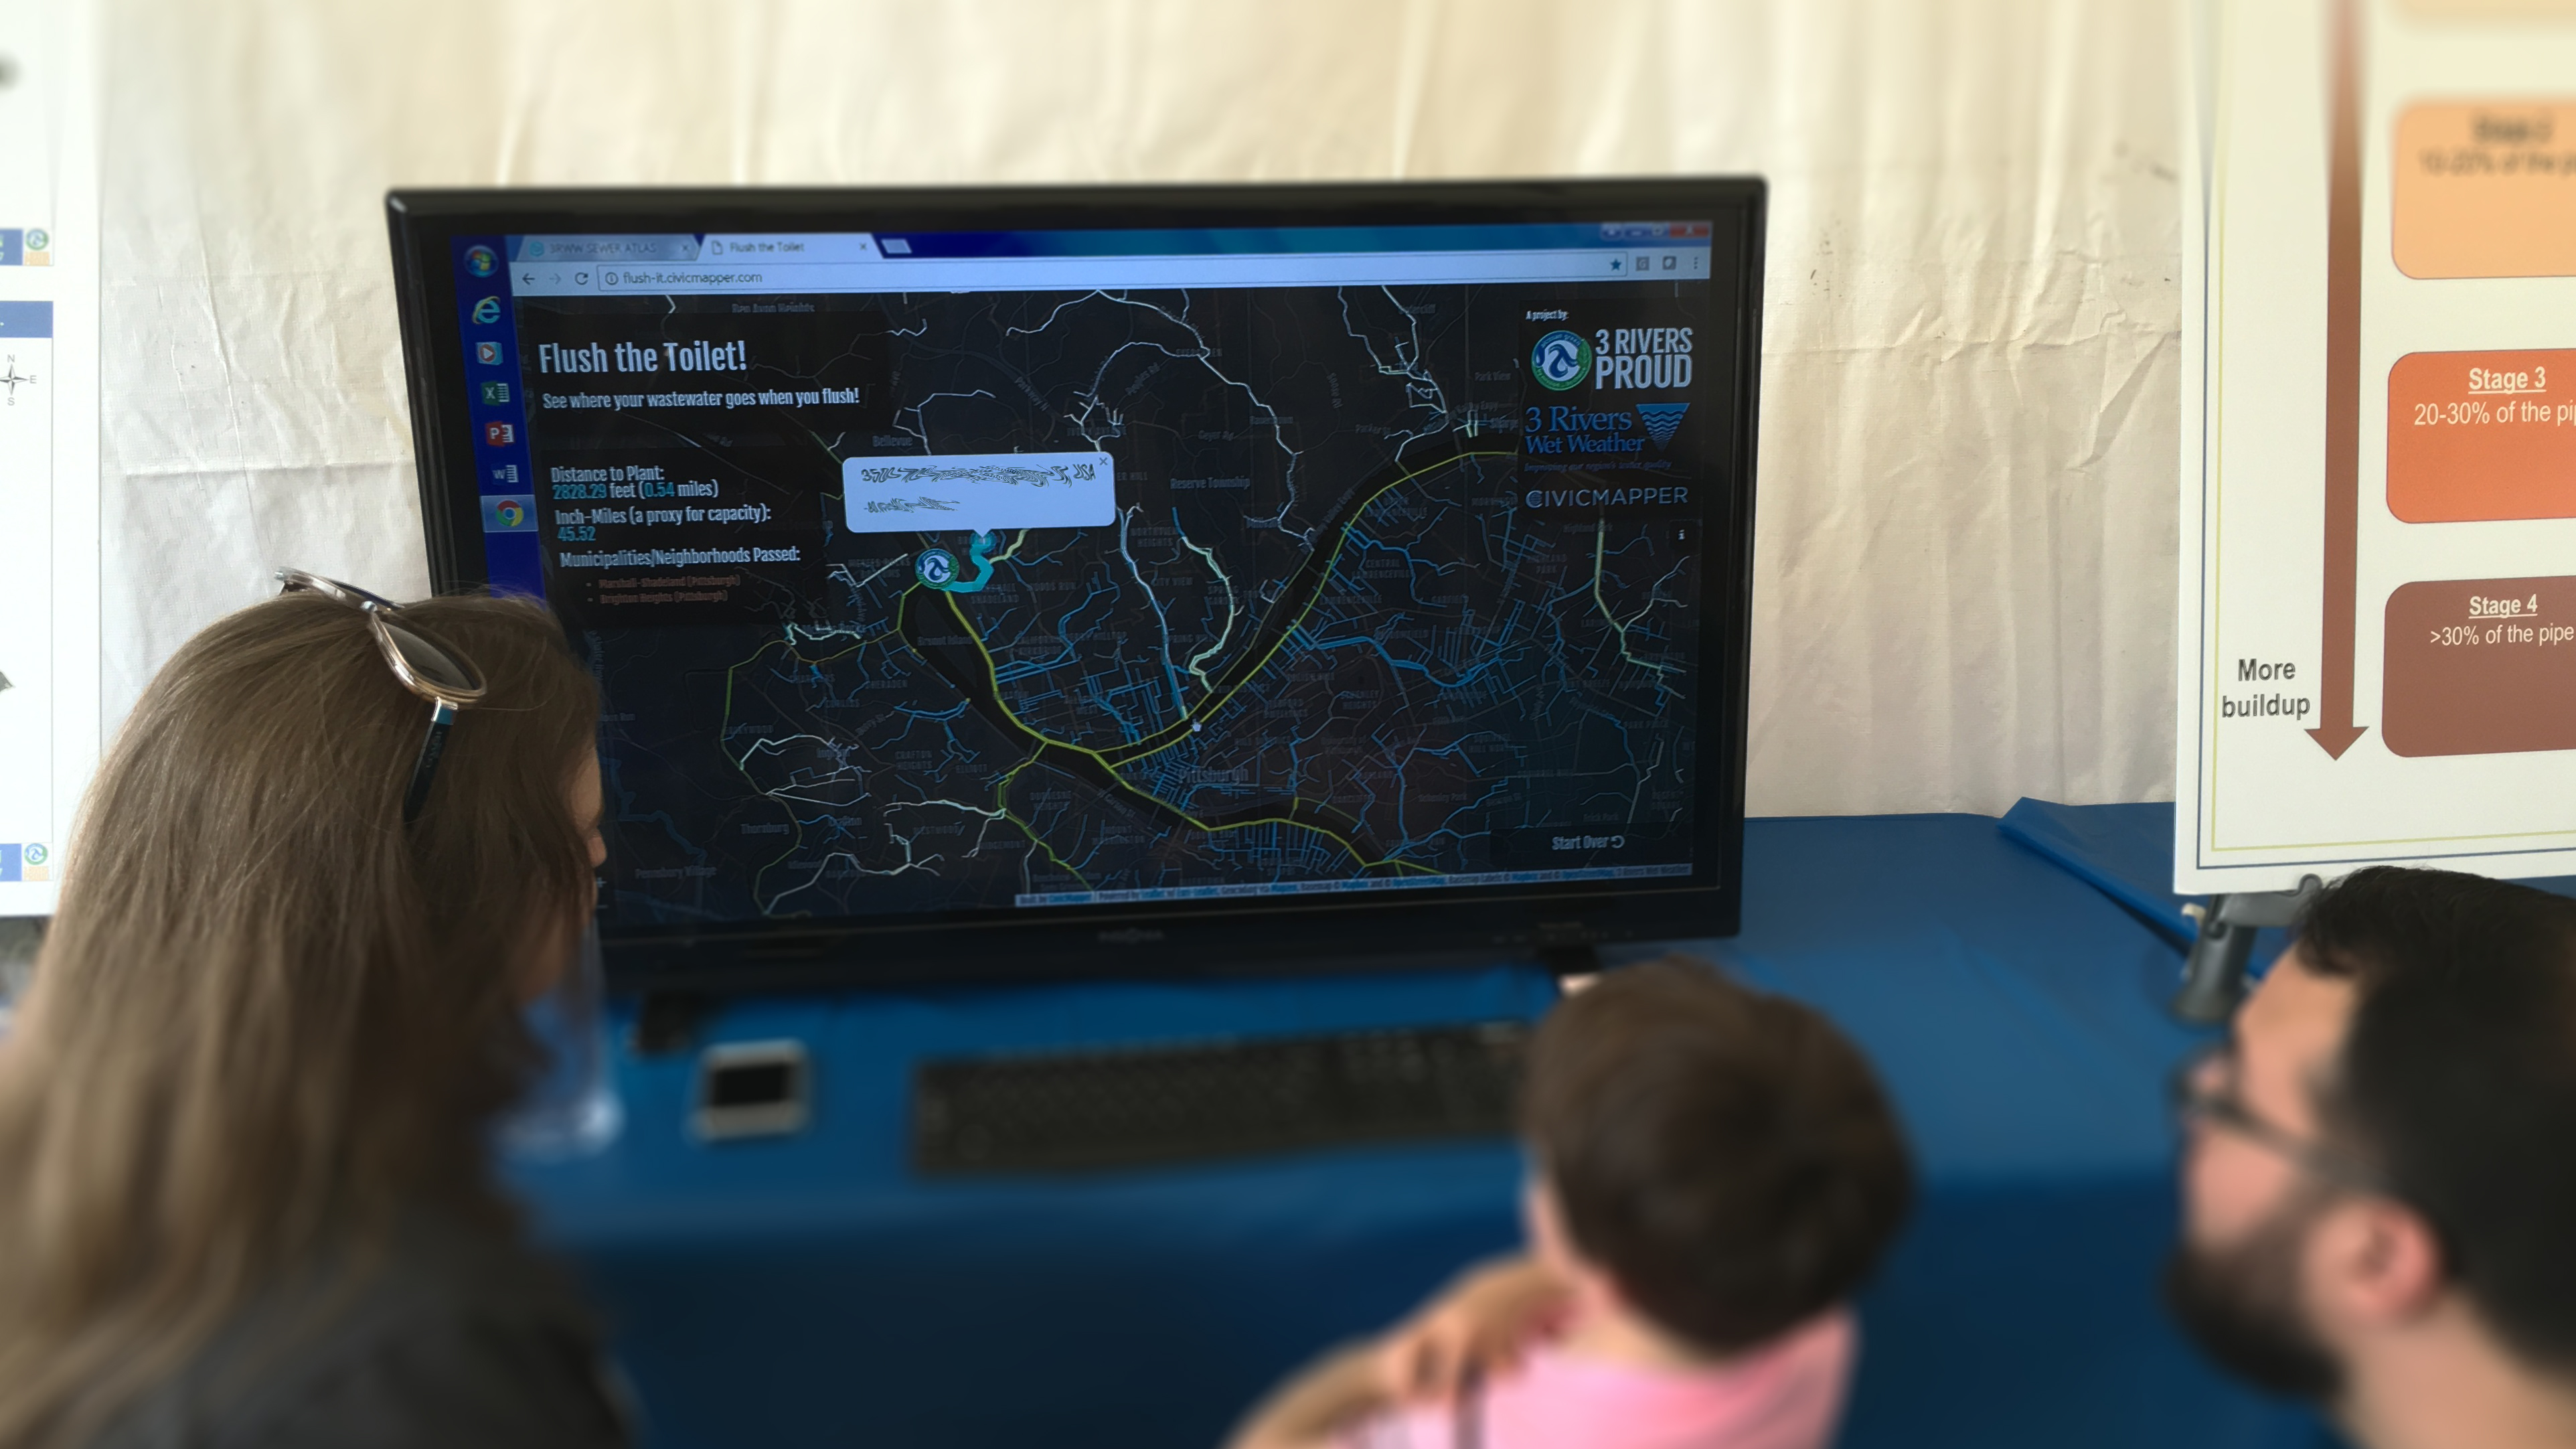
It was first built for ALCOSAN's 2017 Open House, where it was set up as an interactive demo.
Usage
- Enter an address where it says "Enter an address".
- A dropdown will appear with matching addresses; click/tap the address for which you want to flush the toilet from.
- Wait a little bit.
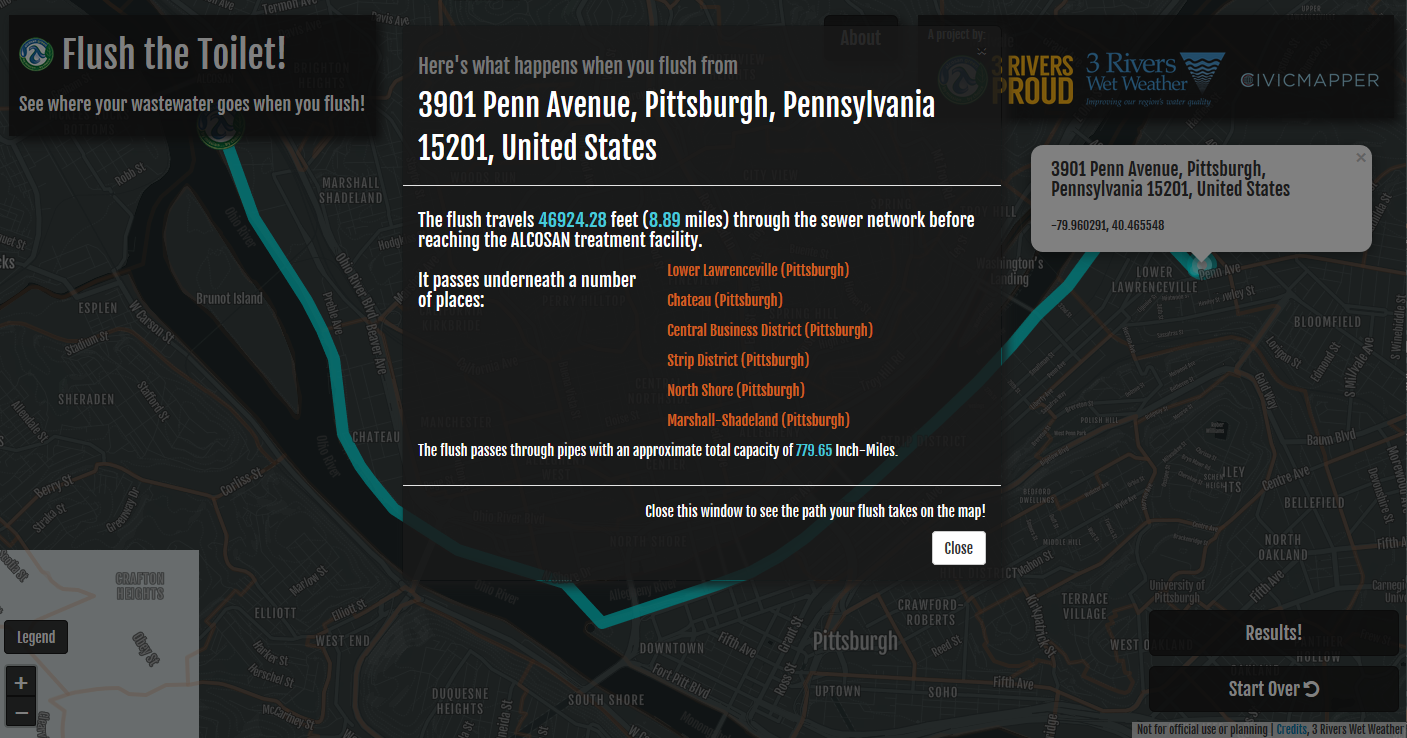
- The traced path and a summary of the trace (e.g., length) will appear on screen.
- Pan/zoom around the map to see the path of your flush.
- Click/tap "Start Over" to start over.
Development and Deployment
Note: this application requires access to secured web services containing multi-municipal infrastructure data, not all of which is publicly available. We don't yet have a way to offer secured access to those services to the general public. If you're interested in the software behind the site you should still be able to get the basic map running following steps below; however, the sewer network won't appear and the downstream network trace will not work.
"Flush-It" is a Python-Flask web application with a basic Twitter Bootstrap- and jQuery-supported UI. It utilizes LeafletJS and Esri-Leaflet for web mapping. The base map (not including the sewer data) comes from OpenStreetMap via Mapbox. Mapbox provides geocoding functionality. Some client-side geoprocessing is performed with Mapbox's TurfJS library.
We're using a combination of pipenv and npm for package management (for python and javascript, respectively); GulpJS is handling client-side site builds and will spin up a development environment for you.
We developed this in a Windows environment; it should also work in POSIX environments. If you want to attempt developing on this in Windows, we strongly recommend:
- using Cmder (the full installation flavor that includes Git-for-Windows) for a shell
- running the official Python 3 installer (to ensure Python is accessible on system the path)
- running the official NodeJS installer (to ensure Node is accessible on the system path)
Installation
This assumes you already have working Python 3+ (w/ pip) and working NodeJS (w/ npm) installations locally, and that you have no problem running those things from the command line (see above)
In a shell in the root of the repository, run the following commands to setup the python environment.
pip install pipenv- we usepipenvfor simplified package andvirtualenvmanagementpipenv install- this will install all python dependencies spec'd in thepipfile
Then (still in the shell in the root of the repository), for client-side javascript libraries:
npm install- this installs all the NodeJS dependencies.
Note about NPM dependencies
(2018/03/06) Currently a bug in the way NPM's writes the package.json and package-lock.json files tends to remove one GitHub-based dependency, Leaflet-Control-Custom, from the dependency list if any other packages are installed/upgraded. The workaround for now is to re-install that dependency after any other installations/upgrades:
npm install git+https://git@github.com/ConstLhq/Leaflet.Control.Custom.git#615dc10062cdf1c5e478053d74850b74768ccc76
Python-Flask Configuration
The Python-Flask application depends on a config.py file with some important variables required by the application for authentication to secured services and other things. A config.example.py file is included with this repo containing the variables used by the application.
Running the development environment
To get a development environment running, run these commands in one console:
pipenv shell- this will activate the virtual environment for Python- then run
gulp- this will run the python web app, build the client side app, listen for changes to the source code, and turn on browser synchronization w/live reload.
You'll see the site at http://127.0.0.1:3000/
Shutting down the development environment
When you're ready to stop developing, ctrl-c will shut the development server both the python-flask dev server and the Gulp watch/build/synchronization process.
In the console running pipenv shell, type exit to shut down the python virtual environment.
Deployment
Build the site with gulp build.
The site is currently being deployed to PythonAnywhere.
Python-Flask re-configuration
When deploying you'll need to add credentials for the ArcGIS Server services to the config.py file (or rewrite that to pull those things from your deployment environment - whatever you like)
In the config file, the *_CLIENT_TYPE parameters for ArcGIS Server token generation must be changed from requestip to referrer in production.