
🎀 Elena's configuration files 🎀


Thanks for dropping by!
This is my personal collection of configuration files.
You are probably here for my AwesomeWM configuration.
The setup section will guide you through the installation process.
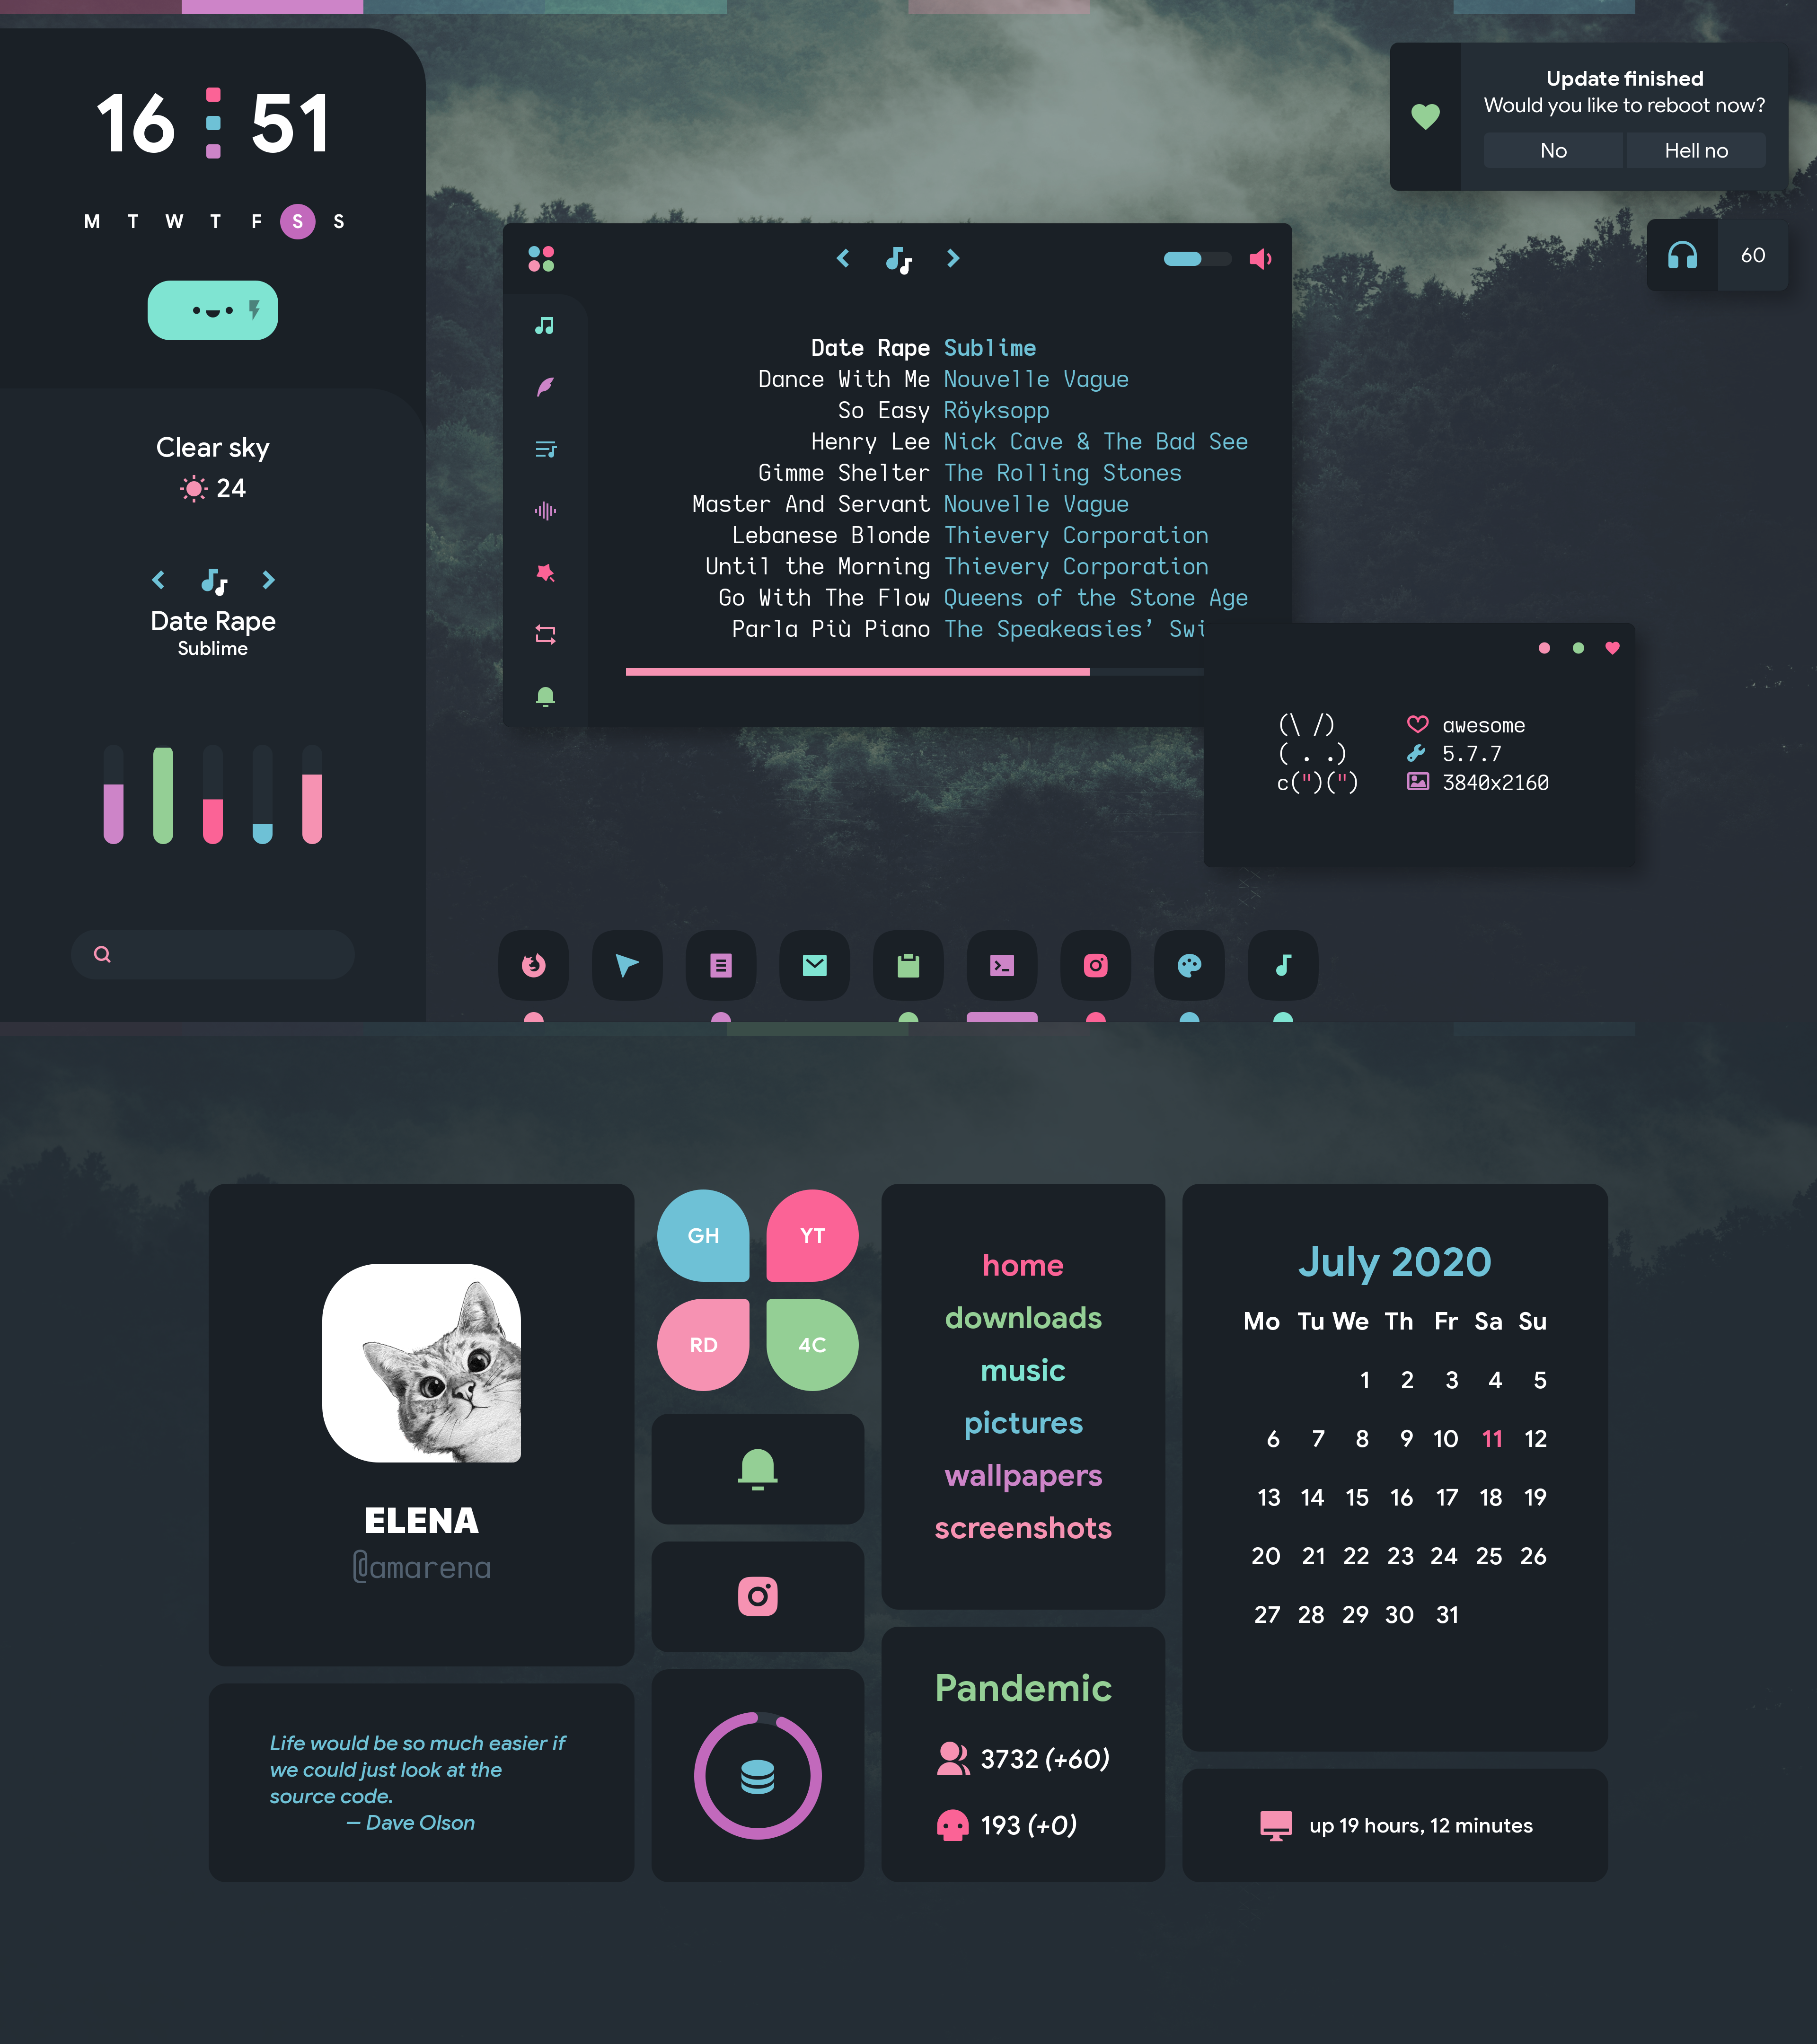
Here are some details about my setup:
- WM: AwesomeWM 💙 config included!
- OS: Arch Linux
- Shell: zsh
- Terminal: kitty 💙 config included!
- Editor: Neovim 💙 config included!
- Org editor: Doom Emacs
- File Manager: Thunar
- Launcher: rofi 💙 config included!
- Browser: Firefox
New stuff
- New release: Code name
amarena - Brand new sidebar theme
- Revamped dashboard: now with corona stats for your country of choice
- Mini window switcher / manager activated with super + tab. Check out all its features here
- Custom mouse-friendly
ncmpcppUI - Adorable battery indicator
- Support for PAM authentication through the built-in lock screen
- Cleaner code (but no one will notice)
Setup
Here are the instructions you should follow to replicate my AwesomeWM setup.
-
Install the git version of AwesomeWM.
Arch users can use the awesome-git AUR package.
yay -S awesome-gitFor other distros, build instructions are here.
-
Install dependencies and enable services
If you are curious, click here to see a table of dependencies and why they are needed.
-
Software
-
Ubuntu 18.04 or newer (and all Ubuntu-based distributions)
sudo apt install rofi lm-sensors acpid jq fortune-mod redshift mpd mpc maim feh pulseaudio inotify-tools xdotool # Install light, which is not in the official Ubuntu repositories wget https://github.com/haikarainen/light/releases/download/v1.2/light_1.2_amd64.deb sudo dpkg -i light_1.2_amd64.deb -
Arch Linux (and all Arch-based distributions)
Assuming your AUR helper is
yayyay -S rofi lm_sensors acpid jq fortune-mod redshift mpd mpc maim feh light-git pulseaudio inotify-tools xdotool
-
-
Services
# For automatically launching mpd on login
systemctl --user enable mpd.service
systemctl --user start mpd.service
# For charger plug/unplug events (if you have a battery)
sudo systemctl enable acpid.service
sudo systemctl start acpid.service
-
-
Install needed fonts
You will need to install a few fonts (mainly icon fonts) in order for text and icons to be rendered properly.
Necessary fonts:
- Typicons - github
- Material Design Icons - dropbox
- Icomoon - dropbox
- Nerd Fonts - website (You only need to pick and download one Nerd Font. They all include the same icons)
- Scriptina - website - Handwritten font used in the lock screen
Optional fonts:
- My custom Iosevka build - dropbox - 💙 my favorite monospace font
- Anka/Coder
- Google Sans - 💙 my favorite sans font
- Roboto Condensed
- San Francisco Display
Once you download them and unpack them, place them into
~/.fontsor~/.local/share/fonts.- You will need to create the directory if it does not exist.
- It does not matter that the actual font files (
.ttf) are deep inside multiple directories. They will be detected as long as they can be accessed from~/.fontsor~/.local/share/fonts.
You can find the fonts required inside the
misc/fontsfolder of the repository.cp -r ./misc/fonts/* ~/.fonts/ # Or to ~/.local/share/fonts cp -r ./misc/fonts/* ~/.local/share/fonts/Finally, run the following in order for your system to detect the newly installed fonts.
fc-cache -v -
Install my AwesomeWM configuration files
git clone https://github.com/elenapan/dotfiles cd dotfiles [ -e ~/.config/awesome ] && mv ~/.config/awesome ~/.config/awesome-backup-"$(date +%Y.%m.%d-%H.%M.%S)" # Backup current configuration cp -r config/awesome ~/.config/awesome -
Configure stuff
The relevant files are inside your
~/.config/awesomedirectory.-
User preferences and default applications
In
rc.luathere is a User variables and preferences section where user preferences and default applications are defined. You should change those to your liking. Probably the most important change you can make is to set yourterminal.For more sophisticated control over your apps, check out
apps.luaNote: For the weather widgets to work, you will also need to create an account on openweathermap, get your key, look for your city ID, and set
openweathermap_keyandopenweathermap_city_idaccordingly. -
Have a general idea of what my keybinds do
My keybinds will most probably not suit you completely, but on your first login you might need to know how to navigate the desktop.
See the keybinds section for more details.
You can edit
keys.luato configure your keybinds. -
(Optional) This is also a good time to take a look at how my configuration is structured in order to understand the purpose of each file.
-
-
Login with AwesomeWM 🎉
Congratulations, at this point you should be ready to log out of your current desktop and into AwesomeWM.
Your login screen should have a button that lets you change between available desktop sessions. If not, click here to find out how to fix it.
Try it, play with it, enjoy it. Consider checking out the Advanced setup in order to enable and configure various components that are not needed to use the desktop, but provide a better experience.
-
(Optional) Eye-candy
-
Set the wallpaper
feh --bg-fill /path/to/your/wallpaper -
Load a colorscheme
xrdb -merge /path/to/colorschemeNotes:
- To see the new colors you should restart AwesomeWM with super+shift+r or by right-clicking the desktop and clicking the gear icon (bottom-right).
- In the .xfiles directory of the repository I provide you with a few of my own colorschemes, but you can also use your favorite one.
- All of my AwesomeWM themes take their colors from
xrdb. This also means that they play nice with tools like pywal.
-
AwesomeWM configuration: File structure
After setting up my AwesomeWM configuration, inside ~/.config/awesome you will find the following:
-
🔧
rc.luaThe main configuration file which binds everything together.
This file allows you to set user preferences, choose themes, configure default layouts for each tag, window rules and more. It is also responsible for initializing all necessary desktop components.
-
⌨️
keys.luaIt initializes global and client keybinds. In addition, it defines what mouse clicks do on windows, window titlebars or the desktop.
-
🎮
apps.luaProvides functions for activating various applications, meaning either spawning them, focusing them or toggling them depending on whether they are currently running or not.
-
📚
helpers.luaProvides various uncategorized helper functions to make our life easier and our code cleaner.
-
🎨
themesdirectoryHere you can find a directory for each available theme.
Such a directory should include at least a
theme.luaand optionally icons, wallpaper, and whatever asset you need that is theme-specific. Thetheme.luafile usually sets colors, sizes and positions of various elements. -
🖼
iconsdirectoryHere you can find a directory for each available icon theme and an
init.luafile which initializes theiconsvariables.Icons can be images taken from the selected icon theme or text symbols taken from some icon font.
For example,
icons.image.firefoxcan be used to refer to your selected theme's Firefox icon instead of using the full path to the image. This makes it easy to switch between themes.Note: Icon themes defined here have nothing to do with your system-wide icon theme.
-
🎀
decorationsdirectoryIn this directory you can find window decoration (titlebar) styles.
They affect the layout of the titlebar and the titlebar buttons (e.g. close, maximize, minimize).
Optionally, they may implement more complex decorations, using multiple titlebars around the window to create a certain look (e.g. double borders) or achieve anti-aliased window corners.
Finally, some clients may have their own special titlebars added to them in order to simulate a custom UI. For now, a custom
mpdUI has been implemented.The
decorationsmodule also includes helper functions that generate titlebar buttons, in case you do not have/want image buttons. -
💎
elementaldirectoryContains desktop components or elements such as bars, sidebars, lock screens and more. Elements with multiple available themes have their own directory. For example:
-
In
elemental/baryou can find a.luafile for each available bar or bar group.Multiple bars can be created in one file. Every bar theme provides the global functions
wibars_toggle()andtray_toggle()which you can bind to any keys you want. -
In
elemental/sidebaryou can find a.luafile for each available sidebar theme. -
... And so on.
-
-
💬
notificationsdirectoryThis directory includes notification daemons that trigger notifications for various desktop events such as volume or brightness change. Also it includes notification themes that define the layout of the notification contents.
-
🍜
noodledirectory: Contains widgets that usually take up more than 50 lines of code.Widgets display information in visual form (text, images, progress bars). Without them, all desktop elements would just be empty boxes. They are used by the desktop components defined inside the
elementaldirectory. Widgets can be defined in any file but I prefer to separate a big widget (with a lot of logic) from the element I am using it in. -
😈
evildirectoryContains daemons (processes that run in the background) which emit system info.
They provide an easy way of writing widgets that rely on external information. All you need to do is subscribe to the signal a daemon provides. No need to remember which shell command gives you the necessary info or bother about killing orphan processes. Evil takes care of everything.
Keybinds
I use super AKA Windows key as my main modifier.
Keyboard
| Keybind | Action |
|---|---|
| super + enter | Spawn terminal |
| super + shift + enter | Spawn floating terminal |
| super + d | Launch rofi |
| super + shift + q | Close client |
| super + control + space | Toggle floating client |
| super + [1-0] | View tag AKA change workspace (for you i3 folks) |
| super + shift + [1-0] | Move focused client to tag |
| super + s | Tiling layout |
| super + shift + s | Floating layout |
| super + w | Maximized / Monocle layout |
| super + [arrow keys] | Change focus by direction |
| super + [hjkl] | ^ |
| super + shift + [arrow keys] | Move client by direction. Move to edge if it is floating. |
| super + shift + [hjkl] | ^ |
| super + control + [arrow keys] | Resize client |
| super + control + [hjkl] | ^ |
| super + f | Toggle fullscreen |
| super + m | Toggle maximize |
| super + n | Minimize |
| super + shift + n | Restore minimized |
| super + c | Center floating client |
| super + u | Jump to urgent client (or back to last tag if there is no such client) |
| super + b | Toggle bar |
| super + = | Toggle tray |
... And many many more.
Mouse on the desktop
| Mousebind | Action |
|---|---|
left click |
Dismiss all notifications, close sidebar and main menu |
double left click |
Jump to urgent client (or back to last tag if there is no such client) |
right click |
App drawer |
middle click |
Dashboard |
scroll up/down |
Cycle through tags |
move to screen edge |
Show sidebar |
Mouse on window titlebars
| Mousebind | Action |
|---|---|
left click |
Focus and raise |
left click (drag) |
Move |
right click (drag) |
Resize |
middle click |
Close |
Notes
If you have any questions or issues, first check if you can find your answer in the wiki. Then you can search in the repository's issues or make a new issue.
Tipjar
If you enjoy my themes and would like to show your appreciation, you may tip me here.
It is never required but always appreciated.
Thank you from the bottom of my heart! 💙
- Patreon
- Ethereum: 0x831539d94155C797f786e99f1D061BEc7F11bD38
- Bitcoin: 12j3D4KR94LY7Svvmp3KzGbfGC4YCZkCLe