Widget Server
Description
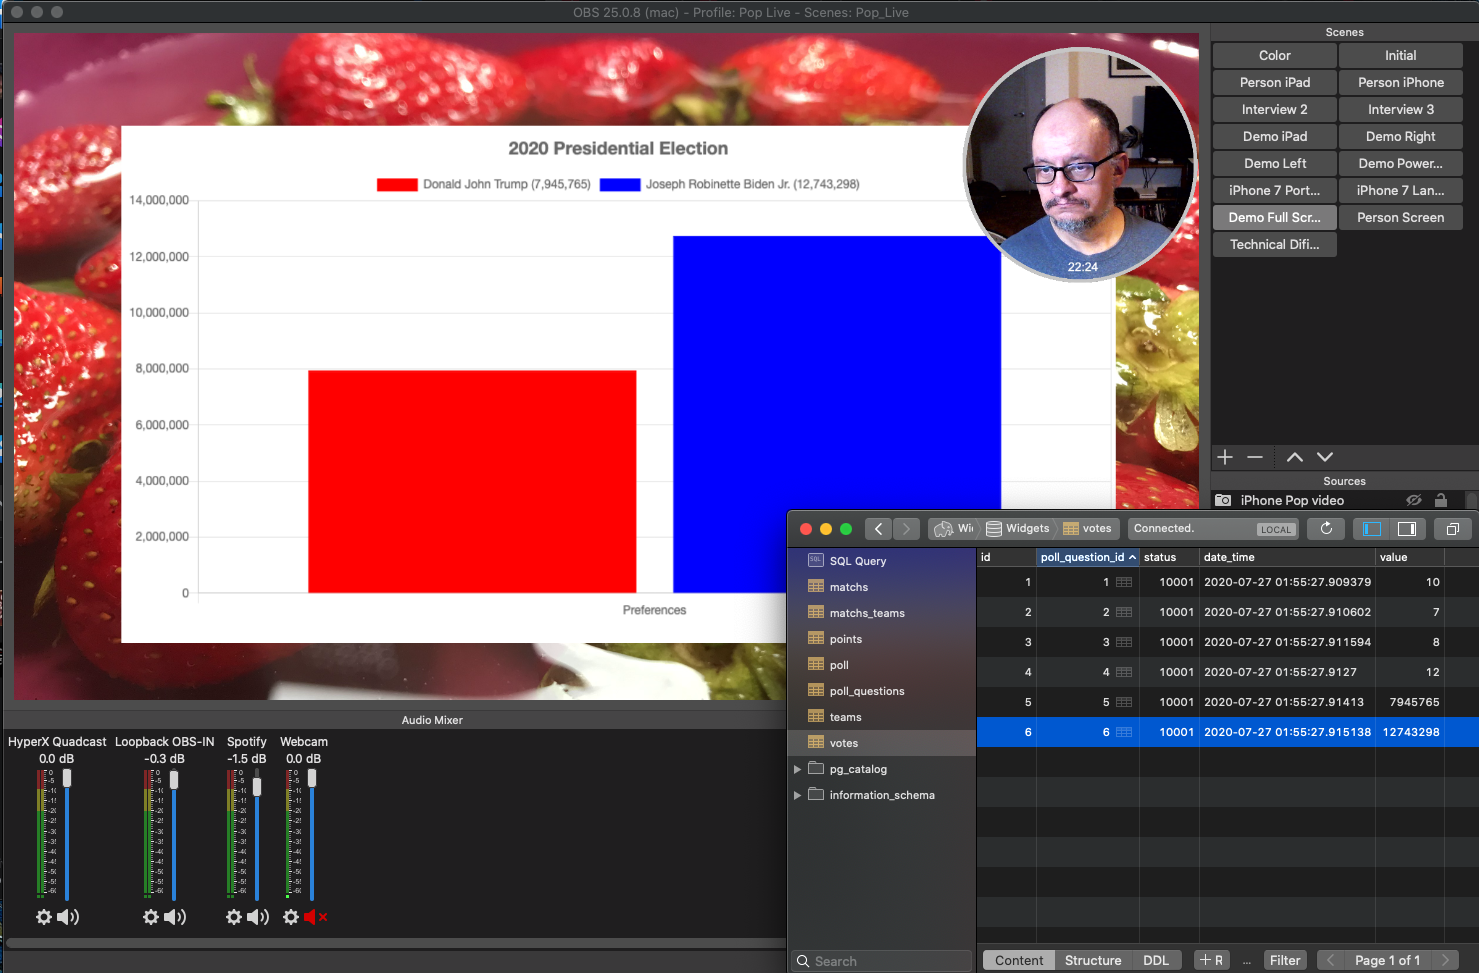
Voting poll sample
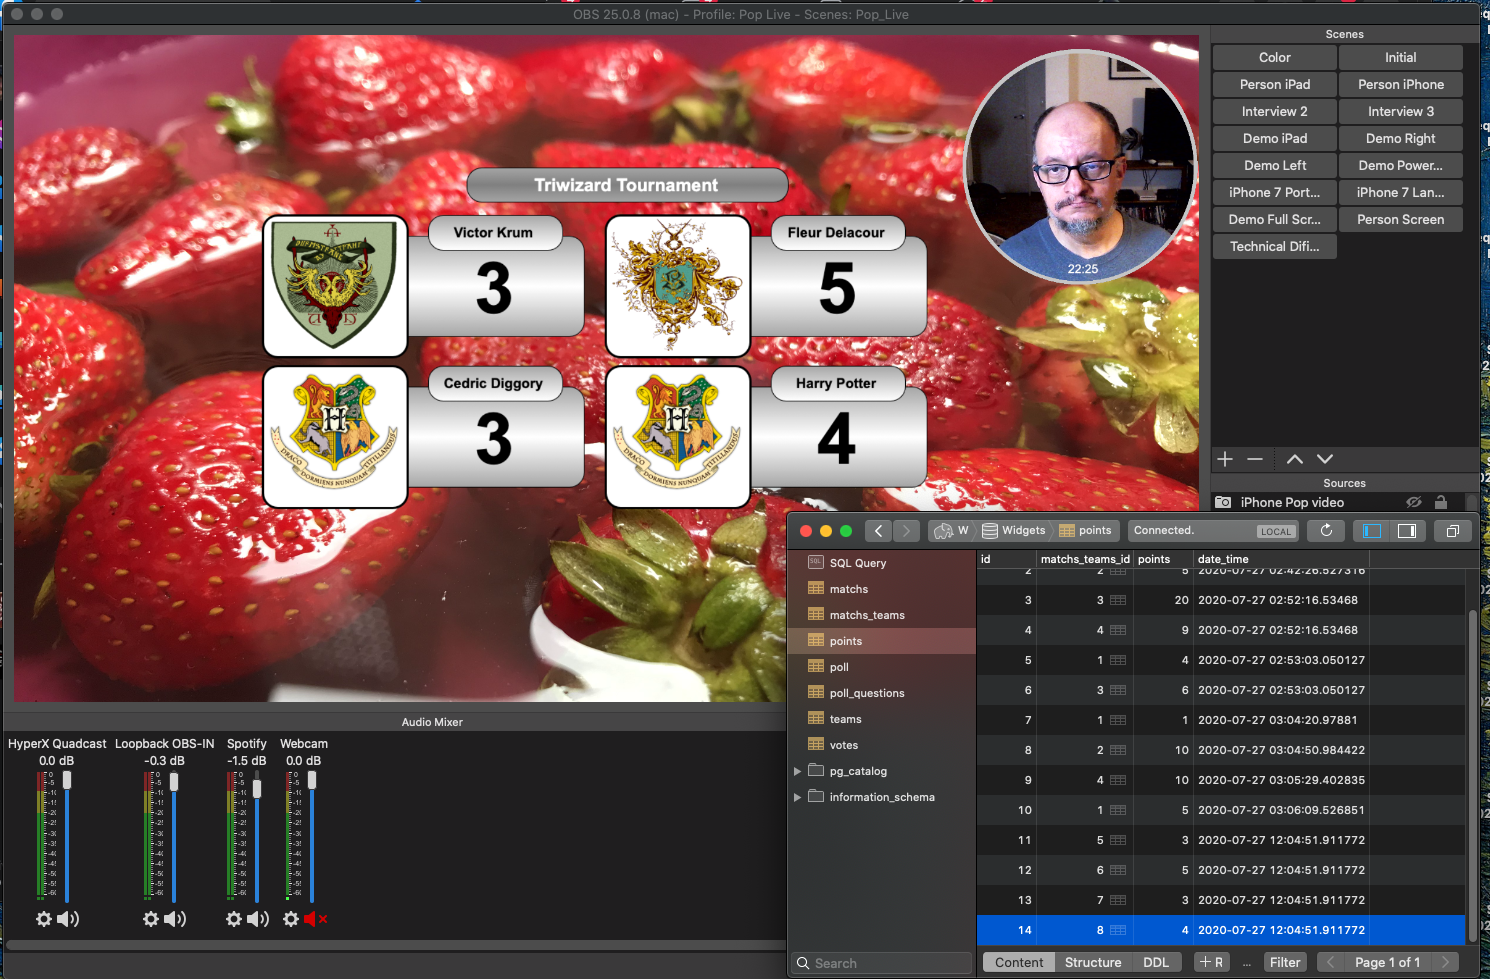
Scoreboard sample
This is a basic Web Server to offer diferent types of Widgets using data store in a database.
Is design to work with streaming programs like OBS ([https://obsproject.com]()) and Ecamm Live ([https://www.ecamm.com]()).
The info to display is stored in a Postgresql Data base ([https://www.postgresql.org]()), could be another database like MariaDB, but i prefer Postgresql.
Tested with OBS Studio 25.0.8 (Mac OS and Linux) and Ecamm Live 3.5.8 (Mac OS).
Install and configuration
Mac OS
You need the git program and another utilities, are available with the Xcode Command Line Tools, I suggest install Xcode from the Apple App Store, then check if you have the command line tools.
I use the vim text editor, is available on Mac OS and any Linux flavor. If you don't have any experience with, please read this guide: vim for beginners
-
Open the Terminal application and put:
xcode-select --installIf are already instaled you see this message:
xcode-select: error: command line tools are already installed, use Software Update to install updatesif are not previously installed, the process ask your admin passsword and proceed the installation.
-
Download the project repository to your disk in your prefered path.
git clone https://github.com/elpop/widget-server.gitWhen the clone process end, you see a new directory called widget-server.
Enter in the directory and copy the configurations files:
cd widget-server sudo cp etc/widget-server.conf /etc/. sudo cp etc/apache2/widget-server.conf /etc/apache2/extra/. -
Postgresql database installation.
The easy way on Mac OS, is using Postgres.app, you can download and install in the following link: https://postgresapp.com
Download the lastest stable release (currently PostgreSQL 12.3)
follow the install instructions and when you finish, you can create the widget's database.
A good tool for interact with postgresql databases is Postico (https://eggerapps.at/postico/), also available in the Apple App Store (cost about $50 USD)
Is important to put postgresql utilities in your path enviroment variable, check your .bash_profile or .zshrc and append this:
PATH=$PATH:/Applications/Postgres.app/Contents/Versions/latest/bin:Exit your terminal and launch again to take the path changes.
and now, we create the Widgets database with this command:
createdb -E utf8 WidgetsAnd back to your widget-server directory and create the tables and samples for the widgets:
psql Widgets < sql/polls.sql psql Widgets < sql/scoreboard.sql -
Perl and CPAN
I wrote the widgets on perl (https://www.perl.org) and Javascript. Any unix system has perl, also Mac OS, and we need a couple of perl libraries to work with.
We use the root user for install the modules system wide. you must take caution when use the root user, you could damage your system if do the things wrong.
To install the Perl modules needed we use cpan(Comprehensive Perl Archive Network) in this way:
sudo su -
cpan
cpan[1]>install CGI
cpan[2]>install Config::Simple
cpan[3]>install DBI
cpan[4]>install DBD::Pg
exit
Each module show a verbose output and finish with "OK". In the case of the last module, DBD::Pg, the installer ask for the pg_config program of the postgresql database, you need to answer this:
/Applications/Postgres.app/Contents/Versions/latest/bin/pg_config -
Customize the configuration files
-
for delivery your widget in your local machine (the same with your striming program), you need to add the name of the webserver in /etc/hosts
sudo vim /etc/hostsYou see something like this:
##
# Host Database
#
# localhost is used to configure the loopback interface
# when the system is booting.  Do not change this entry.
##
127.0.0.1   localhost widget
255.255.255.255 broadcasthost
::1             localhost
You see the line with "127.0.0.1 localhost" you need to append the name of your apache virtual host name, in this case "widget".
-
Edit the widget-server config file
sudo vim /etc/widget-server.confThe /etc/widget-server.conf contains the parameters of the service:
# Widget Server Configuration File
[db_pg]
name = "dbi:Pg:dbname=Widgets;host=127.0.0.1"
user = "dba"
pass = "cacahuamilpa"

[timer]
dbping    = 600
The file is sefl explanatory. only put the name of the database replacing Widgets for any name you want to use.
-
Edit the apache web server configuration file
Here is where the things start to be more difficult, you need to know the exactly path where you clone directory are. is easy whit this command:
pwdand you see somthing like
/Volumes/Pop-Data/pop/Devel/widget-serveror you path. Is important to copy this to procced the next step
-
Edit the apache virtual host configuration file
sudo vim /etc/apache2/extra/widget-server.confYou see the configuration almost duplicate, this is because we use port 80 for OBS (don't like ssl auto signed certs) and the port 443 for Ecamm (don't like plain http conections).
#<VirtualHost *:80>
#        ServerName widget
#        ServerAlias widget
#        Redirect permanent / https://widget/
#</VirtualHost>

<VirtualHost *:80>
    ServerName widget
    ServerAlias widget
    DocumentRoot "/Volumes/Pop-Data/pop/Devel/widget-server/html"
    ErrorLog "/private/var/log/apache2/widget-server-error_log"
    CustomLog "/private/var/log/apache2/widget-server-access_log" common
    ServerAdmin pop@cofradia.org
    ScriptAlias /bin/ /Volumes/Pop-Data/pop/Devel/widget-server/cgi-bin/
    ServerPath /Volumes/Pop-Data/pop/Devel/widget-server/html
    SetEnv CONF_FILE /etc/widget-server.conf
    # AddDefaultCharset UTF-8
    AddDefaultCharset on
    <Directory /Volumes/Pop-Data/pop/Devel/widget-server/ >
        AddHandler cgi-script .cgi .pl
        Options Indexes FollowSymLinks
        Require all granted
    </Directory>
</VirtualHost>

<VirtualHost *:443>
    ServerName widget
    ServerAlias widget
    DocumentRoot "/Volumes/Pop-Data/pop/Devel/widget-server/html"
    ErrorLog "/private/var/log/apache2/widget-server-error_log"
    CustomLog "/private/var/log/apache2/widget-server-access_log" common

    SSLEngine on
    SSLCipherSuite ALL:!ADH:!EXPORT56:RC4+RSA:+HIGH:+MEDIUM:+LOW:+SSLv2:+EXP:+eNULL
    SSLCertificateFile /etc/apache2/ssl/widget.crt
    SSLCertificateKeyFile /etc/apache2/ssl/widget.key

    ServerAdmin pop@cofradia.org
    ScriptAlias /bin/ /Volumes/Pop-Data/pop/Devel/widget-server/cgi-bin/
    ServerPath /Volumes/Pop-Data/pop/Devel/widget-server/html
    SetEnv CONF_FILE /etc/widget-server.conf
    # AddDefaultCharset UTF-8
    AddDefaultCharset on
    <Directory /Volumes/Pop-Data/pop/Devel/widget-server/ >
        AddHandler cgi-script .cgi .pl
        Options Indexes FollowSymLinks
        Require all granted
    </Directory>
</VirtualHost>
You need to replace the path on the DocumentRoot, ScriptAlias, ServerPath and Directory arguments with the path saved.
For example, if your path is /Users/joe/widget-server you replace the arguments like this
DocumentRoot "/Users/joe/widget-server/html"
ScriptAlias /bin/ /Users/joe/widget-server/cgi-bin/
ServerPath /Users/joe/widget-server/html
<Directory /Users/joe/widget-server/ >
Remeber to do it in both definitios of port 80 and 443.
The arguments
ServerName widget
ServerAlias widget
Can be the name you want, but need to match with your definition in /etc/hosts.
Now, if you note, the definition of the port 443, we need to have a SSL certificate to work with Ecamm Live, OBS only accept valid SSL certificates emited by a CA, thas why use the port (80).
To generate a self signed SSL certificate we need to create a directory and the certificates:
sudo mkdir /etc/apache2/ssl
sudo openssl req -x509 -nodes -days 365 -newkey rsa:2048 -keyout /etc/apache2/ssl/widget.key -out /etc/apache2/ssl/widget.crt
The name of certificates must match with the definitions on SSLCertificateFile and SSLCertificateKeyFile on the apache config file.
-
Edit the apache web server configuration files
We need to change the Apache Web server configurations and use the admin user to do it.
important: make a backup of the apache configuration file in case of something go wrong
sudo cp /etc/apache2/httpd.conf /etc/apache2/httpd.conf_backThen we start to edit the apache configuration file with:
sudo vim /etc/apache2/httpd.confYou need to uncomment the lines (deleting the # chararcter) and leave the rest with this text:
#LoadModule vhost_alias_module libexec/apache2/mod_vhost_alias.so

to

LoadModule vhost_alias_module libexec/apache2/mod_vhost_alias.so
#LoadModule rewrite_module libexec/apache2/mod_rewrite.so to LoadModule rewrite_module libexec/apache2/mod_rewrite.so#LoadModule mpm_prefork_module libexec/apache2/mod_mpm_prefork.so to LoadModule mpm_prefork_module libexec/apache2/mod_mpm_prefork.so<IfModule !mpm_prefork_module> #LoadModule cgid_module libexec/apache2/mod_cgid.so </IfModule> <IfModule mpm_prefork_module> #LoadModule cgi_module libexec/apache2/mod_cgi.so </IfModule> to <IfModule !mpm_prefork_module> LoadModule cgid_module libexec/apache2/mod_cgid.so </IfModule> <IfModule mpm_prefork_module> LoadModule cgi_module libexec/apache2/mod_cgi.so </IfModule>To activate the HTTPS protocol, you need to load de ssl_module:
#LoadModule ssl_module libexec/apache2/mod_ssl.so

to

LoadModule ssl_module libexec/apache2/mod_ssl.so
Locate "# Virtual hosts" and append like the sample:
# Virtual hosts
#Include /private/etc/apache2/extra/httpd-vhosts.conf

to

# Virtual hosts
#Include /private/etc/apache2/extra/httpd-vhosts.conf
Include /private/etc/apache2/extra/widget-server.conf
The last line is the definition of our widget-server vitual host.
save the file and check if exists errors previously with the apache control utility:
sudo apachectl configtestand you see something like this:
AH00558: httpd: Could not reliably determine the server's fully qualified domain name, using HT-Pop.local. Set the 'ServerName' directive globally to suppress this message
Syntax OK
The first is a warning, but you need to see the leyend "Syntax OK".
Then use apache control to restart the service:
sudo apachectl restartand now, go to your browser in your local machine and test with http and https puting "http://widget/" and "https://widget/"
You must see the next screen:
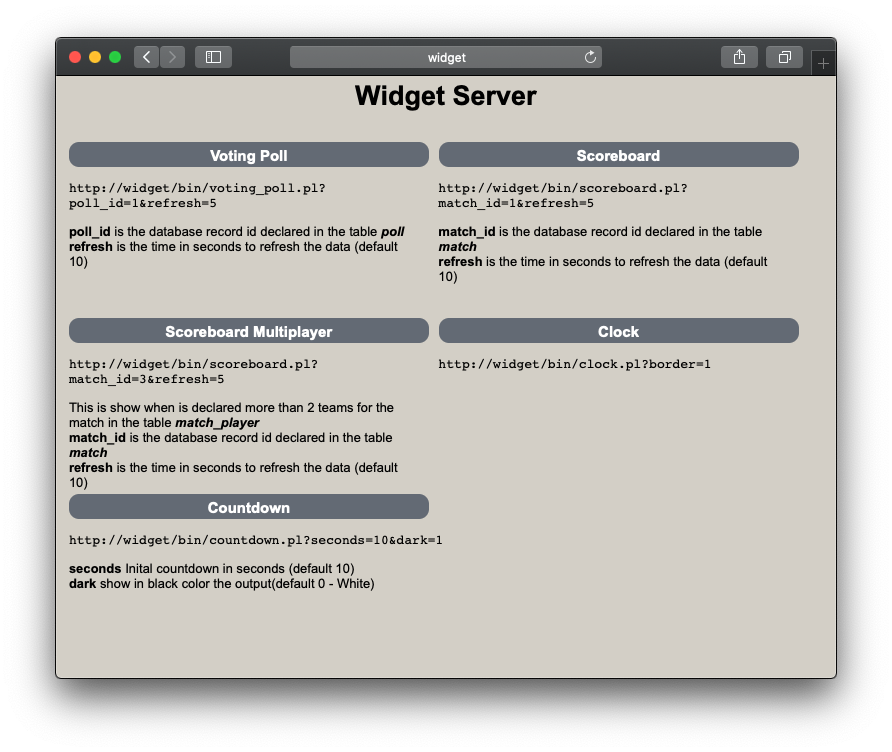
And the page display the widgets available and how to invoke, on OBS use https and remeber to use https in place of http when use Ecamm Live.
-
Using The Widgets
OBS
In your scene, add a Browser source
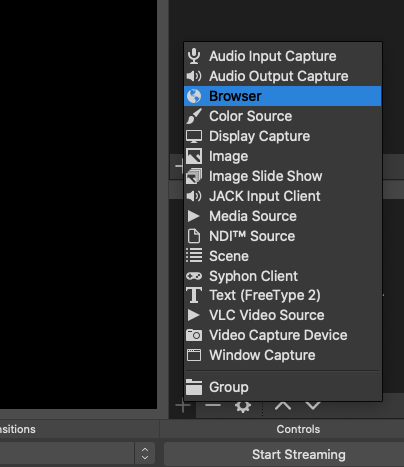
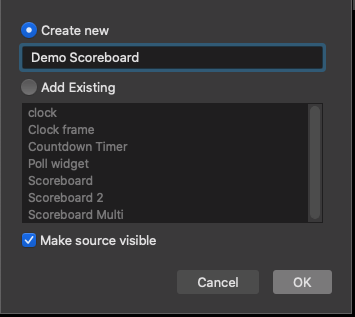
Put the name of your source
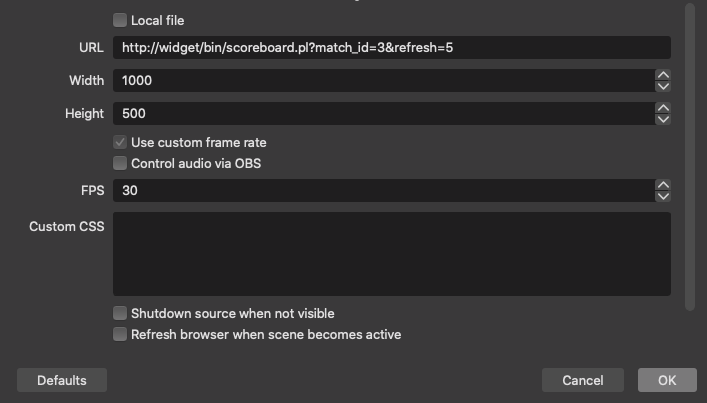
In the URL field put the widget link, in this example use http://widget/bin/scoreboard.pl?match_id=3&refresh=5
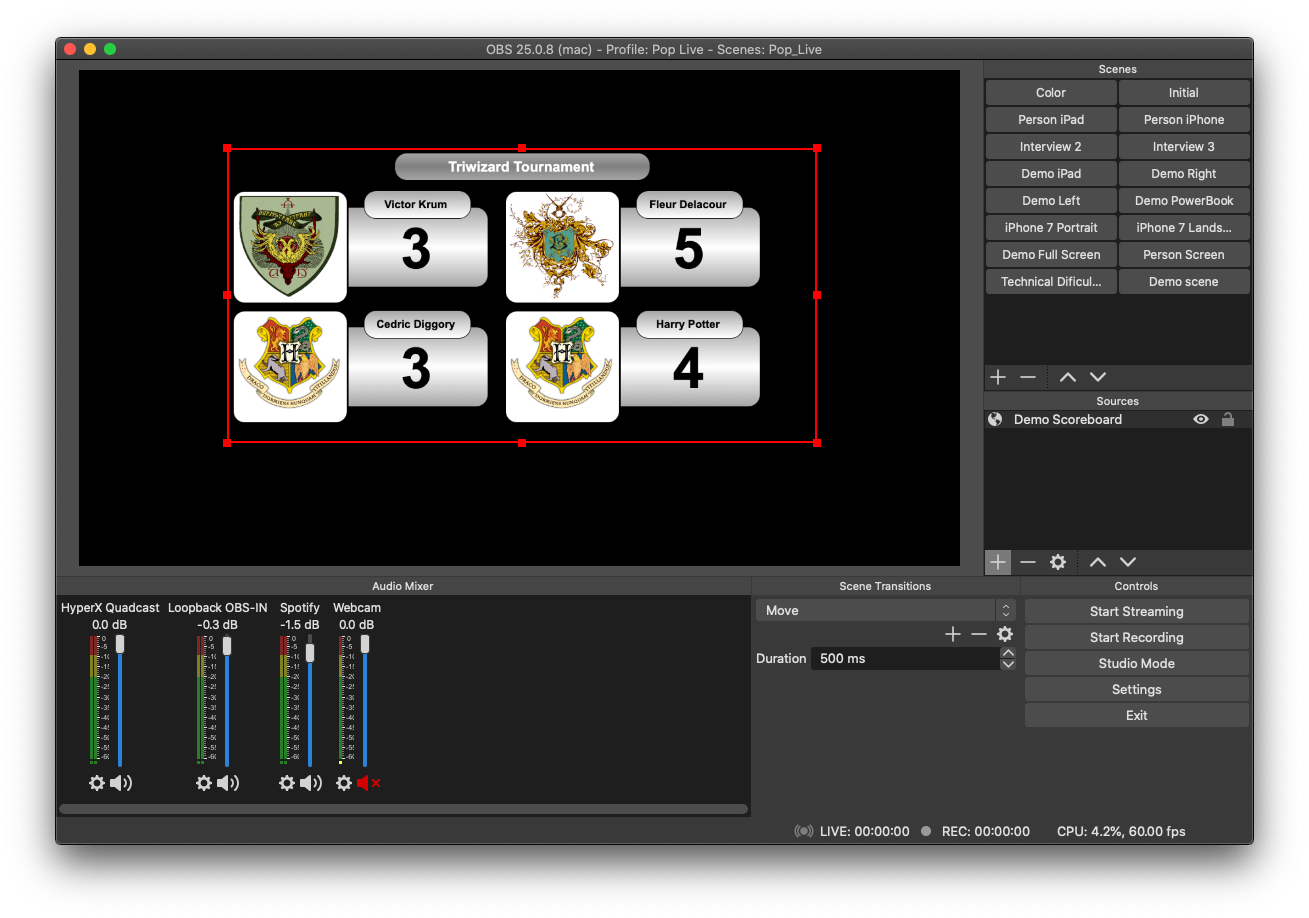
And you can see the output of the widget with the info define in the Database
Ecamm Live
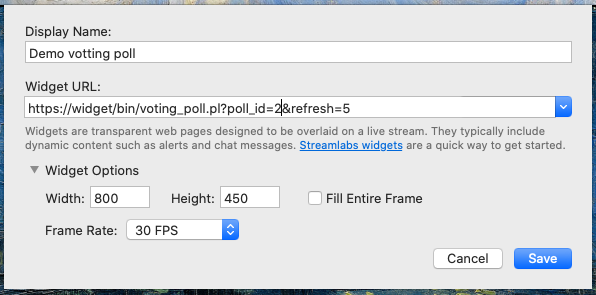
In your Overlay panel, add a New Widget
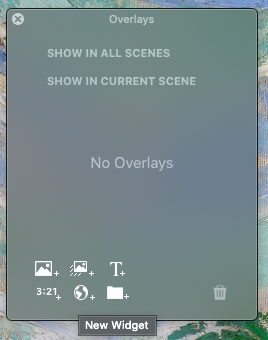
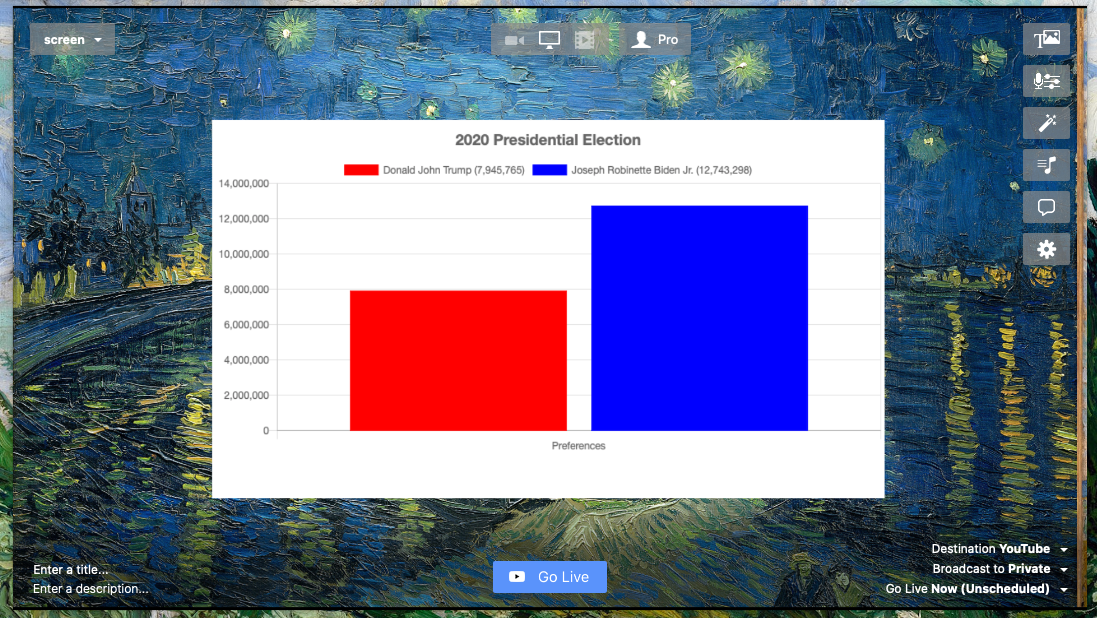
Put the display name and the Widget URL, in this example i use https://widget/bin/voting_poll.pl?poll_id=2&refresh=5, you note the use of https in place of http
And you can see the output of the widget with the info define in the Database
To-Do
- Web admin from database widgets
- Linux Documentation
Author
Fernando Romo (pop@cofradia.org)
License
GNU GENERAL PUBLIC LICENSE Version 3
https://www.gnu.org/licenses/gpl-3.0.en.html
See LICENSE.txt