WebGl 2D Scatterplot with Regl


![]()
![]()
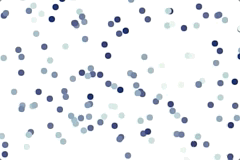
A highly-scalable pan-and-zoomable scatter plot library that uses WebGL through Regl. This library sacrifices feature richness for speed to allow rendering up to 20 million points (depending on your hardware of course) including fast lasso selection. Further, the footprint of regl-scatterplot is kept small. NEW: Python lovers please see jscatter: a Jupyter Notebook/Lab widget that uses regl-scatterplot.

Demo: https://flekschas.github.io/regl-scatterplot/
Live Playground: https://observablehq.com/@flekschas/regl-scatterplot
Default Interactions:
-
Pan: Click and drag your mouse.
-
Zoom: Scroll vertically.
-
Rotate: While pressing ALT, click and drag your mouse.
-
Select a dot: Click on a dot with your mouse.
-
Select multiple dots:
- While pressing SHIFT, click and drag your mouse. All items within the lasso will be selected.
- Upon activating the lasso initiator (i.e.,
lassoInitiator: true) you can click into the background and a circle will appear under your mouse cursor. Click inside this circle and drag your mouse to start lassoing.Click here to see how it works
-
Deselect: Double-click onto an empty region.
Note, you can remap rotate and lasso to other modifier keys via the keyMap option!
Supported Visual Encodings:
- x/y point position (obviously)
- categorical and continuous color encoding (including opacity)
- categorical and continuous size encoding
- point connections (stemming, for example, from time series data)
Install
npm i regl-scatterplotFYI, if you're using npm version prior to 7, you have to install regl-scatterplot's peer dependencies (regl and pub-sub-es) manually.
Getting started
Basic Example
import createScatterplot from 'regl-scatterplot';

const canvas = document.querySelector('#canvas');

const { width, height } = canvas.getBoundingClientRect();

const scatterplot = createScatterplot({
  canvas,
  width,
  height,
  pointSize: 5,
});

const points = new Array(10000)
  .fill()
  .map(() => [-1 + Math.random() * 2, -1 + Math.random() * 2, color]);

scatterplot.draw(points);
IMPORTANT: Your points positions need to be normalized to [-1, 1] (normalized device coordinates). Why? Regl-scatterplot is designed to be a lower-level library, whose primary purpose is speed. As such it expects you to normalize the data upfront.
Color, Opacity, and Size Encoding
In regl-scatterplot, points can be associated with two data values. These two values are defined as the third and forth component of the point quadruples ([x, y, value, value]). For instance:
scatterplot.draw([
  [0.2, -0.1, 0, 0.1337],
  [0.3, 0.1, 1, 0.3371],
  [-0.9, 0.8, 2, 0.3713],
]);
These two values can be visually encoded as the color, opacity, or the size. Integers are treated as categorical data and floats that range between [0, 1] are treated as continuous values. In the example above, the first point value would be treated as categorical data and the second would be treated as continuous data.
In the edge case that you have continuous data but all data points are either 0 or 1 you can manually set the data type via the zDataType and wDatatype draw options.
To encode the two point values use the colorBy, opacityBy, and sizeBy property as follows:
scatterplot.set({
  opacityBy: 'valueA',
  sizeBy: 'valueA',
  colorBy: 'valueB',
});
In this example we would encode the first categorical point values ([0, 1, 2]) as the point opacity and size. The second continuous point values ([0.1337, 0.3317, 0.3713]) would be encoded as the point color.
The last thing we need to tell regl-scatterplot is what those point values should be translated to. We do this by specifying a color, opacity, and size map as an array of colors, opacities, and sizes as follows:
scatterplot.set({
  pointColor: ['#000000', '#111111', ..., '#eeeeee', '#ffffff'],
  pointSize: [2, 4, 8],
  opacity: [0.5, 0.75, 1],
});
You can encode a point data value in multiple ways. For instance, as you can see in the example above, the categorical fist data value is encoded via the point size and opacity.
What if I have more than two values associated to a point? Unfortunately, this isn't supported currently. In case you're wondering, this limitation is due to how we store the point data. The whole point state is encoded as an RGBA texture where the x and y coordinate are stored as the red and green color components and the first and second data value are stored in the blue and alpha component of the color. However, this limitation might be addressed in future versions so make sure to check back or, even better, start a pull request!
Why can't I specify a range function instead of a map? Until we have implemented enough scale functions in the shader it's easier to let you pre-compute the map. For instance, if you wanted to encode a continuous values on a log scale of point size, you can simply do pointSize: Array(100).fill().map((v, i) => Math.log(i + 1) + 1).
Connecting points
You can connect points visually using spline curves by adding a 5th component to your point data and setting showPointConnections: true.
The 5th component is needed to identify which points should be connected. By default, the order of how the points are connected is defined by the order in which the points appear in your data.
const points = [
  [1, 1, 0, 0, 0],
  [2, 2, 0, 0, 0],
  [3, 3, 0, 0, 1],
  [4, 4, 0, 0, 1],
  [5, 5, 0, 0, 0],
];
In the example above, the points would be connected as follows:
0 -> 1 -> 4
2 -> 3
Line Ordering:
To explicitely define or change the order of how points are connected, you can define a 6th component as follows:
const points = [
  [1, 1, 0, 0, 0, 2],
  [2, 2, 0, 0, 0, 0],
  [3, 3, 0, 0, 1, 1],
  [4, 4, 0, 0, 1, 0],
  [5, 5, 0, 0, 0, 1],
];
would lead tp the following line segment ordering:
1 -> 4 -> 0
3 -> 2
Note, to visualize the point connections, make sure scatterplot.set({ showPointConnection: true }) is set!
Synchronize D3 x and y scales with the scatterplot view
Under the hood regl-scatterplot uses a 2D camera, which you can either get via scatterplot.get('camera') or scatterplot.subscribe('view', ({ camera }) => {}). You can use the camera's view matrix to compute the x and y scale domains. However, since this is tedious, regl-scatterplot allows you to specify D3 x and y scales that will automatically be synchronized. For example:
const xScale = scaleLinear().domain([0, 42]);
const yScale = scaleLinear().domain([-5, 5]);
const scatterplot = createScatterplot({
  canvas,
  width,
  height,
  xScale,
  yScale,
});
Now whenever you pan or zoom, the domains of xScale and yScale will be updated according to your current view. Note, the ranges are automatically set to the width and height of your canvas object.
Translating Point Coordinates to Screen Coordinates
Imagine you want to render additional features on top of points points, for which you need to know where on the canvas points are drawn. To determine the screen coordinates of points you can use D3 scales and scatterplot.get('pointsInView') as follows:
const points = Array.from({ length: 100 }, () => [Math.random() * 42, Math.random()]);
const [xScale, yScale] = [scaleLinear().domain([0, 42]), scaleLinear().domain([0, 1])];

const scatterplot = createScatterplot({ ..., xScale, yScale });
scatterplot.draw(points);

scatterplot.subscribe('view', ({ xScale, yScale }) => {
  console.log('pointsInScreenCoords', scatterplot.get('pointsInView').map((pointIndex) => [
    xScale(points[pointIndex][0]),
    yScale(points[pointIndex][1])
  ]));
});Transition Points
To make sense of two different states of points, it can help to show an animation by transitioning the points from their first to their second location. To do so, simple draw() the new points as follows:
const initialPoints = Array.from({ length: 100 }, () => [Math.random() * 42, Math.random()]);
const finalPoints = Array.from({ length: 100 }, () => [Math.random() * 42, Math.random()]);

const scatterplot = createScatterplot({ ... });
scatterplot.draw(initialPoints).then(() => {
  scatterplot.draw(finalPoints, { transition: true });
})
It's important that the number of points is the same for the two draw() calls. Also note that the point correspondence is determined by their index.
Zoom to Points
Sometimes it can be useful to programmatically zoom to a set of points. In regl-scatterplot you can do this with the zoomToPoints() method as follows:
const points = Array.from({ length: 100 }, () => [Math.random() * 42, Math.random()]);

const scatterplot = createScatterplot({ ... });
scatterplot.draw(initialPoints).then(() => {
  // We'll select the first five points...
  scatterplot.select([0, 1, 2, 3, 4]);
  // ...and zoom into them
  scatterplot.zoomToPoints([0, 1, 2, 3, 4], { transition: true })
})
Note that the zooming can be smoothly transitioned when { transition: true } is passed to the function.
Update only the Z/W point coordinates
If you only want to update the z/w points coordinates that can be used for encoding te point color, opacity, or size, you can improve the redrawing performance by reusing the existing spatial index, which is otherwise recomputed every time you draw new points.
const x = (length) => Array.from({ length }, () => -1 + Math.random() * 2);
const y = (length) => Array.from({ length }, () => -1 + Math.random() * 2);
const z = (length) => Array.from({ length }, () => Math.round(Math.random()));
const w = (length) => Array.from({ length }, () => Math.random());

const numPoints = 1000000;
const points = {
  x: x(numPoints),
  y: y(numPoints),
  z: z(numPoints),
  w: w(numPoints),
};

const scatterplot = createScatterplot({ ... });
scatterplot.draw(initialPoints).then(() => {
  // After the initial draw, we retrieve and save the KDBush spatial index.
  const spatialIndex = scatterplot.get('spatialIndex');
  setInterval(() => {
    // Update Z and W values
    points.z = z(numPoints);
    points.w = w(numPoints);

    // We redraw the scatter plot with the updates points. Importantly, since
    // the x/y coordinates remain unchanged we pass in the saved spatial index
    // to avoid having to re-index the points.
    scatterplot.draw(points, { spatialIndex });
  }, 2000);
})
API
Constructors
# createScatterplot(options = {})
Returns: a new scatterplot instance.
Options: is an object that accepts any of the properties.
# createRenderer(options = {})
Returns: a new Renderer instance with appropriate extensions being enabled.
Options: is an object that accepts any of the following optional properties:
regl: a Regl instance to be used for rendering.canvas: background color of the scatterplot.gamma: the gamma value for alpha blending.
# createRegl(canvas)
Returns: a new Regl instance with appropriate extensions being enabled.
Canvas: the canvas object on which the scatterplot will be rendered on.
# createTextureFromUrl(regl, url)
DEPRECATED! Use scatterplot.createTextureFromUrl() instead.
Methods
# scatterplot.draw(points, options)
Sets and draws points. Importantly, the points' x and y coordinates need to have been normalized to [-1, 1] (normalized device coordinates). The two additional values (valueA and valueB) need to be normalized to [0, 1] (if they represent continuous data) or [0, >1] (if they represent categorical data).
Note that repeatedly calling this method without specifying points will not clear previously set points. To clear points use scatterplot.clear().
Arguments:
pointscan either be an array of quadruples (row-oriented) or an object of arrays (column-oriented):- For row-oriented data, each nested array defines a point data of the form
[x, y, ?valueA, ?valueB, ?line, ?lineOrder].valueAandvalueBare optional and can be used for color, opacity, or size encoding.lineandlineOrderare also optional and can be used to visually connect points by lines. - For column-oriented data, the object must be of the form
{ x: [], y: [], ?valueA: [], ?valueB: [], ?line: [], ?lineOrder: [] }.
- For row-oriented data, each nested array defines a point data of the form
optionsis an object with the following properties:showPointConnectionsOnce[default:false]: iftrueand if points contain alinecomponent/dimension the points will be visually conntected.transition[default:false]: iftrueand if the current number of points equalspoints.length, the current points will be transitioned to the new pointstransitionDuration[default:500]: the duration in milliseconds over which the transition should occurtransitionEasing[default:cubicInOut]: the easing function, which determines how intermediate values of the transition are calculatedpreventFilterReset[default:false]: iftrueand if the number of new points is the same as the current number of points, the current point filter will not be resethover[default:undefined]: a shortcut forhover(). This option allows to programmatically hover a point by specifying a point indexselect[default:undefined]: a shortcut forselect(). This option allows to programmatically select points by specifying a list of point indicesfilter[default:undefined]: a shortcut forfilter(). This option allows to programmatically filter points by specifying a list of point indiceszDataType[default:undefined]: This option allows to manually set the data type of the z/valueA value to eithercontinuousorcategorical. By default the data type is determined automatically.wDataType[default:undefined]: This option allows to manually set the data type of the w/valyeB value to eithercontinuousorcategorical. By default the data type is determined automatically.spatialIndex[default:undefined]: This option allows to pass in the array buffer of KDBush to skip the manual creation of the spatial index. Caution: only use this option if you know what you're doing! The point data is not validated against the spatial index.
Returns: a Promise object that resolves once the points have been drawn or transitioned.
Examples:
const points = [
  [
    // The relative X position in [-1,1] (normalized device coordinates)
    0.9,
    // The relative Y position in [-1,1] (normalized device coordinates)
    0.3,
    // The category, which defaults to `0` if `undefined`
    0,
    // A continuous value between [0,1], which defaults to `0` if `undefined`
    0.5,
  ],
];

scatterplot.draw(points);

// You can now do something else like changing the point size etc.

// If we want to animate the transition of our point from above to another
// x,y position, we can also do this by drawing a new point while enableing
// transition via the `options` argument.
scatterplot.draw([[0.6, 0.6, 0, 0.6]], { transition: true });

// Let's unset the points. To do so, pass in an empty array to `draw()`.
// Or alternatively, call `scatterplot.clear()`
scatterplot.draw([]);

// You can also specify the point data in a column-oriented format. The
// following call will draw three points: (1,3), (2,2), and (3,1)
scatterplot.draw({
  x: [1, 2, 3],
  y: [3, 2, 1],
});

// Finally, you can also specify which point will be hovered, which points will
// be selected, and which points will be filtered. These options are useful to
// avoid a flicker which would occur if `hover()`, `select()`, and `filter()`
// are called after `draw()`.
scatterplot.draw(
  { x: [1, 2, 3], y: [3, 2, 1] },
  { hover: 0, selected: [0, 1], filter: [0, 2] }
);
# scatterplot.redraw()
Redraw the scatter plot at the next animation frame.
Note, that regl-scatterlot automatically redraws the scatter plot whenever the view changes in some ways. So theoretically, there should never be a need to call this function!
# scatterplot.clear()
Clears previously drawn points, point connections, and annotations.
# scatterplot.clearPoints()
Clears previously drawn points and point connections.
# scatterplot.clearPointConnections()
Clears previously point connections.
# scatterplot.drawAnnotations(annotations)
Draw line-based annotations of the following kind in normalized device coordinates:
- Horizontal line
- Vertical line
- Rectangle
- Polygon
Arguments:
annotationsis expected to be a list of the following objects:- For horizontal lines:
{ x: number, lineColor?: Color, lineWidth?: number } - For vertical lines:
{ x: number, lineColor?: Color, lineWidth?: number } - For rectangle :
{ x: number, y: number, width: number, height: number, lineColor?: Color, lineWidth?: number }or{ x1: number, y1: number, x2: number, y2: number, lineColor?: Color, lineWidth?: number } - For polygons or lines:
{ vertices: [number, number][], lineColor?: Color, lineWidth?: number }
- For horizontal lines:
Returns: a Promise object that resolves once the annotations have been drawn or transitioned.
Examples:
const scatterplot = createScatterplot({
  ...,
  annotationLineColor: [1, 1, 1, 0.1], // Default line color
  annotationLineWidth: 1, // Default line width
});

scatterplot.draw({
  x: Array.from({ length: 10000 }, () => -1 + Math.random() * 2),
  y: Array.from({ length: 10000 }, () => -1 + Math.random() * 2),
});

scatterplot.drawAnnotations([
  // Horizontal line
  { y: 0 },
  // Vertical line
  { x: 0 },
  // Rectangle
  {
    x1: -0.5, y1: -0.5, x2: 0.5, y2: 0.5,
    lineColor: [1, 0, 0, 0.33],
    lineWidth: 2,
  },
  // Polygon
  {
    vertices: [[-1, 0], [0, 1], [1, 0], [0, -1], [-1, 0]],
    lineColor: [1, 1, 0, 0.33],
    lineWidth: 3,
  },
]);
# scatterplot.clearAnnotations()
Clears previously drawn annotations.
# scatterplot.get(property)
Arguments:
propertyis a string referencing a property.
Returns: the property value.
# scatterplot.set(properties = {})
Arguments:
propertiesis an object of key-value pairs. See below for a list of all properties.
# scatterplot.select(points, options = {})
Select some points, such that they get visually highlighted. This will trigger a select event unless options.preventEvent === true.
Arguments:
pointsis an array of point indices referencing the points that you want to select.options[optional] is an object with the following properties:preventEvent: iftruetheselectwill not be published.
Examples:
// Let's say we have three points
scatterplot.draw([
  [0.1, 0.1],
  [0.2, 0.2],
  [0.3, 0.3],
]);

// To select the first and second point we have to do
scatterplot.select([0, 1]);
# scatterplot.deselect(options = {})
Deselect all selected points. This will trigger a deselect event unless options.preventEvent === true.
# scatterplot.filter(points, options = {})
Filter down the currently drawn points, such that all points that are not included in the filter are visually and interactivelly hidden. This will trigger a filter event unless options.preventEvent === true.
Note: filtering down points can affect previously selected points. Selected points that are filtered out are also deselected.
Arguments:
pointsis an array of indices referencing the points that you want to filter down to.options[optional] is an object with the following properties:preventEvent: iftruetheselectwill not be published.
Examples:
// Let's say we have three points
scatterplot.draw([
  [0.1, 0.1],
  [0.2, 0.2],
  [0.3, 0.3],
]);

// To only show the first and second point we have to do
scatterplot.filter([0, 1]);
# scatterplot.unfilter(options = {})
Reset previously filtered out points. This will trigger an unfilter event unless options.preventEvent === true.
# scatterplot.hover(point, options = {})
Programmatically hover a point, such that it gets visually highlighted. This will trigger a pointover or pointout event unless options.preventEvent === true.
Arguments:
pointis the point index referring to the point you want to hover.options[optional] is an object with the following properties:showReticleOnce: iftruethe reticle will be shown once, even ifshowReticle === false.preventEvent: iftruethepointoverandpointoutwill not be published.
Examples:
scatterplot.draw([
  [0.1, 0.1],
  [0.2, 0.2],
  [0.3, 0.3],
]);

scatterplot.hover(1); // To hover the second point
Arguments:
options[optional] is an object with the following properties:preventEvent: iftruethedeselectwill not be published.
# scatterplot.zoomToPoints(points, options = {})
Zoom to a set of points
Arguments:
pointsis an array of point indices.options[optional] is an object with the following properties:padding: [default:0]: relative padding around the bounding box of the points to zoom totransition[default:false]: iftrue, the camera will smoothly transition to its new positiontransitionDuration[default:500]: the duration in milliseconds over which the transition should occurtransitionEasing[default:cubicInOut]: the easing function, which determines how intermediate values of the transition are calculated
Examples:
// Let's say we have three points
scatterplot.draw([
  [0.1, 0.1],
  [0.2, 0.2],
  [0.3, 0.3],
]);

// To zoom to the first and second point we have to do
scatterplot.zoomToPoints([0, 1]);
# scatterplot.zoomToOrigin(options = {})
Zoom to the original camera position. This is similar to resetting the view
Arguments:
options[optional] is an object with the following properties:transition[default:false]: iftrue, the camera will smoothly transition to its new positiontransitionDuration[default:500]: the duration in milliseconds over which the transition should occurtransitionEasing[default:cubicInOut]: the easing function, which determines how intermediate values of the transition are calculated
# scatterplot.zoomToLocation(target, distance, options = {})
Zoom to a specific location, specified in normalized device coordinates. This function is similar to scatterplot.lookAt(), however, it allows to smoothly transition the camera position.
Arguments:
targetthe camera target given as a[x, y]tuple.distancethe camera distance to the target given as a number between]0, Infinity]. The smaller the number the closer moves the camera, i.e., the more the view is zoomed in.options[optional] is an object with the following properties:transition[default:false]: iftrue, the camera will smoothly transition to its new positiontransitionDuration[default:500]: the duration in milliseconds over which the transition should occurtransitionEasing[default:cubicInOut]: the easing function, which determines how intermediate values of the transition are calculated
Examples:
scatterplot.zoomToLocation([0.5, 0.5], 0.5, { transition: true });
// => This will make the camera zoom into the top-right corner of the scatter plot
# scatterplot.zoomToArea(rectangle, options = {})
Zoom to a specific area specified by a recangle in normalized device coordinates.
Arguments:
rectanglethe rectangle must come in the form of{ x, y, width, height }.options[optional] is an object with the following properties:transition[default:false]: iftrue, the camera will smoothly transition to its new positiontransitionDuration[default:500]: the duration in milliseconds over which the transition should occurtransitionEasing[default:cubicInOut]: the easing function, which determines how intermediate values of the transition are calculatedpreventFilterReset[default:false]: iftrueand if the number of new points equals the number of already drawn points, the point filter set is not being reset.
Examples:
scatterplot.zoomToArea(
  { x: 0, y: 0, width: 1, height: 1 },
  { transition: true }
);
// => This will make the camera zoom into the top-right corner of the scatter plot
# scatterplot.getScreenPosition(pointIdx)
Get the screen position of a point
Arguments:
pointIdxis a point indix.
Examples:
// Let's say we have a 100x100 pixel scatter plot with three points
const scatterplot = createScatterplot({ width: 100, height: 100 });
scatterplot.draw([
  [-1, -1],
  [0, 0],
  [1, 1],
]);

// To retrieve the screen position of the second point you can call. If we
// haven't panned and zoomed, the returned position should be `50, 50`
scatterplot.getScreenPosition(1);
// => [50, 50]
# scatterplot.lookAt(view, options = {})
Update the camera's view matrix to change the viewport. This will trigger a view event unless options.preventEvent === true.
Note, this API is a shorthand to scatterplot.set({ 'cameraView': view }) with the additional features of allowing to prevent view events.
# scatterplot.destroy()
Destroys the scatterplot instance by disposing all event listeners, the pubSub instance, regl, and the camera.
# scatterplot.refresh()
Refreshes the viewport of the scatterplot's regl instance.
# scatterplot.reset(options)
Sets the view back to the initially defined view. This will trigger a view event unless options.preventEvent === true.
# scatterplot.export(options)
Arguments:
optionsis an object for customizing how to export. See regl.read() for details.
Returns: an object with three properties: pixels, width, and height. The pixels is a Uint8ClampedArray.
# scatterplot.subscribe(eventName, eventHandler)
Subscribe to an event.
Arguments:
eventNameneeds to be a valid event name.eventHandlerneeds to be a callback function that can receive the payload.
Returns: an unsubscriber object that can be passed into unsubscribe().
# scatterplot.unsubscribe(eventName, eventHandler)
Unsubscribe from an event. See scatterplot.subscribe() for a list of all
events.
# scatterplot.createTextureFromUrl(url)
Returns: a Promise that resolves to a Regl texture that can be used, for example, as the background image.
url: the URL to an image.
Properties
You can customize the scatter plot according to the following properties that
can be read and written via scatterplot.get() and scatterplot.set().
| Name | Type | Default | Constraints | Settable | Nullifiable |
|---|---|---|---|---|---|
| canvas | object | document.createElement('canvas') |
false |
false |
|
| regl | Regl | createRegl(canvas) |
false |
false |
|
| renderer | Renderer | createRenderer() |
false |
false |
|
| syncEvents | boolean | false |
false |
false |
|
| version | string | false |
false |
||
| spatialIndex | ArrayBuffer | false |
false |
||
| spatialIndexUseWorker | undefined or boolean | undefined |
true |
false |
|
| width | int or str | 'auto' |
'auto' or > 0 |
true |
false |
| height | int or str | 'auto' |
'auto' or > 0 |
true |
false |
| aspectRatio | float | 1.0 |
> 0 | true |
false |
| backgroundColor | string or array | rgba(0, 0, 0, 1) | hex, rgb, rgba | true |
false |
| backgroundImage | function | null |
Regl texture | true |
true |
| camera | object | See dom-2d-camera | false |
false |
|
| cameraTarget | tuple | [0, 0] |
true |
false |
|
| cameraDistance | float | 1 |
> 0 | true |
false |
| cameraRotation | float | 0 |
true |
false |
|
| cameraView | Float32Array | [1,0,0,0,0,1,0,0,0,0,1,0,0,0,0,1] |
true |
false |
|
| colorBy | string | null |
See data encoding | true |
true |
| sizeBy | string | null |
See data encoding | true |
true |
| opacityBy | string | null |
See data encoding | true |
true |
| deselectOnDblClick | boolean | true |
true |
false |
|
| deselectOnEscape | boolean | true |
true |
false |
|
| opacity | float | 1 |
Must be in ]0, 1] | true |
false |
| opacityInactiveMax | float | 1 |
Must be in [0, 1] | true |
false |
| opacityInactiveScale | float | 1 |
Must be in [0, 1] | true |
false |
| points | tuple[] | [[0.5, 2.3], ...] |
false |
false |
|
| selectedPoints | int[] | [4, 2] |
false |
false |
|
| filteredPoints | int[] | [4, 2] |
false |
false |
|
| pointsInView | int[] | [1, 2, 12] |
false |
false |
|
| pointColor | quadruple | [0.66, 0.66, 0.66, 1] |
single value or list of hex, rgb, rgba | true |
false |
| pointColorActive | quadruple | [0, 0.55, 1, 1] |
single value or list of hex, rgb, rgba | true |
false |
| pointColorHover | quadruple | [1, 1, 1, 1] |
single value or list of hex, rgb, rgba | true |
false |
| pointOutlineWidth | int | 2 |
>= 0 | true |
false |
| pointSize | int | 6 |
> 0 | true |
false |
| pointSizeSelected | int | 2 |
>= 0 | true |
false |
| showPointConnection | boolean | false |
true |
false |
|
| pointConnectionColor | quadruple | [0.66, 0.66, 0.66, 0.2] |
true |
false |
|
| pointConnectionColorActive | quadruple | [0, 0.55, 1, 1] |
true |
false |
|
| pointConnectionColorHover | quadruple | [1, 1, 1, 1] |
true |
false |
|
| pointConnectionColorBy | string | null |
See data encoding | true |
false |
| pointConnectionOpacity | float | 0.1 |
true |
false |
|
| pointConnectionOpacityActive | float | 0.66 |
true |
false |
|
| pointConnectionOpacityBy | string | null |
See data encoding | true |
false |
| pointConnectionSize | float | 2 |
true |
false |
|
| pointConnectionSizeActive | float | 2 |
true |
false |
|
| pointConnectionSizeBy | string | null |
See data encoding | true |
false |
| pointConnectionMaxIntPointsPerSegment | int | 100 |
true |
false |
|
| pointConnectionTolerance | float | 0.002 |
true |
false |
|
| lassoColor | quadruple | rgba(0, 0.667, 1, 1) | hex, rgb, rgba | true |
false |
| lassoLineWidth | float | 2 | >= 1 | true |
false |
| lassoMinDelay | int | 15 | >= 0 | true |
false |
| lassoMinDist | int | 4 | >= 0 | true |
false |
| lassoClearEvent | string | 'lassoEnd' |
'lassoEnd' or 'deselect' |
true |
false |
| lassoInitiator | boolean | false |
true |
false |
|
| lassoInitiatorElement | object | the lasso dom element | false |
false |
|
| lassoInitiatorParentElement | object | document.body |
true |
false |
|
| showReticle | boolean | false |
true or false |
true |
false |
| reticleColor | quadruple | rgba(1, 1, 1, .5) | hex, rgb, rgba | true |
false |
| xScale | function | null |
must follow the D3 scale API | true |
true |
| yScale | function | null |
must follow the D3 scale API | true |
true |
| keyMap | object | { alt: 'rotate', shift: 'lasso' } |
See the notes below | true |
false |
| mouseMode | string | 'panZoom' |
'panZoom', 'lasso', or 'rotate' |
true |
false |
| performanceMode | boolean | false |
can only be set during initialization! | true |
false |
| gamma | float | 1 |
to control the opacity blending | true |
false |
| isDestroyed | boolean | false |
false |
false |
|
| isPointsDrawn | boolean | false |
false |
false |
|
| isPointsFiltered | boolean | false |
false |
false |
|
| annotationLineColor | string or quadruple | [1, 1, 1, 0.1] |
hex, rgb, rgba | true |
false |
| annotationLineWidth | number | 1 |
true |
false |
|
| annotationHVLineLimit | number | 1000 |
the extent of horizontal or vertical lines | true |
false |
# Notes:
-
An attribute is considered nullifiable if it can be unset. Attributes that are not nullifiable will be ignored if you try to set them to a falsy value. For example, if you call
scatterplot.attr({ width: 0 });the width will not be changed as0is interpreted as a falsy value. -
By default, the
widthandheightare set to'auto', which will make thecanvasstretch all the way to the bounds of its clostest parent element withposition: relative. When set to'auto'the library also takes care of resizing the canvas onresizeandorientationchangeevents. -
The background of the scatterplot is transparent, i.e., you have to control the background with CSS!
backgroundis used when drawing the outline of selected points to simulate the padded border only. -
The background image must be a Regl texture. To easily set a remote image as the background please use
createTextureFromUrl. -
The scatterplot understan 4 colors per color representing 4 states, representing:
- normal (
pointColor): the normal color of points. - active (
pointColorActive): used for coloring selected points. - hover (
pointColorHover): used when mousing over a point. - background (
backgroundColor): used as the background color.
- normal (
-
Points can currently by colored by category and value.
-
The size of selected points is given by
pointSize + pointSizeSelected -
By default, events are published asynchronously to decouple regl-scatterplot's execution flow from the event consumer's process. However, you can enable synchronous event broadcasting at your own risk via
createScatterplot({ syncEvents: true }). This property can't be changed after initialization! -
If you need to draw more than 2 million points, you might want to set
performanceModetotrueduring the initialization to boost the performance. In performance mode, points will be drawn as simple squares and color blending is disabled. This should allow you to draw up to 20 million points (or more depending on your hardware). Make sure to reduce thepointSizeas you render more and more points (e.g.,0.25for 20 million works for me) to ensure good performance.
# colorBy, opacityBy, sizeBy:
To visual encode one of the two point values set colorBy, opacityBy, or sizeBy
to one of the following values referencing the third or forth component of your
points. To reference the third component you can use category (only for
backwards compatibility), value1, valueA, valueZ, or z. To reference
the forth component use value (only for backwards compatibility), value2,
valueB, valueW, or w.
Density-based opacity encoding: In addition, the opacity can dynamically be
set based on the point density and zoom level via opacityBy: 'density'. As an
example go to dynamic-opacity.html.
The implementation is an extension of Ricky Reusser's awesome notebook.
Huuuge kudos Ricky! 🙇♂️
# pointConnectionColorBy, pointConnectionOpacityBy, and pointConnectionSizeBy:
In addition to the properties understood by colorBy, etc.,
pointConnectionColorBy, pointConnectionOpacityBy, and pointConnectionSizeBy
also understand "inherit" and "segment". When set to "inherit", the value
will be inherited from its point-specific counterpart. When set to "segment",
each segment of a point connection will be encoded separately. This allows you
to, for instance, color connection by a gradient from the start to the end of
each line.
# lassoInitiator:
When setting lassoInitiator to true you can initiate the lasso selection
without the need to hold down a modifier key. Simply click somewhere into the
background and a circle will appear under your mouse cursor. Now click into the
circle and drag you mouse to start lassoing. You can additionally invoke the
lasso initiator circle by a long click on a dot.
You don't like the look of the lasso initiator? No problem. Simple get the DOM
element via scatterplot.get('lassoInitiatorElement') and adjust the style
via JavaScript. E.g.: scatterplot.get('lassoInitiatorElement').style.background = 'green'.
# KeyMap:
The keyMap property is an object defining which actions are enabled when
holding down which modifier key. E.g.: { shift: 'lasso' }. Acceptable
modifier keys are alt, cmd, ctrl, meta, shift. Acceptable actions
are lasso, rotate, and merge (for selecting multiple items by merging a series of lasso or click selections).
You can also use the keyMap option to disable the lasso selection and rotation
by setting keyMap to an empty object.
# Examples:
// Set width and height
scatterplot.set({ width: 300, height: 200 });

// get width
const width = scatterplot.get('width');

// Set the aspect ratio of the scatterplot. This aspect ratio is referring to
// your data source and **not** the aspect ratio of the canvas element! By
// default it is assumed that your data us following a 1:1 ratio and this ratio
// is preserved even if your canvas element has some other aspect ratio. But if
// you wanted you could provide data that's going from [0,2] in x and [0,1] in y
// in which case you'd have to set the aspect ratio as follows to `2`.
scatterplot.set({ aspectRatio: 2.0 });

// Set background color to red
scatterplot.set({ backgroundColor: '#00ff00' }); // hex string
scatterplot.set({ backgroundColor: [255, 0, 0] }); // rgb array
scatterplot.set({ backgroundColor: [255, 0, 0, 1.0] }); // rgba array
scatterplot.set({ backgroundColor: [1.0, 0, 0, 1.0] }); // normalized rgba

// Set background image to an image
scatterplot.set({ backgroundImage: 'https://server.com/my-image.png' });
// If you need to know when the image was loaded you have two options. First,
// you can listen to the following event
scatterplot.subscribe(
  'backgroundImageReady',
  () => {
    console.log('Background image is now loaded and rendered!');
  },
  1
);
// or you load the image yourself as follows
const backgroundImage = await scatterplot.createTextureFromUrl(
  'https://server.com/my-image.png'
);
scatterplot.set({ backgroundImage });

// Color by
scatterplot.set({ colorBy: 'category' });

// Set color map
scatterplot.set({
  pointColor: ['#ff0000', '#00ff00', '#0000ff'],
  pointColorActive: ['#ff0000', '#00ff00', '#0000ff'], // optional
  pointColorHover: ['#ff0000', '#00ff00', '#0000ff'], // optional
});

// Set base opacity
scatterplot.set({ opacity: 0.5 });

// If you want to deemphasize unselected points (when some points are selected)
// you can rescale the unselected points' opacity as follows
scatterplot.set({ opacityInactiveScale: 0.5 });

// Set the width of the outline of selected points
scatterplot.set({ pointOutlineWidth: 2 });

// Set the base point size
scatterplot.set({ pointSize: 10 });

// Set the additional point size of selected points
scatterplot.set({ pointSizeSelected: 2 });

// Change the lasso color and make it very smooth, i.e., do not wait before
// extending the lasso (i.e., `lassoMinDelay = 0`) and extend the lasso when
// the mouse moves at least 1 pixel
scatterplot.set({
  lassoColor: [1, 1, 1, 1],
  lassoMinDelay: 0,
  lassoMinDist: 1,
  // This will keep the drawn lasso until the selected points are deselected
  lassoClearEvent: 'deselect',
});

// Activate reticle and set reticle color to red
scatterplot.set({ showReticle: true, reticleColor: [1, 0, 0, 0.66] });
Renderer
The renderer class is responsible for rendering pixels onto the scatter plot's canvas using WebGL via Regl. It's created automatically internally but you can also create it yourself, which can be useful when you want to instantiate multiple scatter plot instances as they can share one renderer.
Renderer API
# renderer.canvas
The renderer's canvas instance. (Read-only)
# renderer.gamma
The renderer's gamma value. This value influences the alpha blending.
# renderer.regl
The renderer's regl instance. (Read-only)
# renderer.onFrame(function)
Add a function to be called on every animation frame.
Arguments:
function: The function to be called on every animation frame.
Returns: A function to remove the added function from the animation frame cycle.
# renderer.refresh()
Updates Regl's viewport, drawingBufferWidth, and drawingBufferHeight.
# renderer.render(drawFunction, targetCanvas)
Render Regl draw instructions into a target canvas using the renderer.
Arguments:
drawFunction: The draw function that triggers Regl draw instructionstargetCanvas: The canvas to rendering the final pixels into.
Events
| Name | Trigger | Payload |
|---|---|---|
| init | when the scatter plot is initialized | undefined |
| destroy | when the scatter plot is destroyed | undefined |
| backgroundImageReady | when the background image was loaded | undefined |
| pointOver | when the mouse cursor is over a point | pointIndex |
| pointOut | when the mouse cursor moves out of a point | pointIndex |
| select | when points are selected | { points } |
| deselect | when points are deselected | undefined |
| filter | when points are filtered | { points } |
| unfilter | when the point filter is reset | undefined |
| view | when the view has changes | { camera, view, xScale, yScale } |
| draw | when the plot was drawn | { camera, view, xScale, yScale } |
| drawing | when the plot is being drawn | { camera, view, xScale, yScale } |
| lassoStart | when the lasso selection has started | undefined |
| lassoExtend | when the lasso selection has extended | { coordinates } |
| lassoEnd | when the lasso selection has ended | { coordinates } |
| transitionStart | when points started to transition | undefined |
| transitionEnd | when points ended to transition | createRegl(canvas) |
| pointConnectionsDraw | when point connections were drawn | undefined |
Trouble Shooting
Resizing the scatterplot
The chances are high that you use the regl-scatterplot in a dynamically-resizable or interactive web-app. Please note that regl-scatterplot doesn't not automatically resize when the dimensions of its parent container change. It's your job to keep the size of regl-scatterplot and its parent element in sync. Hence, every time the size of the parent or canvas element changed, you have to call:
const { width, height } = canvas.getBoundingClientRect();
scatterplot.set({ width, height });
Using regl-scatterplot with Vue
Related to the resizing, when conditionally displaying regl-scatterplot in Vue you might have to update the width and height when the visibility is changed. See issue #20 for an example.
Citation
If you like regl-scatterplot and are using it in your research, we'd appreciate if you could cite our paper:
@article {lekschas2023reglscatterplot,
  author = {Lekschas, Fritz},
  title = {Regl-Scatterplot: A Scalable Interactive JavaScript-based Scatter Plot Library},
  journal = {Journal of Open Source Software},
  volume = {8},
  number = {84},
  pages = {5275},
  year = {2023},
  month = {4},
  doi = {10.21105/joss.05275},
  url = {https://doi.org/10.21105/joss.05275},
}