llama.cpp

![]()
![]()
Roadmap / Project status / Manifesto / ggml
Inference of Meta's LLaMA model (and others) in pure C/C++
[!IMPORTANT] [2024 Jun 12] Binaries have been renamed w/ a
llama-prefix.mainis nowllama-cli,serverisllama-server, etc (https://github.com/ggerganov/llama.cpp/pull/7809)
Recent API changes
- [2024 Jun 26] The source code and CMake build scripts have been restructured https://github.com/ggerganov/llama.cpp/pull/8006
- [2024 Apr 21]
llama_token_to_piececan now optionally render special tokens https://github.com/ggerganov/llama.cpp/pull/6807 - [2024 Apr 4] State and session file functions reorganized under
llama_state_*https://github.com/ggerganov/llama.cpp/pull/6341 - [2024 Mar 26] Logits and embeddings API updated for compactness https://github.com/ggerganov/llama.cpp/pull/6122
- [2024 Mar 13] Add
llama_synchronize()+llama_context_params.n_ubatchhttps://github.com/ggerganov/llama.cpp/pull/6017 - [2024 Mar 8]
llama_kv_cache_seq_rm()returns aboolinstead ofvoid, and newllama_n_seq_max()returns the upper limit of acceptableseq_idin batches (relevant when dealing with multiple sequences) https://github.com/ggerganov/llama.cpp/pull/5328 - [2024 Mar 4] Embeddings API updated https://github.com/ggerganov/llama.cpp/pull/5796
- [2024 Mar 3]
struct llama_context_paramshttps://github.com/ggerganov/llama.cpp/pull/5849
Hot topics
convert.pyhas been deprecated and moved toexamples/convert-legacy-llama.py, please useconvert-hf-to-gguf.pyhttps://github.com/ggerganov/llama.cpp/pull/7430- Initial Flash-Attention support: https://github.com/ggerganov/llama.cpp/pull/5021
- BPE pre-tokenization support has been added: https://github.com/ggerganov/llama.cpp/pull/6920
- MoE memory layout has been updated - reconvert models for
mmapsupport and regenerateimatrixhttps://github.com/ggerganov/llama.cpp/pull/6387 - Model sharding instructions using
gguf-splithttps://github.com/ggerganov/llama.cpp/discussions/6404 - Fix major bug in Metal batched inference https://github.com/ggerganov/llama.cpp/pull/6225
- Multi-GPU pipeline parallelism support https://github.com/ggerganov/llama.cpp/pull/6017
- Looking for contributions to add Deepseek support: https://github.com/ggerganov/llama.cpp/issues/5981
- Quantization blind testing: https://github.com/ggerganov/llama.cpp/discussions/5962
- Initial Mamba support has been added: https://github.com/ggerganov/llama.cpp/pull/5328
Table of Contents
- Description
-
Usage
- Get the Code
- Build
- BLAS Build
- Prepare and Quantize
- Run the quantized model
- Memory/Disk Requirements
- Quantization
- Interactive mode
- Constrained output with grammars
- Obtaining and using the Facebook LLaMA 2 model
- Seminal papers and background on the models
- Perplexity (measuring model quality)
- Android
- Docker
- Contributing
- Coding guidelines
- Docs
Description
The main goal of llama.cpp is to enable LLM inference with minimal setup and state-of-the-art performance on a wide
variety of hardware - locally and in the cloud.
- Plain C/C++ implementation without any dependencies
- Apple silicon is a first-class citizen - optimized via ARM NEON, Accelerate and Metal frameworks
- AVX, AVX2 and AVX512 support for x86 architectures
- 1.5-bit, 2-bit, 3-bit, 4-bit, 5-bit, 6-bit, and 8-bit integer quantization for faster inference and reduced memory use
- Custom CUDA kernels for running LLMs on NVIDIA GPUs (support for AMD GPUs via HIP)
- Vulkan and SYCL backend support
- CPU+GPU hybrid inference to partially accelerate models larger than the total VRAM capacity
Since its inception, the project has improved significantly thanks to many contributions. It is the main playground for developing new features for the ggml library.
Supported platforms:
- [X] Mac OS
- [X] Linux
- [X] Windows (via CMake)
- [X] Docker
- [X] FreeBSD
Supported models:
Typically finetunes of the base models below are supported as well.
- [X] LLaMA 🦙
- [x] LLaMA 2 🦙🦙
- [x] LLaMA 3 🦙🦙🦙
- [X] Mistral 7B
- [x] Mixtral MoE
- [x] DBRX
- [X] Falcon
- [X] Chinese LLaMA / Alpaca and Chinese LLaMA-2 / Alpaca-2
- [X] Vigogne (French)
- [X] Koala
- [X] Baichuan 1 & 2 + derivations
- [X] Aquila 1 & 2
- [X] Starcoder models
- [X] Refact
- [X] MPT
- [X] Bloom
- [x] Yi models
- [X] StableLM models
- [x] Deepseek models
- [x] Qwen models
- [x] PLaMo-13B
- [x] Phi models
- [x] GPT-2
- [x] Orion 14B
- [x] InternLM2
- [x] CodeShell
- [x] Gemma
- [x] Mamba
- [x] Grok-1
- [x] Xverse
- [x] Command-R models
- [x] SEA-LION
- [x] GritLM-7B + GritLM-8x7B
- [x] OLMo
- [x] GPT-NeoX + Pythia
(instructions for supporting more models: HOWTO-add-model.md)
Multimodal models:
- [x] LLaVA 1.5 models, LLaVA 1.6 models
- [x] BakLLaVA
- [x] Obsidian
- [x] ShareGPT4V
- [x] MobileVLM 1.7B/3B models
- [x] Yi-VL
- [x] Mini CPM
- [x] Moondream
- [x] Bunny
HTTP server
llama.cpp web server is a lightweight OpenAI API compatible HTTP server that can be used to serve local models and easily connect them to existing clients.
simplechat is a simple chat client, which can be used to chat with the model exposed using above web server (use --path to point to simplechat), from a local web browser.
Bindings:
- Python: abetlen/llama-cpp-python
- Go: go-skynet/go-llama.cpp
- Node.js: withcatai/node-llama-cpp
- JS/TS (llama.cpp server client): lgrammel/modelfusion
- JavaScript/Wasm (works in browser): tangledgroup/llama-cpp-wasm
- Typescript/Wasm (nicer API, available on npm): ngxson/wllama
- Ruby: yoshoku/llama_cpp.rb
- Rust (more features): edgenai/llama_cpp-rs
- Rust (nicer API): mdrokz/rust-llama.cpp
- Rust (more direct bindings): utilityai/llama-cpp-rs
- C#/.NET: SciSharp/LLamaSharp
- Scala 3: donderom/llm4s
- Clojure: phronmophobic/llama.clj
- React Native: mybigday/llama.rn
- Java: kherud/java-llama.cpp
- Zig: deins/llama.cpp.zig
- Flutter/Dart: netdur/llama_cpp_dart
- PHP (API bindings and features built on top of llama.cpp): distantmagic/resonance (more info)
UI:
Unless otherwise noted these projects are open-source with permissive licensing:
- iohub/collama
- janhq/jan (AGPL)
- nat/openplayground
- Faraday (proprietary)
- LMStudio (proprietary)
- Layla (proprietary)
- LocalAI (MIT)
- LostRuins/koboldcpp (AGPL)
- Mozilla-Ocho/llamafile
- nomic-ai/gpt4all
- ollama/ollama
- oobabooga/text-generation-webui (AGPL)
- psugihara/FreeChat
- cztomsik/ava (MIT)
- ptsochantaris/emeltal
- pythops/tenere (AGPL)
- RAGNA Desktop (proprietary)
- RecurseChat (proprietary)
- semperai/amica
- withcatai/catai
- Mobile-Artificial-Intelligence/maid (MIT)
- Msty (proprietary)
- LLMFarm (MIT)
- KanTV(Apachev2.0 or later)
- Dot (GPL)
- MindMac (proprietary)
- KodiBot (GPL)
- eva (MIT)
- AI Sublime Text plugin (MIT)
- AIKit (MIT)
- LARS - The LLM & Advanced Referencing Solution (AGPL)
(to have a project listed here, it should clearly state that it depends on llama.cpp)
Tools:
- akx/ggify – download PyTorch models from HuggingFace Hub and convert them to GGML
Here is a typical run using LLaMA v2 13B on M2 Ultra:
$ make -j && ./llama-cli -m models/llama-13b-v2/ggml-model-q4_0.gguf -p "Building a website can be done in 10 simple steps:\nStep 1:" -n 400 -e
I llama.cpp build info:
I UNAME_S:  Darwin
I UNAME_P:  arm
I UNAME_M:  arm64
I CFLAGS:   -I.            -O3 -std=c11   -fPIC -DNDEBUG -Wall -Wextra -Wpedantic -Wcast-qual -Wdouble-promotion -Wshadow -Wstrict-prototypes -Wpointer-arith -Wmissing-prototypes -pthread -DGGML_USE_K_QUANTS -DGGML_USE_ACCELERATE
I CXXFLAGS: -I. -I./common -O3 -std=c++11 -fPIC -DNDEBUG -Wall -Wextra -Wpedantic -Wcast-qual -Wno-unused-function -Wno-multichar -pthread -DGGML_USE_K_QUANTS
I LDFLAGS:   -framework Accelerate
I CC:       Apple clang version 14.0.3 (clang-1403.0.22.14.1)
I CXX:      Apple clang version 14.0.3 (clang-1403.0.22.14.1)

make: Nothing to be done for `default'.
main: build = 1041 (cf658ad)
main: seed  = 1692823051
llama_model_loader: loaded meta data with 16 key-value pairs and 363 tensors from models/llama-13b-v2/ggml-model-q4_0.gguf (version GGUF V1 (latest))
llama_model_loader: - type  f32:   81 tensors
llama_model_loader: - type q4_0:  281 tensors
llama_model_loader: - type q6_K:    1 tensors
llm_load_print_meta: format         = GGUF V1 (latest)
llm_load_print_meta: arch           = llama
llm_load_print_meta: vocab type     = SPM
llm_load_print_meta: n_vocab        = 32000
llm_load_print_meta: n_merges       = 0
llm_load_print_meta: n_ctx_train    = 4096
llm_load_print_meta: n_ctx          = 512
llm_load_print_meta: n_embd         = 5120
llm_load_print_meta: n_head         = 40
llm_load_print_meta: n_head_kv      = 40
llm_load_print_meta: n_layer        = 40
llm_load_print_meta: n_rot          = 128
llm_load_print_meta: n_gqa          = 1
llm_load_print_meta: f_norm_eps     = 1.0e-05
llm_load_print_meta: f_norm_rms_eps = 1.0e-05
llm_load_print_meta: n_ff           = 13824
llm_load_print_meta: freq_base      = 10000.0
llm_load_print_meta: freq_scale     = 1
llm_load_print_meta: model type     = 13B
llm_load_print_meta: model ftype    = mostly Q4_0
llm_load_print_meta: model size     = 13.02 B
llm_load_print_meta: general.name   = LLaMA v2
llm_load_print_meta: BOS token = 1 '<s>'
llm_load_print_meta: EOS token = 2 '</s>'
llm_load_print_meta: UNK token = 0 '<unk>'
llm_load_print_meta: LF token  = 13 '<0x0A>'
llm_load_tensors: ggml ctx size =    0.11 MB
llm_load_tensors: mem required  = 7024.01 MB (+  400.00 MB per state)
...................................................................................................
llama_new_context_with_model: kv self size  =  400.00 MB
llama_new_context_with_model: compute buffer total size =   75.41 MB

system_info: n_threads = 16 / 24 | AVX = 0 | AVX2 = 0 | AVX512 = 0 | AVX512_VBMI = 0 | AVX512_VNNI = 0 | FMA = 0 | NEON = 1 | ARM_FMA = 1 | F16C = 0 | FP16_VA = 1 | WASM_SIMD = 0 | BLAS = 1 | SSE3 = 0 | VSX = 0 |
sampling: repeat_last_n = 64, repeat_penalty = 1.100000, presence_penalty = 0.000000, frequency_penalty = 0.000000, top_k = 40, tfs_z = 1.000000, top_p = 0.950000, typical_p = 1.000000, temp = 0.800000, mirostat = 0, mirostat_lr = 0.100000, mirostat_ent = 5.000000
generate: n_ctx = 512, n_batch = 512, n_predict = 400, n_keep = 0

 Building a website can be done in 10 simple steps:
Step 1: Find the right website platform.
Step 2: Choose your domain name and hosting plan.
Step 3: Design your website layout.
Step 4: Write your website content and add images.
Step 5: Install security features to protect your site from hackers or spammers
Step 6: Test your website on multiple browsers, mobile devices, operating systems etc…
Step 7: Test it again with people who are not related to you personally – friends or family members will work just fine!
Step 8: Start marketing and promoting the website via social media channels or paid ads
Step 9: Analyze how many visitors have come to your site so far, what type of people visit more often than others (e.g., men vs women) etc…
Step 10: Continue to improve upon all aspects mentioned above by following trends in web design and staying up-to-date on new technologies that can enhance user experience even further!
How does a Website Work?
A website works by having pages, which are made of HTML code. This code tells your computer how to display the content on each page you visit – whether it’s an image or text file (like PDFs). In order for someone else’s browser not only be able but also want those same results when accessing any given URL; some additional steps need taken by way of programming scripts that will add functionality such as making links clickable!
The most common type is called static HTML pages because they remain unchanged over time unless modified manually (either through editing files directly or using an interface such as WordPress). They are usually served up via HTTP protocols – this means anyone can access them without having any special privileges like being part of a group who is allowed into restricted areas online; however, there may still exist some limitations depending upon where one lives geographically speaking.
How to
llama_print_timings:        load time =   576.45 ms
llama_print_timings:      sample time =   283.10 ms /   400 runs   (    0.71 ms per token,  1412.91 tokens per second)
llama_print_timings: prompt eval time =   599.83 ms /    19 tokens (   31.57 ms per token,    31.68 tokens per second)
llama_print_timings:        eval time = 24513.59 ms /   399 runs   (   61.44 ms per token,    16.28 tokens per second)
llama_print_timings:       total time = 25431.49 ms
And here is another demo of running both LLaMA-7B and whisper.cpp on a single M1 Pro MacBook:
https://user-images.githubusercontent.com/1991296/224442907-7693d4be-acaa-4e01-8b4f-add84093ffff.mp4
Usage
Here are the end-to-end binary build and model conversion steps for most supported models.
Get the Code
git clone https://github.com/ggerganov/llama.cpp
cd llama.cpp
Build
In order to build llama.cpp you have four different options.
-
Using
make:-
On Linux or MacOS:
make -
On Windows:
- Download the latest fortran version of w64devkit.
- Extract
w64devkiton your pc. - Run
w64devkit.exe. - Use the
cdcommand to reach thellama.cppfolder. - From here you can run:
make
- Notes:
- For faster compilation, add the
-jargument to run multiple jobs in parallel. For example,make -j 8will run 8 jobs in parallel. - For faster repeated compilation, install ccache.
- For debug builds, run
make LLAMA_DEBUG=1
-
-
Using
CMake:cmake -B build cmake --build build --config ReleaseNotes:
- For faster compilation, add the
-jargument to run multiple jobs in parallel. For example,cmake --build build --config Release -j 8will run 8 jobs in parallel. - For faster repeated compilation, install ccache.
-
For debug builds, there are two cases:
- Single-config generators (e.g. default =
Unix Makefiles; note that they just ignore the--configflag):
cmake -B build -DCMAKE_BUILD_TYPE=Debug cmake --build build- Multi-config generators (
-Gparam set to Visual Studio, XCode...):
cmake -B build -G "Xcode" cmake --build build --config Debug - Single-config generators (e.g. default =
- For faster compilation, add the
-
Using
gmake(FreeBSD):- Install and activate DRM in FreeBSD
- Add your user to video group
-
Install compilation dependencies.
sudo pkg install gmake automake autoconf pkgconf llvm15 openblas

gmake CC=/usr/local/bin/clang15 CXX=/usr/local/bin/clang++15 -j4
Homebrew
On Mac and Linux, the homebrew package manager can be used via
brew install llama.cppThe formula is automatically updated with new llama.cpp releases. More info: https://github.com/ggerganov/llama.cpp/discussions/7668
Nix
On Mac and Linux, the Nix package manager can be used via
nix profile install nixpkgs#llama-cppFor flake enabled installs.
Or
nix-env --file '<nixpkgs>' --install --attr llama-cppFor non-flake enabled installs.
This expression is automatically updated within the nixpkgs repo.
Flox
On Mac and Linux, Flox can be used to install llama.cpp within a Flox environment via
flox install llama-cppFlox follows the nixpkgs build of llama.cpp.
Metal Build
On MacOS, Metal is enabled by default. Using Metal makes the computation run on the GPU.
To disable the Metal build at compile time use the GGML_NO_METAL=1 flag or the GGML_METAL=OFF cmake option.
When built with Metal support, you can explicitly disable GPU inference with the --n-gpu-layers|-ngl 0 command-line
argument.
BLAS Build
Building the program with BLAS support may lead to some performance improvements in prompt processing using batch sizes higher than 32 (the default is 512). Support with CPU-only BLAS implementations doesn't affect the normal generation performance. We may see generation performance improvements with GPU-involved BLAS implementations, e.g. cuBLAS, hipBLAS. There are currently several different BLAS implementations available for build and use:
-
Accelerate Framework:
This is only available on Mac PCs and it's enabled by default. You can just build using the normal instructions.
-
OpenBLAS:
This provides BLAS acceleration using only the CPU. Make sure to have OpenBLAS installed on your machine.
-
Using
make: -
On Linux:
make GGML_OPENBLAS=1 -
On Windows:
- Download the latest fortran version of w64devkit.
- Download the latest version of OpenBLAS for Windows.
- Extract
w64devkiton your pc. - From the OpenBLAS zip that you just downloaded copy
libopenblas.a, located inside thelibfolder, insidew64devkit\x86_64-w64-mingw32\lib. - From the same OpenBLAS zip copy the content of the
includefolder insidew64devkit\x86_64-w64-mingw32\include. - Run
w64devkit.exe. - Use the
cdcommand to reach thellama.cppfolder. -
From here you can run:
make GGML_OPENBLAS=1
-
Using
CMakeon Linux:cmake -B build -DGGML_BLAS=ON -DGGML_BLAS_VENDOR=OpenBLAS cmake --build build --config Release
-
-
BLIS
Check BLIS.md for more information.
-
SYCL
SYCL is a higher-level programming model to improve programming productivity on various hardware accelerators.
llama.cpp based on SYCL is used to support Intel GPU (Data Center Max series, Flex series, Arc series, Built-in GPU and iGPU).
For detailed info, please refer to llama.cpp for SYCL.
-
Intel oneMKL
Building through oneAPI compilers will make avx_vnni instruction set available for intel processors that do not support avx512 and avx512_vnni. Please note that this build config does not support Intel GPU. For Intel GPU support, please refer to llama.cpp for SYCL.
-
Using manual oneAPI installation: By default,
GGML_BLAS_VENDORis set toGeneric, so if you already sourced intel environment script and assign-DGGML_BLAS=ONin cmake, the mkl version of Blas will automatically been selected. Otherwise please install oneAPI and follow the below steps:source /opt/intel/oneapi/setvars.sh # You can skip this step if in oneapi-basekit docker image, only required for manual installation cmake -B build -DGGML_BLAS=ON -DGGML_BLAS_VENDOR=Intel10_64lp -DCMAKE_C_COMPILER=icx -DCMAKE_CXX_COMPILER=icpx -DGGML_NATIVE=ON cmake --build build --config Release -
Using oneAPI docker image: If you do not want to source the environment vars and install oneAPI manually, you can also build the code using intel docker container: oneAPI-basekit. Then, you can use the commands given above.
Check Optimizing and Running LLaMA2 on Intel® CPU for more information.
-
-
CUDA
This provides GPU acceleration using the CUDA cores of your Nvidia GPU. Make sure to have the CUDA toolkit installed. You can download it from your Linux distro's package manager (e.g.
apt install nvidia-cuda-toolkit) or from here: CUDA Toolkit.For Jetson user, if you have Jetson Orin, you can try this: Offical Support. If you are using an old model(nano/TX2), need some additional operations before compiling.
- Using
make:make GGML_CUDA=1 - Using
CMake:
cmake -B build -DGGML_CUDA=ON
cmake --build build --config Release
The environment variable
CUDA_VISIBLE_DEVICEScan be used to specify which GPU(s) will be used. The following compilation options are also available to tweak performance:Option Legal values Default Description GGML_CUDA_FORCE_DMMV Boolean false Force the use of dequantization + matrix vector multiplication kernels instead of using kernels that do matrix vector multiplication on quantized data. By default the decision is made based on compute capability (MMVQ for 6.1/Pascal/GTX 1000 or higher). Does not affect k-quants. GGML_CUDA_DMMV_X Positive integer >= 32 32 Number of values in x direction processed by the CUDA dequantization + matrix vector multiplication kernel per iteration. Increasing this value can improve performance on fast GPUs. Power of 2 heavily recommended. Does not affect k-quants. GGML_CUDA_MMV_Y Positive integer 1 Block size in y direction for the CUDA mul mat vec kernels. Increasing this value can improve performance on fast GPUs. Power of 2 recommended. GGML_CUDA_FORCE_MMQ Boolean false Force the use of custom matrix multiplication kernels for quantized models instead of FP16 cuBLAS even if there is no int8 tensor core implementation available (affects V100, RDNA3). MMQ kernels are enabled by default on GPUs with int8 tensor core support. With MMQ force enabled, speed for large batch sizes will be worse but VRAM consumption will be lower. GGML_CUDA_FORCE_CUBLAS Boolean false Force the use of FP16 cuBLAS instead of custom matrix multiplication kernels for quantized models GGML_CUDA_F16 Boolean false If enabled, use half-precision floating point arithmetic for the CUDA dequantization + mul mat vec kernels and for the q4_1 and q5_1 matrix matrix multiplication kernels. Can improve performance on relatively recent GPUs. GGML_CUDA_KQUANTS_ITER 1 or 2 2 Number of values processed per iteration and per CUDA thread for Q2_K and Q6_K quantization formats. Setting this value to 1 can improve performance for slow GPUs. GGML_CUDA_PEER_MAX_BATCH_SIZE Positive integer 128 Maximum batch size for which to enable peer access between multiple GPUs. Peer access requires either Linux or NVLink. When using NVLink enabling peer access for larger batch sizes is potentially beneficial. GGML_CUDA_FA_ALL_QUANTS Boolean false Compile support for all KV cache quantization type (combinations) for the FlashAttention CUDA kernels. More fine-grained control over KV cache size but compilation takes much longer. - Using
-
hipBLAS
This provides BLAS acceleration on HIP-supported AMD GPUs. Make sure to have ROCm installed. You can download it from your Linux distro's package manager or from here: ROCm Quick Start (Linux).
- Using
make:make GGML_HIPBLAS=1 - Using
CMakefor Linux (assuming a gfx1030-compatible AMD GPU):HIPCXX="$(hipconfig -l)/clang" HIP_PATH="$(hipconfig -R)" \ cmake -S . -B build -DGGML_HIPBLAS=ON -DAMDGPU_TARGETS=gfx1030 -DCMAKE_BUILD_TYPE=Release \ && cmake --build build --config Release -- -j 16On Linux it is also possible to use unified memory architecture (UMA) to share main memory between the CPU and integrated GPU by setting
-DGGML_HIP_UMA=ON. However, this hurts performance for non-integrated GPUs (but enables working with integrated GPUs).
Note that if you get the following error:
clang: error: cannot find ROCm device library; provide its path via '--rocm-path' or '--rocm-device-lib-path', or pass '-nogpulib' to build without ROCm device libraryTry searching for a directory under
HIP_PATHthat contains the fileoclc_abi_version_400.bc. Then, add the following to the start of the command:HIP_DEVICE_LIB_PATH=<directory-you-just-found>, so something like:HIPCXX="$(hipconfig -l)/clang" HIP_PATH="$(hipconfig -p)" \ HIP_DEVICE_LIB_PATH=<directory-you-just-found> \ cmake -S . -B build -DGGML_HIPBLAS=ON -DAMDGPU_TARGETS=gfx1030 -DCMAKE_BUILD_TYPE=Release \ && cmake --build build -- -j 16-
Using
make(example for target gfx1030, build with 16 CPU threads):make -j16 GGML_HIPBLAS=1 GGML_HIP_UMA=1 AMDGPU_TARGETS=gfx1030 -
Using
CMakefor Windows (using x64 Native Tools Command Prompt for VS, and assuming a gfx1100-compatible AMD GPU):set PATH=%HIP_PATH%\bin;%PATH% cmake -S . -B build -G Ninja -DAMDGPU_TARGETS=gfx1100 -DGGML_HIPBLAS=ON -DCMAKE_C_COMPILER=clang -DCMAKE_CXX_COMPILER=clang++ -DCMAKE_BUILD_TYPE=Release cmake --build buildMake sure that
AMDGPU_TARGETSis set to the GPU arch you want to compile for. The above example usesgfx1100that corresponds to Radeon RX 7900XTX/XT/GRE. You can find a list of targets here Find your gpu version string by matching the most significant version information fromrocminfo | grep gfx | head -1 | awk '{print $2}'with the list of processors, e.g.gfx1035maps togfx1030.
The environment variable
HIP_VISIBLE_DEVICEScan be used to specify which GPU(s) will be used. If your GPU is not officially supported you can use the environment variable [HSA_OVERRIDE_GFX_VERSION] set to a similar GPU, for example 10.3.0 on RDNA2 (e.g. gfx1030, gfx1031, or gfx1035) or 11.0.0 on RDNA3. The following compilation options are also available to tweak performance (yes, they refer to CUDA, not HIP, because it uses the same code as the cuBLAS version above):Option Legal values Default Description GGML_CUDA_DMMV_X Positive integer >= 32 32 Number of values in x direction processed by the HIP dequantization + matrix vector multiplication kernel per iteration. Increasing this value can improve performance on fast GPUs. Power of 2 heavily recommended. Does not affect k-quants. GGML_CUDA_MMV_Y Positive integer 1 Block size in y direction for the HIP mul mat vec kernels. Increasing this value can improve performance on fast GPUs. Power of 2 recommended. Does not affect k-quants. GGML_CUDA_KQUANTS_ITER 1 or 2 2 Number of values processed per iteration and per HIP thread for Q2_K and Q6_K quantization formats. Setting this value to 1 can improve performance for slow GPUs. - Using
-
Vulkan
With docker:
You don't need to install Vulkan SDK. It will be installed inside the container.
# Build the image
docker build -t llama-cpp-vulkan -f .devops/llama-cli-vulkan.Dockerfile .

# Then, use it:
docker run -it --rm -v "$(pwd):/app:Z" --device /dev/dri/renderD128:/dev/dri/renderD128 --device /dev/dri/card1:/dev/dri/card1 llama-cpp-vulkan -m "/app/models/YOUR_MODEL_FILE" -p "Building a website can be done in 10 simple steps:" -n 400 -e -ngl 33
Without docker:
Firstly, you need to make sure you have installed Vulkan SDK
For example, on Ubuntu 22.04 (jammy), use the command below:
wget -qO - https://packages.lunarg.com/lunarg-signing-key-pub.asc | apt-key add -
wget -qO /etc/apt/sources.list.d/lunarg-vulkan-jammy.list https://packages.lunarg.com/vulkan/lunarg-vulkan-jammy.list
apt update -y
apt-get install -y vulkan-sdk
# To verify the installation, use the command below:
vulkaninfo
Alternatively your package manager might be able to provide the appropriate libraries. For example for Ubuntu 22.04 you can install
libvulkan-devinstead. For Fedora 40, you can installvulkan-devel,glslcandglslangpackages.Then, build llama.cpp using the cmake command below:
cmake -B build -DGGML_VULKAN=1
cmake --build build --config Release
# Test the output binary (with "-ngl 33" to offload all layers to GPU)
./bin/llama-cli -m "PATH_TO_MODEL" -p "Hi you how are you" -n 50 -e -ngl 33 -t 4

# You should see in the output, ggml_vulkan detected your GPU. For example:
# ggml_vulkan: Using Intel(R) Graphics (ADL GT2) | uma: 1 | fp16: 1 | warp size: 32
Prepare and Quantize
[!NOTE] You can use the GGUF-my-repo space on Hugging Face to quantise your model weights without any setup too. It is synced from
llama.cppmain every 6 hours.
To obtain the official LLaMA 2 weights please see the Obtaining and using the Facebook LLaMA 2 model section. There is also a large selection of pre-quantized gguf models available on Hugging Face.
Note: convert.py has been moved to examples/convert-legacy-llama.py and shouldn't be used for anything other than Llama/Llama2/Mistral models and their derivatives.
It does not support LLaMA 3, you can use convert-hf-to-gguf.py with LLaMA 3 downloaded from Hugging Face.
# obtain the official LLaMA model weights and place them in ./models
ls ./models
llama-2-7b tokenizer_checklist.chk tokenizer.model
# [Optional] for models using BPE tokenizers
ls ./models
<folder containing weights and tokenizer json> vocab.json
# [Optional] for PyTorch .bin models like Mistral-7B
ls ./models
<folder containing weights and tokenizer json>

# install Python dependencies
python3 -m pip install -r requirements.txt

# convert the model to ggml FP16 format
python3 convert-hf-to-gguf.py models/mymodel/

# quantize the model to 4-bits (using Q4_K_M method)
./llama-quantize ./models/mymodel/ggml-model-f16.gguf ./models/mymodel/ggml-model-Q4_K_M.gguf Q4_K_M

# update the gguf filetype to current version if older version is now unsupported
./llama-quantize ./models/mymodel/ggml-model-Q4_K_M.gguf ./models/mymodel/ggml-model-Q4_K_M-v2.gguf COPY
Run the quantized model
# start inference on a gguf model
./llama-cli -m ./models/mymodel/ggml-model-Q4_K_M.gguf -n 128
When running the larger models, make sure you have enough disk space to store all the intermediate files.
Running on Windows with prebuilt binaries
You will find prebuilt Windows binaries on the release page.
Simply download and extract the latest zip package of choice: (e.g. llama-b1380-bin-win-avx2-x64.zip)
From the unzipped folder, open a terminal/cmd window here and place a pre-converted .gguf model file. Test out the main example like so:
.\main -m llama-2-7b.Q4_0.gguf -n 128Memory/Disk Requirements
As the models are currently fully loaded into memory, you will need adequate disk space to save them and sufficient RAM to load them. At the moment, memory and disk requirements are the same.
| Model | Original size | Quantized size (Q4_0) |
|---|---|---|
| 7B | 13 GB | 3.9 GB |
| 13B | 24 GB | 7.8 GB |
| 30B | 60 GB | 19.5 GB |
| 65B | 120 GB | 38.5 GB |
Quantization
Several quantization methods are supported. They differ in the resulting model disk size and inference speed.
(outdated)
| Model | Measure | F16 | Q4_0 | Q4_1 | Q5_0 | Q5_1 | Q8_0 |
|---|---|---|---|---|---|---|---|
| 7B | perplexity | 5.9066 | 6.1565 | 6.0912 | 5.9862 | 5.9481 | 5.9070 |
| 7B | file size | 13.0G | 3.5G | 3.9G | 4.3G | 4.7G | 6.7G |
| 7B | ms/tok @ 4th | 127 | 55 | 54 | 76 | 83 | 72 |
| 7B | ms/tok @ 8th | 122 | 43 | 45 | 52 | 56 | 67 |
| 7B | bits/weight | 16.0 | 4.5 | 5.0 | 5.5 | 6.0 | 8.5 |
| 13B | perplexity | 5.2543 | 5.3860 | 5.3608 | 5.2856 | 5.2706 | 5.2548 |
| 13B | file size | 25.0G | 6.8G | 7.6G | 8.3G | 9.1G | 13G |
| 13B | ms/tok @ 4th | - | 103 | 105 | 148 | 160 | 131 |
| 13B | ms/tok @ 8th | - | 73 | 82 | 98 | 105 | 128 |
| 13B | bits/weight | 16.0 | 4.5 | 5.0 | 5.5 | 6.0 | 8.5 |
- k-quants
- recent k-quants improvements and new i-quants
- #2707
- #2807
- #4773 - 2-bit i-quants (inference)
- #4856 - 2-bit i-quants (inference)
- #4861 - importance matrix
- #4872 - MoE models
- #4897 - 2-bit quantization
- #4930 - imatrix for all k-quants
- #4951 - imatrix on the GPU
- #4969 - imatrix for legacy quants
- #4996 - k-qunats tuning
- #5060 - Q3_K_XS
- #5196 - 3-bit i-quants
- quantization tuning, another one, and another one
Perplexity (measuring model quality)
You can use the perplexity example to measure perplexity over a given prompt (lower perplexity is better).
For more information, see https://huggingface.co/docs/transformers/perplexity.
The perplexity measurements in table above are done against the wikitext2 test dataset (https://paperswithcode.com/dataset/wikitext-2), with context length of 512.
The time per token is measured on a MacBook M1 Pro 32GB RAM using 4 and 8 threads.
How to run
- Download/extract: https://huggingface.co/datasets/ggml-org/ci/resolve/main/wikitext-2-raw-v1.zip
- Run
./llama-perplexity -m models/7B/ggml-model-q4_0.gguf -f wiki.test.raw - Output:
perplexity : calculating perplexity over 655 chunks
24.43 seconds per pass - ETA 4.45 hours
[1]4.5970,[2]5.1807,[3]6.0382,...
And after 4.45 hours, you will have the final perplexity.
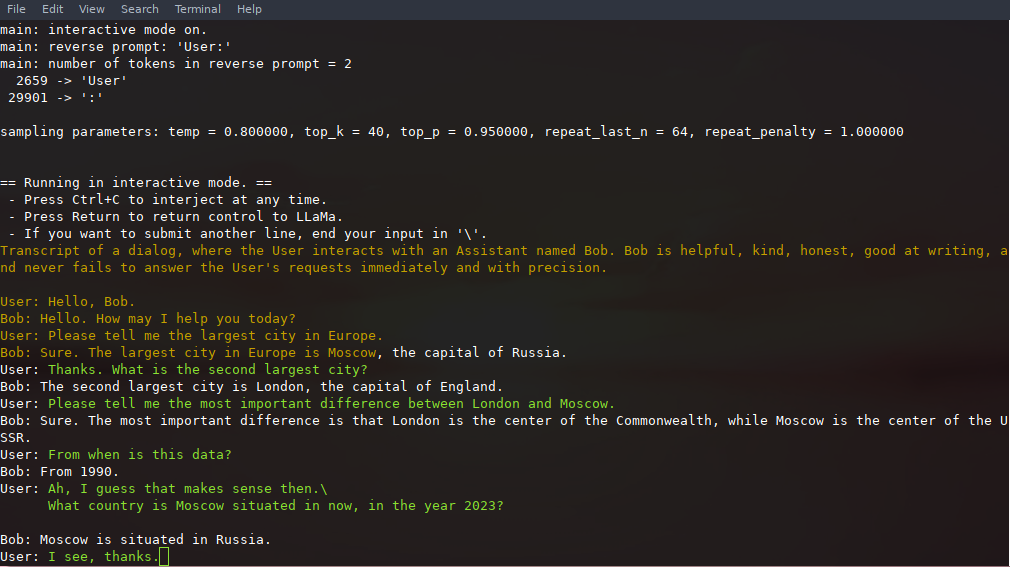
Interactive mode
If you want a more ChatGPT-like experience, you can run in interactive mode by passing -i as a parameter.
In this mode, you can always interrupt generation by pressing Ctrl+C and entering one or more lines of text, which will be converted into tokens and appended to the current context. You can also specify a reverse prompt with the parameter -r "reverse prompt string". This will result in user input being prompted whenever the exact tokens of the reverse prompt string are encountered in the generation. A typical use is to use a prompt that makes LLaMA emulate a chat between multiple users, say Alice and Bob, and pass -r "Alice:".
Here is an example of a few-shot interaction, invoked with the command
# default arguments using a 7B model
./examples/chat.sh

# advanced chat with a 13B model
./examples/chat-13B.sh

# custom arguments using a 13B model
./llama-cli -m ./models/13B/ggml-model-q4_0.gguf -n 256 --repeat_penalty 1.0 --color -i -r "User:" -f prompts/chat-with-bob.txt
Note the use of --color to distinguish between user input and generated text. Other parameters are explained in more detail in the README for the llama-cli example program.
Persistent Interaction
The prompt, user inputs, and model generations can be saved and resumed across calls to ./llama-cli by leveraging --prompt-cache and --prompt-cache-all. The ./examples/chat-persistent.sh script demonstrates this with support for long-running, resumable chat sessions. To use this example, you must provide a file to cache the initial chat prompt and a directory to save the chat session, and may optionally provide the same variables as chat-13B.sh. The same prompt cache can be reused for new chat sessions. Note that both prompt cache and chat directory are tied to the initial prompt (PROMPT_TEMPLATE) and the model file.
# Start a new chat
PROMPT_CACHE_FILE=chat.prompt.bin CHAT_SAVE_DIR=./chat/default ./examples/chat-persistent.sh

# Resume that chat
PROMPT_CACHE_FILE=chat.prompt.bin CHAT_SAVE_DIR=./chat/default ./examples/chat-persistent.sh

# Start a different chat with the same prompt/model
PROMPT_CACHE_FILE=chat.prompt.bin CHAT_SAVE_DIR=./chat/another ./examples/chat-persistent.sh

# Different prompt cache for different prompt/model
PROMPT_TEMPLATE=./prompts/chat-with-bob.txt PROMPT_CACHE_FILE=bob.prompt.bin \
    CHAT_SAVE_DIR=./chat/bob ./examples/chat-persistent.sh
Constrained output with grammars
llama.cpp supports grammars to constrain model output. For example, you can force the model to output JSON only:
./llama-cli -m ./models/13B/ggml-model-q4_0.gguf -n 256 --grammar-file grammars/json.gbnf -p 'Request: schedule a call at 8pm; Command:'The grammars/ folder contains a handful of sample grammars. To write your own, check out the GBNF Guide.
For authoring more complex JSON grammars, you can also check out https://grammar.intrinsiclabs.ai/, a browser app that lets you write TypeScript interfaces which it compiles to GBNF grammars that you can save for local use. Note that the app is built and maintained by members of the community, please file any issues or FRs on its repo and not this one.
Obtaining and using the Facebook LLaMA 2 model
- Refer to Facebook's LLaMA download page if you want to access the model data.
- Alternatively, if you want to save time and space, you can download already converted and quantized models from TheBloke, including:
Seminal papers and background on the models
If your issue is with model generation quality, then please at least scan the following links and papers to understand the limitations of LLaMA models. This is especially important when choosing an appropriate model size and appreciating both the significant and subtle differences between LLaMA models and ChatGPT:
- LLaMA:
- GPT-3
- GPT-3.5 / InstructGPT / ChatGPT:
Android
Build on Android using Termux
Termux is a method to execute llama.cpp on an Android device (no root required).
apt update && apt upgrade -y
apt install git make cmake
It's recommended to move your model inside the ~/ directory for best performance:
cd storage/downloads
mv model.gguf ~/
Get the code & follow the Linux build instructions to build llama.cpp.
Building the Project using Android NDK
Obtain the Android NDK and then build with CMake.
Execute the following commands on your computer to avoid downloading the NDK to your mobile. Alternatively, you can also do this in Termux:
$ mkdir build-android
$ cd build-android
$ export NDK=<your_ndk_directory>
$ cmake -DCMAKE_TOOLCHAIN_FILE=$NDK/build/cmake/android.toolchain.cmake -DANDROID_ABI=arm64-v8a -DANDROID_PLATFORM=android-23 -DCMAKE_C_FLAGS=-march=armv8.4a+dotprod ..
$ make
Install termux on your device and run termux-setup-storage to get access to your SD card (if Android 11+ then run the command twice).
Finally, copy these built llama binaries and the model file to your device storage. Because the file permissions in the Android sdcard cannot be changed, you can copy the executable files to the /data/data/com.termux/files/home/bin path, and then execute the following commands in Termux to add executable permission:
(Assumed that you have pushed the built executable files to the /sdcard/llama.cpp/bin path using adb push)
$cp -r /sdcard/llama.cpp/bin /data/data/com.termux/files/home/
$cd /data/data/com.termux/files/home/bin
$chmod +x ./*
Download model llama-2-7b-chat.Q4_K_M.gguf, and push it to /sdcard/llama.cpp/, then move it to /data/data/com.termux/files/home/model/
$mv /sdcard/llama.cpp/llama-2-7b-chat.Q4_K_M.gguf /data/data/com.termux/files/home/model/Now, you can start chatting:
$cd /data/data/com.termux/files/home/bin
$./llama-cli -m ../model/llama-2-7b-chat.Q4_K_M.gguf -n 128 -cml
Here's a demo of an interactive session running on Pixel 5 phone:
https://user-images.githubusercontent.com/271616/225014776-1d567049-ad71-4ef2-b050-55b0b3b9274c.mp4
Docker
Prerequisites
- Docker must be installed and running on your system.
- Create a folder to store big models & intermediate files (ex. /llama/models)
Images
We have three Docker images available for this project:
ghcr.io/ggerganov/llama.cpp:full: This image includes both the main executable file and the tools to convert LLaMA models into ggml and convert into 4-bit quantization. (platforms:linux/amd64,linux/arm64)ghcr.io/ggerganov/llama.cpp:light: This image only includes the main executable file. (platforms:linux/amd64,linux/arm64)ghcr.io/ggerganov/llama.cpp:server: This image only includes the server executable file. (platforms:linux/amd64,linux/arm64)
Additionally, there the following images, similar to the above:
ghcr.io/ggerganov/llama.cpp:full-cuda: Same asfullbut compiled with CUDA support. (platforms:linux/amd64)ghcr.io/ggerganov/llama.cpp:light-cuda: Same aslightbut compiled with CUDA support. (platforms:linux/amd64)ghcr.io/ggerganov/llama.cpp:server-cuda: Same asserverbut compiled with CUDA support. (platforms:linux/amd64)ghcr.io/ggerganov/llama.cpp:full-rocm: Same asfullbut compiled with ROCm support. (platforms:linux/amd64,linux/arm64)ghcr.io/ggerganov/llama.cpp:light-rocm: Same aslightbut compiled with ROCm support. (platforms:linux/amd64,linux/arm64)ghcr.io/ggerganov/llama.cpp:server-rocm: Same asserverbut compiled with ROCm support. (platforms:linux/amd64,linux/arm64)
The GPU enabled images are not currently tested by CI beyond being built. They are not built with any variation from the ones in the Dockerfiles defined in .devops/ and the GitHub Action defined in .github/workflows/docker.yml. If you need different settings (for example, a different CUDA or ROCm library, you'll need to build the images locally for now).
Usage
The easiest way to download the models, convert them to ggml and optimize them is with the --all-in-one command which includes the full docker image.
Replace /path/to/models below with the actual path where you downloaded the models.
docker run -v /path/to/models:/models ghcr.io/ggerganov/llama.cpp:full --all-in-one "/models/" 7BOn completion, you are ready to play!
docker run -v /path/to/models:/models ghcr.io/ggerganov/llama.cpp:full --run -m /models/7B/ggml-model-q4_0.gguf -p "Building a website can be done in 10 simple steps:" -n 512or with a light image:
docker run -v /path/to/models:/models ghcr.io/ggerganov/llama.cpp:light -m /models/7B/ggml-model-q4_0.gguf -p "Building a website can be done in 10 simple steps:" -n 512or with a server image:
docker run -v /path/to/models:/models -p 8000:8000 ghcr.io/ggerganov/llama.cpp:server -m /models/7B/ggml-model-q4_0.gguf --port 8000 --host 0.0.0.0 -n 512Docker With CUDA
Assuming one has the nvidia-container-toolkit properly installed on Linux, or is using a GPU enabled cloud, cuBLAS should be accessible inside the container.
Building Locally
docker build -t local/llama.cpp:full-cuda -f .devops/full-cuda.Dockerfile .
docker build -t local/llama.cpp:light-cuda -f .devops/llama-cli-cuda.Dockerfile .
docker build -t local/llama.cpp:server-cuda -f .devops/llama-server-cuda.Dockerfile .
You may want to pass in some different ARGS, depending on the CUDA environment supported by your container host, as well as the GPU architecture.
The defaults are:
CUDA_VERSIONset to11.7.1CUDA_DOCKER_ARCHset toall
The resulting images, are essentially the same as the non-CUDA images:
local/llama.cpp:full-cuda: This image includes both the main executable file and the tools to convert LLaMA models into ggml and convert into 4-bit quantization.local/llama.cpp:light-cuda: This image only includes the main executable file.local/llama.cpp:server-cuda: This image only includes the server executable file.
Usage
After building locally, Usage is similar to the non-CUDA examples, but you'll need to add the --gpus flag. You will also want to use the --n-gpu-layers flag.
docker run --gpus all -v /path/to/models:/models local/llama.cpp:full-cuda --run -m /models/7B/ggml-model-q4_0.gguf -p "Building a website can be done in 10 simple steps:" -n 512 --n-gpu-layers 1
docker run --gpus all -v /path/to/models:/models local/llama.cpp:light-cuda -m /models/7B/ggml-model-q4_0.gguf -p "Building a website can be done in 10 simple steps:" -n 512 --n-gpu-layers 1
docker run --gpus all -v /path/to/models:/models local/llama.cpp:server-cuda -m /models/7B/ggml-model-q4_0.gguf --port 8000 --host 0.0.0.0 -n 512 --n-gpu-layers 1
Contributing
- Contributors can open PRs
- Collaborators can push to branches in the
llama.cpprepo and merge PRs into themasterbranch - Collaborators will be invited based on contributions
- Any help with managing issues and PRs is very appreciated!
- Make sure to read this: Inference at the edge
- A bit of backstory for those who are interested: Changelog podcast
Coding guidelines
- Avoid adding third-party dependencies, extra files, extra headers, etc.
- Always consider cross-compatibility with other operating systems and architectures
- Avoid fancy looking modern STL constructs, use basic
forloops, avoid templates, keep it simple - There are no strict rules for the code style, but try to follow the patterns in the code (indentation, spaces, etc.). Vertical alignment makes things more readable and easier to batch edit
- Clean-up any trailing whitespaces, use 4 spaces for indentation, brackets on the same line,
void * ptr,int & a - See good first issues for tasks suitable for first contributions
- Tensors store data in row-major order. We refer to dimension 0 as columns, 1 as rows, 2 as matrices
- Matrix multiplication is unconventional:
C = ggml_mul_mat(ctx, A, B)means $C^T = A B^T \Leftrightarrow C = B A^T.$
