Merkury 720 Smart Home Camera root and customization
This project contains information and files to Root(hack) and Customize the Merkury 720P and similar cameras (i.e. geeni, teco, etc) running older 2.7.x firmware.
NOTICE: Firmware 2.7.6 and newer, 2.10.x and newer and 4.0.x have port 80 closed by default -- so to use the http://admin:05656... links below you have to RIGHT CLICK this link: https://github.com/guino/Merkury720/raw/main/ppsFactoryTool.txt select "Save as.." and save this file to the root of the SD card. EDIT the file (do NOT create it new and do NOT copy/paste the contents of it) and modify only the ssid and password (The file requires specific format to work). When the device detects the file (in the right format) it will disconnect and re-connect the wifi (to the wifi specified) and will OPEN port 80 (or port 8090 for 4.0.x) so the http://admin:05656... links work.
You can check the current camera firmware in the app (tuya/geeni/smart life/etc) or with this URL (some users report no http response on their device, but you can still try the steps below):
http://admin:056565099@IP/devices/deviceinfo (on 4.0.x use http://admin:056565099@IP:8090/devices/deviceinfo)
If you have firmware 2.9.x then chances are the information HERE will work for you.
If you have firmware 4.0.x then the information below can be used but there are different files you have to download from HERE
NOTE: If you know your camera is similar OR it's a TUYA camera, you may try this process even if you get no response from the deviceinfo URL -- there's still a chance it will work but you'll have to check your SD card after the process is done to see if a 'hack' file was created in the SD card.
Background
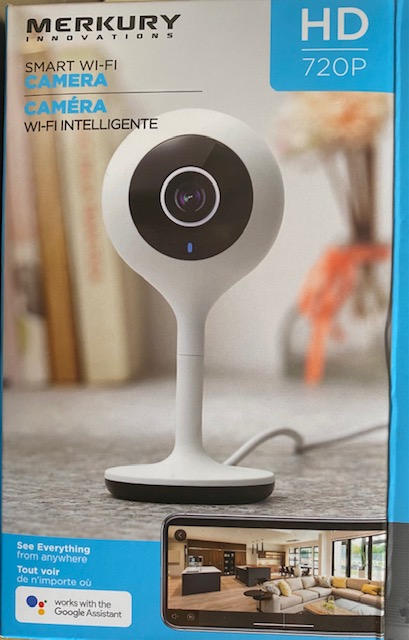
I got this cheap camera at walmart for CAD$25 because I already was familiar with a similar product (https://github.com/guino/BazzDoorbell) so it works in the same app and has similar features/structure which would hopefully allow me to root and customize (and with some effort it worked out).
Here's what the device looks like:
Hardware
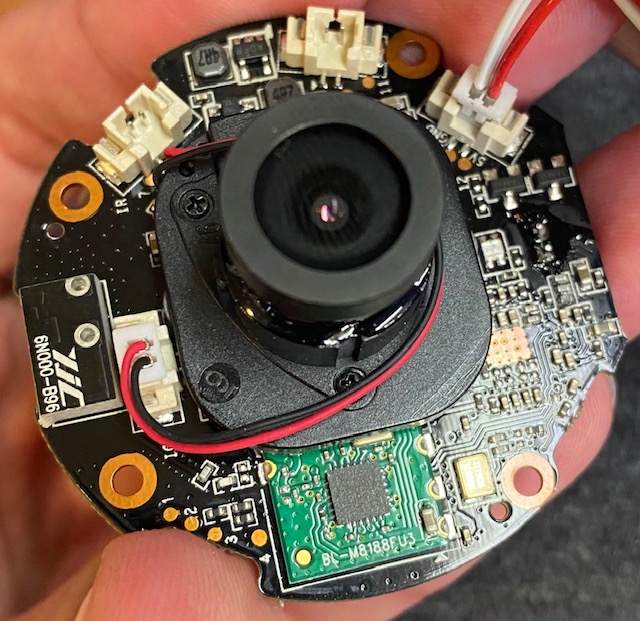
This is an older hardware which is ok for a 720P resolution but it boots slower, and runs slower overall. As far as physical aspects the quality seems fine for the price range. This is one of the easiest devices to open I have ever seen -- no screws, just use a plastic pry tool (like those used with cell phones) and the back cover pops right-off revealing the board. There's no need for you to open the device with the root/hack files provided but here's what it looks like inside:
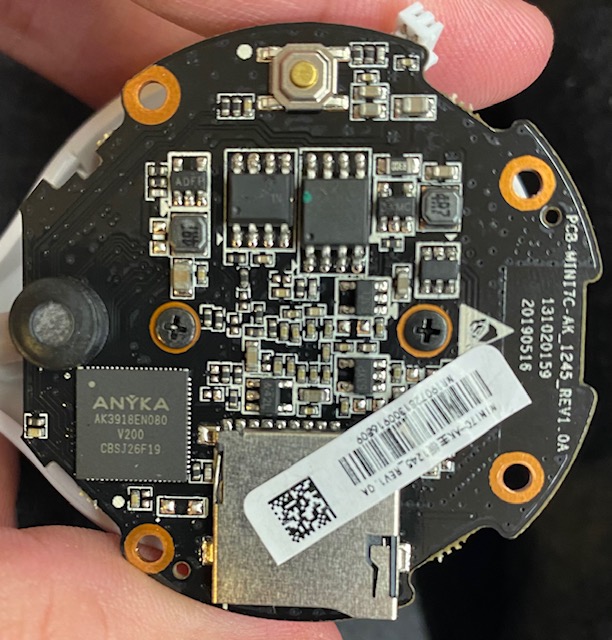
The UART port is thru the pads marked 1, 2, 3 and 4 (1=3.3v, 2/3=RX/TX, 4=GND) -- I only used 2,3 and 4 when playing with the UART.
WARNING: this board is very fragile so if you're going to solder wires on these pads I recommend some hot-glue to hold the wires in place without pulling on the pads or they will come right off the board. You don't need to use the UART with the files provided.
At last, here's the flash chip which would be used to read/write the flash with a programmer:
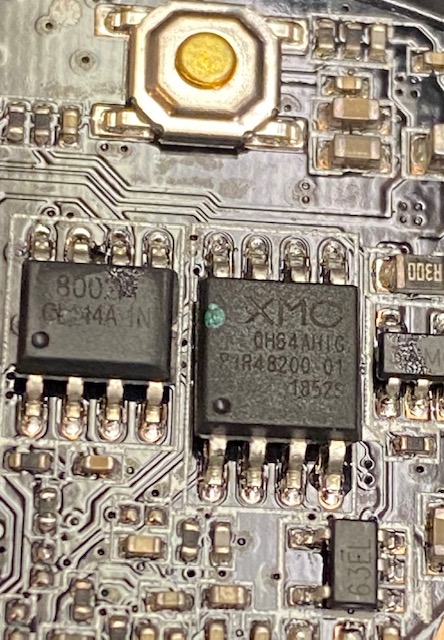
The XMC flash chip is the same used on the BazzDoorBell project (which has a PDF for it).
I verified and you only need to disconnect PIN 6 to read the flash (I didn't try to write it but I'd expect it to work as it does on the other/similar device).
WARNING: this board is very fragile so I highly discourage messing with the pins/flash chip unless you're very experienced and have the right tools to work with surface mount chips. I am experienced but without the right tools I in fact damaged my board. Again with the files provided here there's no need to use a programmer.
Rooting and customizng the device
The process was made very simple, and should be farily safe (even if you mess things up the device should still work normally), here are the steps:
- Clone/download the files in the project
- Copy all files under the mmc directory to the root of a FAT32 formated SD Card. SEPARATELY download busybox from HERE into the root of the SD card -- it should have 1109128 bytes.
- Properly eject/unmount the SD card from the computer and insert into the Camera while powered off.
- Hold the RESET button while powering on the device, you can let go of the reset button after 5 seconds but let the device boot completely as a confirmation that the process was not interrupted
- Open this URL: http://admin:056565099@IP/proc/cmdline -- it should look like this:
mem=64M console=ttySAK0,115200n8 mtdparts=spi0.0:256k(bld)ro,64k(env)ro,64k(enc)ro,64k(sysflg)ro,2496k(sys),4608k(app),640k(cfg) ppsAppParts=5 ip=0 - ip=30;/mnt/mmc01/initrun.sh)&:::::;date>/tmp/hack;(sleep - If you don't see the last part after - ip=30... then the hack did not work and your camera should work normally (not rooted). I had this happen when testing with a ATP (Industrial grade) SD card but everything worked fine with a cheap/crappy Samsung Evo 32GB SD card, so you can try again with different cards. It has also been reported that using different tools to partition/format the SD card may help in making this work.
- Open this URL: http://admin:056565099@IP/proc/self/root/mnt/mmc01/hack it should say 'done' indicating the hack worked (you may also just remove the SD card and check for a 'hack' file and 'home' directory indicating it worked (some users report no http response on their device).
- Power off the device and take the SD card to a computer, you should find your ppsapp under home/app/ so you can look for a patch to enable RTSP HERE OR (for more savvy users) you can patch it yourself with instructions HERE -- if you do make a patch please post it in the first link so others can use it too. Place the patched ppsapp in the root of the SD card so it is loaded the next time you boot the device with the SD card in it.
- For telnet access: either set the password hash in the passwd file (get a hash here using the calculate 'DES' button and copy the value) OR add
-l /bin/shto the telnetd line in custom.sh (for no password) - For snap.cgi and mjpeg.cgi to work you'll need to adjust the address in these files (as provided with the patch file) -- the address on the default files is from my camera as provided HERE. The URL to view these will be http://user:password@IP:8080/cgi-bin/snap.cgi and http://user:password@IP:8080/cgi-bin/mjpeg.cgi -- you can set the user:password in httpd.conf (the password here is NOT a hash, it is just plain text).
NOTES:
- There's no need to "remove" the root/hack -- if you boot the device without a SD card (or scripts) it should work normally, just without the root/customizations.
- This is a very slow device so it is normal to hear the start up sound 2 times (one for ppsapp from the flash and one from the modified one in SD card).
- FIXED ~Due to the slowness the snap/mjpeg images will often display artifacts due to the device constantly updating the images (slowly) while we read it. It should be fine for simple preview but for perfect quality you should use the RTSP stream~
- It has been reported that VLC for MAC has issues playing the RTSP streams from these devices (so try different devices/applications if you have issues with VLC on MAC).
- It has also been reported that the default VLC playback is over UDP and causes the camera to use a lot of CPU/resources and causes it to reboot in about 13 minutes of viewing the RTSP feed. You can fix this by starting VLC like this
vlc --rtsp-tcp rtsp://ip:8554OR you can go into VLC settings and selecting RTP over RTSP (TCP) : Click 'Tools > Preferences > Input / Codecs and select 'RTP over RTSP (TCP)' at the bottom, them click 'Save'. - The device will erase files from the SD card if the free space is low -- so I recommend running the cleanup.cgi script daily to prevent your files from being deleted (which would cause the root/customizations to go away) OR you can alternatively disable recording. The cleanup.cgi script needs to be adjusted with your devices SERIAL number and number of days to keep files. The last 5 lines in custom.sh will execute the cleanup.cgi script once-a-day as provided, you can remove the last 5 lines if you don't want that to happen.
- You should never run ppsapp from a different version on your device -- this may brick it.
- I recommend reading the information/process/notes on https://github.com/guino/BazzDoorbell/issues/2 as most of the stuff in there is also valid for this device and may help you run the device better. Some customizations such as offline/mqtt/etc may also be possible for this device (just look at the issues under the BazzDoorBell project).
- If you'd like help patching your ppsapp , please feel free to post it HERE along with the firmware, hardware and model information from http://admin:056565099@IP/devices/deviceinfo for your device.
- I could not find an option in the tuya app to set this device to record only on motion but it was easy to telnet into it and modify /home/cfg/tuya_config.json to set "enable_event_record": 1 which did the trick (same as my other device). This may go away if you change settings in the app but there's nothing I can change on mine. You can remove the # from the line
#/mnt/mmc01/set enable_event_record 1in custom.sh to set motion-only recording OR you can disable recording entirely by removing the # from the line#/mnt/mmc01/set record_enable 0in custom.sh - It is possible that different hardware/firmware/SD card brands may cause the device to boot slower than normal which could cause the initrun.sh script not to run after the SD card is mounted. What you can try in that case is to change the 30 in the env file (hack= line) to 60 and repeat step 4. After booting verify that the cmd line changed to 60 where it was 30, then wait 1-2 mins after booting and see if the script ran (step 7). You could also try a different SD card to see if makes any difference. On my tests/device/SD card the script always ran but this hack has no way to 'monitor' the SD card mount status (it just waits and hopes it's ready).
- It is possible that a similar device with different firmware/hardware may use a different bootloader address in which case you could try the file in this post to 'force' the address to load the new bootloader settings. This should be safe to try/use on any device (worst case it just won't don anything).
If you'd like to buy me a beer/coffee in appreciation of the effort I put in to make the above possible, feel free to:
cash app: $wbbo
Enjoy!