Purpose
The purpose of this project is to connect a telescope to a computer through the mount guide port (ST-4 port) using an arduino. This is similar to GPUSB.
The ST-4 Port is present on some computerized mounts and it is easy to add one to motorized mounts like the EQ3 / EQ4 / EQ5. Refer to this for other mounts modifications.
Building your own ST-4 adapter costs less than available commercial solutions (~6 USD) and on the top of providing autoguiding, the custom driver also has a working GOTO functionality.
Functionalities
Autoguiding and GOTO are supported, this allows the telescope to be used for astrophotography using PHD or for finding objects in the sky with a software like stellarium or cartes du ciel.
GOTO will require a good polar alignment in order to have acceptable accuracy.
The slewing speed will be limited by the mount maximal speed.
Implementation
The project has 3 main components:
- The hardware
- The arduino software
- The ASCOM driver
Getting started
Building the hardware
The hardware is built from off the shelf cheap components, you can buy them from ebay:
- An arduino with an USB port (I used the Nano v3 clone since it is cheap and small).
- An optocoupler (I used the TLP521-4).
- A RJ12 socket.
- A RJ12 straight cable (6P6C).
- A bunch of 100 Ohm resistors to protect the optocoupler leds (it works without those as well)
The connection between the components is as below:
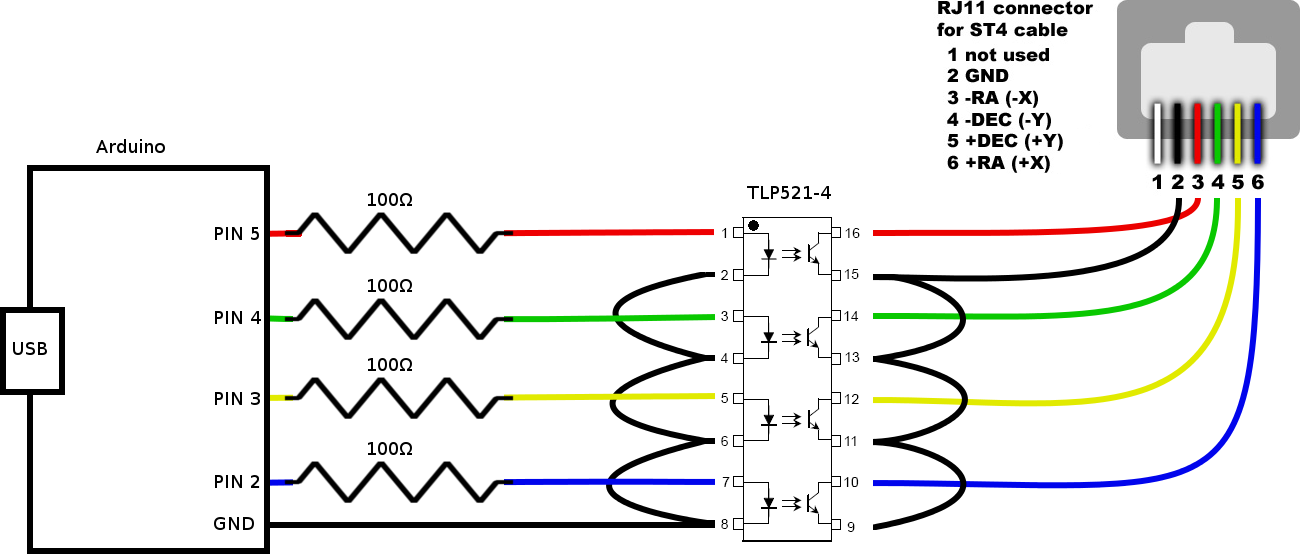
Be careful not to invert GND with some other pins.
Please note that some mounts may have a different pinout for ST-4.
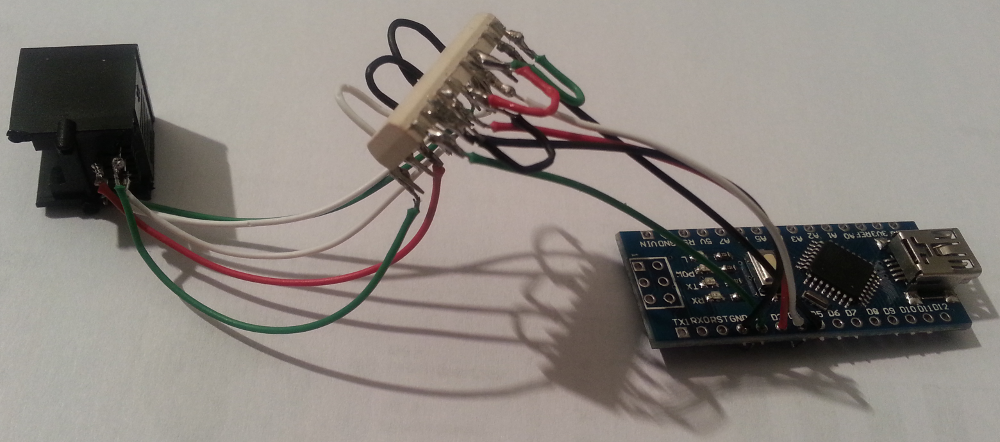
My first version looked like this (quick and dirty solders, very fragile!):
It is also possible to avoid buying the RJ12 cable and the connector by soldering the optocoupler directly to the mount controler.
Flashing the arduino
Once the hardware is built, you have to upload the code to the arduino.
- Download the arduino IDE
- Download the firmware
- Connect your arduino to your PC, open the downloaded .ino file with the IDE and click on the upload button (there are plenty of tutorials on the internet describing how to upload code to an arduino if you need more details)
At this point, you should be able to send commands to the arduino through the serial monitor of the IDE and to test if you can control you telescope axes (bitrate is 57.6k, if you see garbled output, you might want to check this).
Accepted commands are:
| Command | Action |
|---|---|
| CONNECT# | Stop all the moves and light up the arduino LED |
| RA+# | Start moving right ascension axis towards upper position |
| RA-# | Start moving right ascension axis towards lower position |
| RA0# | Stop moving right ascension axis |
| DEC+# | Start moving declination axis towards upper position |
| DEC-# | Start moving declination axis towards lower position |
| DEC0# | Stop moving declination axis |
| DISCONNECT# | Stop all the moves and shut down the arduino LED |
The arduino should respond "OK#" to all the commands above. The commands should all end with #.
If the telescope is not behaving as expected, check your connections, you may have inverted some cables.
Installing the ASCOM driver
First, please check that the ASCOM platform v6.0 (or higher) is installed on your computer.
Then download and run the installer: https://github.com/kevinferrare/arduino-st4/releases/download/1.0/ArduinoST4.Setup.exe
Configuring the driver
- Open any software you would like to use with your telescope (for example cartes du ciel or PHD)
- Open the connection dialog
- Select the "ArduinoST4 telescope driver"
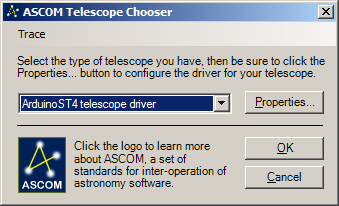
If you couldn't find it, there was a problem with the driver installation.
- Click on "Properties" to configure it
- Put in com port the name of the port on which the arduino is connected
- Modify if needed the different slewing rates in order to match the axis rates of the mount (multiple of sideral rate, 1X = earth rotation rate).

The default settings work fine for my EQ5 mount with the speed switch on the 8X position.
Please note that RA+ and RA- value is not 8, this is because of the earth rotation. Your mount may compensate for this or not.
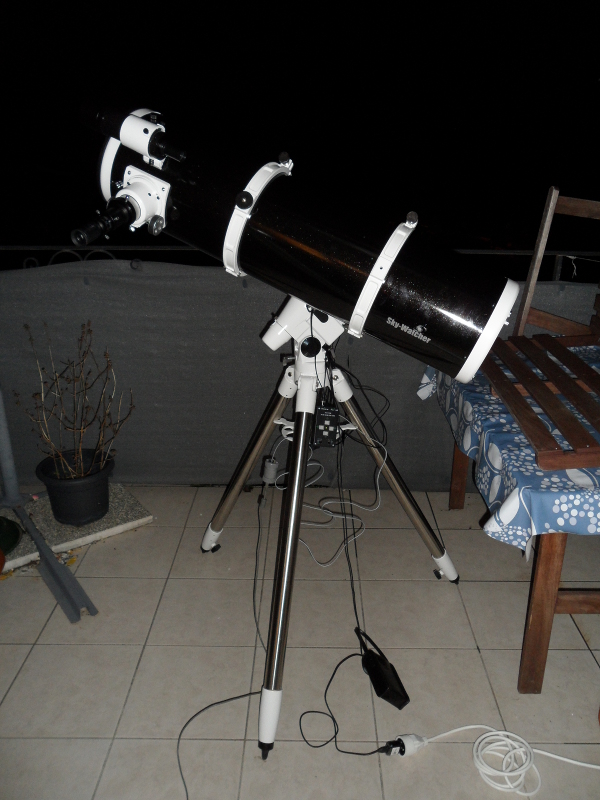
Everything plugged in:
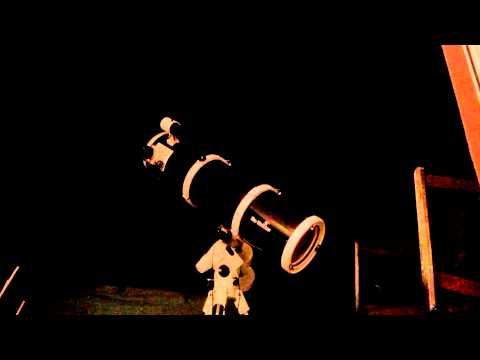
Video of the telescope slewing:
Usage notes
Autoguiding should work just fine.
GOTO will be slow, going from andromeda to the pleiades takes 20 minutes with 8X speed. When searching for an object, it is faster to point the telescope to a known position that is close and to slew from there.
If the polar alignment is good, GOTO will be precise enough. Most of the times, the object is right in the center of the eyepiece :)
Stellarium does not support ASCOM out of the box, it is thus necessary to install an ASCOM<->Stellarium bridge like Stellariumscope.
Indi driver
Thanks to Stephan for implementing a basic indi driver that can do autoguiding.
Todo
- Write a complete indi driver.
- Cleanup ASCOM boilerplate (API had to be implemented through trial and error due to lack of details in documentation).
- Test the driver on more configurations, especially windows 32 bits.
- Implement a way to do a meridian flip (Easiest way would be to do it in the ASCOM driver)
License
This project is licensed under the GNU LGPL v3