fast-artistic-videos
This is the source code for fast video style transfer described in
Artistic style transfer for videos and spherical images
Manuel Ruder,
Alexey Dosovitskiy,
Thomas Brox
The paper builds on A Neural Algorithm of Artistic Style by Gatys et al. and Perceptual Losses for Real-Time Style Transfer and Super-Resolution by Johnson et al. and our code is based on Johnson's implementation fast-neural-style.
It is a successor of our previous work Artistic style transfer for videos and runs several orders of magnitudes faster.
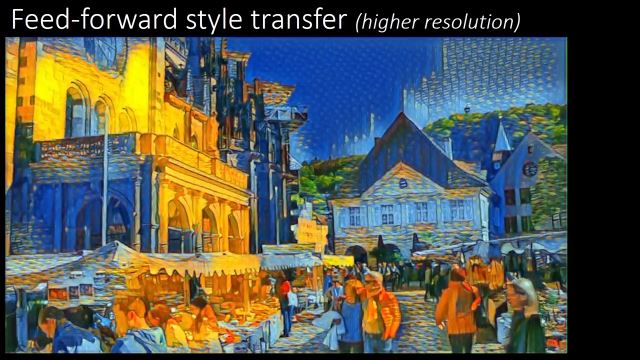
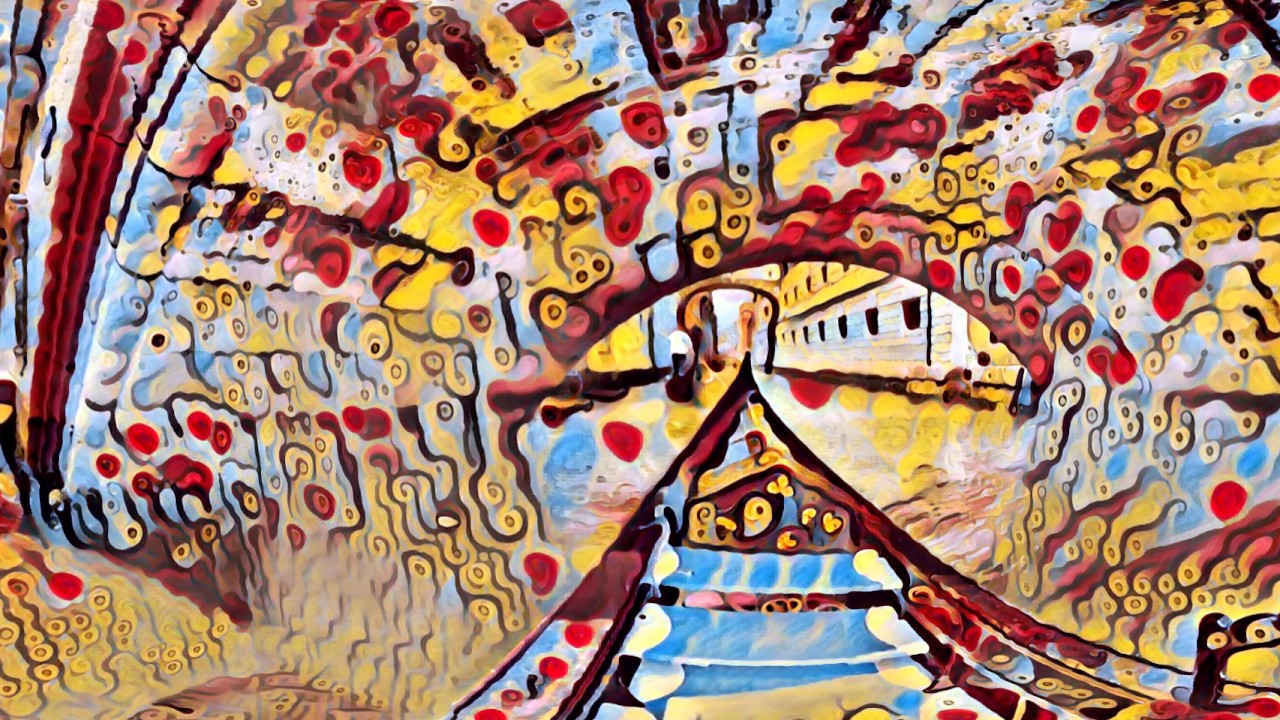
Example videos:
Comparison between the optimization-based and feed-forward approach:
360° video:
If you find this code useful for your research, please cite
@Article{RDB18,
  author       = "M. Ruder and A. Dosovitskiy and T. Brox",
  title        = "Artistic style transfer for videos and spherical images",
  journal      = "International Journal of Computer Vision",
  month        = " ",
  year         = "2018",
  note         = "online first",
  url          = "http://lmb.informatik.uni-freiburg.de/Publications/2018/RDB18"
}
Table of contents
Setup
Disclaimer: Please note that this repository is no longer actively developed. Furthermore, the framework it uses, torch, is not maintained anymore and probably incompatible with most recent software environments. I have collected possible workarounds at the bottom of this chapter, however, there is neither a guarantee that this will work nor will there be any support from my side to get this code to run on recent environments.
First install Torch, then update / install the following packages:
luarocks install torch
luarocks install nn
luarocks install image
luarocks install lua-cjson
luarocks install hdf5
(Optional) GPU Acceleration
If you have an NVIDIA GPU, you can accelerate all operations with CUDA.
First install CUDA, then update / install the following packages:
luarocks install cutorch
luarocks install cunn
Also install stnbhwd (GPU accelerated warping) included in this repository:
cd stnbhwd
luarocks make stnbdhw-scm-1.rockspec
For CUDA version 9.0 and later, you must adapt the arch flag in CMakeLists.txt at line 55 to your GPU and CUDA version.
If you can not get stnbhwd to run but you want to use GPU acceleration at least for the stylization, remove all instances of require 'stn' from the code and edit the warp_image function in utilities.lua and remove everything in that function but line 147.
(Optional) cuDNN
When using CUDA, you can use cuDNN to accelerate convolutions and reduce memory footprint.
First download cuDNN and copy the
libraries to /usr/local/cuda/lib64/. Then install the Torch bindings for cuDNN:
luarocks install cudnnWorkarounds for installing with recent Ubuntu / CUDA / cuDNN version
Some were able to fix erroneous results by downgrading torch, others by downgrading CUDA.
But what worked for me and also fixes some incompatibilities (Ubuntu 18.04, CUDA10, cuDNN7) was this fix.
Also for CUDA10, you need this fix.
And for Ubuntu 18.04 in order to install and use hdf5, you need this fix.
Optical flow estimator
Our algorithm needs an utility which estimates the optical flow between two images. Since our new stylization algorithm only needs a fraction of the time compared to the optimization-based approach, the optical flow estimator can become the bottleneck. Hence the choice of a fast optical flow estimator is crucial for near real time execution.
There are example scripts in our repository for either DeepFlow or FlowNet 2.0. DeepFlow is slower but comes as a standalone executable and is therefore very easy to install. Faster execution times can be reached with FlowNet 2.0 which runs on a GPU as well, given you have a sufficient fast GPU. FlowNet 2.0 was used for the experiments in our paper.
DeepFlow setup instructions
Just download both DeepFlow and DeepMatching (CPU version) and place the static binaries (deepmatching-static and deepflow2-static) in the root directory of this repository.
FlowNet 2.0 setup instructions
Go to flownet2 (GitHub) and follow the instructions there on how to download, compile and use the source code and pretrained models. Since FlowNet is build upon Caffe, you may also want to read Caffe | Installation for a list of dependencies. There is also a Dockerfile for easy installation of the complete code in one step: flownet2-docker (GitHub)
Then edit run-flownet-multiple.sh and set the paths to the FlowNet executable, model definition and pretrained weights.
If you have struggles installing Caffe, there is also a TensorFlow implementation: FlowNet2 (TensorFlow). However, you will have to adapt the scripts in this repository accordingly.
Please don't ask me for support installing FlowNet 2.0. Ask the original authors or use DeepFlow.
Pretrained Models
Download all pretrained video style transfer models by running the script
bash models/download_models.shThis will download 6 video model and 6 image model files (~300MB) to the folder models/.
You can download pretrained spherical video models with download_models_vr.sh, it will download 2 models (~340MB). These models are larger because they have more filters. We later found that less filters can archive similar performance, but didn't retrain the spherical video models.
Running on new videos
Example script
You can use the scripts stylizeVideo_*.sh <path_to_video> <path_to_video_model> [<path_to_image_model>] to easily stylize videos using pretrained models. Choose one of the optical flow methods and specify one of the models we provide, see above. If image model is not specified, it will use the video model to generate the first frame (by marking everything as occluded). It will do all the preprocessing steps for you. For longer videos, make sure to have enough disk space available. This script will extract the video into uncompressed image files.
Advanced usage
For advances users, videos can be stylized with fast_artistic_videos.lua.
You must specify the following options:
model_vidPath to a pretrained video model.model_imgPath to a separate pretrained image model which will be used to stylize the first frame, or 'self', if the video model should be used for this (the whole scene will be marked as uncertain in this case)input_patternFile path pattern of the input frames, e.g.video/frame_%04d.pngflow_patternA file path pattern for files that store the backward flow between the frames. The placeholder in square brackets refers to the frame position where the optical flow starts and the placeholder in braces refers to the frame index where the optical flow points to. For exampleflow_[%02d]_{%02d}.flomeans the flow files are named flow_02_01.flo, flow_0302.flo, etc. If you use the script included in this repository (makeOptFlow.sh), the filename pattern will be `backward[%d]_{%d}.flo`.occlusions_patternA file path pattern for the occlusion maps between two frames. These files should be a grey scale image where a white pixel indicates a high flow weight and a black pixel a low weight, respective. Same format as above. If you use the script, the filename pattern will bereliable_[%d]_{%d}.pgm.output_prefixFile path prefix of the output, e.g.stylized/out. Files will then be namedstylized/out-00001.pngetc.
By default, this script runs on CPU; to run on GPU, add the flag -gpu
specifying the GPU on which to run.
Other useful options:
occlusions_min_filter: Width of a min filter applied to the occlusion map, can help to remove artifacts around occlusions. (Default:7)median_filter: Width of a median filter applied to the output. Can reduce network noise. (Default:3)continue_with: Continue with the given frame index, if the previous frames are already stylized and available at the output location.num_frames: Maximum number of frames to process. (Default:9999)backward: Process in backward direction, from the last frame to the first one.
To use this script for evaluation, specify -evaluate and give the following options:
flow_pattern_eval: Ground truth optical flow.occlusions_pattern_eval: Ground truth occlusion maps.backward_eval: 'Perform evaluation in backward direction. Useful if only forward flow is available as it is the case for the Sintel dataset.evaluation_file: File to write the results in.loss_network: Path to a pretrained network used to compute style and content similarity, e.g. VGG-16.content_layers: Content layer indices to compute content similarity.style_layers: Style layer indices.style_image: Style image to be used for evaluation.style_image_size
Running on new spherical videos
To stylize spherical videos, frames must be present as cube map projections with overlapping borders. Most commonly, however, spherical videos are encoded as equirectangular projection. Therefore, a reporjection becomes necessary.
Reprojection software
Transform360 can do the necessary transformations. To install, follow the instruction in their repository.
Example script
Given a successful Transform360 compilation and a vr video in equirectangular projection (most common format), you can use the script stylizeVRVideo_[deepflow|flownet].sh <path_to_equirectangular_projection_video> <path_to_pretrained_vr_model>. Make sure to place the ffmpeg binary dropped by Transform360 in the root directory of this repository. As above, also make sure to have enough disk space available for longer videos.
Advanced usage
See the example scripts above for a preprocessing pipeline. Each cube face must be stored in a separate file.
fast_artistic_videos_vr.lua has similar options than the video script with the following differences:
- The arguments given for
input_pattern,flow_patternandocclusions_patternmust have another placeholder for the cube face id, for exampleframe_%05d-%d.ppmandbackward_[%d]_{%d}-%d.flo. overlap_pixel_w: Horizontal overlapping region.overlap_pixel_h: Vertical overlapping region.out_cubemap: Whether the individual cube faces should be combined to one file.out_equi: Whether an additional equirectangular projection should be created from the output. Increases processing time. If this option is present, the size of the projection can be specified without_equi_wandout_equi_h.create_inconsistent_border: No border consistency (for benchmarking purposes).
Training new models
Training a new model is complicated and requires a lot of preparation steps. Only recommended for advanced users.
Prerequisites
Note that you can omit some of these steps depending on the training parameters (see below). If you aim to reproduce the results in our paper, all steps are necessary though.
First, you need to prepare a video dataset consisting of videos from the hollywood2 dataset. This requires a lot of free hard drive capacity (>200 GB).
- Prepare a python environment with h5py, numpy, Pillow, scipy, six installed (see this requirements.txt)
- Visit HOLLYWOOD2, download Scene samples (25Gb) and extract the files to your hard drive.
- Run
video_dataset/make_flow_list.py <folder_to_extracted_dataset> <output_folder> [<num_tuples_per_scene> [<num_frames_per_tuple>]]. This script will extracttuples consisting of consecutive frames from each scene of the hollywood2 dataset by amount of motion in the scene and create a file called flowlist.txt in the output folder. The default is num_tuples_per_scene=5(I recommend to recude this if you just want to get good results but don't aim to exactly reproduce the results in our paper. A lower number will reduce dataset size and save some optical flow computations which could take quite long on an older computer), andnum_frames_per_tuple=5(needed for multi-frame traning, otherwise set to2). - Compute optical flow for all frame pairs listed in flowlist.txt. This file also contains the output paths and is directly compatible to the flownet2 script run-flownet-many.py which expects a listfile as input.
- Compute occlusions from the forward and backward flow using the script
bash video_dataset/make_occlusions.sh <output_folder>, whereshould be identical to in step 3. - Run
video_dataset/make_video_dataset.py --input_dir <path> --sequence_length <n>, where \<path> should be identical to \<output_folder> and \<n> to \<num_frames_per_tuple> in step 3.
Secondly, to make use of the mixed training strategy, the spherical video training or the additional training data from simulated camera movement on single images, you also need to prepare a single image dataset as described by Johnson et al.. You may want to change image size to 384x384, since the algorithm takes multiple smaller crops per image and resizes them to 256x256.
Thirdly, you have to download the loss network from here and place it somewhere.
Fourthly, create a single image style transfer model as described by Johnson et al. (you can also use a pre-trained model if it has the same style). Please remember settings for style and content weight, style image size and other parameters that change the appearance of the stylized image. Then use the same parameters for the video net. Different parameters may cause unwanted results.
Training parameters
Now, you can start a training using train_video.lua with the following main arguments:
-h5_file: Path to a file containing single images (e.g. from MS COCO, created as described in fast-neural-style). Required if you use any data source other thanvideoin thedata_mixargument.-h5_file_video: Path to a file containing video frames and optical flow. (As created above). Required if you use thevideodata source in thedata_mixargument.-image_model: Path to a pretrained image model to generate the first frame. (orself, if the first frame should be generated by the video network pretending an all-occluded empty prior image. You may also setsingle_image_untithen.)-style_image: Path to the style image.-loss_network: Path to a.t7file containing a pretrained CNN to be used as a loss network. The default is VGG-16, but the code should support many models such as VGG-19 and ResNets.
Besides that, the following optional arguments can be modified to customize the result:
Training data options:
-data_mix: What kind of training samples the network should use and how they are weighted. Weights are integer numbers and specify the probability of sampling during training. (Each number is divided by the sum of all numbers to get a proper probability distribution) Can be any of the following; multiple values are separated by a comma and the weight of each source is appended by a colon.single_image: Present an empty all-occluded prior image as the first frame and let the network stylize the image from scratch (corresponding to the mixed training strategy in the paper)shift: Take a single image and shift image to simulate camera movement.zoom_out: Same as above but with a zoom-out effect.video: Actual video frames from the video dataset.vr: Pseuo-warped images to simulate spherical video input (in the cube face format). Example:shift:1,zoom_out:1,video:3. Then,shift,zoom_outandvideoare sampled with probability 1/5, 1/5 and 3/5, respectively.
-num_frame_stepsHow many succesive frames to use per sample in a pseudo-reccursive manner (as described by our paper by the multi-frame training) as a function of the iteration. Multiple data points are separated by a comma. E.g.0:1,50000:2means that one succesive frame is used at the beginning and two succesive frames are used starting with iteration 50000. (Default:0:1)-single_image_until: Use only thesingle_imagedata source until the given iteration. (default:0)-reliable_map_min_filter: Width of minimum filter applied to the reliable map such that artefacts near motion boundaries are removed. (Default:7)
Model options:
-arch: String specifying the architecture to use. Architectures are specified as comma-separated strings. The architecture used in the original paper by Johnson et al. isc9s1-32,d64,d128,R128,R128,R128,R128,R128,u64,u32,c9s1-3. However, we achieved better results withc9s1-32,d64,d128,R128,R128,R128,R128,R128,U2,c3s1-64,U2,c9s1-3. All internal convolutional layers are followed by a ReLU and either batch normalization or instance normalization.cXsY-Z: A convolutional layer with a kernel size ofX, a stride ofY, andZfilters.dX: A downsampling convolutional layer withXfilters, 3x3 kernels, and stride 2.RX: A residual block with two convolutional layers andXfilters per layer.uX: An upsampling convolutional layer withXfilters, 3x3 kernels, and stride 1/2.UX: A nearest neighbor upsampling layer with an upsampling factor ofX. Avoids checkerboard pattern compared to upsampling conv as described here.
-use_instance_norm: 1 to use instance normalization or 0 to use batch normalization. Default is 1.-padding_type: What type of padding to use for convolutions in residual blocks. The following choices are available:zero: Normal zero padding everywhere.reflect: Spatial reflection padding for all convolutions in residual blocks.replicate: Spatial replication padding for all convolutions in residual blocks.reflect-start(default): Spatial reflection padding at the beginning of the model and no padding for convolutions in residual blocks.
-tanh_constant: There is a tanh nonlinearity after the final convolutional layer; this puts outputs in the range [-1, 1]. Outputs are then multiplied by the-tanh_constantso the outputs are in a more standard image range.-preprocessing: What type of preprocessing and deprocessing to use; eithervggorresnet. Default isvgg. If you want to use a ResNet as loss network you should set this toresnet.-resume_from_checkpoint: Path to a.t7checkpoint created bytrain_video.luato initialize the model from. If you use this option then all other model architecture options will be ignored. Note that this will not restore the optimizer state, so that this option is mainly useful for finetuning with different input data.
Optimization options:
-pixel_loss_weight: Weight to use for the temporal consistency loss. Note: if you use the mixed training strategy, this weight must be increased proportional to the number ofsingle_imagesamples. (Default:50)-content_weights: Weight to use for each content reconstruction loss. (Default:1)-content_layers: Which layers of the loss network to use for the content reconstruction loss. This will usually be a comma-separated list of integers, but for complicated loss networks like ResNets it can be a list of layer strings.-style_weights: Weight to use for style reconstruction loss. Reasonable values are between 5 and 20, dependent on the style image and your preference. (Default:10)-style_image_size: Before computing the style loss targets, the style image will be resized so its smaller side is this many pixels long. This can have a big effect on the types of features transferred from the style image.-style_layers: Which layers of the loss network to use for the style reconstruction loss. This is a comma-separated list of the same format as-content_layers.-tv_strength: Strength for total variation regularization on the output of the transformation network. Default is1e-6; higher values encourage the network to produce outputs that are spatially smooth.-num_iterations: Total number of iterations. (default:60000)-batch_size: Batch-size. Since we use instance normalization, smaller batch sized can be used without substantial degeneration. (default:4)-learning_rate(default:1e-3)
Checkpointing:
-checkpoint_every: Everycheckpoint_everyiterations, check performance on the validation set and save both a.t7model checkpoint and a.jsoncheckpoint with loss history.-checkpoint_name: Path where checkpoints are saved. Default ischeckpoint, meaning that every-checkpoint_everyiterations we will write filescheckpoint.t7andcheckpoint.json.-images_every: Save current input images, occlusion mask and network output everyimages_everyiterations in a folder nameddebug. Useful to see what the network has already learned and to detect errors that lead to degeneration. (default:100)
Backend:
-gpu: Which GPU to use; default is 0. Set this to -1 to train in CPU mode.-backend: Which backend to use for GPU, eithercudaoropencl.-use_cudnn: Whether to use cuDNN when using CUDA; 0 for no and 1 for yes.
Training parameters for the results in our paper
Simple training (baseline):
th train_video.lua -data_mix video:3,shift:1,zoom_out:1 -num_frame_steps 0:1 -num_iterations 60000 -pixel_loss_weight 50 -arch c9s1-32,d64,d128,R128,R128,R128,R128,R128,U2,c3s1-64,U2,c9s1-3
Mixed training:
th train_video.lua -data_mix video:3,shift:1,zoom_out:1,single_image:5 -num_frame_steps 0:1 -num_iterations 60000 -pixel_loss_weight 100 -arch c9s1-32,d64,d128,R128,R128,R128,R128,R128,U2,c3s1-64,U2,c9s1-3
Multi-frame, mixed training:
th train_video.lua -data_mix video:3,shift:1,zoom_out:1,single_image:5 -num_frame_steps 0:1,50000:2,60000:4 -num_iterations 90000 -pixel_loss_weight 100 -arch c9s1-32,d64,d128,R128,R128,R128,R128,R128,U2,c3s1-64,U2,c9s1-3
Spherical videos:
First, train a video model of any kind.
Then, finetune on spherical images:
th train_video.lua -resume_from_checkpoint <checkpoint_path> --data_mix ...,vr:<n> -num_iterations <iter>+30000 -checkpoint_name ..._vr
where you have to replace <n> such that vr is presented exactly half of the time (e.g. 5 for simple training, 10 for multi-frame) and <iter>+30000 with 30000 added to the number of iterations of the previous model (i.e. we finetune for 30000 iterations), and use otherwise the same parameters as the video model. However, to avoid that the video model gets overwritten, change parameter checkpoint_name.
Contact
For issues or questions related to this implementation, please use the issue tracker. For everything else, including licensing issues, please email us. Our contact details can be found in our paper.
License
Free for personal or research use; for commercial use please contact us. Since our algorithm is based on Johnson's implementation, see also fast-neural-style #License.