pico-rgb2hdmi
![]()
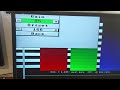
Raspberry Pico as an RGB Scanner to HDMI Converter
About the device
The device presents a simplistic approach of using a single generic purpose microcontroller to capture in real time RGB (CSYNC / HVSYNC) signals and to display it in an HDMI output without requiring FPGA chipsets of Single Boards computers with an HDMI diplay. This system relies on the use of the PIO capabilities of the RP2040, to do dedicated processing of IO signals enabled with IRQ and DMA capabilites of the processor.
Methodology
One processor is mostly dedicating to generate HDMI TMDS signals and the other to capture trigger captures and render on screen information among other functionalities. PIO + DMA are used to dedicate the capture without requiring CPU intervention and to send the TMDS frames to the HDMI diplay.
License - updated
The project full under the terms of the MIT license
Collaboration
You are encouraged to build, develop and share, if you want to collaborate share PRs and github issues.
Disclaimers
This solution (HW / FW /SW) is provided as is without any express or implied warranties.
While every effort has been taken to ensure the solution will work as is, the authors & contributors assume no responsibility for errors or omissions, or for damages resulting from the use of the solution of the information contained herein. There is no guarantee as to the suitability of said source code, executable scripts, circuits and other information, for any purpose whatsoever other than as a self-training aid. I.E. If it blows your equipments, trashes your hard disc, wipes your backup, burns your building down or just plain don't work, IT ISN'T MY FAULT I will not be held responsible for any damages or costs which might occur as a result of the usage of the beforementioned solution, USE IT AT YOUR OWN RISK
Donations
You can allways collaborate to buy me coffees to focus on new cool features, this is my paypal. paypalme mlorenzati
PCB
You can build yourself the PCB out of the gerber in HW section, if you wan you can buy it in pbcway pico-rgb2hdmi
Setup
- Download the pico-sdk, pico-extras, and pico-playground repositories
- Define PICO_SDK_PATH in your ~/.bashrc•
- Download the pico-sdk repository
Security
Install sha3sum to hash the binary
Mac
brew install md5sha1sumLocal sha3sum usage for sha256
sha1sum <file>
echo -n "<device_salt><device_uid>" | sha1sum -b
Tools
Tools were developed for sake of simplicity, focus is on firmware. It is required to install python3, pip and the following packages
pip install pyserial numpy pillow pyinstallerconverting CSV captures from serial port to images
python3 csv2png.py image.csvThis generates as output image.png
Using packtiles to generate include headers from images
./packtiles -s -f r1 char_c64_lineal.png font_c64.h
Using packtiles to generate sprites
./packtiles -sdf rgab5515 -m images/commodore.png cbm.h
Running the python gui app
python .\rgb2hdmiGui.pyPackaging the python app as a native app
pyinstaller -w -F rgb2hdmiGui.pyBuild
mkdir build
cd build
cmake .. -DCMAKE_BUILD_TYPE=Debug
Go to the specific folder and
make -j4
Visual Studio Code integration
Install the extensions as explained in the Pico Getting started manual
Or just download VScode and add the following extension
code --install-extension marus25.cortex-debug
code --install-extension ms-vscode.cmake-tools
code --install-extension ms-vscode.cpptools
Debug
Install open ocd as explained in the Pico Getting started manual section Installing OpenOCD
Using Pico probe
On the same document check Appendix A: Using Picoprobe
Open deploy and run
openocd -f interface/picoprobe.cfg -f target/rp2040.cfg -c "program <specific elf file> verify reset exit"Read RP2040 to uf2
picotool save -a pico_rgb2hdmi_xyz.uf2Videos