Infinitive Integration for Home Assistant
![]()
THIS README IS A WIP! Please let me know if parts of these instructions no longer work.
This integration started when I purchased a new home. It's got a Bryant (Carrier) HVAC unit. Sure enough, I bought a house with one of the 5% of units that isn't compatible with Nest thermostats. I started my research and found the Infinitive project. I wanted to dig deeper into python so a Home Assistant integration seemed like the perfect opportunity. Once you're done with these instructions you should have a thermostat in HA that controls your Bryant/Carrier HVAC unit.
Installation Steps:
-
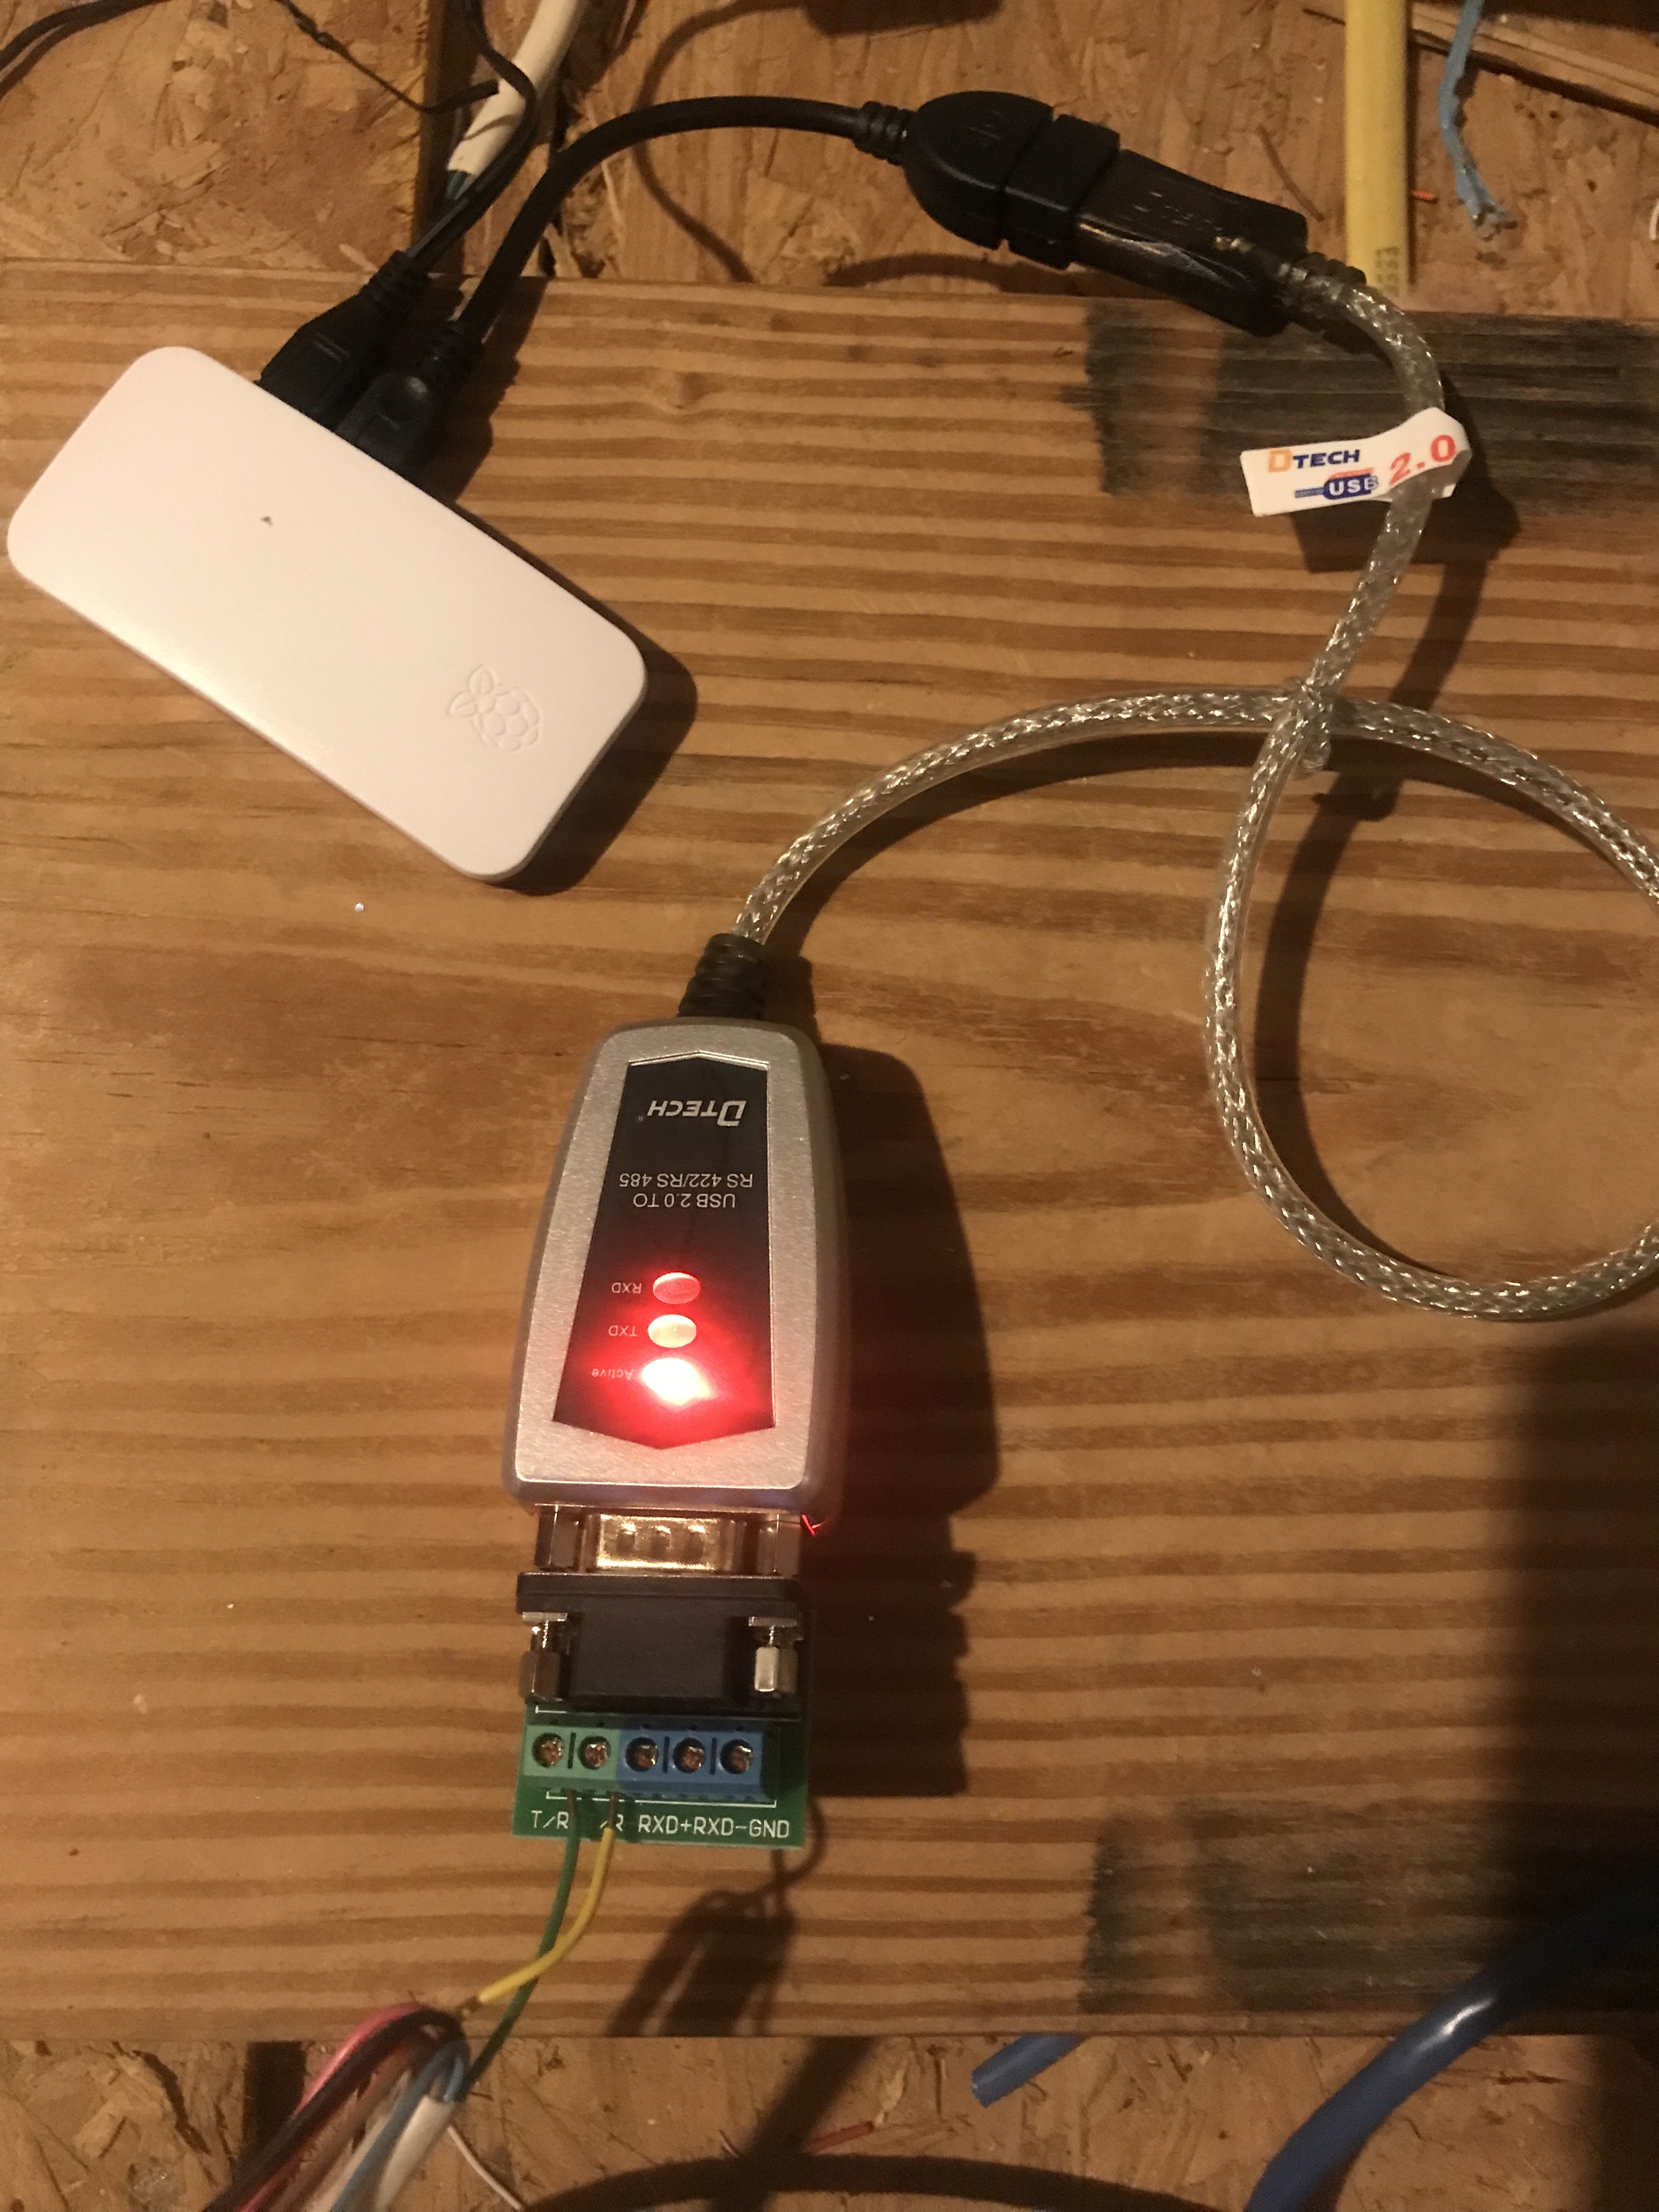
Buy a Raspberry Pi - I'm running mine on a Pi Zero with no issues. Here's the Pi Zero I purchased and it has everything we need. As of mid-2022 supplies seem to be low so you may have to search elsewhere for one.
-
Buy a RS-485 USB adapter 11 for the Raspberry Pi - Here's the RS-485 USB adapter I purchased but any RS-485 FTDI adapter should do.
-
Buy some wire - Search for
18/2 thermostat wire. It's cheap and solid core. You need enough to reach from your HVAC unit system board to the location of your RS-485 adapter.
Note: Some users have seen communication reliability issues with stranded core wire so solid core is preferred. Not sure why but this is what we've observed. -
Flash the latest version of
Raspberry Pi OS Liteto your SD card - Here's an all-in-one installer for Raspberry Pi OS. -
Setup your Raspberry Pi OS install to have a fixed/static IP on your network - Here's a quick tutorial on setting a static IP.
-
Once the Pi is on your network we need to install the required packages:
-
For git and wget run the following:
apt install git wgetCommands with "sudo"
``` sudo apt install git wget ``` -
For Go we want to download the latest version and install it manually (not using apt). You can find the latest Go package on the Go Website. If the latest version is newer please adjust the wget download link below. For official Go installation instructions see here.
Note: Latest version as of this writing is 1.19. Debian repos currently have 1.11 and that version does not work for what we need.
wget https://go.dev/dl/go1.19.linux-amd64.tar.gz
rm -rf /usr/local/go && tar -C /usr/local -xzf go1.19.linux-amd64.tar.gz
export PATH=$PATH:/usr/local/go/bin
go install github.com/mww012/infinitive@latest
Commands with "sudo"
``` wget https://go.dev/dl/go1.19.linux-amd64.tar.gz sudo rm -rf /usr/local/go && sudo tar -C /usr/local -xzf go1.19.linux-amd64.tar.gz sudo export PATH=$PATH:/usr/local/go/bin sudo go install github.com/mww012/infinitive@latest ```
-
-
Place this file at /etc/systemd/system/infinitive.service:
Please update the ExecStart line to reflect your Go binary install location. Mine was
/root/go/bin/infintivebut yours may be different.[Unit] Description=Infinitive Service After=network.target StartLimitIntervalSec=0 [Service] Type=simple Restart=always RestartSec=1 User=root ExecStart=/root/go/bin/infinitive -httpport=8080 -serial=/dev/ttyUSB0 [Install] WantedBy=multi-user.targetNote: If your RS-485 adapter does not show up as /dev/ttyUSB0 please adjust the file to reflect the proper device name.
-
After the infinitive.service file has been created run the following:
systemctl daemon-reload
systemctl enable infinitive.service
systemctl start infinitive.service
Commands with "sudo"
``` sudo systemctl daemon-reload sudo systemctl enable infinitive.service sudo systemctl start infinitive.service ``` -
Run
systemctl status infinitiveto ensure that the service is running. -
If all went well you should be able to browse to http://[rasbperry_pi_IP]:8080 and be presented with the Infinitive web interface. It won't have data until we connect everything up so let's do that.
-
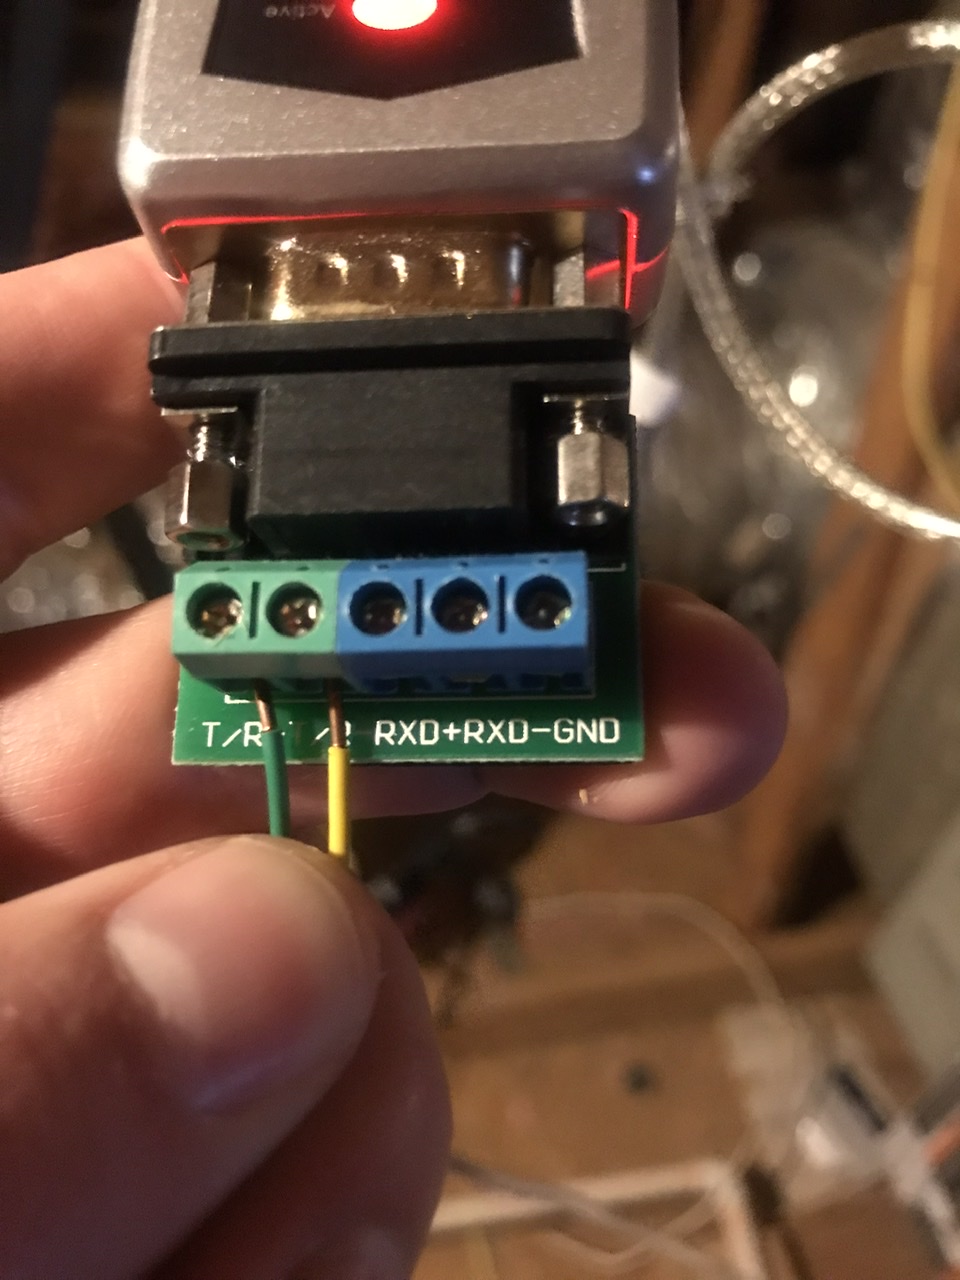
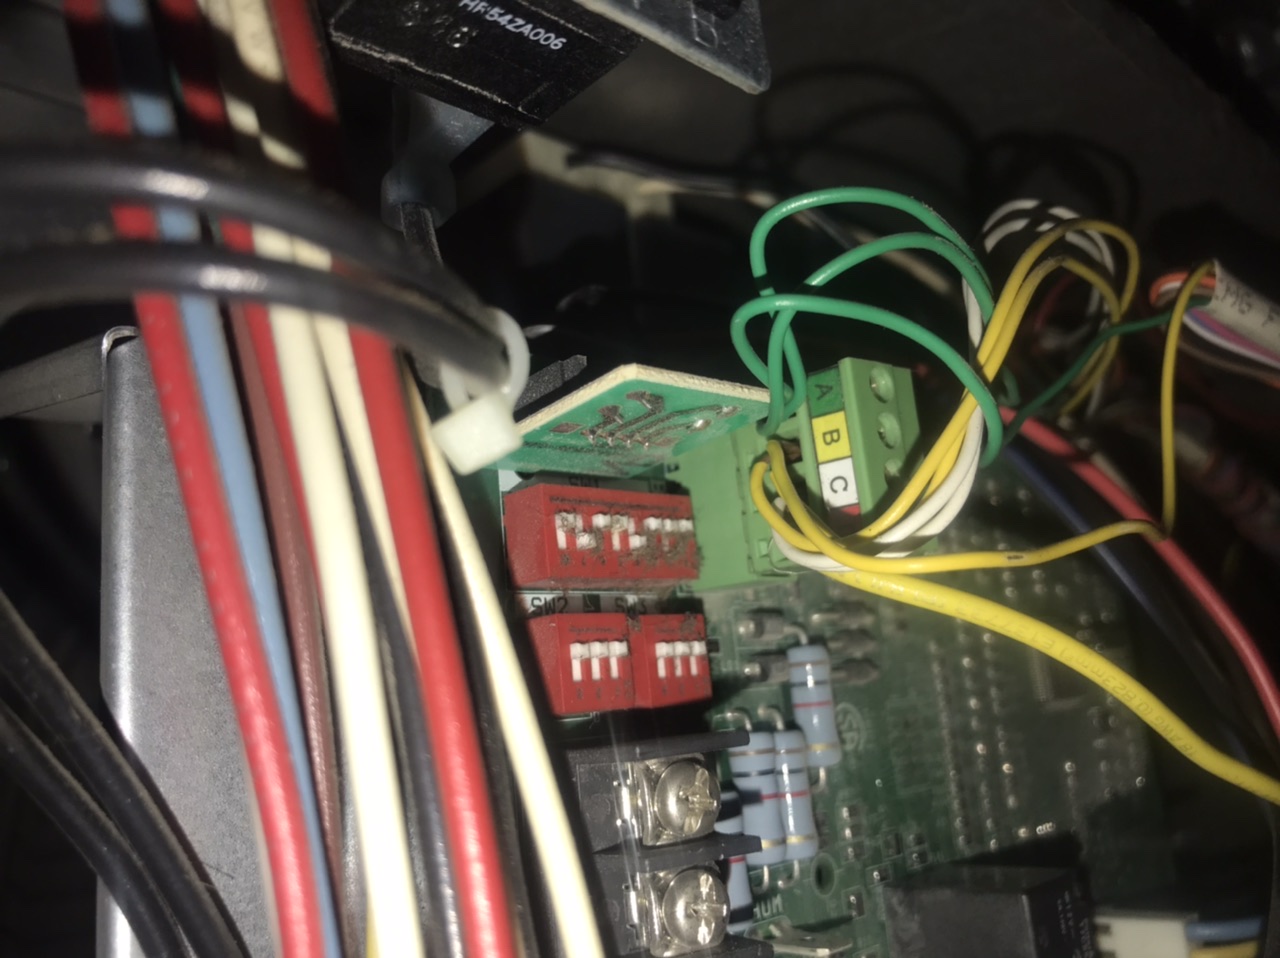
Using the thermostat wire, connect one end to the RS-485 adapter as shown below:
Note: Don't connect to ports C and D on the HVAC system board. Those are for power, not data, and you'll end up frying your RS-485 adapter.
- T/R+ (Green wire) connects to the A port on the HVAC system board.
- T/R- (Yellow wire) connects to the B port on the HVAC system board.
Installation Pictures
At this point you should have data in your Infinitive web interface mentioned in the previous step.
-
Install the HA Infinitive integration
HACS Installation (Recommended)
1. Install HACS in HA. [Here](https://hacs.xyz/docs/setup/download) are instructions if you need them. 2. Add ```https://github.com/mww012/hass-infinitive``` as a custom repository. See [here](https://hacs.xyz/docs/faq/custom_repositories) for instructions.Manual Installation
1. Download the [hass-infinitive repository](https://github.com/mww012/hass-infinitive) 2. Copy the ```custom_components/infinitive``` folder into your HA custom_components folder. -
Add this to your configuration.yaml:
climate: - platform: infinitive host: [Raspberry Pi IP] port: 8080 -
Restart Home Assistant