TypedSignalR.Client.DevTools
SignalR development tools inspired by SwaggerUI.
What is TypedSignalR.Client.DevTools?
ASP.NET Core can easily use OpenAPI/SwaggerUI (Built in the default Web API template). It allows for quick execution and debugging of REST APIs.
On the other hand, SignalR does not have an ecosystem like SwaggerUI. So, to execute and debug, we had to connect to the SignalR Hub from the client application or web front end under development for your project or write a simple console app each time. These are tedious.
TypedSignalR.Client.DevTools is intended to play a similar role to the SwaggerUI in SignalR.
In other words, it allows easy and quick execution and debugging from the GUI.
Table of Contents
- What is TypedSignalR.Client.DevTools?
- Install
- Usage
- Input Rules
- Streaming Support
- JWT Authentification Support
- Recommendation
- Example
- Related Work
Install
NuGet: TypedSignalR.Client.DevTools
dotnet add package TypedSignalR.Client.DevToolsUsage
Two steps are required to use this library.
- Add two middleware to the http pipeline.
- Add the attribute to hub and receiver interfaces.
Fist, after installing the package, add the app.UseSignalRHubSpecification() and app.UseSignalRHubDevelopmentUI() like the following code to the HTTP pipeline in Program.cs.
It is recommended to activate it only in the development environment.
using TypedSignalR.Client.DevTools; // <- Add!

var builder = WebApplication.CreateBuilder(args);

// Impl...

var app = builder.Build();

// Configure the HTTP request pipeline.
if (app.Environment.IsDevelopment())
{
    app.UseSwagger();
    app.UseSwaggerUI();

    app.UseSignalRHubSpecification(); // <- Add!
    app.UseSignalRHubDevelopmentUI(); // <- Add!
}

app.UseAuthentication();
app.UseAuthorization();

app.MapControllers();

app.Run();
Next, apply the attributes to your application's hub and receiver interfaces.
using TypedSignalR.Client; // <- Add!

[Hub] // <- Add!
public interface IChatHub
{
    Task EnterRoom(Guid roomId, string userName);
    Task PostMessage(string text);
    Task<Message[]> GetMessages();
}

[Receiver] // <- Add!
public interface IChatHubReceiver
{
    Task OnEnter(string userName);
    Task OnMessage(Message message);
}

public record Message(Guid UserId, string UserName, string Text, DateTime DateTime);
Then implement the Hub as usual. Nothing special is required.
public class ChatHub : Hub<IChatHubReceiver>, IChatHub
{
    // Implementation as usual.
}
Finally, add MapHub as usual in Program.cs.
Note that the first argument of MapHub must be a string literal or const string because this library determines the hub URL at compile time.
// Program.cs

// Impl...

app.MapControllers();

app.MapHub<ChatHub>("/hubs/ChatHub"); // <- Add MapHub as usual.

app.Run();
Launch the application server and access /signalr-dev from browser! Now you can easily execute and debug your SignalR Application!

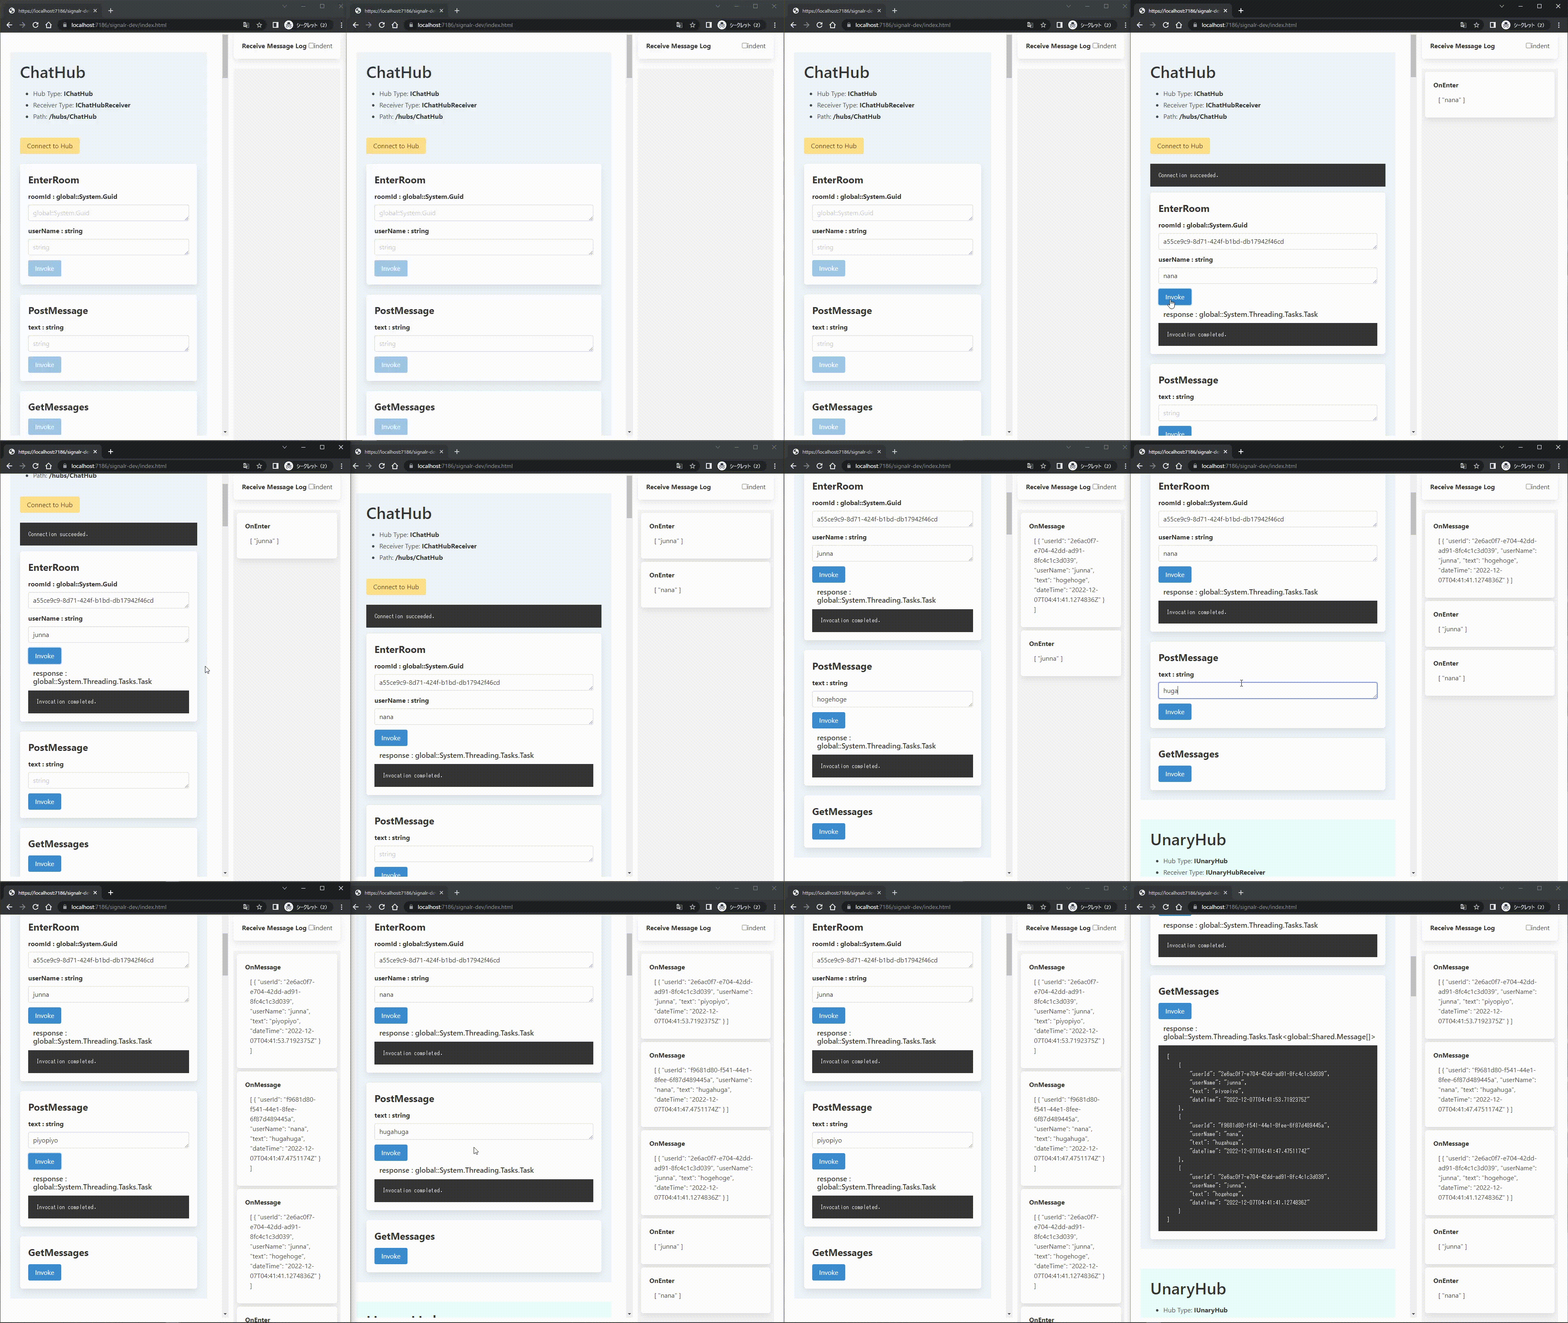
Messages received from the Hub are displayed in the right panel, as shown in the figure below. Received messages are displayed in JSON format. If the indent option is turned on, indented JSON will be displayed.

Input Rules
Input rules depend on the argument type.
Built-in Types
If an argument is a built-in type, enter the string as normal, as shown in the following image.

Build-in types: bool char byte sbyte decimal double float int uint long ulong short ushort byte[] string Uri Guid DateTime
Note: byte[] require base64 string as input.
User Defined Types
If an argument is a user defined type, enter the json string, as shown in the following image.

Streaming Support
This library supports both server-to-client streaming and client-to-server streaming.
Server-to-Client Streaming
In server-to-client streaming, messages sent by the server are displayed in the right panel. Unlike ordinary server-to-client invocation, the keywords OnNext, OnCompleted, and OnError are added next to the method name.
When defining a server-to-client streaming method in a C# interface, it is possible to take a CancellationToken as an argument.
However, it is impossible to set the CancellationToken from the GUI provided by this library. It is normal behavior for the input area to be disabled.

Client-to-Server Streaming
When using client-to-server streaming, method definitions on C# interfaces include an IAsyncEnumerable<T> or ChannelReader<T> argument. The library automatically set up a stream for that argument internally. Therefore, the input area is disabled on the GUI, which is the correct behavior.
Once you click the invoke button, the stream will start. Set a value in the input area below the invoke button, and click the next button to stream the set value. Also, click buttons like complete and cancel to control the stream.

JWT Authentification Support
This library supports authentication using JWT.
When [Authorize] is applied to a hub or a hub method, a field to enter JWT will appear in the GUI automatically.

Recommendation
I recommend setting up Properties/launchSettings.json as follows.
In other words, have two patterns of launchUrl, signalr-dev and swagger.
This way, if you are using Visual Studio or Rider, you can easily switch between SignalR development and REST API development with one click.
{
    "profiles": {
        "ProjectName-SignalR": {
            "commandName": "Project",
            "dotnetRunMessages": true,
            "launchBrowser": true,
            "launchUrl": "signalr-dev",
            "applicationUrl": "https://localhost:7186;http://localhost:5186",
            "environmentVariables": {
                "ASPNETCORE_ENVIRONMENT": "Development"
            }
        },
        "ProjectName-Swagger": {
            "commandName": "Project",
            "dotnetRunMessages": true,
            "launchBrowser": true,
            "launchUrl": "swagger",
            "applicationUrl": "https://localhost:7186;http://localhost:5186",
            "environmentVariables": {
                "ASPNETCORE_ENVIRONMENT": "Development"
            }
        }
    }
    ...other settings...
}
Example
CLI
Enter the following command.
After entering the command and starting the server, try to access /signalr-dev from your browser.
$ git clone git@github.com:nenoNaninu/TypedSignalR.Client.DevTools.git
$ cd TypedSignalR.Client.DevTools
$ dotnet run --project ./examples/Server/Server.csproj
Visual Studio
If you use visual studio, set the startup project to server and select Server-SignalR to run the application. A browser will automatically launch and access /signalr-dev.

JWT Authentification Example
This example uses auth0 for authentication. For the auth0 key, set the following to the user secret, etc. If keys are empty, this example works well, but JWT authentication does not work correctly. Please refer to this blog if you need to learn how to use auth0.
{
    "Auth0:Domain": "xxxx.auth0.com",
    "Auth0:Audience": "yyyy"
}
Related Work
- nenoNaninu/TypedSignalR.Client
- C# Source Generator to create strongly typed SignalR clients.
- nenoNaninu/TypedSignalR.Client.TypeScript
- TypeScript source generator to provide strongly typed SignalR clients by analyzing C# type definitions.
- nenoNaninu/AspNetCore.SignalR.OpenTelemetry
- SignalR instrumentation library for OpenTelemetry.
