Hayward Pool Heater MQTT Bridge
Home Assistant Integration
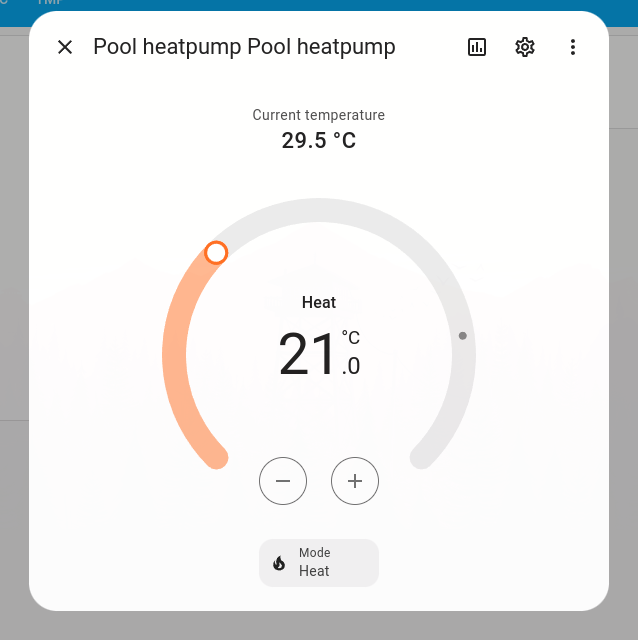
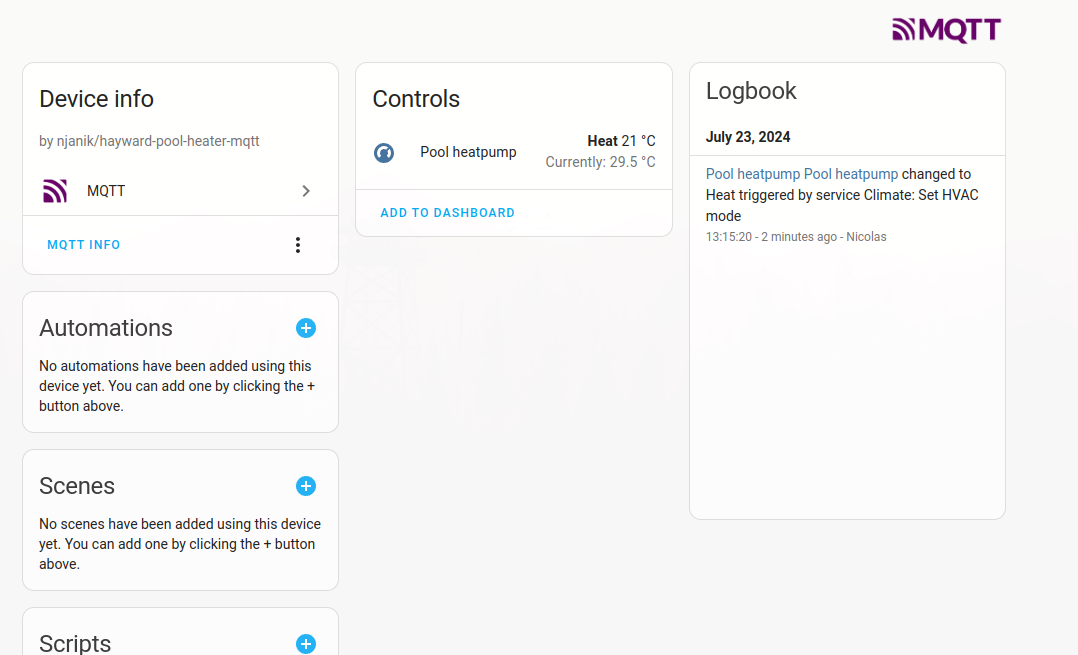
This project now includes auto-discovery for Home Assistant (via MQTT), making it easier than ever to integrate and control your Hayward pool heater through Home Assistant.

Project Overview
This is a project I've been working on for a while. I'm the owner of a Hayward pool heater (Trevium HP55TR, which is also the same exact model of Hayward Energy Line Pro). This heat pump uses a controller called PC1000.
Tested Pool Heaters:
- Trevium HP55TR heat pump using a PC1000 controller.
- Hayward Energy Line Pro heat pump using a PC1000 controller.
- MONO 50 Basic heat pump using a CC203 controller (if the online manual is correct).
- Majestic heat pump (Hayward white label) using a PC1001 controller.
- CPAC111 heat pump (Hayward) using a PC1001 controller.
I decoded the data using a small logic sniffer.
The latest version of the sketch can now receive current parameters and send commands to the heat pump. This version works on a Wemos D1 Mini (using the Arduino IDE with the Arduino core installed).
Schematic
You have to connect the NET pin of the PC1000 controller to your D5 pin of the Wemos D1 via a bidirectional level shifter, and connect the PC1000 GND to the GND of your ESP8266. The 5V <-> 3.3V level shifter is mandatory because the ESP8266 is not 5V tolerant, and the heat pump controller does not work with 3.3V.
On the PC1001 board, you can connect the Wemos on +5V and GND using the connector CN16, then connect NET, +5V, and GND to a bi-directional logic level converter (high voltage side) and, on the other side (low voltage side), connect the Wemos +3.3V, GND, and D5.
Config
Before compiling and uploading the sketch, you need to update the following values in the config.h file:
SSID: Your WiFi network name.WIFIPASS: Your WiFi network password.MQTT_HOST: The IP address or hostname of your MQTT broker.MQTT_PORT: The port your MQTT broker is running on (usually 1883).MQTT_USER: Your MQTT broker username.MQTT_PASS: Your MQTT broker password.MQTT_CLIENT_NAME: A unique name for your MQTT client.HARDWARE_HOSTNAME: The hostname you want to assign to your ESP8266.
Example config.h:
#define SSID "your_wifi_ssid"
#define WIFIPASS "your_wifi_password"
#define MQTT_HOST "your_mqtt_broker_ip"
#define MQTT_PORT 1883
#define MQTT_USER "your_mqtt_username"
#define MQTT_PASS "your_mqtt_password"
#define MQTT_CLIENT_NAME "your_mqtt_client_name"
#define HARDWARE_HOSTNAME "your_esp8266_hostname"
OTA (Over-the-Air) Updates
The sketch includes support for OTA updates, allowing you to upload new firmware to your device without needing a physical connection. However, OTA is disabled by default.
How to Enable OTA
If you wish to enable OTA, uncomment the relevant sections in the setup function in the main sketch file.
Example of enabling OTA:
// In the setup function
httpUpdater.setup(&server);
server.on("/", HTTP_GET, []()
{
    server.send(200, "text/plain", "Ok");
});
server.begin();
When OTA is enabled, you can update the firmware by navigating to http://[your_device_ip]:8080/update in your web browser and uploading the new firmware file.
MQTT Topics
Published Topics
Data is published on your MQTT server every few seconds using these topics:
pool/available(online / offline)pool/power(true / false)pool/mode(off / auto / heat / cool)pool/temp_in(temperature in Celsius)pool/temp_out(temperature out in Celsius)pool/temp_prog(programmed temperature in Celsius)pool/wifi_rssi(WiFi received signal strength indication)pool/data(All data in JSON format)pool/debug(DEBUG messages)homeassistant/climate/PoolHeater/config(Auto-discovery payload)
Subscribed Topics
You can change settings via these topics:
pool/set_power_on(NULL message to turn on)pool/set_mode(off / auto / heat / cool)pool/set_temp(temperature in Celsius, supports half degrees e.g., 27.5)
Special Thanks
Special thanks to the French Arduino community, and especially to Plode. Also, thanks to GitHub users @jruibarroso and @marcphilibert for adding temperature in and WiFi RSSI data.
Whole reverse engineering topic (in French)
Feel free to further customize or refine this README as needed!